Advertisement
Quick Links
Advertisement

Related Manuals for Sauber SD-100


Summary of Contents for Sauber SD-100
- Page 1 TECHNIC STICK VACUUM SD-100...
- Page 2 Accessories...
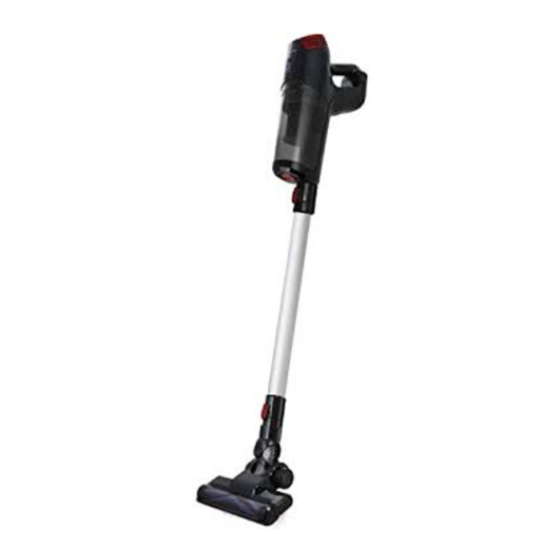
- Page 3 SD-100 Technic Stick Vacuum Congratulations on the purchase of your new Sauber Technic stick vacuum cleaner. There are many useful features built into your cleaner. We recommend that you carefully read this instruction manual for the best results. Battery On/Off Trigger...
-
Page 4: Before You Begin
Before You Begin This cleaner must be operated in accordance with these instructions and used only for domestic household cleaning to remove DRY dirt and dust from household carpets, flooring, walls and fabrics. This cleaner is not fit to be used as an industrial cleaner and will void the manufacturer’s warranty if used inappropriately. - Page 5 IMPORTANT! Always switch off the cleaner and remove the power plug from the electricity power supply before cleaning your appliance, when not in use or attempting any maintenance task. The cleaner must only be connected to an AC power supply at the voltage shown on the rating label.
- Page 6 18. Before carrying out any maintenance service Battery use and care or cleaning the filters, always switch off the The appliance is only to be used with the vacuum cleaner. charger uniquely provided with the appliance. 19. Keep openings away from your face and body. Only charge the battery inside the product and 20.
- Page 7 Assembly WARNING! Switch Off the machine before fitting the machine rod and motorised head. Connecting the Powerhead Insert the Powerhead into the rod. You will hear a “click” sound when it is securely in place. Connecting the rod to the unit To install the rod, insert the plug end into the air inlet of the cleaner.
- Page 8 Install wall mount To confirm the punching position, hold the Wall Mount Shelf firmly and use the screw holes to guide positioning. It is recommended to lift the Wall Mount Shelf 130cm off the ground. Use a hole drill (user-supplied) with a drill bit of 5mm to make holes at the confirmed hole positions.
- Page 9 Instructions For Use Switch On/Off Press On/Off trigger to start the machine. While the vacuum is turned on, press the Boost button to select the cleaning mode. Attention: It is recommended to charge your product after each use to maintain maximum performance. Charging the machine Connect the power adapter to a household power supply, and insert the DC plug into the machine charging port.
- Page 10 Accessories Multi-tasker Powerhead Safety Precautions: Keep hair, hands Ideal for daily cleaning on carpets. and feet away from rotating brush while the motorised brush is running. Do not run the Hard Floor Powerhead motorised brush over Ideal for daily cleaning on hard floors. electric cables or string.
- Page 11 Mini Motorised Pets Brush Makes light work of removing pet hair from your furniture, car and upholstery. Safety Precautions: Keep hair, hands and feet away from rotating brush while the motorised brush is running. Do not run the motorised brush over electric cables or string. Do not use the motorised brush on pets.
-
Page 12: Maintenance
Maintenance Empty the Dust Bin Click the Dust Bin Release button and remove the entire dust bin. Firmly hold the filter handle and pull the filter out of the Dust Bin to empty. Wash the Dust Bin if necessary under a tap, then wipe it dry completely before use. - Page 13 Clean filters Hold the filter bin handle to rotate counter-clockwise. Tap the dirt from the HEPA filter. Refit the HEPA filter into the filter housing and slide them both back into the Dust Bin, then reassemble into the main unit. Note: It is recommended to replace the HEPA filter every 6 months or when it becomes visibly dirty.
- Page 14 Clean Multi-tasker Powerhead Warning: Please switch Off the machine, disconnect the motorised brush from the machine before cleaning the cleaning head The Multi-tasker Powerhead can be cleaned by pressing the brush roll release button and pulling out the roller brush shaft at the side. To remove hair caught on the brush, carefully run a cutting cleaning tool down the groove to cut the hair and pull it off, then re-insert the brush into the powerhead.
- Page 15 Clean Mini Motorised Pets Brush Warning: Please switch Off the machine, disconnect the motorised brush from the machine before cleaning the cleaning head Lift the floor brush side cover slightly and rotate it anticlockwise. Pull the soft fleece roller out of the brush body (note: some dust will come out when it is pulled out).
-
Page 16: Troubleshooting
Troubleshooting Problems and Solutions If you come across a problem, please use the checklist of troubleshooting tips before ringing Sauber Customer Service Australia on 1800 728 237 or New Zealand on 0800 282 288. Fault Cause Solution Cleaner doesn’t start... -
Page 17: Spare Parts
Spare Parts Part Part Number HEPA Filter 32201814 Battery 33201975 Dust Bin 33156910 Agitator 33788179 Hard Floors Powerhead 31155628 Multi-tasker Powerhead 31155629 Mini Motorised Pets Brush 31155635 Charger Adaptor 33201976... - Page 18 Notes...
- Page 20 2 Years Warranty TECHNIC STICK VACUUM Your cleaner, in the case of domestic use, has a two (AUS) or 0800 282 288 (NZ), Monday-Friday 9am-5pm years parts and labour warranty against product defects EST. The decision to repair or replace the cleaner is at and failures when the product is used in accordance with the sole discretion of Electrical Home-Aids Pty.
Need help?
Do you have a question about the SD-100 and is the answer not in the manual?
Questions and answers