Table of Contents
Advertisement
Quick Links
Advertisement
Table of Contents

Related Manuals for Baumatic POM9651SS


Summary of Contents for Baumatic POM9651SS
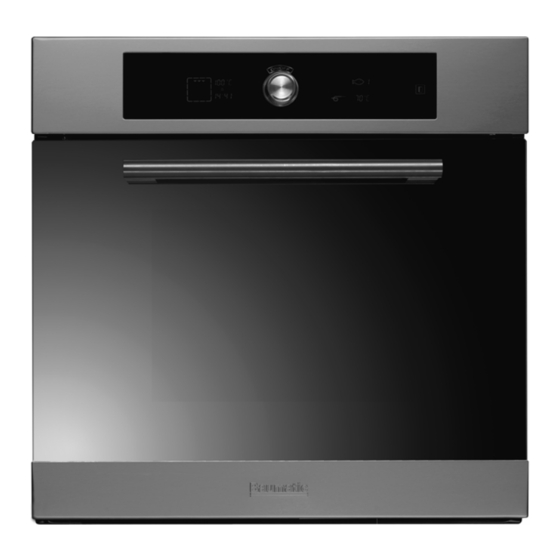
- Page 1 POM9651SS 60 cm Multifunction built in oven with joystick control...
- Page 2 User Manual for your Baumatic POM9651SS 60 cm Multifunction built in oven with joystick control NOTE : This User Instruction Manual contains important information, including safety & installation points, which will enable you to get the most out of your appliance. Please keep it in a safe place so that it is easily available for future reference;...
-
Page 3: Table Of Contents
Contents Environmental note Important safety information 5 – 7 Specifications 8 - 12 Product and aperture dimensions Product specifications Standard accessories Electrical details Cooling fan Control panel 10 - 11 The joystick control knob 11 - 12 Before first use 12 - 13 Setting the time of day Oven burn-off... -
Page 4: Environmental Note
Environmental note o The packaging materials that Baumatic uses are environmentally friendly and can be recycled. o Please discard all packaging material with due regard for the environment. -
Page 5: Important Safety Information
Baumatic’s Conditions Of Guarantee. The foregoing does not affect your statutory rights. o Repairs may only be carried out by Baumatic Service Engineers or their authorised service agent. - Page 6 Warning and safety instructions o This appliance complies with all current European safety legislation. Baumatic do wish to emphasise that this compliance does not remove the fact that the appliance surfaces will become hot during use and retain heat after operation.
- Page 7 This appliance must be correctly installed by a suitably qualified person, strictly in accordance with the manufacturer’s instructions. o Baumatic Ltd. declines any responsibility for injury or damage, to person or property, as a result of improper use or installation of this appliance.
-
Page 8: Specifications
Specifications Product Dimensions Height: 600.3 mm Width: 598 mm Depth: 565.5 mm Aperture dimensions Height: 583 - 585 mm Width: 560 mm Depth: 560 mm Product specifications o 12 Oven functions o Energy efficiency class: A o Oven capacity (net): 61 litres o Oven capacity (gross): 68 litres o Joystick operation o SteamClean function... -
Page 9: Electrical Details
Electrical details Rated Voltage: 220-240 Vac 50-60 Hz Supply Connection: 20 A (double pole switched fused outlet with 3mm contact gap) Max Rated Inputs: 2.7-3.25 kW Mains Supply Lead: 3 x 1.5 mm² Oven Light Bulb: 25 W/300°C screw type pigmy For future reference please record the following information which can be found on the rating plate and the date of purchase which can be found on your sales invoice. -
Page 10: Control Panel
Control Panel Left hand display Oven function display Oven temperature display Minute minder symbol Duration symbol End cook symbol Timer display... -
Page 11: The Joystick Control Knob
Right hand display Recipe number Flan recipes Fish recipes Bread/pizza recipes Meat recipes The joystick control knob ON/OFF segment Recipe segment Timer segment Oven temperature segment Cooking function segment... -
Page 12: Before First Use
o The joystick control knob should be used to access the various setting options that appear in the segments around it. o You should press the oven selector control knob once to activate o As you turn the joystick control knob, the segments around the outside of it will light. -
Page 13: Selecting A Cooking Function And Temperature
o It is perfectly normal for a smell to be produced during this process. o You should make sure that any windows in the room are left open during this process. o It is advisable for you not to remain in the room whilst the burning off process is taking place. -
Page 14: Adjusting The Oven Temperature
o The frame around the cooking function symbol will flash, to confirm the cooking function, press the joystick control knob again. o If you do not confirm the cooking function within 20 seconds, the oven will reset itself and the ON/OFF segment will light. -
Page 15: Oven Functions
Oven functions Cooking Cooking Min. – max. Default oven function name function oven cavity cavity and symbol description temperature temperature OVEN LIGHT Separate light control which allows the light to be switched on, even when the oven is not heating. PRH –... - Page 16 CONVENTIONAL This method of 50 - 250°C 200°C cooking provides OVEN + FAN traditional cooking with heat from the top and the lower element. The running of the circulation fan ensures a fast and even distribution of the heat. Suitable for light and delicate baking, such as pastries.
-
Page 17: Prh (Rapid Pre-Heating) Function
CENTRE GRILL This cooking 50 - 250°C 200°C method is normal grilling, utilising the inner part only of the top element, which directs heat downwards onto the food. Suitable for grilling small portions of bacon, toast, meat etc. GRILL WITH This cooking 50 - 250°C 165°C... -
Page 18: Rapid Defrost Function
o At this point, you should place your food in the oven and select an appropriate cooking function and temperature. o IMPORTANT: Please note that it is not possible to adjust the temperature that the oven is heating to during the rapid pre- heating function. -
Page 19: Timer Functions
Timer functions Setting the minute minder function This function allows you to set a countdown time. When this period of time has elapsed, an audible alarm will sound. The countdown time can be set, before or after a cooking function and temperature have been selected. -
Page 20: Setting The Duration Function
Setting the duration function This function will allow you to set a countdown time similar to the minute minder function. However the oven will no longer continue to heat, once the countdown period has elapsed. o Select a cooking function and oven temperature (as described in previous sections of this manual). -
Page 21: Setting The End Cook Function
o The left hand display will show o To switch the oven off, turn the joystick control knob until the symbol is lit. o Press the joystick control knob once. o The word “OFF” will appear on the left hand display and there will be a brief audible signal. -
Page 22: Cancelling A Countdown Period
o Throughout the countdown period, the timer display (6) will show the time of day. o If you want to check how long the countdown time has to run, turn the joystick control knob until the TIMER segment is lit. Press the joystick control knob and the remaining time will appear on the timer display (6). -
Page 23: Adjusting The Volume Of The Audible Signal
o To exit the TIMER menu, turn the joystick control knob until the word ESC is highlighted and then press the joystick control knob. Adjusting the volume of the audible signal The audible signal has three different volume levels; low, medium and high. -
Page 24: Recipe Function
Recipe functions Your oven has preset recipes that you can select, where the optimum oven function, temperature and time will be automatically selected. You can also programme the oven to remember your own recipes, so that you can recall them easily in the future. How to select a preset recipe o Once the oven is switched on, turn the joystick control knob until the recipe segment (RECIPES) is lit. -
Page 25: Recipe Table
o To confirm the recipe that you have selected, press the joystick control knob again. o At the end of the recipe time, an audible signal will sound and the oven will stop heating. o To exit the RECIPES menu, turn the joystick control knob until the word ESC is highlighted and then press the joystick control knob. -
Page 26: How To Add A Personal Recipe To The Preset Recipes
MEAT Roast pork Conventional 170°C 1.30 oven + fan Roast veal Conventional 190°C 1.40 oven + fan Roast Conventional 200°C 0.50 chicken oven + fan Meat loaf Fan oven 180°C 1.10 Beef fillet Conventional 220°C 0.25 oven + fan How to add a personal recipe to the preset recipes IMPORTANT: Before you can get the oven to memorise a personal recipe, YOU MUST select an oven function, temperature and cooking time (duration function). -
Page 27: Restoring The Factory Preset Recipes
o Press the joystick control knob once to save the personal recipe. o Whilst the appliance is saving the personal recipe, the left hand display will show the word “SAv”. o When the recipe number stops flashing, it means that the personal recipe has been saved. -
Page 28: Cooking Guidelines
Cooking guidelines o Please refer to the information given on food packaging for guidance on cooking temperatures and times. Once familiar with the performance of your appliance, temperatures and times can be varied to suit personal preference. o If you are using the fan oven function, then you should follow the information given on the food packaging for this particular mode of cooking. -
Page 29: Shelf Positions
o You should also never line the base of your oven with aluminium foil. o During cooking, never place pans or cookware directly onto the bottom of your oven. They should always be placed on the shelves provided. o The grill heating element and other internal components of the oven become extremely hot during operation, avoid touching them inadvertently when handling the food which you are grilling. -
Page 30: Cleaning And Maintenance
Any damage that is caused to the appliance by a cleaning product will not be fixed by Baumatic free of charge, even if the appliance is within the guarantee period. o No abrasive cleaners should be used. -
Page 31: Removing The Side Racks
Removing the side racks To properly clean the oven cavity, it is necessary to remove all of the oven furniture, including the side racks. To remove the side racks you should do the following:- o Remove the oven shelves, the enamelled baking tray and trivet from the oven cavity. -
Page 32: The Steamclean Process
The SteamClean process This cleaning function will loosen food spillages that may have occurred in the oven cavity. o Remove the oven shelves and the oven roof liner from the oven cavity. o Fill the enamelled baking tray half full of warm water, mixed with a little washing up liquid. -
Page 33: Replacing The Oven Bulb
Replacing the oven bulb IMPORTANT: The oven must be disconnected from your mains supply before you attempt to either remove or replace the oven bulb. o Remove all oven shelves, the drip tray and the side rack that is on the same side as the oven light. -
Page 34: Removing The Inner Door Glass For Cleaning
o WARNING- Care should be taken as the inner edges of the door may be sharp. o IMPORTANT: You should make sure that the door is supported at all times and that you place the door on some padded material whilst cleaning it. o The oven door and door glass should only be cleaned using a damp cloth and a small amount of detergent. - Page 35 o Place a coin horizontally into one of the small slots and rotate the coin clockwise. You will feel part of the plastic sealing section disengage from the door. o Repeat this process for the other slots and you will be able to lift the plastic sealing section away from the top of the door.
-
Page 36: Installation
Care must be taken to ensure that the temperature of the mains supply cable does not exceed 50°C. o If the mains supply cable is damaged, then it must be replaced by an appropriate replacement which can be obtained from the Baumatic Spares Department. -
Page 37: Installing The Oven Into The Kitchen Cabinet
Installing the oven into the kitchen cabinet Positioning the appliance o Ensure that the aperture that you will be fitting the oven into is of the size given in the above diagram. o The oven must be fitted into an oven housing with the ventilation cut-outs shown in the “Ventilation requirements”... -
Page 38: Ventilation Requirements
Ventilation requirements (Figure shows the ventilation and cut-out requirements for the installation of the appliance into a standard kitchen unit). (Figure shows ventilation and cut- out requirements for the installation of the appliance into a tall housing unit). o Ensure that the oven has been securely fixed into the housing unit. -
Page 39: My Appliance Isn't Working Correctly
Check whether warm air is venting out from underneath the control panel If it isn’t, then contact Baumatic Customer Care, quoting the error code that has appeared on the display ER:04 High temperature near... - Page 40 * Check that the mains fuses are in working order. * Check that the operating instructions for setting the time of day and putting the appliance into manual operation mode have been followed. o The grill function works but the main oven does not. * Check that you have selected the correct cooking function.
- Page 41 Or any installation other than the one specified by Baumatic Ltd. has been completed. Please refer to the conditions of guarantee that appear on the warranty card that you receive with the appliance.
-
Page 42: Contact Details
Czech Republic United Kingdom Baumatic CR spol s.r.o. Baumatic Ltd., Průmyslová zóna Sever 696 Baumatic Buildings, 460 11 Liberec 11 6 Bennet Road, Czech Republic Reading, Berkshire RG2 0QX +420 483 577 200 United Kingdom www.baumatic.cz Sales Telephone (0118) 933 6900... - Page 44 44 44...
Need help?
Do you have a question about the POM9651SS and is the answer not in the manual?
Questions and answers