
Subscribe to Our Youtube Channel
Related Manuals for Rail King READY-TO-RUN ES44AC


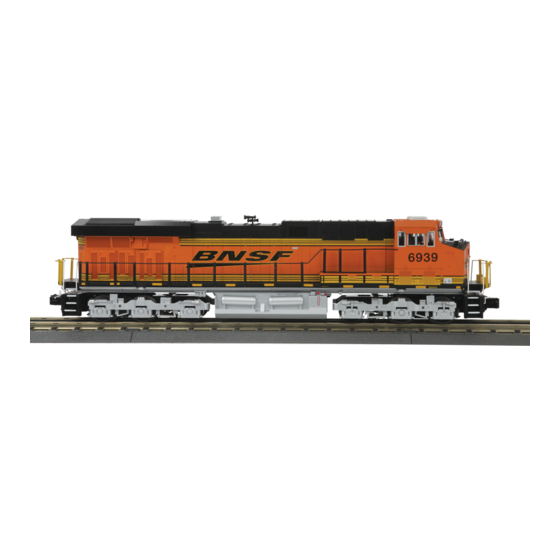
Summary of Contents for Rail King READY-TO-RUN ES44AC
- Page 1 ES44AC Diesel ™ Ready-To-Run Set Operation Manual Passenger/Freight Announcements ® Thank you for purchasing this RailKing product. PLEASE READ BEFORE USE AND SAVE www.mthtrains.com...
-
Page 2: Table Of Contents
Table of Contents Set Up Checklist ..................3 Getting Started . -
Page 3: Set Up Checklist
Set Up Checklist ® r Assemble RealTrax r Lubricate the engine r Prime the Smoke Unit r Place the engine and cars on the track and couple them together r Connect the transformer and install the DCS Remote Commander r Apply power to run as described in the Basic Operation section of these instructions. -
Page 4: Getting Started
Getting Started ® Assembling RealTrax The quick connectors and built-in roadbed allow you to set up RealTrax anywhere, including carpeted surfaces. Knock-out must be removed Remove knock-out from STEP STEP STEP before remote lock-on can outer edge of track by be installed holding and twisting up Insert lock-on into... -
Page 5: Priming The Smoke Unit
Priming the Smoke Unit ou should prime the smoke unit with smoke fluid before operating. Add 15-20 drops of smoke fluid from the included pipette through the smokestack, then gently blow into the stack to eliminate any air bubbles in the fluid. If you choose not to prime the unit with fluid, turn the smoke unit control (see illustration) to the OFF position. -
Page 6: Coupling The Engine And Cars
Coupling the Engine and Cars Our couplers are designed for realistic operation. Place the engine and cars on the track and couple them together. If the coupler is already closed, press down on the small finger that extends from under the right side of the coupler to open the coupler knuckle and allow the couplers to interlock as shown in Step 3 of Figure 3. -
Page 7: Connecting The Transformer & Installing Dcs Remote Commander Set
Connecting the Transformer & Installing DCS Remote Commander Set Your set comes with M.T.H.'s latest DCS System, the DCS Remote Commander. The DCS Remote Commander includes a handheld Remote which communicates with a Receiver powered by a UL approved Transformer to provide an easy-to-use, safe power source for your new train set. -
Page 8: Basic Operation
Basic Operation After making sure everything is properly assembled, aim the Remote at the Receiver and press the SU/SD Button on the Remote (NOTE: Because this is an infrared line-of- sight remote, you must aim the remote at the receiver in order to send signals to the track.). - Page 9 Operation Buttons Using the Remote Handheld START UP/SHUT DOWN (SU/SD)- Pressing this button will start your engine. Its lights, sound and smoke (if equipped) will turn on when pressed once and off when pressed again (if the train is already on). Throttle Control (+ and -) (center rocker)- After START UP, quickly pressing and releasing the + end of the Throttle Control allows you to increase the speed of your locomotive in 1mph increments.
- Page 10 Instructions to reset an engine using the DCS Remote Commander (DRC) 1. Apply power to the track through the DCS Remote Commander receiver. The engine should be dark and quiet. 2. Press the following buttons, in order, on the DCS Remote Commander IR Handheld: a.
-
Page 11: Ps 3.0 Enhancements
PS 3.0 Enhancements ® Here are some of the exciting changes incorporated into your new MTH Proto-Sound 3.0 Locomotives. More advanced features such as Custom Speed Tables and Advanced Consisting can be found in the DCC section of this manual. ®... -
Page 12: Activating Dcc Mode
Activating DCC Mode Even though your locomotive is equipped with a DCC decoder, you will notice that there is no switch to select it. We found that when the switch was present, it was confusing to those who are not familiar with DCC operations. In order to operate in DCC you will need to remove the body shell and then carefully cut the gray wire as shown. -
Page 13: Modes Of Operation
Modes of Operation The following pages have detailed descriptions of the 4 different modes of operation: • Conventional AC • Conventional DC • DCS - MTH Digital Command System • DCC - Digital Command Control (requires modification) Conventional AC Operation When using conventional AC power, the engine will respond to changes in track voltage. -
Page 14: Proto-Sound 3.0 Conventional Ac Operating Instructions
® Proto-Sound 3.0 Conventional AC Operating Instructions ® Activating Proto-Sound 3.0 Conventional AC Mode Features Throttle: To increase or decrease track voltage, and therefore train speed, turn the throttle control knob. Turning clockwise will increase voltage and speed, while turning counterclockwise will decrease voltage and speed. -
Page 15: Manual Volume Control
Manual Volume Control ® Proto-Sound 3.0 Manual Volume Control To adjust the volume of all sounds made by this engine, turn the manual volume control (fig. 5) clockwise to increase the volume and counterclockwise to reduce the volume. Turning the manual volume control completely counterclockwise will turn of all of the... -
Page 16: Pfa
Passenger/Freight Announcements (PFA) Your engine is equipped with a sound package of either passenger station announcements or freight yard sounds that you can play when you pull into a station or a yard. Each sequence described below will play as long as it is left on, randomly generating sounds, but be sure to allow approximately 30 seconds between the button pushes described below to allow the PFA sufficient time to run through each sequence. -
Page 17: Proto-Coupler Operation
Tips on Using PFA • You can terminate PFA at any time by turning off power to the track for 15 seconds. • You do not have to be in Forward to use PFA. At the conclusion of the full sequence, the train will pull away from the station or yard in whatever direction you were going when you activated the feature. -
Page 18: Speed Control
Speed Control M.T.H. engines equipped with Proto-Sound® 3.0 have speed control capabilities that allow the engine to maintain a constant speed up and down grades and around curves, much like an automobile cruise control. You can add or drop cars on the run, and the engine will maintain the speed you set. -
Page 19: Ditch Lights
Ditch Lights (On/Off) (if equipped) By Default your Ditch Lights are set to ON. That means they are ON as soon as the engine starts moving in forward. When you sound the horn they will alternately flash and will continue to flash for 5 seconds after the horn button has been released. When you set the Ditch Lights OFF they will stay off regardless of movement or horn sounds. -
Page 20: Conventional Dc Operation
Conventional DC Operation Your MTH locomotive will operate on conventional DC track voltage also. However, functions such as sounding the horn, ringing the bell and the PFA sounds cannot be initiated in conventional DC. Only the engine sounds, smoke, squealing brakes and idle sounds will function. -
Page 21: Dcc / Digital Command Control
DCC - Digital Command Control (see page 12 for activation instructions) DCC is a popular digital command scheme wherein the track power is also a digital control signal. That is, using a DCC controller, you can communicate with multiple engines and have all of them moving at different speeds and in varying directions on the same track at the same time. -
Page 22: Lights
Bell/Whistle (Horn) F1 – Bell To activate the Bell press F1. To deactivate it, hit F1 again F2 – Whistle (Horn) To activate the Whistle/Horn, press F2. To shut it off either let off the F2 button or press and release it F4 –... -
Page 23: Master Volume
Master Volume F6 – Master Volume The operation for Master Volume in DCC has changed to the following functionality: When you activate F6, the Master Volume will begin increasing. If you are at 0 (no volume), the first time you turn on F6 it will take approximately 3 seconds to get to 100% volume. When you get to your desired volume level then turn F6 off. -
Page 24: Engine Sounds
Engine Sounds F25 - Engine Sounds You can turn the Engine Sounds On/Off by pressing the F25 button. Pressing it once (enabling F25) will cause the Engine Sounds to shut off. The Whistle/Horn and Bell sounds will still be active, however. To turn the engine sounds back on press the F25 button again (disable F25). - Page 25 F22 – Coupler Slack When an engine hooks up and pulls a train it has to take up the coupler slack. You can play this sound by pressing F22 twice (toggling on then off). This feature works two ways – While the engine is sitting still, press F22 twice to enable it. Then, when you move the engine, it will play the Coupler Slack sound.
-
Page 26: Function Chart
FUNCTION CHART F Key Description Head/Tail light Bell Horn Start-Up/Shut Down Lights (except head/tail) Master Volume Front Coupler Rear Coupler Forward Signal Reverse Signal Grade Crossing Smoke (On/Off) Smoke Volume Idle Sequence 3 Idle Sequence 2 Idle Sequence 1 Extended Start-Up Extended Shut-Down Rev Up Rev Down... -
Page 27: Cv29
CV29 CV29 is the basic decoder setup CV that is used by all DCC decoder manufactures. So, if you are familiar with CV29 from other manufacturer’s decoders M.T.H.’s is no different. The most important part of CV29 is the ability to switch between long and short addressing. -
Page 28: Feature/Factory Resetting
Enter in the long address you want then click anywhere else in the spreadsheet and it will return the values for CV17 and CV18 (it will also return the hex conversion of the CV17 and CV18 values if your DCC system requires this). Below is an example for extended address 2011: CV 17 and CV 18 Conversion Tool Desired 4-Digit... - Page 29 Lost or Unknown Engine Address and the 55-55-55 Address Reset In some cases you may not remember or have somehow lost the engine address. Following the above Feature or Factory Resets will allow you to recover an engine. The limitation to this is that for most resets you must know the engine address.
-
Page 30: Proto-Sound® 3.0 Expanded Dcc Functionality
MTH PS3.0 Expanded DCC Functionality Advanced DCC Operation This section of the manual provides more in-depth detail on how to set up and configure your MTH PS3.0-equipped engine using the NMRA-standard CV’s as well as the manufacturer-specific CV’s. It also explains some of the other F Functions not covered in the Basic DCC Operation section. - Page 31 Factory Default Values for MTH PS3.0 DCC Configuration Variables (CV’s) Default Description F-Key Description Value Range 0-127 Short Address Function - Bell High Byte 0-255 Start Voltage (Cv52 bit 0 must =1) Function - Bell Low Byte 0-255 Accel Adjustment Horn High Byte 0-255 Decel Adjustment...
- Page 32 User-Settable F-Function List This feature allows you to take the 28 F-Functions that currently reside in each MTH Proto-Sound 3.0-equipped O-Gauge Engine and change the location of that function. For example: F4 is currently PFA and you'd like that placed down to F28 which is Feature Reset.
- Page 33 The above list includes ALL F functions that an MTH PS3 engine could have. You are free to change any of the above listed items to any F function position, 1-28. For example, if you your engine came from the factory without a smoke unit but you added one at a later date you could swap out any of the F functions, 1-28, for the Smoke On/Off and the Smoke Volume.
-
Page 34: Anti-Jackrabbit (Cv57)
CV57 - Anti-Jackrabbit • This either enables or disables the feature whereby in Conventional DC one has to lower the track voltage below approx 9VDC and then raise it again to get the engine to move • The only method to enable/disable this feature is through DCC •... -
Page 35: Advanced Consisting
Custom Speed Tables Below is a table that shows the value to write to CV25 to achieve the desired speed curve. For example, if you would like to use speed curve 18 then: 1. Write a value of 1 to CV52 to enable PWM Mode 2. - Page 36 To set this consists up so that: • The Headlight is ON in the Front engine when going Forward, OFF when the consist is in Reverse • The Reverse light and headlight is OFF in the Rear engine when the consist is going Forward, headlight is ON, reverse light is OFF when the consist is in Reverse •...
- Page 37 11. Call up the consist address (address 4 in this example) 12. Press the F0 button to ensure the FL is toggled on. Most systems have a light bulb icon to indicate whether F0 is active or not. Ensure that it is ON NOTE: The convenient thing about setting up the consist as described above is that it allows you flexibility in the orientation of an engine in a consist;...
-
Page 38: Programming Track
NOTE: CV21 is ONLY used when you have some value other than 0 written to CV19. If CV19 = 0 then the values of CV21, CV22, CV23, and CV24 are not used 3. Call up your Middle engine (address 2 in the example) 4. - Page 39 So, in the above example you simply add up the values in the “Decimal Value” row – 128+64+0+16+8 +0+0+1 = 217. You would write 217 to the CV you were altering. The above applies to any CV. Also, if you have a CV that already has a value assigned that you do not want to alter but need to make additions to it, for example CV29, you would simply add the additional bits you enabled to the existing value to obtain the new CV value.
-
Page 40: Maintenance
Maintenance Lubricating and Greasing Instructions The engine should be well oiled and greased in order to run properly. DO NOT DO NOT Regularly lubricate all axles and pickup rollers to prevent squeaking. Use OVER OIL OVER OIL light household oil, such as that found in M.T.H.'s maintenance kit. Do not over oil. -
Page 41: Cleaning The Wheels, Tires And Track
Grease Idler Gears (G) Figure 8: Grease Points Cleaning The Wheels, Tires, and Track Periodically check the locomotive wheels and pickups for dirt and buildup, which can cause poor electrical contact and traction and prematurely wear out the neoprene traction tires. Wheels and tires can be cleaned using denatured (not rubbing) alcohol applied with a cotton swab. -
Page 42: Protosmoke Unit Operation
2. Slip the new tire onto the wheel. You may find it useful to use two small flathead screwdrivers to stretch the tire over the wheel. 3. If you twist the tire while stretching it over the wheel, you will need to remove and reinstall the tire. -
Page 43: Headlight Replacement Instructions
After removing the engine from storage, add another 25 drops of fluid, letting the wickdiminish, add another 10-15 drops of smoke fluid or turn the smoke unit off. When storing the unit for long periods of time, you may want to add about 15 drops of fluid to prevent the wick from drying out. -
Page 44: Troubleshooting
DCS Remote Commander Troubleshooting Guide The following Guide will help you trouble shoot your DCS Remote Commander handheld remote. Symptom Solution Engine has no sound Ensure SU/SD has been pressed. Press the VOL button then press + on the throttle control to raise the volume Engine’s coupler will not fire 1. - Page 45 Troubleshooting Proto-Sound® 3.0 Problems Although Proto-Sound® 3.0 has been designed and engineered for ease of use, you may have some questions during initial operation. The following table should answer most questions. If your problem cannot be resolved with this table, contact M.T.H. for assistance (telephone: 410-381-2580;...
- Page 46 Conventional AC Lock-out Solution The engine maybe locked into the neutral I can't get the engine to run after I power position. Follow the procedure in the "Lock up the transformer. It sits still with the into a Direction" section to unlock the diesel and compressor sounds running.
- Page 47 Conventional DC Start-up Solution Check to see if that section of track has When I apply power to the track my power. Use a voltmeter or a lit passenger car. engine doesn't do anything. No lights, no sound, no nothing. Slide the engine a couple of feet in either direction, you may have a bad track section Have you got that section electrically isolated...
- Page 48 Conventional DC Lights Solution One of my lights is out. Most likely you had been running the engine in DCC or DCS mode and toggled that light off. Put it back into one of those modes and turn that light back on. The engine will remember that when you run it again in Conventional DC.
- Page 49 Start-up Solution When I apply power to the track my Did you press F3 yet? F3 on your DCC handheld will start your engine up. engine doesn’t do anything. No lights, no sound. Check to see if that section of track has power.
- Page 50 Lights Solution Check your F keys. F0 is the headlight (also One of my lights is out. controls the Back-up light) and F5 will toggle the Cab light and firebox light. Could be the same reason as “One of my None of my lights are on.
- Page 51 DCS (Remember, it's NOT DCC) Start-up Solution This is normal. You have to hit the Start-Up When I apply power to the track my button. engine doesn't do anything. No lights, no sound, no nothing. Check to see if that section of track has power.
- Page 52 DCS (Remember, it's NOT DCC) Smoke Solution Press the smoke button, this will activate the My engine isn’t smoking at all smoke If you just filled it with the smoke fluid sometimes the fluid can make a seal in the stack.
-
Page 53: Transformer Compatibility Chart
Transformer Compatibility and Wiring Chart Proto-Sound® 3.0 is designed to work with most standard AC transformers. The chart below lists the many compatible transformers. Note that many of the operational commands described in these instructions require a bell button, so if your transformer does not have its own bell button, you should consider adding one to get the full benefit of the system. - Page 54 DC Power Supply Chart RECOMMENDED DC TRANSFORMERS Transformer Power Notes On Use Transformer Min/Max. Model Rating Type Voltage MRC 6200 0-18.5v 60-Watt Not Recommended For #70-3001-1 J3a Electronic 0-20v 100-Watt Electronic Controlmaster 20 PH Hobbies 0-20v 100-Watt Electronic PH Hobbies 0-20v 180-Watt Electronic...
-
Page 55: Additional Features With Dcs Remote Control System
Additional Features Accessible with the DCS Remote Control System (Additional equipment required) While conventional mode operation of a Proto-Sound® 3.0 engine yields wonderfully realistic sound and several train control features, command mode operation allows the user to access a world of command functions never before accessible to O Gauge railroaders. -
Page 56: Railware In Teractive Dvd
Quick-Start and RailWare Interactive DVD Included in this set is a Quick-Start DVD that demonstrates the start-up and basic operation of this set as well as other information about model railroading. You may find it helpful to view the DVD before operating this set. It is full of helpful information on M.T.H. product history, track planning software, a dealer finder, and information and video clips on Loco-Sound and Proto- Sound 3.0. -
Page 57: Service And Warranty Information
Service & Warranty Information How to Get Service Under the Terms of the Limited One-Year Warranty When you suspect an item is defective, please check the operator's manual for standard operation and trouble- shooting techniques that may correct the problem. Additional information may be found on the M.T.H. Website. Should you still require service, follow the instructions below to obtain warranty service.
Need help?
Do you have a question about the READY-TO-RUN ES44AC and is the answer not in the manual?
Questions and answers
How do I run. Factory reset No horn bell