Table of Contents
Advertisement
Quick Links
Advertisement
Table of Contents

Related Manuals for NCI MiniPrinter 122 Series

Summary of Contents for NCI MiniPrinter 122 Series
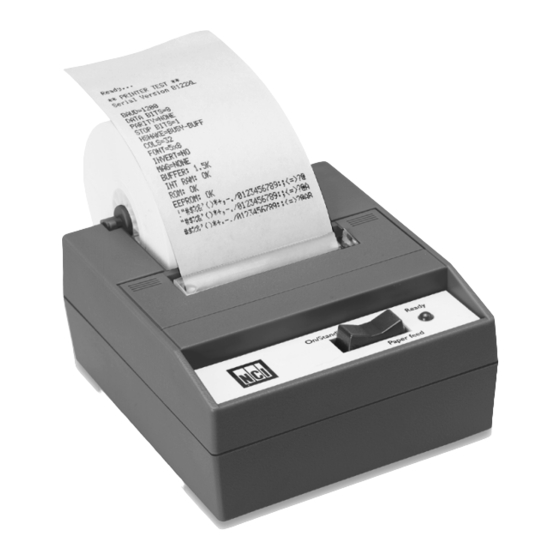
- Page 1 Model 122X MiniPrinter Series User's Manual...
- Page 2 CAUTION Risk of electrical shock. Do not remove cover. No user serviceable parts inside. Refer servicing to qualified service personnel. Weigh-Tronix reserves the right to change specifications at any time. 10/01 122XUser’sManual.p65 PN 7424-14954G...
-
Page 3: Table Of Contents
TABLE OF CONTENTS Introduction ................. 1 Installation ................1 Installing the Paper ..........1 To Remove the Paper Roll ........4 Operation ................5 Connecting and Powering up Your Printer ....5 Maintenance ............... 5 Changing the Printer Ribbon ........6 Inserting a Ribbon with Paper in the Printer .. - Page 4 Specifications Interface Interface Interface Interface Interface- - - - - Serial Serial Serial Serial Serial Available baud rates: 300, 600, 1200, 2400, 4800, 9600, 19200 Voltage levels: RS-232C: -9 Volts to + 9 Volts TTL: 0 Volts to + 5 Volts 20mA current loop RS-485: 200mV differential Character format:...
- Page 5 P P P P P rint Head Life rint Head Life rint Head Life rint Head Life rint Head Life 500,000 lines mean character before failure. Ribbon life Ribbon life Ribbon life Black- 200,000 characters Ribbon life Ribbon life Purple-250,000 characters P P P P P aper aper aper...
-
Page 6: Introduction
Introduction The Model 122X impact printer series consists of these models and electronic interfaces: Model 1220 - RS-232 Model 1221 - Parallel Model 1222 - TTL Model 1223 - Current Loop Model 1224 - RS-485 This manual is split into the following main sections: •... - Page 7 This will facilitate the entry of the paper into the printer. Slide the paper through the slot connecting the paper compartment and the printer compartment. You can slide it in about one-quarter inch before it stops. While holding the paper in place, press the rocker switch to the Paper Feed position.
- Page 8 10. Push the back of the printer cover down and into place. 11. Press the front of the printer cover down to lock in place. 12. Put the paper spindle into the paper roll as shown below, and place the roll with the spindle onto the snaps near the back of the printer.
-
Page 9: To Remove The Paper Roll
T T T T T o Remove the P o Remove the P o Remove the P o Remove the P o Remove the Paper aper aper aper aper Advance the paper about one inch beyond the paper Roll Roll Roll Roll Roll... -
Page 10: Operation
Maintenance When printing becomes faint or difficult to see, replace the ribbon in your printer with an NCI cartridge ribbon. Ribbon Type: NCI Part Number: Black... -
Page 11: Changing The Printer Ribbon
Changing the P Changing the P rinter rinter Changing the P Changing the P Changing the Printer rinter rinter If your printer is used infrequently, the print impression Ribbon Ribbon Ribbon Ribbon Ribbon may become weak because the ribbon has dried out. To advance the ribbon to a new section, hold down the Paper Feed switch for several seconds. -
Page 12: Inserting A Ribbon With Paper In The Printer
Install new cartridge. Be sure the ink cartridge is inserted firmly to prevent weak or irregular printing. The cartridge must be properly seated and aligned for best printing. Turn the cartridge “knob” (marked by an arrow) clockwise to stretch the ribbon. If you get ribbon Replace the cover. -
Page 13: Printer Test And Setup
Printer Test and Setup The printer can be tested and setup using the steps described in this section. Testing and setup are done using the rocker switch on the printer. P P P P P rinter T rinter T rinter T rinter T rinter Test With the printer unplugged at the outlet or at the back of... -
Page 14: Accessing The Setup Menu
Accessing the Setup Accessing the Setup Accessing the Setup Accessing the Setup Accessing the Setup To access the setup menu follow these steps: Menu Menu Menu Menu Menu Unplug the printer either at the outlet or at the back of the printer. - Page 15 With the printer in the setup menu and with CONFIGURE CONFIGURE CONFIGURE CONFIGURE CONFIGURE [NEXT/OK] [NEXT/OK] [NEXT/OK] [NEXT/OK] [NEXT/OK] as the last item printed, press OK (right side) to access the CONFIGURE CONFIGURE CONFIGURE CONFIGURE CONFIGURE menu. The following is printed: L L L L L OAD DEF OAD DEF OAD DEF...
- Page 16 P P P P P arity arity arity arity arity Parity can be selected only if 7 data bits are set. Choose Odd or Even. If you choose 8 data bits, parity defaults to None. Stop Bits Stop Bits Stop Bits ST ST ST ST STOP BITS OP BITS OP BITS...
-
Page 17: Custom
DOUBLE HIGH DOUBLE WIDE/HIGH After you choose one of the magnifications the printer will print R R R R R eady eady eady eady to show the printer is out of the configuration eady menu and the setup menu and is ready to print. CUST CUST CUST... - Page 18 T/D Format T/D Format T/D Format T/D Format T/D Format TIME/D TIME/D TIME/D TIME/D TIME/DA A A A A TE FORMA TE FORMA TE FORMA TE FORMA TE FORMAT T T T T is the next parameter. Choose from the following formats. MM/DD/YY hh:mm ?M MM/DD/YY hh:mm ?M DOW MM = month...
-
Page 19: Set Clock
YES - YES - YES - YES - YES - voltage will be in a low state until the unit is busy then voltage level goes high. NO - NO - NO - NO - NO - voltage will be in a high state until the unit is busy then voltage level goes low. -
Page 20: Reset Seq
The cursor now appears over the 2nd position. Press This feature is NEXT NEXT NEXT NEXT NEXT (left side) to increment this number if needed and available only on OK if it is right. Continue this sequence of accepting or units with the changing the year, month, day, and DOW (Day Of Week). -
Page 21: Communication
Communication This section shows the cable differences in the models of the 1220 series printer and the control codes and communication protocols. Model 1220 Model 1220 Model 1220 Model 1220 Model 1220 RS RS RS RS RS-232 Serial V -232 Serial V -232 Serial V -232 Serial V -232 Serial Version... - Page 22 Model 1220 (2600) Model 1220 (2600) Model 1220 (2600) Model 1220 (2600) Model 1220 (2600) RS RS RS RS RS-232 Serial V -232 Serial V -232 Serial V ersion ersion -232 Serial V -232 Serial Version ersion ersion Pin No. Pin No.
-
Page 23: Model 1221 Parallel Version
Model 1221 Model 1221 Model 1221 Model 1221 Model 1221 P P P P P arallel V arallel V arallel V ersion ersion arallel V arallel Version ersion ersion Pin No. Pin No. Pin No. Signal Signal Signal Direction Direction Direction Description Description... - Page 24 Connectors On the printer: 36-pin receptacle, equivalent to 57-40360-12-D56 AMP On the cable: 36-pin plug, equivalent to 57-30360 AMP or plug equivalent to 552274-1 AMP cover equivalent to 552073-1 AMP Cable Use a cable less than 10 feet long. A shielded cable using twisted pair conductions is desirable.
-
Page 25: Model 1222 Serial Ttl Version
Model 1222 Model 1222 Model 1222 Model 1222 Model 1222 Serial TTL V Serial TTL V ersion ersion Serial TTL V Serial TTL V Serial TTL Version ersion ersion Pin No. Pin No. T T T T T ype Pin No. Pin No. -
Page 26: Model 1223 20 Ma Current Loop Version
Model 1223 Model 1223 Model 1223 Model 1223 Model 1223 20 mA Current Loop 20 mA Current Loop 20 mA Current Loop 20 mA Current Loop 20 mA Current Loop V V V V V ersion ersion ersion ersion ersion Pin No. -
Page 27: Model 1224 Rs-485 Serial Version
Model 1224 Model 1224 Model 1224 Model 1224 Model 1224 RS RS RS RS RS-485 Serial V -485 Serial V -485 Serial V ersion ersion -485 Serial V -485 Serial Version ersion ersion Pin No. Pin No. Signal Signal DTE Direction DTE Direction Description Description... - Page 28 Connectors On the printer: 25-hole receptacle, equivalent to DB-25S On the cable: 25-pin plug, equivalent to DB-25P Cable Use cable less than 2500 feet long Use cable less than 2500 feet long Use cable less than 2500 feet long Use cable less than 2500 feet long Use cable less than 2500 feet long.
-
Page 29: Control Codes
CONTROL CONTROL CONTROL CONTROL CONTROL According to the American Standard Code of Information Interchange (ASCII), there are 32 control codes in addition CODES CODES CODES CODES CODES to the codes for the printable characters. (Control codes are sent as data, but the receiving device interprets them as abbreviated ‘’instructions”, communication - status messages, etc.) The printer recognizes these control codes:... - Page 30 Back Space Back Space Back Space Back Space Back Space Upon receipt of this code, the printer erases from its Code 8 Code 8 Code 8 Code 8 Code 8 buffer the previously received character. This is useful in correcting typing errors for programs that send data both to a video screen and the hardcopy printer.
- Page 31 Enlarged P Enlarged P Enlarged P Enlarged P Enlarged Printing rinting rinting rinting rinting Enlarged printing may be selected by sending both the Codes 14 and 15 Codes 14 and 15 Codes 14 and 15 Codes 14 and 15 Codes 14 and 15 double height command (control code 14) and the double width command (control code 15).
- Page 32 Dot Graphics Dot Graphics Dot Graphics Dot Graphics Dot Graphics The mechanism used in the printer prints one line of dots Code 18 Code 18 Code 18 Code 18 Code 18 across at a time. This means that when it prints one line of characters it has actually printed ten lines of dots where the first eight lines make up the character and the last two lines are blank for the space between character...
- Page 33 Example 1: Example 2: By using CHR$(19) you enter the Custom Character mode. User P User Programmable User P rogrammable rogrammable rogrammable User P User P rogrammable This allows you to design and print your own 6 x 8 charac- Character Character Character...
- Page 34 Use quad ruled paper to design your character. Number 8 consecutive rows like this: Now design your character in dot form (see the example below). Add together all the numbers from the column on the left, counting only where you have placed a dot in a row.
- Page 35 After typing RUN, your custom character will be stored in the printer’s memory. It will retain this information until the printer is switched off or until you write over the data by defining a different character. To print your newly designed character, simply send CHR$(126) which corresponds to hexidecimal value 7E.
- Page 36 Selectable Column Selectable Column Selectable Column Selectable Column Selectable Column The printer powers up in the column mode last selected by Width Width Width Width Width configuration. You can change the column width by Codes 29, 30, 31 Codes 29, 30, 31 Codes 29, 30, 31 sending the appropriate control code from the list below: Codes 29, 30, 31...
- Page 37 For special applications please contact our Customer Service Department for further assistance: Phone 800-982-6622 707-527-5555 800-847-6743 707-579-0180 P P P P P rinter Escape rinter Escape rinter Escape rinter Escape rinter Escape Command Command Command Command Command P P P P P rint formatted data rint formatted data rint formatted data rint formatted data...
-
Page 38: Default Table
Default Table Below is a table showing the possible values for the Custom and Configuration menu parameters. The values shown in bold bold bold bold type are the default settings. bold Custom Menu Custom Menu Custom Menu Custom Menu Custom Menu Configuration Menu Configuration Menu Configuration Menu... - Page 39 Notes...
- Page 40 1000 Armstrong Drive Fairmont, MN 56031 USA Telephone: 507-238-4461 Facsimile: 507-238-4195 E-mail: service @wt-nci.com www.wt-nci.com...
Need help?
Do you have a question about the MiniPrinter 122 Series and is the answer not in the manual?
Questions and answers