Table of Contents

Related Manuals for Ancona PRESTO 30


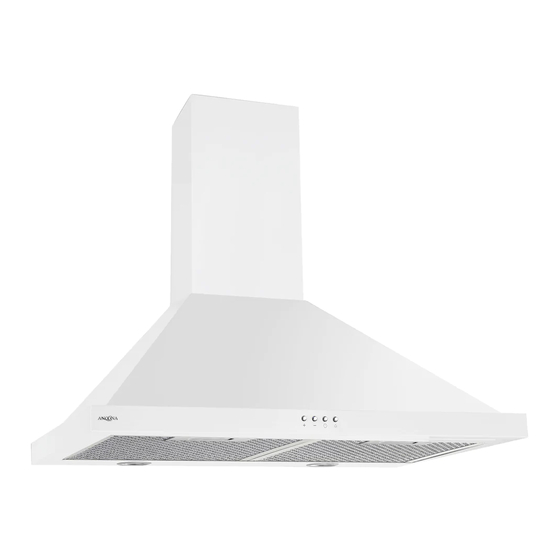
Summary of Contents for Ancona PRESTO 30
- Page 1 MODEL: PRESTO 30 & 36 MODEL: TRINA 30 & 36 IMPORTANT SAFETY INSTRUCTIONS Carefully read the following important information regarding installation safety and maintenance. Keep these instructions for future reference. 06/27/2013 MA1130-2...
-
Page 2: Important Safety Notice
IMPORTANT SAFETY NOTICE READ ALL INSTRUCTIONS BEFORE INSTALLING AND OPERATING THIS APPLIANCE The installation in this manual is intended for qualified installers, service technicians or persons ● with similar qualified background. Installation and electrical wiring must be done by qualified professionals and in accordance with all applicable codes and standards, including fire-rated construction. - Page 3 IMPORTANT SAFETY NOTICE READ ALL INSTRUCTIONS BEFORE INSTALLING AND OPERATING THIS APPLIANCE To reduce the risk of stove top grease fire: ● ● ● ● ● ● ● Note: * if included with your model To reduce the risk of injury to persons in the event of a stove top grease fire: ●...
-
Page 4: Parts Supplied
PARTS SUPPLIED:... - Page 5 VENTING REQUIREMENTS: HEIGHT & CLEARANCE: Vent system must terminate to the outside Chimney mounting bracket (Roof or side wall). Maximum DO NOT terminate the vent system in an attic ceiling clearance at 112 7/8” or other enclosed area. Upper chimney at 30”...
-
Page 6: Calculating Vent System Length
IMPORTANT: CALCULATING VENT SYSTEM LENGTH: Duct Run Calculation example: One roof cap, two 90º elbows, and one 45º elbow use 0ft + 9ft + 9ft + 5ft = 23ft used. Deduct 23ft from 30ft, 7ft maximum available for straight duct run. -
Page 7: Venting Methods
VENTING METHODS: This range hood is factory set for venting through the roof or wall. Vent work can terminate either through the roof or wall. To vent through a wall, a 90° elbow is needed. IMPORTANT: NEVER exhaust air or terminate duct work into spaces between walls, crawl spaces, ceiling, attics or garages. -
Page 8: Electrical Requirements
ELECTRICAL REQUIREMENTS: IMPORTANT: Observe all governing codes and ordinances. It is the customer’s responsibility to contact a qualified electrical installer. If codes permit and a separate ground wire is used, it is recommended that a qualified electrician determine that the ground path is adequate. A 120-Volt, 60 Hz, AC-only, fused electrical supply is required on a separate 15-amp circuit, fused on both sides of the line. - Page 9 PREPARATIONS: Advanced Preparations: Range Hood Operations Range Hood Operations Preparations: NOTE: To avoid damage to your hood, prevent debris from entering the vent opening. CAUTION If moving the cooking range is necessary to install the hood, turn OFF the power on an electric range at the main electrical box.
-
Page 10: Installation
INSTALLATION: Installations (refer to Page 4 for parts): NOTE: Use threaded drywall anchors only when mounting the hood on sheet rock. Mounting the hood on wall studs or lumbars is highly recommended. Step 1: Measuring Step 2: Installing the hood mounting bracket Step 3: Installing the upper chimney bracket... - Page 11 INSTALLATION CONTINUE: Step 4: Venting Step 5: Mounting the hood on the wall CAUTION - Make certain the range hood is secure before releasing!
- Page 12 INSTALLATION CONTINUE: Step 6: Installing filters To install filters for the following four steps (See Figure # 6): - Angle the filter into slots at the back of the hood. - Push the button on handle of the filter. - Release the handle once the filter fits into a resting position. - Repeat to install all filters.
-
Page 13: Control Panel Operation
CONTROL PANEL OPERATION: Increase Decrease Timer Control Panel Layout and Buttons Configurations: Electronic Controls with Time Delay... -
Page 14: Replacing The Bulbs
REPLACING THE BULBS: Replacing the light bulbs: NOTE:... -
Page 15: Mounting Brackets
MOUNTING BRACKETS: Upper Chimney Bracket 4 7/8” (124 mm) 8 5/8” (219 mm) Lower Chimney Bracket 8” (203 mm) 4 5/8” (119 mm) 8 5/8” (219 mm) Mounting Bracket Hook 7 7/8” (200 mm) 3 15/16” (100 mm) 3 15/16” (100 mm) 8 5/8”... - Page 16 MEASUREMENTS AND DIAGRAMS: 6 3/4’’ 8 3/4’’ (170mm) (222mm) 17” - 33.5’’ (430 - 850 mm) 11 3/4’’ (300 mm) 1 5/8’’ (40mm) 19 3/4’’ 29 1/2” 35 1/2” (500mm) (750mm) (900mm)
-
Page 17: Troubleshooting
TROUBLE SHOOTING: 1) If the range hood or halogen light does not operate after installation: make sure that all power has been turned back ON,fused not blown and all electrical wiring are properly connected. 2) The range hood vibrates when the blower is on: properly on to the ceiling or wall. -
Page 18: Range Hood Assembly
RANGE HOOD ASSEMBLY: Description Flexible tube-optional Decorative upper flue Decorative lower flue Upper flue mounting bracket Lower flue mounting bracket Power cord Air metal outlet Mounting bracket for hood Connection plate Rear plate Housing Decorative plate Front plate Light Electronic box PCB board Capacitor Transformer... -
Page 19: Specifications
SPECIFICATIONS: Stainless steel Body design 120V / 60Hz (USA & Canada standard) Power rating 250W (210W + 2x20W) General input power 210W Motor input power Ampere 2.2A 3 levels Levels of speed control 250CFM/330CFM/450CFM Airflow (50db)/(55db)/(60db) Noise Level Single motor Number of Motor Centrifugal squirrel cage Fan Type... -
Page 20: Blower Assembly
BLOWER ASSEMBLY: Description Description Grid Motor Blower Impeller ELECTRICAL ASSEMBLY: Description Description Electrical box base Screw (ST3*6) Electrical cover Capacitor Screw (ST3*10) - Page 21 USE AND CARE INFORMATION: Operations: Cleaning: SAFETY WARNING: Never put your hand into area housing the fan while the fan is operating! Cleaning Exterior Surfaces: CAUTION: DO NOT leave on too long as this may cause damage to hood finish. Cleaning Filters: IMPORTANT:...
-
Page 22: Limited Product Warranty
Subject to the limitations, exclusions and disclaimers hereof, AMS warrants exclusively to the original purchaser (the “Purchaser”) of this Ancona Range hood product (the “Product”) that it shall be free from defects in material or workmanship (the “Limited Product Warranty”). The duration of the Limited Product Warranty is 12 months from the date of original purchase (the “Warranty Period”).
Need help?
Do you have a question about the PRESTO 30 and is the answer not in the manual?
Questions and answers