Table of Contents
Advertisement
Available languages
Available languages
Quick Links
VDP401GLD7
LASER LIGHT PROJECTOR – GREEN (7 DMX CHANNELS)
LASERPROJECTOR – GROEN (7 DMX-KANALEN)
PROJECTEUR LASER – VERT (7 CANAUX DMX)
PROYECTOR LÁSER – VERDE (7 CANALES DMX)
LASERPROJEKTOR – GRÜN (7 DMX-KANÄLE)
USER MANUAL
GEBRUIKERSHANDLEIDING
NOTICE D'EMPLOI
MANUAL DEL USUARIO
BEDIENUNGSANLEITUNG
Advertisement
Table of Contents

Related Manuals for HQ Power VDP401GLD7


Summary of Contents for HQ Power VDP401GLD7
- Page 1 VDP401GLD7 LASER LIGHT PROJECTOR – GREEN (7 DMX CHANNELS) LASERPROJECTOR – GROEN (7 DMX-KANALEN) PROJECTEUR LASER – VERT (7 CANAUX DMX) PROYECTOR LÁSER – VERDE (7 CANALES DMX) LASERPROJEKTOR – GRÜN (7 DMX-KANÄLE) USER MANUAL GEBRUIKERSHANDLEIDING NOTICE D’EMPLOI MANUAL DEL USUARIO...
- Page 2 VDP401GLD7 VELLEMAN...
-
Page 3: Introduction And Features
• A qualified technician should install and service this device. • This device is designed for professional use on stage, in discos, theatres, etc. The VDP401GLD7 should only be used indoors and connected to an alternating current of max. 240VAC / 50Hz. -
Page 4: Installation
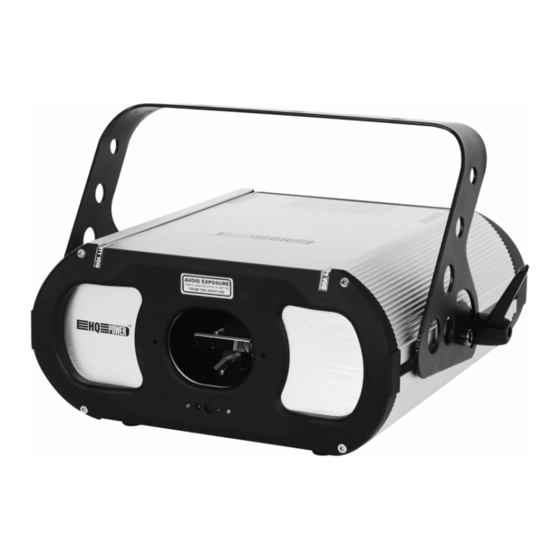
• The installation has to be approved by an expert before the device is taken into service. 4. Description a. Front 1. Sound-active microphone 2. DMX indicator 3. Blue sound mode indicator 4. Red laser indicator 5. Green power indicator VDP401GLD7 VELLEMAN... -
Page 5: Operation
Connect the provided XLR cable to the female 3-pin XLR output of your controller and the other side to the male 3- pin XLR input of the VDP401GLD7. Multiple VDP401GLD7s can be linked through serial linking. The linking cable should be a two-core screened cable with XLR input and output connectors. -
Page 6: Cleaning And Maintenance
In the case of the 7-channel VDP401GLD7, you will have to set the start address of the first VDP401GLD7 to 1, the second VDP401GLD7 to 8 (1 + 7), the third to 15 (8 + 7) and so on. -
Page 7: Troubleshooting
5.3kg Max. Ambient Temperature 30°C The information in this manual is subject to change without prior notice. VDP401GLD7 – LASERPROJECTOR - GROEN (7 DMX-KANALEN) 1. Inleiding en kenmerken Aan alle ingezetenen van de Europese Unie Belangrijke milieu-informatie betreffende dit product Dit symbool op het toestel of de verpakking geeft aan dat, als het na zijn levenscyclus wordt weggeworpen, dit toestel schade kan toebrengen aan het milieu. - Page 8 • Maak het toestel ook vast met een veiligheidskabel. • Sta nooit recht onder het toestel wanneer u het monteert, verwijdert of schoonveegt. Laat het toestel controleren door een geschoolde technicus voor u het in gebruik neemt en laat het 1 x per jaar volledig nakijken. VDP401GLD7 VELLEMAN...
- Page 9 12. Voedingsschakelaar: in- en uitschakeling van het toestel. Zorg dat het toestel is uitgeschakeld wanneer u deze aan het lichtnet koppelt 13. Vergrendeling: het toestel produceert geen laserstraal wanneer u de vergrendeling inschakelt 14. Regeling gevoeligheid tijdens muziekgestuurde modus VDP401GLD7 VELLEMAN...
- Page 10 Dit digitale startadres is het kanaalnummer van waarop het toestel “luistert” naar het signaal van de DMX controller. Geef het correcte nummer in en lees het af op de display onderaan uw VDP401GLD7. U kunt één enkel startadres gebruiken voor een groep toestellen of u kunt per toestel een nieuw startadres ingeven.
-
Page 11: Reiniging En Onderhoud
In het geval van de 7-kanaals VDP401GLD7, zult u het startadres van het eerste toestel op 1 moeten instellen, van het tweede toestel op 8 (1 + 7), van het derde op 15 (8 + 7) enz. Het DMX-startadres wordt door de 9 eerste DIP-schakelaars bepaald. Het coderen is van het binaire type: DIP nr. 1 heeft waarde 1, DIP nr. -
Page 12: Technische Specificaties
Gewicht 5.3kg De informatie in deze handleiding kan te allen tijde worden gewijzigd zonder voorafgaande kennisgeving. VDP401GLD7 – PROJECTEUR LASER – VERT (7 CANAUX DMX 1. Introduction et caractéristiques Aux résidents de l'Union européenne Des informations environnementales importantes concernant ce produit Ce symbole sur l'appareil ou l'emballage indique que l’élimination d’un appareil en fin de vie peut polluer... - Page 13 • Toute modification de l’appareil est interdite pour des raisons de sécurité. • Garder votre VDP401GLD7 hors de la portée de personnes non qualifiées et de jeunes enfants. • Brancher l’appareil sur le réseau électrique par la fiche d’alimentation. Ne pas le brancher sur un bloc de puissance.
- Page 14 Le projecteur utilise les modes d’opération suivants : le mode DMX512, le mode maître-esclave ou le mode autonome. En outre, il est possible de contrôler l’appareil à distance en utilisant un contrôleur DMX512. Le VDP401GLD7 est en grade de projeter plus de 300 motifs. VDP401GLD7...
- Page 15 « écoutera » son propre canal. Par conséquent, un ajustement des réglages d’un canal n’influence que l'appareil sur ce canal. Pour le VDP401GLD7 à 7 canaux, l’adresse de départ du premier appareil est 1, du deuxième 8 (1 + 7), du troisième 15 (8 + 7), etc.
-
Page 16: Nettoyage Et Entretien
Mode test 6. Nettoyage et entretien Un composant de votre VDP401GLD7 d’une importance cruciale est le miroir. Un miroir non propre influencera le faisceau laser. Nettoyer régulièrement les miroirs pour obtenir un faisceau puissant, particulièrement les miroirs d’un projecteur installé dans un endroit poussiéreux. Voici quelques instructions : 1. -
Page 17: Instrucciones De Seguridad
Si tiene dudas, contacte con las autoridades locales para residuos. ¡Gracias por haber comprado el VDP401GLD7! Lea cuidadosamente las instrucciones del manual antes de usarlo. Desembale el proyector cuidadosamente y póngalo en una superficie plana y estable. Controle el aparato. Si el aparato ha sufrido algún daño en el transporte no lo instale y póngase en contacto con su distribuidor. -
Page 18: Instalación
• El soporte donde irá el aparato, debe ser capaz de sostener 10 veces el peso de éste durante una hora, sin que se produzca una deformación de dicho soporte. • Fije el VDP401GLD7 con un cable de seguridad (seguridad adicional). • Evite ponerse debajo del aparato durante el montaje, la limpieza, etc. Un técnico especializado debe revisar el aparato antes de la puesta en marcha. - Page 19 Conecte el cable con conector XLR (incl.) a la salida XLR hembra de 3 polos del controlador y el otro conector XLR macho de 3 polos a la entrada del VDP401GLD7. Es posible conectar varios VDP401GLD7 en serie. Use un cable blindado de doble hilo conductor con conectores XLR de entrada y de salida.
-
Page 20: Limpieza Y Mantenimiento
En el caso del VDP401GLD7 de 7 canales, la dirección inicial del primer aparato es 1. Introduzca 8 (1 + 7) para el segundo aparato, introduzca 15 (8 + 7) para el tercer aparato, etc. -
Page 21: Solución De Problemas
Falls Zweifel bestehen, wenden Sie sich für Entsorgungsrichtlinien an Ihre örtliche Behörde. Wir bedanken uns für den Kauf des VDP401GLD7! Bitte lesen Sie diese Bedienungsanleitung vor Inbetriebnahme sorgfältig durch. Nehmen Sie das Gerät vorsichtig aus der Verpackung und stellen Sie es auf eine ebene und stabile Oberfläche. - Page 22 • Ersetzen Sie eine Sicherung nur durch eine Sicherung desselben Typs und derselben Leistung (siehe “Technische Daten”). Vorgehensweise: 1. Entfernen Sie den Sicherungshalter mit einem geeigneten Schraubendreher. 2. Entfernen Sie die defekte Sicherung und setzen Sie eine neue Sicherung gleichen Typs ein. 3. Bringen Sie den Sicherungshalter wieder in das Gehäuse ein. VDP401GLD7 VELLEMAN...
- Page 23 7. DIP-Schalter: eingeben der DMX-Startadresse und Wahl zwischen den verschiedenen Betriebsmodi 8. Sicherungsanschluss: DE-9-Anschluss, der den Laserstrahl abbrecht wenn der Anschluss unterbrochen wird 9. a. Signaleingang: Standard DMX512-Anschluss an den DMX-Controller oder Anschluss zur Verwendung des Projektors in einem Master-Slave-Betrieb VDP401GLD7 VELLEMAN...
- Page 24 Verbinden Sie ein XLR-Kabel mit dem 3-pol. XLR-Ausgang der Steuerung und die andere Seite mit dem 3-pol. XLR- Eingang des VDP401GLD7. Sie können verschiedene VDP401GLD7 in Serie schalten. Die Verbindung muss mit einem zweipoligen geschirmten Kabel mit XLR-Stecker und -Kupplung erfolgen.
-
Page 25: Reinigung Und Wartung
Sie die Einstellungen für 1 Kanal verändern, werden nur die Einstellungen von diesem Kanal geändert. Im Fall des 7-Kanal VDP401GLD7, werden Sie die Startadresse der ersten Einheit auf 1, der zweiten Einheit auf 8 (1 + 7), des dritten Gerätes auf 15 (8 + 7) usw. -
Page 26: Problemlösung
> 40mW Wellenlänge 532nm Kühlsystem thermo-elektrisch Sicherung 2.5A, 250VAC (5 x 20mm) (order code FF2.5N) Scanning Mikromotor Betriebsarten DMX512, Stand Alone und musikgesteuert, Master-Slave Abmessungen 300 x 280 x 130mm Gewicht 5.3kg Alle Änderungen ohne vorherige Ankündigung vorbehalten. VDP401GLD7 VELLEMAN...
Need help?
Do you have a question about the VDP401GLD7 and is the answer not in the manual?
Questions and answers