Table of Contents
Advertisement
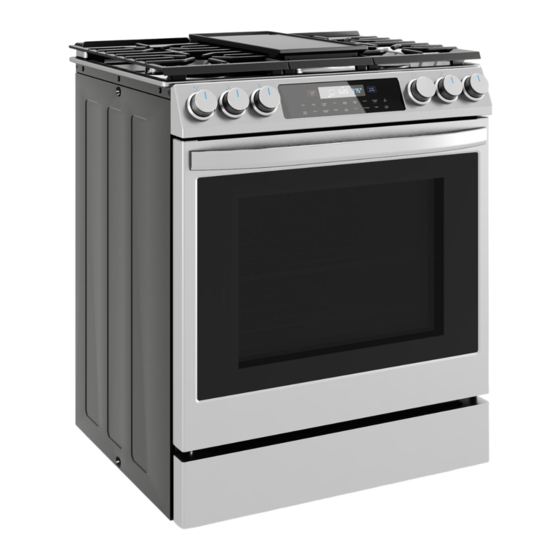
30" Slide-In Gas Range
WiFi Connectivity with Smart
Device App
5 Burner Cooktop with
Edge-to-Edge Grates
6.1 Cubic Feet Total Oven
Capacity
Glass Touch Controls
"Built In" Appearance
Note:
Before using this product, please
read this manual carefully and
keep it for future reference.
Contact Midea Customer Service
at 1-866-646-4332 or visit
midea.com/us/support for
assistance.
version A - 3 - 2020
USER'S MANUAL
(Pictures are for reference only and may not
accurately represent all models covered by this manual.)
MODEL NUMBERS
MGS30S2AST
MGS30S4AST
www.midea.com
en
Advertisement
Table of Contents

Related Manuals for Midea MGS30S2AST


Summary of Contents for Midea MGS30S2AST
- Page 1 Before using this product, please (Pictures are for reference only and may not read this manual carefully and accurately represent all models covered by this manual.) keep it for future reference. Contact Midea Customer Service at 1-866-646-4332 or visit midea.com/us/support for assistance. MODEL NUMBERS...
-
Page 3: Table Of Contents
Dear user Thankyou for letting Midea help you "make yourself at home. " This manual is part of our commitment to your total satisfaction. Please read this manual carefully before use and keep it in a convenient place for future reference. - Page 4 Keep Warm ....................29 Broil ......................30 Proof ......................31 Convection Bake ................. 32 Convection Roast ................33 Pizza Mode ....................34 Delay ......................34 Cook Time ....................35 Probe ......................36 Sabbath Mode ..................38 Steam Clean .....................40 Self Clean ....................41 Control Lock ....................42 WiFi (Remote Operation) ..............42 Timer ......................43 Oven Lights...
-
Page 5: Safety Definitions
IMPORTANT SAFETY INSTRUCTIONS READ ALL INSTRUCTIONS BEFORE USING THE APPLIANCE SAFET Y DEFINITIONS Warnings and safety instructions in this manual do not cover all possible conditions and situations that may occur. It is your responsibility to use common sense, caution, and care when installing, maintaining, and operating your oven. -
Page 6: Important Safety Instructions
IMPORTANT SAFETY INSTRUCTIONS READ ALL INSTRUCTIONS BEFORE USING THE APPLIANCE IMPORTANT SAFETY INSTRUCTIONS WARNING Read all safety instructions before using this product. Failure to follow these instructions may result in fire, electrical shock, serious injury, or death. It is the owner's responsibility to ensure that anyone using the appliance knows how to operate it safely. - Page 7 IMPORTANT SAFETY INSTRUCTIONS READ ALL INSTRUCTIONS BEFORE USING THE APPLIANCE WARNING Never Operate the Top Surface Cooking Section of this Appliance Unattended Failure to follow this warning statement could result in fire, explosion, or burn hazard that could cause property damage, personal injury, or death. If a fire should occur, keep away from the applianc e and immediately call your fire department.
- Page 8 IMPORTANT SAFETY INSTRUCTIONS READ ALL INSTRUCTIONS BEFORE USING THE APPLIANCE WARNING INSTALLATION AND MAINTENANCE This appliance is intended for normal residential use. It is not approved for commercial use, outdoor installation, or any other application not specifically allowed by this manual. Be sure your appliance is properly installed and grounded by a qualified service provider.
- Page 9 IMPORTANT SAFETY INSTRUCTIONS READ ALL INSTRUCTIONS BEFORE USING THE APPLIANCE WARNING GAS SAFETY Have the installer show you where the gas shut-off valve is located. NEVER cover any slots, holes or passages in the oven bottom or cover an entire rack with materials such as aluminum foil. Doing so blocks airflow through the oven and may cause carbon monoxide poisoning.
- Page 10 IMPORTANT SAFETY INSTRUCTIONS READ ALL INSTRUCTIONS BEFORE USING THE APPLIANCE WARNING COOKTOP HAZARDS DO NOT USE WATER ON GREASE FIRES. Smother fire or flame with a close-fitting lid or metal tray. Never pick up a flaming pan. Dry chemical or foam-type extinguisher may be used if it is CLASS ABC or CLASS K and you already know how to use it.
- Page 11 IMPORTANT SAFETY INSTRUCTIONS READ ALL INSTRUCTIONS BEFORE USING THE APPLIANCE To reduce the risk of burns, ignition of flammable materials, and spillage due to unintentional contact with the utensil, the handle of a utensil should be positioned so that it is turned inward, and does not extend over the front of the counter top or over adjacent cooktop burners.
- Page 12 IMPORTANT SAFETY INSTRUCTIONS READ ALL INSTRUCTIONS BEFORE USING THE APPLIANCE WARNING OVEN HAZARDS Never place anything (aluminum foil, spill mat, baking stone, cookware, etc.) on the bottom of the oven cavity. These items can trap heat or melt, resulting in damage to the appliance and risk of electric shock, smoke, or fire.
- Page 13 IMPORTANT SAFETY INSTRUCTIONS READ ALL INSTRUCTIONS BEFORE USING THE APPLIANCE DO NOT TOUCH OVEN BURNERS OR INTERIOR SURFACES OF OVEN – Oven burners and surfaces may be hot even though no flames are present. Interior surfaces of an oven become hot enough to cause burns. During and after use, do not touch, or let clothing or other flammable materials contact oven burners or interior surfaces of oven until they have had sufficient time to cool.
- Page 14 IMPORTANT SAFETY INSTRUCTIONS READ ALL INSTRUCTIONS BEFORE USING THE APPLIANCE WARNING FCC NOTICE According to Federal Communication Commission requirements, this equipment has been tested and found to comply with the limits for a Class B digital device, pursuant to part 15 of the FCC Rules. These limits are designed to provide reasonable protection against harmful interference in a residential installation.
-
Page 15: Preparing For First Use
PREPARING FOR FIRST USE Range Overview: 9 22 Door Gasket Cooling Vents Oven Vent Convection Fan Oven Control Cooktop Oven Bottom Cooktop Control Knobs Control input knob or oven light switch Door Hinge (each side) Door Lock Control Panel Storage Drawer Broil Burner Door Switch Leveling Legs (front and back) -
Page 16: Review Of Controls
Review of Controls: All Midea ranges are provided with intuitive touch controls to help you easily take advantage of the features available in your oven. Depending on the model and configuration, your oven may be controlled in one of two ways. -
Page 17: Wifi Connection
To connect additional devices, repeat step 2 above for each device. Setting the Clock: If you have successfully connected the oven to the Midea App, the clock will automatically be set based on your location. If the app has incorrectly identified your location or you otherwise want to set a different time, the automatic setting can be disabled through the app. -
Page 18: Before First Use
Familiarize yourself with the controls and features described in this manual. Confirm that cooktop burners and oven operate as intended. Contact Midea customer service at 1-866-646-4332 or by visiting midea.com/us/support immediately if appliance is not working as expected. -
Page 19: Cooktop Operation
COOKTOP OPERATION WARNING FIRE, CARBON MONOXIDE HAZARD DO NOT USE WATER ON GREASE FIRES. Smother fire or flame with a close-fitting lid or metal tray. Never pick up a flaming pan. Never operate the top surface cooking section of this appliance unattended. -
Page 20: Types Of Cooktop Burners
Types of Cooktop Burners: All Midea ranges are provided with 5 cooktop burners. Some models may include burners with multiple rings for greater cooking flexibility. See diagrams below. (Images do not represent all possible configurations.) See "Cooktop Burners" section under "Cleaning and Maintenance" for proper burner position and alignment. -
Page 21: Pan Size/Burner Size Selection
Pan Size/Burner Size Selection: To minimize burn risk and maximize cooking efficiency, select cookware and adjust burners so that flames do not extend beyond the edge of the pan as indicated below: Correct Selection: Small Pan on Small Burner Large Pan on Large Burner Large Pan on Small Burner Incorrect Selection: Pan Off-Center on Burner... -
Page 22: Controlling The Cooktop Burners
Controlling the Cooktop Burners: To turn a cooktop burner on, push in on the control knob and turn left (counter-clockwise) to the "LIGHT" position. Gas will flow and the igniters on all burners will begin to spark. The small icon above the control knob indicates the location of the burner being controlled. -
Page 23: Griddle
Griddle (some models): WARNING FIRE HAZARD Use care when cooking greasy foods. Spilled grease may result in fire. Never place any items on the griddle when it is not in use. Heat from surrounding burners can heat the griddle and may result in fire. CAUTION BURN HAZARD Place and remove the griddle only when griddle is cool and all surface... -
Page 24: In Case Of Power Failure
In Case of Power Failure: CAUTION BURN HAZARD Use extreme caution if lighting cooktop burners during power outage. Keep hands away from flames by using fireplace matchsticks or grill lighter with extended wand. During a power failure, electronic ignition will not function. However, cooktop burners may be operated if lit manually. -
Page 25: Oven Operation
OVEN OPERATION WARNING FIRE, CARBON MONOXIDE HAZARD Never place anything (aluminum foil, spill mat, baking stone, cookware, etc.) on the bottom of the oven cavity. These items can trap heat or melt, resulting in damage to the appliance and risk of electric shock, smoke, or fire. -
Page 26: Oven Racks
inside of the oven, such as the door trim or control panel. Steam or moisture may appear at the oven vent - this is normal. Do not leave the door open any longer than necessary. If the door is left open too long, the baking mode will be automatically cancelled. -
Page 27: Removing/Inserting Racks
Removing/Inserting Racks: CAUTION BURN HAZARD Always place oven racks in the desired location while oven is cool. If rack must be moved while oven is hot, do not let pot holder contact hot oven surfaces. Removing Rack: Racks are designed to stop before coming completely out of the oven to reduce the risk of dropped or spilled foods. -
Page 28: Rack Positions
Rack Positions: For best performance, adjust rack so food is placed at the center of the oven. For most foods this will be rack position #4. For larger foods like roasts and turkey, move the rack position down to #3 or #2 to keep the food centered in the oven. -
Page 29: Bake
If a baking mode (Bake, Convection Bake, Convection Roast, Pizza, etc.) utilizes preheat, after "START/ENTER" is pressed, the temperature display will show the current oven temperature. The display will continue to show the oven temperature increasing until the set temperature is reached. Once the set temperature is reached, the control will beep to alert the user that preheat is complete. -
Page 30: Broil
Directions (Control Input Knob models): Press the "KEEP WARM" button. 2.Press the "START/ENTER" button or click the Control Input Knob (if present). Press "CLEAR/OFF" to exit. Directions (Numeric Keypad Input models): Press the "BAKE" button twice. 2.Press the "START/ENTER" button or click the Control Input Knob (if present). -
Page 31: Proof
Directions: Press the "BROIL" button. The control will default to "high broil." To select "low broil," press the "BROIL" button again or turn the Control Input Knob (if present). Press the "START/ENTER" button or click the Control Input Knob (if present). Allow broil to operate for 5-10 minutes before placing food in the oven. -
Page 32: Convection Bake
Convection Bake: Convection baking uses a fan inside the oven to circulate the air. This provides a better distribution of the oven heat and a more efficient baking process. Heat is applied to the oven from above, below, and (on some models) behind. CONVECT BAKE is designed for baking recipes that require the use of multiple racks, such as 4-layer white cakes, multiple racks of cookies, or baking multiple recipes simultaneously. -
Page 33: Convection Roast
Special instructions for Air-Frying and getting crispy foods from your oven: Place oven rack at position 5 (closer to broiler) Press “CONVECT BAKE” button. The control will default to 350 F(175℃). Adjust temperature based on the food to cook (see attached chart). Press the "START/ENTER"... -
Page 34: Pizza Mode
Directions: Press the "CONVECT ROAST" button. The control will default to 350°F (175°C). If desired, and depending on your model, use either the numeric keypad or the available knob to adjust the desired oven temperature. Press the "START/ENTER" button or click the Control Input Knob (if present). Allow oven to preheat before placing food in oven. -
Page 35: Cook Time
- oven operation must be cancelled and restarted from the beginning to set a different "DELAY" value. "DELAY" cannot be set for more than 12 hours in advance. Directions: Select oven baking mode by pressing the appropriate button (i.e. "BAKE," "CONV BAKE,"... -
Page 36: Probe
Probe (some models): WARNING FOODBORNE ILLNESS & BURN HAZARDS Consuming undercooked food can result in foodborne illness. Use probe feature only according to the following instructions to ensure all portions of the food reach minimum safe cooking temperatures. Consult reputable government sources, such as USDA, FDA, or CDC, for recommended safe minimum cooking temperatures. - Page 37 3.Select the baking mode ("BAKE," "CONV BAKE," or "CONV ROAST"), select oven temperature, and press the "START/ENTER" button or click the Control Input Knob (if present). 4.Once oven temperature has been set, the blue text and probe icon will flash, indicating that the desired food temperature is to be set next. Adjust food temperature to the desired value and press the "START/ENTER"...
-
Page 38: Sabbath Mode
Sabbath Mode: Designed for use on Jewish Sabbath and holidays, this mode has been certified to comply with the standards set forth by Star-K. For further assistance, guidelines for proper usage, and a complete list of models with the Sabbath feature, please visit http:\\www.star-k.org. - Page 39 5.Temperature can be adjusted at any time by pressing the button corresponding to the desired oven temperature, then pressing the "START /ENTER" button. 6.Press the "CLEAR/OFF" button to cancel any baking operation in progress. After a random delay between 30 and 60 seconds, the display will return to a single bracket "]".
-
Page 40: Steam Clean
Steam-Clean (some models): CAUTION BURN HAZARD Oven surfaces - especially oven bottom - may be hot. Use caution to avoid contact with hot surfaces. Hot surfaces may create hot steam in wet sponge or cloth while cleaning. If steam is evident when wiping out oven, wait until oven has cooled slightly. Designed to generate steam and gently warm the oven surfaces to loosen grease and light soils. -
Page 41: Self Clean
Self-Clean: WARNING FIRE & BURN HAZARDS Read and follow instructions in the "Self-Clean Hazards" section at the beginning of this manual before using self-clean. NOTE: FOR BEST EXPERIENCE 1.Due to the high temperatures generated, it may be preferable to delay using the self-clean feature until the weather is colder to avoid unnecessarily burdening the home air conditioning system. -
Page 42: Control Lock
Control Lock: Allows user to disable the buttons on the control to prevent accidental operation of the oven from pets or children, or while cleaning controls. For safety reasons, the "CLEAR/OFF" button is never disabled. CONTROL LOCK can be enabled after a baking mode has been started. Directions: Hold "CONTROL LOCK"... -
Page 43: Timer
Timer: Midea ovens come equipped with a built-in kitchen timer function for your convenience. Directions: Press "TIMER" button. Clock will display "00:00". Enter time in hours and minutes (hh:mm) and press the "START/ENTER" button or click the Control Input Knob (if present). -
Page 44: Control Settings
CONTROL SETTINGS Settings: Midea ovens are provided with a variety of settings available to help you customize the appliance to your personal preferences. The ability to adjust settings is only available when no other oven operation is in progress. Navigation of the settings menu: Enter the settings menu by pressing the "SETTINGS"... - Page 45 Display Brightness - The user interface is programmed by default to operate at maximum brightness. If desired, you can reduce the brightness of the display using this setting. Reducing the brightness will reduce the standby energy usage of the oven control and could extend the life of the display.
-
Page 46: Cleaning And Maintenance
CLEANING AND MAINTENANCE WARNING Tip-Over Hazard If range is moved for cleaning, servicing, or any Confirm leveling leg is engaged with anti-tip bracket other reason, confirm the anti-tip device is engaged per the installation instructions. Leveling Anti-Tip A child or adult can tip the range and be killed. Bracket Failure to follow these instructions can result in See installation instructions... -
Page 47: Cooktop Burners
Clean stainless steel surfaces with general purpose stainless steel cleaner. Follow instructions provided with cleaning compound. Rub in direction of brushed finish. Repeat as necessary to remove all soils. Dry thoroughly to prevent corrosion and water marks. Clean enameled surfaces and around burner bases with general purpose kitchen cleaner. -
Page 48: Control Panel
Burner Grate Burner Cap Burner Cooktop Ignitor Correct Incorrect Incorrect Control Panel: CAUTION ELECTRIC SHOCK HAZARD Do not use excessive amounts of water or cleaners to clean knob areas. If moisture is forced into openings behind knobs, there is a potential for electric shocks. -
Page 49: Oven Interior
For best results, it is recommended to clean the user interface and control panel after each use. Control knobs can be removed for easier cleaning. Ensure knobs are in the "OFF" position before removing. Pull straight back with a firm pressure to remove knob from stem. Clean entire panel with a lightly damp, non-abrasive cloth using mild soap and water. -
Page 50: Oven Lights
Oven Lights: CAUTION SHOCK, BURN, AND LACERATION HAZARDS Disconnect power to oven and wait until oven is cool before attempting to service light bulbs. Handle glass cover carefully to reduce risk of breakage. If lamp cover is difficult to remove, do not force. Contact a qualified service provider for repairs. -
Page 51: Door
Door: WARNING FIRE HAZARD To maintain proper door seal during baking operations and self-clean, do not rub or clean the door gasket. It has a very low resistance to abrasion. If the gasket becomes worn, frayed, or damaged in any way, contact a qualified service provider for repair. - Page 52 Reinstalling door: Holding door from the sides, align door so that hinges slip back into openings. Rotate door until 2-3 inches from being fully closed, allow door to drop into notches on hinges. Rotate door out until fully open. Flip the hinge locking mechanism back up and away from the door. Check that door opens and closes correctly.
-
Page 53: Troubleshooting
TROUBLESHOOTING (read before calling for service) Midea is committed to providing you with a quality appliance that works as expected. If you find something that is not working as anticipated, check the table below for helpful hints and advice that might save you the time and expense of calling for repair. -
Page 54: Oven
Oven: Problem: Possible Reason: If WiFi signal icon is flashing slowly, WiFi has not been connected. See instructions in "Preparing For First Use." If WiFi signal icon is flashing quickly, WiFi signal has Unable to use been lost. Check that router is on and no obstructions MSmartLife app to are hindering signal. - Page 55 Problem: Possible Reason: Drawer has come off of slide rails. See instructions on Drawer will not removing and re-installing drawer in "Cleaning and close properly Maintenance" section. All ovens operate slightly differently from each other. Oven is taking Adjust oven calibration upwards to make oven cook too long to cook.
- Page 56 Problem: Possible Reason: It is normal for steam to be released from the oven vent at the back of the cooktop. If the exhaust has no smell (or smells like normal baking food), do not be alarmed. If the exhaust smells like burning food, check that the Smoke or steam is food is not burning and that there is no spillage or coming from the...
-
Page 57: Warranty
Canada. Mid ea Customer Service In the U.S.A. or Canada, call 1-866-646-4332. If outside the 50 States of the United States or Canada, contact your authorized Midea dealer to determine whether another warranty applies. LIMITED WARRANTY WHAT IS COVERED... - Page 58 4. Consumable parts (i.e. light bulbs, batteries, air or water filters, etc.). 5. Defects or damage caused by the use of non-genuine Midea parts or accessories. 6. Damage from accident, misuse, abuse, fire, floods, electrical issues, acts of God or use with products not approved by Midea.
- Page 59 If you want a longer or more comprehensive warranty than the limited warranty that comes with this major appliance, you should ask Midea or your retailer about buying an extended warranty.
- Page 60 Parsippany, NJ, 07054 If appliance is not working as expected, please contact Midea customer service at: 1-866-646-4332 http://midea.com/us/support Free 3 months extension* of the original limited warranty period! simply text a picture of your proof of purchase to: 1-844-224-1614 *The warranty extension is for the three months immediately following the completion of the product’s...
Need help?
Do you have a question about the MGS30S2AST and is the answer not in the manual?
Questions and answers