
Related Manuals for Pregis SHARP SX


Summary of Contents for Pregis SHARP SX
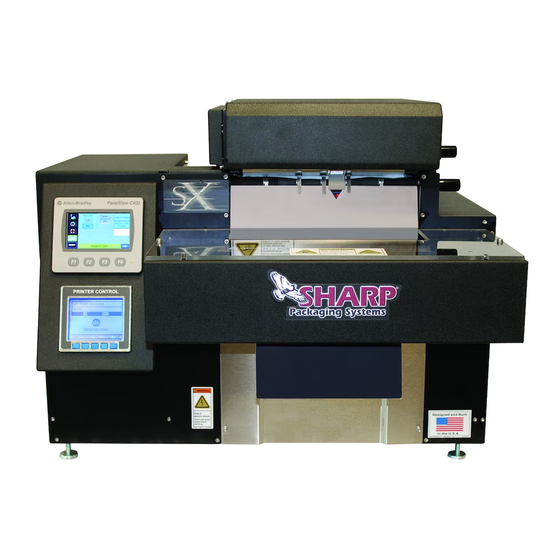
- Page 1 SX™ Operator Manual Models 1153-02 & 1166-02 Parts: (800) 634-6359 ext. 1571 sharpparts@pregis.com Service: (800) 634-6359 ext. 1572 sharpservice@pregis.com Original Printed English Copyright © 2018...
- Page 2 INTENTIONAL BLANK PAGE...
-
Page 3: Table Of Contents
TABLE OF CONTENTS Adding Fields to Label IMPORTANT SAFETY INFORMATION Saving Label Definitions of Terms Downloading Label to Printer Safety Rules & Procedures FAULT & ALERT MANAGEMENT INTRODUCTION HMI Fault Management General Information HMI Alert Management Technical Assistance Printer Fault Management Specifications ©... -
Page 4: Important Safety Information
SAFETY LABELS The following label is placed onto the Sharp SX™ The label shown below is located on the Sharp SX™ wherever a removable shield, or panel, guards the wherever a removable shield, or panel, guards electri- heated sealing area. -
Page 5: Safety Rules & Procedures
Failure to do so could result in severe bodily injury or death. EQUIPMENT SAFETY FEATURES The Sharp SX is equipped with a polycarbonate shield covering the Obstruction Sensing Jaw and Heated Seal Wire. ©... -
Page 6: Introduction
Multiple graphic formats supported (up to maximum print ar- ea); Link fields to databases; Scalable text and blocks. Your Sharp SX™ is the result of extensive research and field testing with the following features: ... -
Page 7: Specifications
INTRODUCTION SPECIFICATIONS PACKAGING SPECIFICATIONS BAG WIDTH BAG LENGTH FILM GAUGE MINIMUM 2” (5 cm) 4” (10 cm) 1 mil (25 microns) MAXIMUM 11” (28 cm) 32” (81 cm) 4 mil (100 microns) MACHINE SPECIFICATIONS OPERATING HUMIDITY WIDTH HEIGHT DEPTH WEIGHT POWER RATE TEMP... -
Page 8: Sharp Ez-Bags
SHARP EZ-BAGS & RIBBON THERMAL TRANSFER RIBBON The Sharp SX™ is designed to use a wide variety of bag sized and materials. Sharp EZ-Bags© are recom- The Sharp SX uses thermal transfer ribbon to print mended for optimum operating performance, efficien- various information onto the bags as they pass cy and safety. -
Page 9: Theory Of Operation
INTRODUCTION THEORY OF OPERATION MODES The bagger has four distinct operating modes: Manual, Auto, Filler, and Auto Filler. Manual and Auto modes are built into the machine and require no optional equipment or changes to the Factory Configuration. Filler and Auto Filler are optional and must be setup in the Admin and Setting II Screen. - Page 10 INTRODUCTION THEORY OF OPERATION The filler function has a separate detailed specification, “Sharp Packaging Filler Handshaking”. The spec- ification covers all Sharp Baggers and includes signature sign-off lines so that Filling machine vendors are in 100% compliance with this specification. This also ensures proper operation of a complete system. AUTO MODE Filler = OFF Auto = ON...
- Page 11 INTRODUCTION THEORY OF OPERATION A Safety Light Curtain can be used in a hand loading operation. The operator places the product into the open bag. When the operator removes their hand from the safety light curtain, the Parts Counter will increment by one count.
- Page 12 INTRODUCTION THEORY OF OPERATION This option is strictly a hardware option. No HMI Factory Configuration is needed. Green Light – In Cycle OFF indicates the following information: The bagger is not ready for the next cycle to begin due to a fault condition, power is removed, etc. FLASHES at a steady rate, light is on for 0.5 seconds and off for 0.5 seconds, to indicate the follow- ing: ...
- Page 13 INTRODUCTION THEORY OF OPERATION PERMISSIVES & SPECIAL CONDITIONS This section describes Permissives and Special Conditions. In general terms, a permissive is a condition that must be TRUE in order to permit or allow a particular operation to take place. All options must be configured. All optional features must be selected or configured before they can be turned on.
- Page 14 INTRODUCTION THEORY OF OPERATION Infeed Option The bagger can be configured with an optional Infeed to automatically deliver product into the opened bag. The device can be selected as a Filler The general Filling machine can take on many variations and is usually sup- plied by another company.
-
Page 15: Security
INTRODUCTION SECURITY Sharp Packaging has developed two versions of the HMI software. A non-secure version and a secure version. Both versions will be installed on the bagger. The secure version has security login as described below. SECURITY LOGIN The Security Login occurs when the user selects a secured screen. A login Numeric Keypad will be automatical- ly displayed. -
Page 16: Set-Up & Operation
SET-UP & OPERATION MACHINE PLACEMENT 5. Printer cannot be switched ON independent of the The Sharp SX™ should be placed on a smooth level main power switch. surface with access to a 115 VAC, 50/60 Hz, 10 Amp (minimum) electrical outlet. -
Page 17: Loading Bag Film
SET-UP & OPERATION LOADING BAG FILM A decal showing the film threading path through the machine is located on the Frame Cover. WARNING! Use extreme caution when feeding bags into machine; electrical voltage and possible pinch points are present. RADLE ATCH Remove the Roll Tensioner from the Roll Unwind Shaft by loosening the Adjustment Handle and... -
Page 18: Loading Ribbon
SET-UP & OPERATION LOADING RIBBON 6. Close the Printhead Cradle Cover. A decal showing the ribbon threading path is located on the Frame Cover. 7. Lower and lock the Printhead Cradle. 1. Raise the Printhead Cradle and lift the Printhead Cradle Cover. -
Page 19: Machine Operation
SET-UP & OPERATION MACHINE OPERATION Before attempting to operate the machine, please carefully read and understand the entire operator’s manual including the information under Important Safety Information Controls to obtain optimum performance and a longer service life from the unit. 1. - Page 20 SET-UP & OPERATION MAINTENANCE cloth using a rubber platen roller conditioner/ GENERAL cleaner or isopropyl alcohol. This machine requires regular, periodic cleaning to 3. Inspect Teflon tape and replace if damaged or ensure reliable service. Shift and daily cleaning can worn.
-
Page 21: Controls
CONTROLS SCREEN NAVIGATION OPERATOR CONTROLS The operator control buttons appear at the lower left hand side of every screen. Pressing the “CYCLE” momentary pushbutton will initiate a bagger cycle if “Ready To Cycle” message is displayed. This HMI button is the equivalent to a mechanical Footswitch or Optical Palm button start sig- nals. -
Page 22: Home Screen
CONTROLS SCREEN NAVIGATION HOME SCREEN This screen is the Main Menu. This is the starting point to gather information and to setup the machine. This screen is access by pressing the HOME BUTTON on top left corner. DASHBOARD SCREEN This screen is the Dashboard. The Dashboard is the primary screen used by the operator. This screen is ac- cessed by pressing the TACHOMETER BUTTON below the Home Button. -
Page 23: Help Screen
CONTROLS SCREEN NAVIGATION HELP SCREENS A Help Screen can be accessed by pressing the LIFESAVER RING BUTTON beneath the Tachometer But- ton. The screen provides detailed help information about the particular screen that the user is on. In this example these screens provide help from the Home Screen. Note that there are 2 help screens for the home screen. -
Page 24: Admin Screen
CONTROLS SCREEN NAVIGATION ADMIN SCREEN This screen is used to enable the options that are installed on the bagger. The option must be enabled here first before it can be used on the bagger. To enable an option, press the pushbutton of the option, the pushbutton will change color. Note, If a Safety Light Curtain is installed the Filler should be enabled so that the light curtain can be used for Parts Counting/Cycle Initiate function. -
Page 25: Settings Screen I
CONTROLS SETTINGS SCREEN There are two screens that allow the user to view and change the current bagger settings. SETTINGS SCREEN 1 Bag Length This refers to the usable area inside the bag. This is measured from the bottom of the bag to the seal. The typical setting is 0.5"... - Page 26 CONTROLS SCREEN NAVIGATION SETTING SCREEN 2 Batch Counter The maintained button turns on the Counter. The numeric entry to the right of the button is the Target Count setting. This can be adjusted from 2-9999. When the counter is done, the yellow alert banner is displayed and the bagger cannot cycle until the counter is reset.
- Page 27 CONTROLS SCREEN NAVIGATION OPTIONS The buttons on the Options Screen provide screen navigation for each option that is configured on the bagger. Press the desired button to activate the option. © SX™ Operator Manual Original Printed in English...
-
Page 28: I/O Screen
CONTROLS SCREEN NAVIGATION I/O Screen This screen describes the I/O available to qualified service technicians and technical personnel. The purpose of this screen is to aid in the troubleshooting and maintenance of the bagger. The section assumes that the person using this screen has a working knowledge of electronics and PLC based control systems. Input Screen This screen shows the status of all Input points on the Main PLC and the expansion cassette. -
Page 29: Service Screen I
CONTROLS SCREEN NAVIGATION SERVICE SCREENS There are two Service Screens to be used by qualified service and maintenance personnel to test the various machine motions. It is assummed that the person using this screen understands the nature of each motion, prior to invoking that motion. - Page 30 CONTROLS SCREEN NAVIGATION SERVICE SCREENS Service Screen 2 Raise Print Head – The Printer Option must be enabled in the Admin Screen before this service button is active. Pressing it will deenergize the elctrical solenoid and raise the print head. The Print Head Lowered sensor will switch off when the head raises.
-
Page 31: About Sharp Screen
CONTROLS SCREEN NAVIGATION ABOUT SHARP SCREEN SX Software Version: – This is the revision number of the PLC software. For this example, 06_17_00 breaks down in the following way: 6 is the Major Release number _17 is the minor revision number _00 indicates a custom version. Custom versions use alpha characters appending on to the last two digits to the numeric. -
Page 32: Printer Configuration Screen
CONTROLS PRINTER PRINTER CONFIGURATION SCREEN Printer Button The printer option must be turned on to operate. Printer is on when large box is Blue. Print Speed This numeric setting determines the web feed speed during the print cycle. It is adjustable from 2.00 to 12.00 Inches/Sec. -
Page 33: Barcode Verifier Configuration Screen
CONTROLS BARCODE VERIFIER BARCODE VERIFIER CONFIGURATION SCREEN Barcode Verifier Button This maintained button turns on the Barcode Verification Option. Bad Read Fault Count The number of consecutive bad barcode reads before the bagger will fault. The valid range is 000 - 999. Consecutive Bad Read Count The number of bad reads scanned in a row. -
Page 34: Printer Controls
PRINTER CONTROLS PRINTER CONTROL PANEL The Control Panel is an event-driven user interface composed of a graphics display and Soft Keys. Time and Date Displays the current time and date. Printer Status Line Following initialization, the ‘READY’ message and label counter during a batch print job. Current State Icons Displays the Icons of the current state of the printer. - Page 35 PRINTER CONTROLS PRINTER CURRENT STATUS ICONS ICON DESCRIPTION Initialization, typically brief (but a damaged or invalid printhead can delay the process). Display Large Fonts Input Mode - DPL Input Mode - LINE Input Mode - Emulation RFID Detected SD Memory Card Detected USB Memory (or keyboard) Detected Wired Network Detected Server Inaccessible...
-
Page 36: Loading Label
PRINTER CONTROLS PRINTER CREATING A NEW LABEL LOADING A LABEL 1. To Create a new Label format, go to File + New or This section will briefly guide you through creating and click on the icon. loading labels using Labelview™. Labelview™ is la- beling software available from Sharp Packaging Sys- 2. -
Page 37: Saving Label
PRINTER CONTROLS PRINTER BOXES / LINES Click on the or the button. When you add a line to the label, it will first appear in a default size set by the program. Click on and drag the handles provided to resize the object. Clicking on the item where there is no handle will allow you to drag it to a new location on the label. -
Page 38: Fault & Alert Management
FAULT & ALERT MANAGEMENT HMI FAULT MANAGEMENT All fault and alert messages appear at the bottom of most screens in a single line of text. Messages alternate through a technique known as “Round Robin Display”. Each active message appears for 3 seconds and then the display goes to the next. - Page 39 FAULT & ALERT MANAGEMENT HMI FAULT MANAGEMENT CAUSE: The Lower Print Head PLC output O-05 was turned off, but Input I-05 stayed on. REMEDY: Lower Print Head Solenoid may have failed or proximity sensor is not positioned correctly with the target. Check PLC I/O circuits. CAUSE: The Jaw Axis detected a motion fault REMEDY: Reset the fault.
-
Page 40: Hmi Alert Management
FAULT & ALERT MANAGEMENT HMI ALERT MANAGEMENT CAUSE: The Jaw Homing Cycle could not be completed or the cycle was stopped by the Operator. REMEDY: The Jaw Closed sensor may be inoperative or there may be a physical obstruction between the Jaw and the bagger frame that does not activate the Jaw Obstruction sensors. - Page 41 FAULT & ALERT MANAGEMENT PRINTER FAULTS All printer functions are internally monitored. When a problem (Fault) or a potential problem (Warning) is detect- ed, a corresponding message will appear in the display. Fault messages receive the highest display priority . if more the one fault is detected the display will cycle between messages.
- Page 42 FAULT & ALERT MANAGEMENT PRINTER FAULTS Display Message Description Possible Solution (s) The printer has detected defective Replace the printhead. If the print DOT FAILURE printhead elements. quality becomes unacceptable. The printer was unable to save set- Possible faulty main logic card. If the RTC RAM FAILURE tings in permanent memory.
- Page 43 FAULT & ALERT MANAGEMENT PRINTER FAULTS Display Message Description Possible Solution (s) RIBBON FEEDS OUT THOUGH Ribbon take-up motor not spinning. Check ribbon take-up motor wiring. FRONT OF PRINTER Clutch Pressure. Increase clutch pressure. Heat setting in Labelview set too Decrease heat setting in Labelview.
-
Page 44: Appendix
APPENDIX SETTINGS SUMMARY Print Speed This section list the range of each setting and an Initial value if applicable. Note: The initial settings are only Range: 2.00 – 12.00 in/sec applicable during the first time power up of the bagger. Initial: 6 in/sec Bag Length Print Length... - Page 45 APPENDIX WARRANTY SHARP PACKAGING SYSTEMS ("SHARP") STANDARD TERMS AND CONDITIONS FOR PACKAGING MACHINERY By placing an order, Buyer agrees to the following terms and conditions: TERMS OF PAYMENT: Cash in lawful U.S. currency payable as follows: For base machinery w/o automatic in -feed devices, (2/3) of net price with the order and the final (1/3) of net price within thirty (30) days after shipment.
-
Page 46: Replacement Parts
REPLACEMENT PARTS REPLACEMENT PARTS ORDER FORM Spare or replacement parts can be purchased directly through Sharp Packaging or your local distributor. If faxing or mailing in an order it must be accompanied by a hard copy purchase order. Please follow up with a confirming telephone call. -
Page 47: Ce Certification
CE CERTIFICATION © Original Printed in English SX™ Operator Manual... - Page 48 CE CERTIFICATION © Original Printed in English SX™ Operator Manual...
Need help?
Do you have a question about the SHARP SX and is the answer not in the manual?
Questions and answers