
Subscribe to Our Youtube Channel
Related Manuals for Pregis SHARP MAX 1143


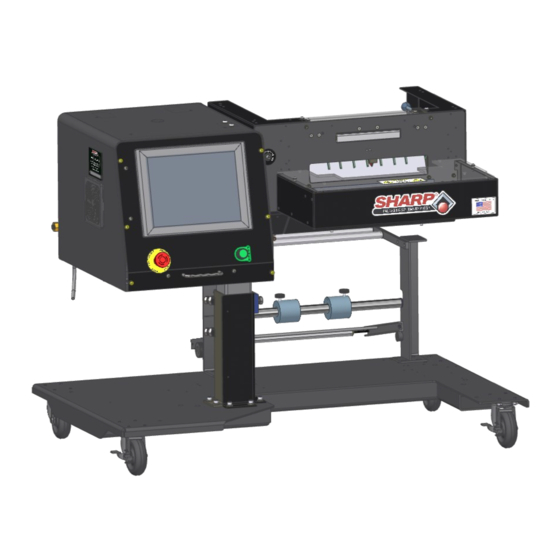
Summary of Contents for Pregis SHARP MAX 1143
- Page 1 MAX™ Operator Manual Models 1143 & 1145 Parts: +1 (262) 246-8815 ext. 1571 sharpparts@pregis.com Service: +1 (262) 246-8815 ext. 1572 sharpservice@pregis.com Original Printed In English Rev. 11 Copyright © 2021...
- Page 2 INTENTIONAL BLANK PAGE...
-
Page 3: Table Of Contents
TABLE OF CONTENTS SECTION 3 –CONTROLS SECTION 1 –INTRODUCTION Touchscreen Prefix Left Menu Bar Introduction Fault Banner About This Manual Cycle Start General Information Help Screen Important Safety Information ® EZ-Bags and Film Materials SECTION 4 –HMI SCREENS Specifications Packaging Specifications Main Menu Machine Specifications Home Screen... - Page 4 TABLE OF CONTENTS Printer Display Display Layout 4-30 Soft Keys 4-31 System Menu 4-32 Printer Icons 4-33 User Settings 4-34 SECTION 5 –MACHINE OPERATION Operation Machine Operation Creating a Job Editing a Job Deleting a Job Loading Print Job Cleaning Machine Machine Maintenance SECTION 6 –FAULT &...
- Page 5 QUICK START-UP GUIDE* 3. Release the E-Stop Button and press the Green COMPLETE POWER-UP PROCEDURE* Power Button. The green light should illuminate and energize the MCR. Note: If the bagger has the Stack Light option, the horn will sound until the HMI program has finished loading.
- Page 6 INTENTIONAL BLANK PAGE...
- Page 7 BAGGER SHUT DOWN PROCEDURE* COMPLETE POWER DOWN SEQUENCE 3. WHEN SCREEN IS BLACK, switch Power Entry The bagger must be properly Power down in the Module Switch to OFF. The machine is now correct sequence. electrically shut down. 1. From the Main Menu Screen, press and hold the “Shutdown HMI”...
- Page 8 INTENTIONAL BLANK PAGE...
-
Page 9: Prefix
PREFIX Thank you for purchasing the Sharp MAX™ bagger. The Sharp MAX™ is the low cost solution for manually bagging product, dramatically reducing packaging costs and improving package quality. The Sharp MAX™ has an optional integrated high-performance, low-cost ribbon printer for printing barcodes, text, or graphics on the packaging material. -
Page 10: General Information
SECTION 1 - INTRODUCTION GENERAL INFORMATION READ ALL INSTRUCTIONS BEFORE OPERATION • Upon receipt, unpack and inspect the unit for damages that may have occurred during shipment. Sharp Packaging is not in any way responsible for any damages that occur during transport. If you receive dam- aged equipment, it is your responsibility to make a claim with the transporter. - Page 11 SECTION 1 - INTRODUCTION GENERAL INFORMATION connections clean and keep your body, hand-held tools and any other electrically conductive objects away from any exposed electrical components. Ensure the electrical cabinet is always closed, unless needed for maintenance. Always ensure that the ground wire is firmly connected with the ground before starting the machine.
-
Page 12: Important Safety Information
SECTION 1 - INTRODUCTION IMPORTANT SAFETY INFORMATION EQUIPMENT SAFETY FEATURES The Sharp MAX™ is equipped with guards covering the heated sealing area and the underside of the Head Assembly. DO NOT operate the MAX™ with these or any other guards removed. The Top Lexan®... -
Page 13: Ez-Bags ® And Film Materials
SECTION 1 - INTRODUCTION SHARP EZ-BAGS & FILM MATERIALS THERMAL TRANSFER RIBBONS ® SHARP EZ-BAGS and FILM MATERIALS Sharp thermal transfer ribbons are selected specifical- Call Sharp Customer Service (+1 (262) 246-8815) to ly for use with our printer. Use of ribbons other than ®... -
Page 14: Specifications
SECTION 1 - INTRODUCTION SPECIFICATIONS PACKAGING SPECIFICATIONS BAG WIDTH BAG LENGTH FILM GAUGE MINIMUM 2” (5.1 cm) 3.5” (8.9 cm) .001” (1 mil) 25 Microns MAXIMUM 12” (30.5 cm) 32” (101.6 cm) .004” (4 mil) 100 Microns Table 1-5A. 1143 Packaging Specifications. BAG WIDTH BAG LENGTH FILM GAUGE... -
Page 15: Machine Dimensions
SECTION 1 - INTRODUCTION MACHINE DIMENSIONS FRONT VIEW Bagger dimensions viewed from front.* Measurements are in inches. Table 1-6. 1145 Front View. * The 1143 model adjusts to the same height. © MAX™ Operator Manual Original Printed In English... - Page 16 SECTION 1 - INTRODUCTION MACHINE DIMENSIONS SIDE VIEW Bagger dimensions viewed from side.* Measurements are in inches. Table 1-7. 1145 Side View * 1143 model has same height adjustments. © MAX™ Operator Manual Original Printed In English...
- Page 17 SECTION 1 - INTRODUCTION MACHINE DIMENSIONS TOP VIEW Bagger dimensions viewed from top.* Measurements are in inches. Table 1-8. 1145 Top View * The 1143 model is 45.32” wide and 39.81” deep. ** Center of Gravity for 1143 Model is 26.90” wide and 23.32” deep. ©...
-
Page 18: Theory Of Operation
SECTION 1 - INTRODUCTION THEORY OF OPERATION The MAX™ machine have four distinct operating modes: Manual, Auto, Filler, and Auto Filler. Manual and Auto modes are built into the machine and require no optional equipment or changes to the Factory Configuration. Filler and Auto Filler are optional and must be setup in the Factory Configuration screen. -
Page 19: Auto Mode
SECTION 1 - INTRODUCTION THEORY OF OPERATION Ready for Filler (O:3/00) - The bagger PLC (Programmable Logic Controller) turns on this output as follows: 1. The machine has successfully completed a cycle and presented a new bag. 2. If the bagger is equipped with a positive entry funnel. •... - Page 20 SECTION 1 - INTRODUCTION THEORY OF OPERATION With Filler and Auto both ON the bagger will run in “Auto Filler Mode”. In this mode a Filler device is used to both fill and automatically initiate the next cycle. This is accomplished by means of hand-shaking I/O provided in the bagger's standard control interface.
-
Page 21: Parts Counter Mode
SECTION 1 - INTRODUCTION THEORY OF OPERATION output is On. Output 0:3/00 remains on until the terminal count is reached. The parts counting must hand- shake in accordance with “Sharp Packaging Filler Handshaking Specification” 2. Safety Light Curtain – Hand Load •... - Page 22 SECTION 1 - INTRODUCTION THEORY OF OPERATION condition. Dirty Drive Rollers can result in loss of registration and slipping. Recovery Mode will be limited to open retires only, since it is not possible to replace the bag when it is part of a string. The Bag Feed retry will automatically be se t to 0 if this mode is cho- sen.
-
Page 23: Event Log
SECTION 1 - INTRODUCTION THEORY OF OPERATION RECOVERY BAG COUNT The Recovery Mode is turned on automatically when Bag Open Sensors are se- lected and can be viewed from Dashboard Screen. This is the number of bags that failed to open when Recovery Mode was turned on. -
Page 24: Permissive & Special Conditions
SECTION 1 - INTRODUCTION PERMISSIVE & SPECIAL CONDITIONS This section describes and lists Permissive and Special Conditions. In general terms, a Permissive is a condition that must be TRUE in order to permit or allow a particular operation to take place. 1. -
Page 25: Security
SECTION 1 - INTRODUCTION SECURITY NOTE: See supervisor or manager to change or SECURITY LEVELS determine the proper security level for your ap- Security is screen based and defined as three levels: plication. High, Medium, and No Security. High Security - The user can access the Main Menu, Dashboard, PLC Settings, Job Download screens. -
Page 26: Machine Placement
SECTION 2 - SETUP & ADJUST- MACHINE PLACEMENT* Your Sharp Bagger has been shipped to you well crat- ed in order to prevent any damage to the machine. It is important that you follow the Uncrating Instructions attached to crate. After being uncrated, place the Sharp MAX™... -
Page 27: Air Supply
SECTION 2 - SETUP & ADJUST- MACHINE PLACEMENT AIR SUPPLY The Sharp MAX™ has a filter/regulator equipped with a male end 1/4” nominal flow NPT air quick disconnect plug (Figure 2-1A). The machine requires 100 PSI (regulated to 80 PSI) of non-lubricated clean dry air at 5 SCFM. -
Page 28: Loading Bag Film - Standard Unwind
SECTION 2 - SETUP & ADJUSTMENTS LOADING BAG FILM - STANDARD UNWIND 1. Remove the bag roll shaft from the unit. 2. Place the film roll onto the shaft with a core chuck on each side of the roll. Figure 2-3B. 3. -
Page 29: Loading Bag Film - Box Power Unwind
SECTION 2 - SETUP & ADJUSTMENTS LOADING BAG FILM - BOX POWER UNWIND 3. Slide the box tray out from unwind and place the box of bags centered on tray. Figure 2-4C. A diagram showing the film threading path through the machine is located on the side of the Power Un- wind near the rear of the MAX™... - Page 30 SECTION 2 - SETUP & ADJUSTMENTS LOADING BAG FILM - BOX POWER UNWIND Roller and Drive Roller. 8. Disengage the Dancer Lock from the Dancer Arm. 9. Slowly pull on the web until you have enough slack to reach the front of the bagger. Figure 2- 5A.
- Page 31 SECTION 2 - SETUP & ADJUSTMENTS LOADING BAG FILM - VFD BOX POWER UNWIND A diagram showing the film threading path through the machine is located on the side of the Power Un- wind. Figure 2-6A. Figure 2-6C. Box Guides. NOTE: Position the box in tray so the perforation of Figure 2-6A.
-
Page 32: Height
SECTION 2 - SETUP & ADJUSTMENTS ADJUSTMENTS - HEIGHT Figure 2-7A. Height Adjustment Bolts. HEIGHT ADJUSTMENT Machine height can be adjusted to allow manual load- ing at a convenient height. NOTE: Height Adjustment requires two people. NOTE: A counterbalance spring is located in the frame upright. -
Page 33: Load Plate
SECTION 2 - SETUP & ADJUSTMENTS ADJUSTMENTS LOAD PLATE ADJUSTMENT The Load Plate can be adjusted for different angles. 1. Remove pin securing air cylinder to load plate. Figure 2-9A. Figure 2-9B. Unwind Adjustments. DANCER WEIGHT ADJUSTMENT - Standard Un- wind The Dancer Weight is a fine tune adjustment for the Figure 2-9A. - Page 34 SECTION 2 - SETUP & ADJUSTMENTS ADJUSTMENTS - HEAD ROTATION HEAD ROTATION 4. Loosen the adjustment bolts approximately 1/2 to 3/4 turns. 5. Pivot the machine to the desired angle. 6. Tighten rotation bolts to 15 ft-lbs torque. 7. Close front panel and secure 1/4 turn screws. Some heavier parts (approximately 5 lbs.) may require loading from an angle to prevent bag breakage.
- Page 35 SECTION 2 - SETUP & ADJUSTMENTS ADJUSTMENTS - BOX POWER UNWIND 4. Push cap down to lock in place. AIR PRESSURE PINCH ROLLER CLOSING SPEED This adjustment will reduce the amount of pressure the Pinch Roller has against the Drive Roller of the 1.
-
Page 36: Section 3 -Controls
SECTION 3 - CONTROLS TOUCHSCREEN The Touchscreen displays all adjustment information along with machine diagnostic and error messages. • Manual motion pushbuttons on Service Screens provide both text and color cues as to the state of the device or motion. •... - Page 37 SECTION 3 - CONTROLS TOUCHSCREEN ALERT MESSAGES FAULT MESSAGES Alert messages are displayed in yellow and will not Faults are defined as an error condition that will stop generally stop a bagger cycle. Alerts are intended to the bagger and prevent subsequent cycles from oc- inform the operator of an event or status of the ma- curring as long as the fault persists.
-
Page 38: Help Screen
SECTION 3 - CONTROLS TOUCHSCREEN HELP SCREENS The PLC Settings Help Screen is a sub-screen of the A Help Screen provides detailed information of the PLC Setting Screen. The user can navigate back to screen that is displayed on the HMI. the higher level screen by touching the “PLC Settings”... -
Page 39: Section 4 -Hmi Screens
SECTION 4 - HMI SCREENS MAIN MENU Figure 4-1A. Home Screen HOME SCREEN General Description The Main Screen is accessed by pressing the Home Button on the Left Menu Bar. This screen gives access to all of the screens not accessible through the left menu bar. Minimum Security Access: High Button/Label Descriptions: Bagger Settings - This will open the Bagger Settings screen that contains bagger setup settings such as Batch... -
Page 40: Bagger Settings Screen
SECTION 4 - HMI SCREENS BAGGER SETTINGS SCREEN Figure 4-2A. Bagger Settings Screen. BAGGER SETTINGS General Description The Bagger Settings screen manages all of the global bagger settings/functions. Button/Label Descriptions: Batch Counter - This will turn on/off the Batch Counter on the Dashboard. When this is enabled, the batch coun- ter will increment with every good bag. -
Page 41: I/O Screen
SECTION 4 - HMI SCREENS INPUT/OUTPUT SCREEN Figure 4-3A. Input/output Screen. I/O SCREEN General Description The I/O screen displays the status of all physical I/O (inputs and outputs) in the PLC. Minimum Security Access: Medium Button/Label Descriptions: This page is divided by tabs for each slot on the PLC. The physical I/O for each slot is displayed on the corre- sponding tab. -
Page 42: Job Setup Screen
SECTION 4 - HMI SCREENS JOB SETUP SCREEN Figure 4-4A. Job Setup Screen. JOB SETUP General Description The Job Setup screen manages the machines predefined jobs. Minimum Security Access: Medium Button/Label Descriptions: Pen Button - This button will display the details of the selected job in the list. Plus Button - This will add a new job with default settings. -
Page 43: Job Detail Screen
SECTION 4 - HMI SCREENS JOB DETAILS SCREEN Figure 4-5A. Job Detail Screen. JOB DETAILS General Description The Job Details screen displays the details of a job and allows them to be edited. Minimum Security Access: Medium Button/Label Descriptions: Job Name - The name given to a job. This name will be used for job recall. Label - This is the name of the label that is assigned to the job and will be sent to the printer when the printer option is on and a job is loaded. - Page 44 SECTION 4 - HMI SCREENS JOB DETAILS SCREEN - CONTINUED Bag Length - This refers to the usable area inside the bag. This is measured from the bottom of the bag to the seal. The typical setting is .5 to 1.5 inches less than the measured overall bag length. Skirt Length - The distance from the bottom of the bag to the start of the seal.
-
Page 45: Admin Screen
SECTION 4 - HMI SCREENS ADMIN SCREEN Figure 4-7A. Admin Screen. ADMIN SCREEN General Description The Admin screen is a collection of administrative functions used to setup the HMI and monitor bagger perfor- mance. Minimum Security Access: No Security Button/Label Descriptions: Factory Configuration - This screen is used by the factory to configure purchased options. -
Page 46: Communication Screen
SECTION 4 - HMI SCREENS COMMUNICATIONS SCREEN Figure 4-8A. Communications Screen COMMUNICATIONS SCREEN General Description The Communications screen displays the IP Address settings needed for the HMI to communicate with various devices. Minimum Security Access: High Button/Label Descriptions: Printer IP Address - This is the IP Address currently assigned to the Printer PLC IP Address - This is the IP Address currently assigned to the PLC ©... -
Page 47: Security Screen
SECTION 4 - HMI SCREENS SECURITY SCREEN Figure 4-9A. Security Screen SECURITY SCREEN General Description The Security screen allows an admin to set custom passwords for each security level. These passwords are en- tered when a user clicks the Lock icon on the bottom right of the screen. Minimum Security Access: Medium Button/Label Descriptions: Medium Security Password - This will set the Medium security level password. -
Page 48: Dashboard Setup Screen
SECTION 4 - HMI SCREENS DASHBOARD SETUP SCREEN Figure 4-10A. Dashboard Setup Screen. Dashboard Setup General Description The dashboard setup screen displays a list of available options/functions to be displayed on the Dashboard. Minimum Security Access: Medium Button/Label Descriptions: A checked item in the list indicates the option/function is displayed and can be controlled on the Dashboard Screen. -
Page 49: Dashboard Screen
SECTION 4 - HMI SCREENS DASHBOARD SCREEN Figure 4-11A. Dashboard Setup Screen. DASHBOARD SCREEN General Description The dashboard is a customizable screen that can be setup to display the most common operator interfaces. Op- tions can be switched on or off from this screen, and many of the individual machine motions can be setup on this screen for operator ease of use. -
Page 50: Directories Screen
SECTION 4 - HMI SCREENS DIRECTORIES SCREEN Figure 4-12A. Directories Setup Screen. DIRECTORIES SCREEN General Description The Directories screen displays the file locations of certain files needed by the HMI. Minimum Security Access: No Security Button/Label Descriptions: Labels Directory - This is the location on the HMI where the label formats are stored for jobs Images Directory - This is the location on the HMI where images are stored for Job Verification DB Type - This sets the database driver type used for the database storing saved jobs. -
Page 51: Event Log Screen
SECTION 4 - HMI SCREENS EVENT LOG SCREEN Figure 4-13A. Event Log Setup Screen. EVENT LOG General Description The Event Log screen displays a list of events that have occurred on the machine for the current day. This in- cludes faults, warnings and user initiated events. Minimum Security Access: Medium Button/Label Descriptions: The event log displays an indicator, timestamp, and short description of the event. -
Page 52: Options Screen
SECTION 4 - HMI SCREENS MACHINE OPTIONS SCREEN Figure 4-14A. Machine Options Screen. MACHINE OPTIONS General Description The Machine Options screen displays the many options that can be installed and selected on the bagger. (Not all of these options will be available on every machine. It depends on what has been purchased.) The buttons of the options that are currently selected will be highlighted. - Page 53 SECTION 4 - HMI SCREENS MACHINE OPTIONS SCREEN - CONTINUED Figure 4-15A. Machine Options Screen. Bag Open Assist - This will open the Bag Open Assist configuration screen. Bag Open Assist includes high/low pressure air, bag open sensor, and vacuum assist. Trim Seal - This will open the Trim Seal configuration screen.
-
Page 54: Printer Screen
SECTION 4 - HMI SCREENS MACHINE OPTIONS SCREEN - CONTINUED Figure 4-16A. Printer Screen. PRINTER SCREEN General Description There are four types of printers that can be installed on the bagger; Intermittent or Continuous Videojet printer and A-Class 4” or 8” Stand Behind Datamax Printer. Button/Label Descriptions: Printer - This will toggle on/off the Printer option. - Page 55 SECTION 4 - HMI SCREENS MACHINE OPTIONS SCREENS - CONTINUED Figure 4-17A. Seal Flatteners Screen. SEAL FLATTENERS SCREEN General Description Seal Flatteners are designed to flatten out the opening of the bag prior to sealing. This has the effect of remov- ing wrinkles from film in the seal area and creates an anesthetically pleasing seal.
-
Page 56: Package Eject Screen
SECTION 4 - HMI SCREENS MACHINE OPTIONS SCREEN - CONTINUED Figure 4-18A. Package Eject Screen. PACKAGE EJECT SCREEN General Description The Package Eject option helps remove the sealed bag from the loading area. There are several versions of this option. A Retracting Load Plate, Retracting Load Shelf, Side Retracting Load Shelf, and 2-Axis Package Eject. Button/Label Descriptions: Package Eject - This will toggle on/off the Package Eject Option. - Page 57 SECTION 4 - HMI SCREENS MACHINE OPTIONS SCREENS - CONTINUED Figure 4-19A. Funnel Screen. FUNNEL SCREEN General Description The Funnel Option screen displays available Funnel settings. Minimum Security Access: Medium Button/Label Descriptions: Funnel - This will toggle on/off the Funnel Option. Accumulating Funnel Air Dwell - Amount of time, in seconds, that the accumulating funnel air knife will be active starting from the moment the accumulating doors are opened.
-
Page 58: Filler Screen
SECTION 4 - HMI SCREENS MACHINE OPTIONS SCREEN - CONTINUED Figure 4-20A. Filler Screen. FILLER SCREEN General Description The Filler Option screen displays available Filler settings. Minimum Security Access: Medium Button/Label Descriptions: Filler - This will toggle on/off the Filler option. Filler Drop Time - This setting determines the amount of time from when the Filler Trigger is a applied until the bagger cycles. -
Page 59: Verification Screen
SECTION 4 - HMI SCREENS MACHINE OPTIONS SCREENS - CONTINUED Figure 4-21A. Verification Screen. VERIFICATION SCREEN General Description The Verification Option screen displays available Verification settings. Minimum Security Access: Medium Button/Label Descriptions: Verification - This will toggle on/off the Verification option. Bad Read Fault Count - This setting determines how many consecutive bad reads are required before the ma- chine is faulted. - Page 60 SECTION 4 - HMI SCREENS MACHINE OPTIONS SCREENS - CONTINUED Figure 4-22A. Bag Open Assist Screen. BAG OPEN ASSIST General Description The Bag Open Assist Option screen displays available Bag Open settings Bag Open Assist - This will turn on Bag Open Assist. When OFF, the High/Low pressure air opens the bag. Minimum Security Access: Medium Button/Label Descriptions: Bag Open Assist - This will toggle on/off the Bag Open Assist option.
-
Page 61: Trim Seal Screen
SECTION 4 - HMI SCREENS MACHINE OPTIONS SCREENS - CONTINUED Figure 4-23A. Trim Seal Screen. TRIM SEAL SCREEN General Description This option utilizes a Seal Trimming Knife attached to the Seal Bar. This removes the excess material fro the sealed bag. The options includes Air Knives to blow off the trimmed scrap material into a waste bag. Button/Label Descriptions: Trim Seal - This will toggle on/off the Trim Seal option. - Page 62 SECTION 4 - HMI SCREENS MACHINE OPTIONS SCREENS - CONTINUED Figure 4-24A. Bag Open Fingers BAG OPEN FINGERS SCREEN General Description This option consists of two mechanical fingers operated by rotary air actuators. The fingers are mounted outside the Finger Funnel. The fingers rotate into the bag as the Pressure Bar begins to open the bag. When the fingers are down, they pin the bag to the Pressure Bar and held to open or form the bag into a 10”...
- Page 63 SECTION 4 - HMI SCREENS MACHINE OPTIONS SCREENS - CONTINUED Figure 4-25A. VFD Unwind Screen VFD UNWIND SCREEN General Description The VFD Unwind Option screen is used to setup the Dancer Feedback positions. Minimum Security Access: Medium Button/Label Descriptions: VFD Unwind - This button is automatically turned on by the PLC and can not be turned off whenever a VFD Un- wind is enabled in the Factory Configuration Current Dancer Counts - This is a live numeric reading of the raw analog counts from the dancer position sen- sor.
-
Page 64: Service Screen
SECTION 4 - HMI SCREENS SERVICE SCREEN Figure 4-26A. Service Screen. SERVICE SCREEN General Description The Service Screen provides manual control over the major components of the machine. Use this screen when troubleshooting options on the machine. Minimum Security Access: No Security Button/Label Descriptions: Main Extend Seal Bar - This will extend the seal bar. -
Page 65: Slot 1
SECTION 4 - HMI SCREENS SERVICE SCREEN Figure 4-27A. Service Screen - Slot 1. SLOT 1 Extend Flatteners - This will extend the seal flatteners. The button will display Flatteners Extended when the Seal Flatteners Extended Sensor is made. Retract Flatteners - This will retract the seal flatteners. The button will display Flatteners Retracted when the Seal Flatteners Retracted Sensor is made. - Page 66 SECTION 4 - HMI SCREENS SERVICE SCREEN Figure 4-28A. Service Screen - Slot 3. SLOT 3 Open Funnel - This will open the funnel door. The button will display Funnel Opened when the Funnel Opened Sensor is made. Close Funnel - This will close the funnel door. The button will display Funnel Closed when the Funnel Closed Sensor is made.
-
Page 67: Slot 5
SECTION 4 - HMI SCREENS SERVICE SCREEN Figure 4-29A. Service Screen - Slot 5. SLOT 5 Turn Vacuum On - This will turn the vacuum on. The button will display Vacuum On when the vacuum is ON. Turn Vacuum Off - This will turn off the vacuum. The button will display Vacuum Off when the vacuum is OFF. Extend Vacuum - This will extend the Vacuum Cylinder on a cylinder-mounted vacuum. -
Page 68: Printer Display
SECTION 5 - MACHINE OPERATION PRINTER DISPLAY The graphic display is a window into printer operations, displaying the following information Time And Date The current setting for time and date. Printer Status Line Following initialization, the ‘READY’ message and label counter during a batch print job, but also any prompt condition, warning, or fault message. -
Page 69: Soft Keys
SECTION 5 - MACHINE OPERATION PRINTER DISPLAY SOFT KEYS The Soft Keys are mode-dependent, changing functions as needed. Depending upon the printer’s stat, many functions can be accessed by pressing (or pressing and holding for various durations) the keys and buttons. Menu The menu key takes the printer offline and enters menu mode. -
Page 70: System Menu
SECTION 5 - MACHINE OPERATION PRINTER DISPLAY THE SYSTEM MENU To enter the System Menu, press Menu Soft Key. (This places the printer in Menu mode, taking it offline, halting the processing of the new data.) Media Settings The Media Settings menu contains label and ribbon settings, and printhead maintenance selections. Media Type, Sensor Type, Label Length, Maximum Label Length, Paper Empty Distance, Label Width, Ribbon Low Options, Sensor Calibration, and Printhead Cleaning. - Page 71 SECTION 5 - MACHINE OPERATION PRINTER DISPLAY REAL TIME STATUS INDICATORS © MAX™ Operator Manual Original Printed In English 4-33...
-
Page 72: User Settings
SECTION 5 - MACHINE OPERATION USER SETTINGS The printer is preset at the factory. There ‘ENTER’. Highlight ‘START OF PRINTING’ Press ‘ENTER’ highlight ‘ACTIVE LOW’ and are settings to check if you are having is- Press ‘ENTER’. Press ‘ESC’ until you get to sues with the printer. -
Page 73: Operation
Sharp Packaging requests that you provide the Figure 5-1B. Power Entry Module Switch. serial number of bagger and a brief description of the problem. Phone: +1 (262) 246-8815 (ext. 1572) E-mail: sharpservice@pregis.com © MAX™ Operator Manual Original Printed In English... -
Page 74: Machine Operation
SECTION 5 - MACHINE OPERATION CREATING A JOB The following steps will create a job. The security level is medium for this procedure. To change security, See Security Pass Codes, page 1-11. 1. From the Main Menu, press the Job Setup button. 2. -
Page 75: Editing A Job
SECTION 5 - MACHINE OPERATION EDITING A JOB The following steps will edit a saved job. The security level is medium for this procedure. To changes securi- ty, See Security Pass Codes, page 1-11. 1. From the Main Menu, press the Job Setup button. 2. -
Page 76: Deleting A Job
SECTION 5 - MACHINE OPERATION DELETING A JOB The following steps will delete a saved job. The secu- rity level is medium for this procedure. To change se- curity, See Security Pass Codes, page 1-11. 1. From the Main Menu, press the Job Setup button. 2. - Page 77 SECTION 5 - MACHINE OPERATION LOADING PRINT LABEL © MAX™ Operator Manual Original Printed In English...
- Page 78 SECTION 5 - MACHINE OPERATION CLEANING Particles of steel wool may break off and cause This machine requires regular, periodic cleaning to rusting or contaminate lubricated surfaces. ensure reliable service. The Operator with a minimum of training can perform daily cleaning. •...
- Page 79 SECTION 5 - MACHINE OPERATION MAINTENANCE • Inspect the Electric Eye. Clean with a cotton WEEKLY MAINTENANCE swab if dirty. Do not use any solvents or cleaning solutions on the sensing portions of the Electric Eye. ® • Inspect the Teflon Tape that covers the Pres- sure Bar Anvil Rubber and replace is worn or damaged.
-
Page 80: Faults
SECTION 6 - FAULT & ALERT MANAGE- CAUSE SOLUTION FAULT Printer Offline Printer Option is turned on, but the Go to Printer HMI Screen for de- printer is faulted or offline tailed information. Barcode Fault Consecutive Bad Read Counter = There is a problem with the Barcode Barcode Fault Setting. - Page 81 SECTION 6 - FAULT & ALERT MANAGE- CAUSE SOLUTION FAULT Vacuum Cylinder Sensor Conflict The cylinder position sensors are See Sensor Conflict Fault. providing conflicting position status. Master Control Relay is Off E-Stop Button was pressed or E- Release the E-Stop and press the Stop is released but the green Pow- green Power Button.
- Page 82 SECTION 6 - FAULT & ALERT MANAGE- CAUSE SOLUTION FAULT Pressure Bar Obstruction The Pressure Bar attempted to This is usually a part that did not close, but was blocked by an ob- drop past the Pressure Bar. In- struction. crease the Filler Drop Timer setting.
- Page 83 SECTION 6 - FAULT & ALERT MANAGE- CAUSE SOLUTION FAULT Seal Bar Under Temp. The actual Seal Bar temperature is If the temperature Set Point was just more than 10 degrees below the Set raised, wait for Seal Bar Tempera- Point.
- Page 84 SECTION 6 - FAULT & ALERT MANAGE- CAUSE SOLUTION FAULT Print Label Failed To Load A label was sent to printer but did This fault should clear if the label is not load correctly. sent again and loads correctly. The fault can also be reset by turning off the printer option.
-
Page 85: Alerts
SECTION 6 - FAULT & ALERT MANAGE- CAUSE SOLUTION ALERT Batch Count Is Completed The Batch Counter actual value has Batch is done. Reset and bagger is reached the Target Count. This alert free to cycle again. will not interrupt the bagger cycle, but subsequent cycles are not possi- ble until the Alert has been reset. - Page 86 SECTION 6 - FAULT & ALERT MANAGE- ALERT SOLUTION CAUSE Infeed Conveyor Out Of Parts Applies when equipped with an EZ- Load parts on the conveyor belt and Feed Integrated Conveyor. The con- the Cycle Start device. Conveyor veyor was running in Parts Counting should resume running to count Mode and not parts are being count- parts.
-
Page 87: Section 7 -Appendix A Warranty
SECTION 7 - APPENDIX A WARRANTY SHARP PACKAGING SYSTEMS (“SHARP”) STANDARD TERMS AND CONDITIONS FOR PACKAGING MACHINERY By placing an order, Buyer agrees to the following terms and conditions: TERMS OF PAYMENT: Cash in lawful U.S. currency payable as follows: For base machinery w/o automatic in-feed divides, (2/3) of net price with the order and the final (1/3) of net price within thirty (30) days after shipment. -
Page 88: Airborne Noise Emissions
SECTION 7 - APPENDIX A AIRBORNE NOISE EMISSIONS © MAX™ Operator Manual Original Printed In English... - Page 89 SECTION 7 - APPENDIX A CE MANUFACTURER DECLARATION © MAX™ Operator Manual Original Printed In English...
- Page 90 SECTION 7 - APPENDIX A CE MANUFACTURER DECLARATION © MAX™ Operator Manual Original Printed In English...
-
Page 91: Section 8 - Appendix Bce Power Up
SECTION 8 - APPENDIX B POWER UP PROCEDURE - CE MODELS 3. Release the E-Stop Button and press the Green COMPLETE POWER-UP PROCEDURE Power Button. The green light should illuminate and energize the MCR. Read and understand the en- tire Operator Manual before attempting any procedures on this machine. - Page 92 SECTION 8 - APPENDIX B POWER DOWN PROCEDURE - CE MODELS 3. WHEN SCREEN IS BLACK, switch Power Entry COMPLETE POWER DOWN SEQUENCE Module Switch to OFF. The machine is now electrically shut down. The bagger must be properly power down in the correct sequence.
- Page 93 SECTION 2 - SETUP & ADJUST- MACHINE PLACEMENT - CE MODELS Your Sharp Bagger has been shipped to you well crat- ed in order to prevent any damage to the machine. It is important that you follow the Uncrating Instructions attached to crate.
Need help?
Do you have a question about the SHARP MAX 1143 and is the answer not in the manual?
Questions and answers