Advertisement
Operating Instructions
Air Conditioner
Model No.
Indoor Unit
CS-Z20VKR
CS-Z25VKR
CS-Z35VKR
CS-Z42VKR
CS-Z50VKR
CS-Z60VKR
CS-Z71VKR
CS-Z80VKR
Outdoor Unit
CU-Z20VKR
CU-Z25VKR
CU-Z35VKR
CU-Z42VKR
CU-Z50VKR
CU-Z60VKR
CU-Z71VKR
CU-Z80VKR
Operating Instructions
Air Conditioner
Before operating the unit, please read these operating
instructions thoroughly and keep them for future reference.
The included Installation Instructions should be kept and read
by the installer before installation.
Remote control is packaged in the indoor unit and removed
by the installer before installation.
ACXF55-22380
Advertisement

Related Manuals for Panasonic CS-Z25VKR


Summary of Contents for Panasonic CS-Z25VKR
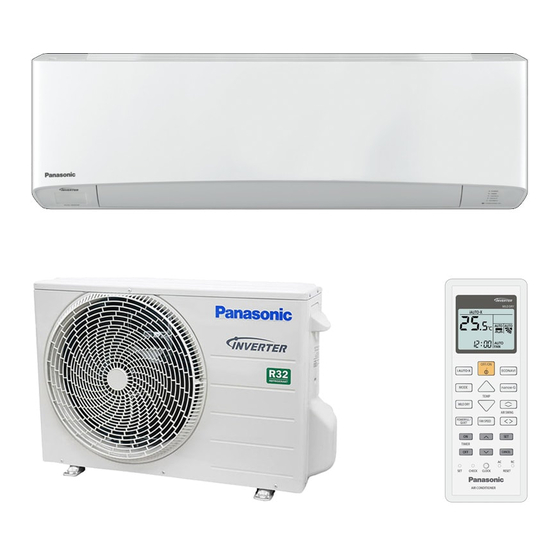
- Page 1 Operating Instructions Air Conditioner Model No. Indoor Unit Outdoor Unit CS-Z20VKR CU-Z20VKR CS-Z25VKR CU-Z25VKR CS-Z35VKR CU-Z35VKR CS-Z42VKR CU-Z42VKR CS-Z50VKR CU-Z50VKR CS-Z60VKR CU-Z60VKR CS-Z71VKR CU-Z71VKR CS-Z80VKR CU-Z80VKR Operating Instructions Air Conditioner Before operating the unit, please read these operating instructions thoroughly and keep them for future reference.
- Page 2 Provides maximum comfort and clean air with optimal energy saving methods. Use remote control within 8 m from the remote control receiver of the indoor unit. Quick Guide Inserting the batteries Clock setting 1 Press and set the time 1 Pull out the back cover of remote control.
-
Page 3: Table Of Contents
Thank you for purchasing Panasonic Air Conditioner. Table of contents Safety precautions ……… 4-11 How to use ……………………12-13 To learn more ………………… 14 Cleaning instructions ……… 15 Troubleshooting ………… 16-18 Information………………… 19 Accessories • Remote control • AAA or R03 batteries × 2 •... -
Page 4: Safety Precautions
Safety precautions To prevent personal injury, injury to others or property damage, please comply with the following: WARNING Incorrect operation due to failure to follow instructions below may cause harm or damage, the seriousness of which is classifi ed as below: This appliances is not intended for accessibility by the Indoor unit and outdoor unit general public. - Page 5 If the supply cord is damaged, it must be replaced by the manufacturer, service agent CAUTION or similarly qualifi ed persons in order to avoid a hazard. It is strongly recommended to be installed Indoor unit and outdoor unit with Earth Leakage Circuit Breaker (ELCB) Do not wash the indoor unit with water, or Residual Current Device (RCD) to prevent benzine, thinner or scouring powder to avoid...
- Page 6 Safety precautions Must always ensure that foreign matter (oil, water, etc.) does not enter the piping. Also, WARNING when storing the piping, securely seal the opening by pinching, taping, etc. (Handling of R32 is similar to R410A.) This appliance is fi lled with R32 •...
- Page 7 f) Precautions shall be taken to avoid 2. Servicing excessive vibration or pulsation to 2-1. Service personnel refrigerating piping. • The system is inspected, regularly supervised g) Ensure protection devices, refrigerating and maintained by a trained and certifi ed piping and fi ttings are well protected service personnel who is employed by the against adverse environmental effects person user or party responsible.
- Page 8 Safety precautions 2-3. Checking for presence of refrigerant 2-7. Checks to the refrigerating equipment • The area shall be checked with an • Where electrical components are being appropriate refrigerant detector prior to and changed, they shall be fi t for the purpose and during work, to ensure the technician is aware to the correct specifi...
- Page 9 3. Repairs to sealed components 6. Detection of fl ammable refrigerants • During repairs to sealed components, all • Under no circumstances shall potential electrical supplies shall be disconnected from sources of ignition be used in the searching or the equipment being worked upon prior to any detection of refrigerant leaks.
- Page 10 Safety precautions 8. Removal and evacuation 9. Charging procedures • When breaking into the refrigerant circuit • In addition to conventional charging to make repairs – or for any other purpose procedures, the following requirements shall – conventional procedures shall be used. be followed.
- Page 11 e) If a vacuum is not possible, make a manifold • The recovery equipment shall be in good so that refrigerant can be removed from working order with a set of instructions various parts of the system. concerning the equipment that is at hand and f) Make sure that cylinder is situated on the shall be suitable for the recovery of fl...
-
Page 12: How To Use
How to use To adjust airfl ow direction To adjust airfl ow direction Upper direction AIR SWING Indicator Lateral direction POWER TIMER • Do not adjust the fl ap by hand. i AUTO-X nanoe X To adjust fan speed AUTO FAN SPEED •... - Page 13 See "To learn more..." for details. To reach temperature quickly i AUTO-X -1°C / temperature -2°F Max = 4 hours • The unit controls set temperature according to room temperature to accelerate room cooling. • After max 4 hours, the set temperature is shifted according to activity detection. •...
-
Page 14: To Learn More
To learn more... Operation mode AUTO : During operation mode selection the POWER indicator blinks. • Unit selects operation mode every 10 minutes according to setting temperature and room temperature. HEAT : Unit takes a while to warm up. The POWER indicator blinks during this operation. -
Page 15: Cleaning Instructions
Cleaning instructions To ensure optimal performance of the unit, Indoor unit cleaning has to be carried out at regular Aluminium fi n intervals. Dirty unit may cause malfunction and Front panel you may see error code “H99”. Please consult authorised dealer. •... -
Page 16: Troubleshooting
Troubleshooting The following symptoms do not indicate malfunction. Symptom Cause POWER indicator blinks before the unit is • This is a preliminary step in preparation for the switched on. operation when the ON timer has been set. • When ON Timer is set, the unit may start earlier (up to 35 minutes) before the actual set time in order to achieve the desired temperature on time. - Page 17 When... ■The remote control is missing or a malfunction has occurred 1.Raise the front panel. 2.Press the button once to use in i AUTO-X mode. 3. Press and hold the button until you hear 1 beep, then release to use in forced COOL mode.
- Page 18 Troubleshooting How to retrieve error codes If the unit stops and the TIMER indicator blinks, use the remote control to retrieve the error code. Press for Press until you hear beep 5 seconds sound, then write down the error code TIMER TIMER CANCEL...
-
Page 19: Information
Information Information for Users on Collection and Disposal of Old Equipment and used Batteries [Information on Disposal in other Countries outside the European Union] These symbols are only valid in the European Union. If you wish to discard these items, please contact your local authorities or dealer and ask for the correct method of disposal. - Page 20 Panasonic Corporation 1006 Kadoma, Kadoma City, Osaka, Japan Website: http://www.panasonic.com © Panasonic Corporation 2019 ACXF55-22380 Printed in Malaysia FA0319-0...
Need help?
Do you have a question about the CS-Z25VKR and is the answer not in the manual?
Questions and answers