
Related Manuals for Logik L60CHDB12


Summary of Contents for Logik L60CHDB12
- Page 1 Instruction / Installation Manual 60cm Black Chimney Hood L60CHDB12 60cm Silver Chimney Hood LCHD60S12 L60CHDB12_LCHD60S12_IB_120919_Zell.indd 1 19/9/12 2:17 PM...
- Page 2 L60CHDB12_LCHD60S12_IB_120919_Zell.indd 2 19/9/12 2:17 PM...
-
Page 3: Table Of Contents
Contents Unpacking ............................. 4 Product Overview ......................... 5 Modes of Operation ........................6 Air Extraction ................................6 Air Recirculation ................................6 Operation ............................6 To Select the Fan Motor Speed ..........................6 Hob Lighting ................................6 Cleaning and Maintenance ......................7 Grease Filters ................................7 Cleaning the Grease Filters by Hand .........................8 Cleaning the Grease Filters in the Dishwasher ....................8 Carbon Filter Usage ..............................9... -
Page 4: Unpacking
Thank you on the purchase of your new Logik Cooker Hood. We recommend that you spend some time to read this manual in order to fully understand how to install and operate it correctly. Read all the safety warnings carefully before use and keep this manual for future reference. -
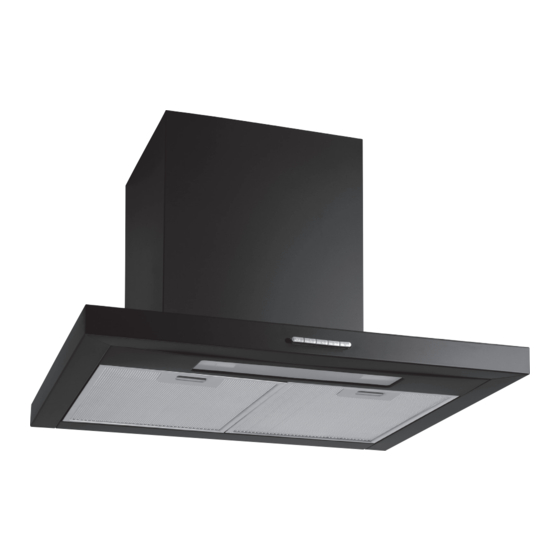
Page 5: Product Overview
Product Overview Recirculation Vents Control Panel Internal Chimney Illumination External Chimney Aluminium Filter Control Panel OFF button Motor speed buttons Lamp button L60CHDB12_LCHD60S12_IB_120919_Zell.indd 5 19/9/12 2:17 PM... -
Page 6: Modes Of Operation
Modes of Operation The cooker hood works with Air Extraction The air is drawn in and cleaned by the grease filters and directed outside. When the cooker hood is switched on, the non-return flap opens for the cooking vapours to be ducted away. Ensure there is adequate ventilation in the room when the cooker hood is used at the same time as other appliances burning gas or other fuels. -
Page 7: Cleaning And Maintenance
Cleaning and Maintenance • Before any cleaning or maintenance work is carried out, disconnect the cooker hood from the mains power supply. Ensure that: – it is switched off at the isolator, or – it is switched off at the wall socket and the plug is withdrawn, or –... -
Page 8: Cleaning The Grease Filters By Hand
Cleaning the Grease Filters by Hand • Clean the filters with a soft nylon brush in a mild solution of hot water and a little washing-up liquid. Do not use “neat” washing up liquid. Do not use: • Cleaning agents containing descaling agents. • Powder cleaners, cream cleaners or abrasive all-purpose cleaners. -
Page 9: Carbon Filter Usage
Carbon Filter Usage Your product is compatible with one type of carbon filter (carbon filters are not provided). • Before installing or replacing the carbon filters, you should switch off and disconnect the electricity supply. • The carbon filters should never be washed. • The grease filters should be installed on the product even when carbon filters are not being used. -
Page 10: Hints And Tips
Hints and Tips Problem Solution • Check Electric connection. (The supply voltage should be 220-240 V. The cooker hood must be connected to an earthed socket) Cooker hood does not operate • Check motor speed selector. (Motor speed selector should be in position I, II or III) • Check Electric connection. -
Page 11: Technical Specification
Technical Specifications Model no. LCHD60S12 / L60CHDB12 Extraction Rate (m Voltage (V) 220 – 240 ~ Frequency (Hz) Total Power (W) Lamp 2 × 40 W Features and specifications are subject to change without notice. L60CHDB12_LCHD60S12_IB_120919_Zell.indd 11 19/9/12 2:17 PM... -
Page 12: Installation
Installation Product Overview Grill For Air Outlet Internal Chimney Connection Plate Internal Chimney External Chimney Connection Plate External Chimney Hanging Plate L60CHDB12_LCHD60S12_IB_120919_Zell.indd 12 19/9/12 2:17 PM... - Page 13 440-820 All dimensions shown are in mm. L60CHDB12_LCHD60S12_IB_120919_Zell.indd 13 19/9/12 2:17 PM...
-
Page 14: Safety Distance Between Hob And Cooker Hood
Safety Distance Between Hob and Cooker Hood When planning the installation height of your cooker hood, the minimum safe distance between the top of a cooker or hob and the bottom of the cooker hood are as follows, unless a greater distance is specified by the manufacturer of your cooking appliance: 650 mm —... -
Page 15: Connection For Air Extraction
Connection for Air Extraction To avoid the danger of toxic fumes, please observe the Safety Warnings. This is especially crucial when using the cooker hood at the same time as another heating appliance which relies on air from the same room. The cooker hood should be installed according to local and national building regulations. -
Page 16: Mounting The Cooker Hood
Mounting the Cooker Hood • We recommend professional tradespersons are consulted prior to the fitting of this appliance. • Each installation is different and these instructions should be used as a guide only. If in doubt consult professional tradespersons. • Air must not be discharged into a flue that is used for exhausting fumes from appliances burning gas or other fuels. - Page 17 Assembling Hanging Plate Holes Drill (A, B, C, D, E) holes on marked points by using a Ф8mm drill bit. Push 5 pcs of plastic wall plugs into the drilled holes (A, B, C, D, E). Put the hanging plate on the holes A, B, E. Using the supplied 4 x 40mm screws;...
-
Page 18: Safety Warnings
Safety Warnings • This appliance complies with all relevant local and Correct Use national safety requirements. Inappropriate use • Never use an open flame beneath the cooker hood. can, however, lead to personal injury and damage To avoid the danger of fire, do not flambé or grill to property. - Page 19 Using at the same time as other heating • The electrical safety of this appliance can only be guaranteed when continuity is complete between appliances that depend on the air from the same the appliance and an effective earthing system room.
- Page 20 Correct Installation • Refer to the cooker or hob manufacturer's instructions as to whether a cooker hood may be operated above the cooker/hob. • The minimum safe distances between the top of the cooker or hob and the bottom of the cooker hood given in the Installation section of this booklet must be maintained, unless the hob/ cooker manufacturer states that a greater safe...
- Page 21 Replacement Part Part Number Hanging Plate HP-U-01 External Chimney Connection Plate HP-EC-01 Internal Chimney Connection Plate HP-IC-01 LIC90CHB (for L60CHDB12) Internal Chimney LIC90CHSS (for LCHD60S12) LEC90CHB (for L60CHDB12) External Chimney LEC90CHSS (for LCHD60S12) Ø8 x 40mm Plastic Wall Plug PWP75/37...
- Page 22 L60CHDB12_LCHD60S12_IB_120919_Zell.indd 22 19/9/12 2:17 PM...
- Page 23 L60CHDB12_LCHD60S12_IB_120919_Zell.indd 23 19/9/12 2:17 PM...
- Page 24 L60CHDB12_LCHD60S12_IB_120919_Zell.indd 24 19/9/12 2:17 PM...
Need help?
Do you have a question about the L60CHDB12 and is the answer not in the manual?
Questions and answers