
Subscribe to Our Youtube Channel
Related Manuals for SEAL AquaSEAL SW-3000


Summary of Contents for SEAL AquaSEAL SW-3000
- Page 1 AquaSEAL™ SW-3000 Seal Brands … the finishing touch. Owner’s Operation Manual Important: Read and understand all safety information before operating. AquaSEAL™ SW-3000 Liquid Laminator...
- Page 2 Preface This manual contains the following Sections: Section 1. Introduction – provides a basic overview of the AquaSEAL™ Superwide liquid laminator, and contains illustrations of the basic hardware components. Section 2. Operating Procedures – describes procedures for setting up, starting, stopping, and controlling the machine.
-
Page 3: Table Of Contents
Table of Contents General Warranty Statement ……………………………………………………………… Safety Information ……………………………………………………………….. Safety Labels …………………………………………………………………….. Section 1. Introduction Hardware Overview ……………………………………………………………… 6-10 Section 2. Operating Procedures Tools / Supplies Needed ………………………………………………………… Loading the Sealant ……………………………………………………………… Priming the Pump ………………………………………………………………... Loading the Media………………………………………………………………... Pre-heat the Laminator …………………………………………………………. -
Page 4: Warranty Statement
SEAL Graphics. SEAL Graphics assumes no responsibility for any errors that may appear in this document. Nor does it make expressed or implied warranty of any kind with regard to this material, including, but not limited to, the implied warranties of merchantability and fitness for a particular purpose. -
Page 5: Safety Information
Safety Information Intended Use The AquaSEAL™ SW-3000 liquid laminator is intended for use with medium, large, and grand format graphic output. Graphics can vary in widths from 0.3 – 2.6M (1–8ft.) in width and can be up to 90M (295 ft.) in length (dependent on thickness of media used). The AquaSEAL™... -
Page 6: Safety Labels
Safety Information General Do not operate the machine until it is connected to the proper power source. Refer to Installation instructions located inside control cabinet. It is strongly recommended that the machine is fed from an “Earth Leakage” protected electrical outlet – if in doubt, please contact Hunt Technical Services (contact details in “After Sales Support”... -
Page 7: Section 1. Introduction
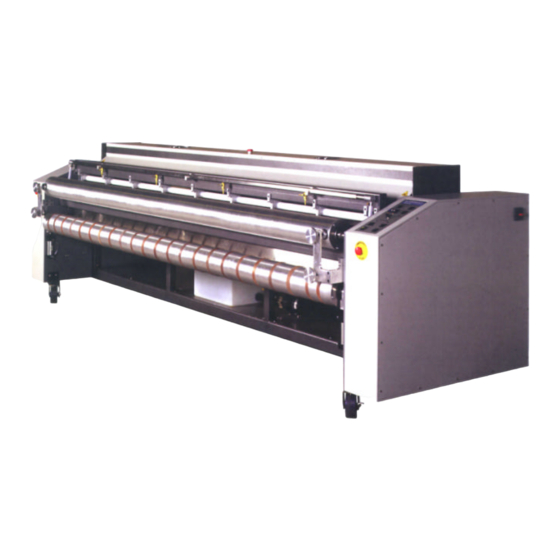
Section 1. Introduction The AquaSEAL™ SW-3000 is a medium, large, and grand format media liquid laminator used to coat graphics with a protective sealant. Operating either roll or fan fed, the media is threaded through the applicator mechanism, under the drying assembly, and onto the take-up roller. - Page 8 Section 1. Introduction Three Emergency Stop Buttons are fitted to the machine, located prominently on the front of both end cabinets and in the center of the machine on top of the Heater assembly. When pressed, all power is removed from the working parts of the machine and all pneumatic assemblies return to their safe state.
- Page 9 Section 1. Introduction The Unwind Stands are used to position rolls of media directly under the front of the machine for straight feeding and trouble free operation. Each SW-3000 is equipped with 2 Unwind Stands. The Control Panel contains all the displays, controls, and indicators required to operate the laminator.
- Page 10 Section 1. Introduction • Take-Up Drive/Disengage is used to switch the drive from its normal forward state to a disengaged state that allows the Take-up to free spin in the reverse direction for unloading purposes. Machine must be in DRIVE position for normal operation.
- Page 11 Maximum Power Consumption in either configuration: 11,451 Watts It is strongly recommended that the machine is fed from an “Earth Leakage” protected electrical outlet – if in doubt, please contact Seal Graphics Technical Services (listed at rear of manual) or consult a licensed electrician The Compressed Air Connection is located on the lower back of the left side cabinet where an outside source of compressed air is connected.
-
Page 12: Section 2. Operating Procedures
Section 2. Operating Procedures All operating functions are initiated at the control panel. The following section outlines general procedures and describes specific functions used to coat outdoor media. This section is divided into the following sub-headings: Loading Materials Pre-heat the laminator Web the laminator Run the laminator Cleaning the laminator... -
Page 13: Priming The Pump
Section 2. Operating Procedures Priming the Pump 1. After filling the Sealant Tank, connect the supplied length of hose to the drain valve and place the other end into the supply tank. Open the drain valve on the pump valve assembly and close the flow control valve. This will allow the coating to flow freely from the Sealant Tank to the pump and purge any air from the impeller housing. -
Page 14: Loading The Media
Section 2. Operating Procedures Loading the Media: 1. If using rolled media, position the Unwind stands equally spaced under the front of the machine and place the roll of media on the stands so that it is well supported. The media must be oriented to feed into the machine with the image side up. -
Page 15: Web The Laminator
Section 2. Operating Procedures 3. Web the Laminator A Web diagram is provided in Figure 2-3 below. Photo Eyes Dryer Panel Draw Down Assembly Applicator Tube Web Idler Take Up Roller Tension Idler Sealant Tank Media Sealant Unwind Stands Pump Figure 2-3. -
Page 16: Run The Laminator
Section 2. Operating Procedures 4. Run the Laminator 1. Adjust the Speed Control to “1” on the dial. 2. Raise the Tension Idler and adjust brakes lightly into the Tension and Web Idlers by turning clockwise. 3. Open the distribution valves on the applicator tube and ensure that the tips of the flex hoses are not clogged with dried coating. -
Page 17: Cleaning The Laminator
Section 2. Operating Procedures 5. Cleaning the Laminator 1. It is important to clean the machine immediately after the end of the material is completely through the Dryer panel. 2. Switch the machine into Stop mode. 3. Using a WET cloth wipe the 2 draw down bars to remove any excess sealant from them. -
Page 18: Section 3. Periodic Maintenance
Section 3. Periodic Maintenance Shutdown and Cleaning: Important Do not allow the laminator to sit idle without performing one of the following cleaning procedures immediately after it is shut down! Level 1 Cleaning (Laminator will be used within 24 hours) 1. -
Page 19: Level 2 Cleaning
Section 3. Periodic Maintenance Level 2 Cleaning (Detailed Cleaning) Detailed cleaning is recommended once a month. Under extremely heavy use this may be necessary more often. 1. Perform all the steps listed in level 1 cleaning. 2. Remove the Sealant Tank by closing the valves in front of the quick-disconnects and disconnecting the tank from the pump supply hose. -
Page 20: Troubleshooting
Section 4. Troubleshooting The following table lists problems that may occur when using the SW-3000 Liquid Laminator. Recommended corrective actions are provided for all commonly encountered problems. Problem / Symptom Causes Corrective Action Very thin coating Sealant is diluted with water Remove old coating and refill with new Heavy coating... - Page 21 Section 4. Troubleshooting Problem / Symptom Cause Corrective Action • Poor pump pressure Pump impeller is locked or Check pump impeller for broken obstruction and clear if necessary • Replace pump • Pump is air locked Bleed air from impeller housing by opening the drain valve on the pump valve assembly.
-
Page 22: After Sales Support
Section 4. After Sales Support... - Page 23 Section 4. After Sales Support...
- Page 24 Tel: +31 572 345 500 Fax: 1-800-966-4554 Fax: +31 572 345 501 Note: SEAL Graphics recommends that your main power be installed by a licensed electrician in accordance with electrical codes in your area. Specifications subject to change without notice. Seal Graphics...
Need help?
Do you have a question about the AquaSEAL SW-3000 and is the answer not in the manual?
Questions and answers