
Subscribe to Our Youtube Channel
Related Manuals for SEAL ProSEAL 44


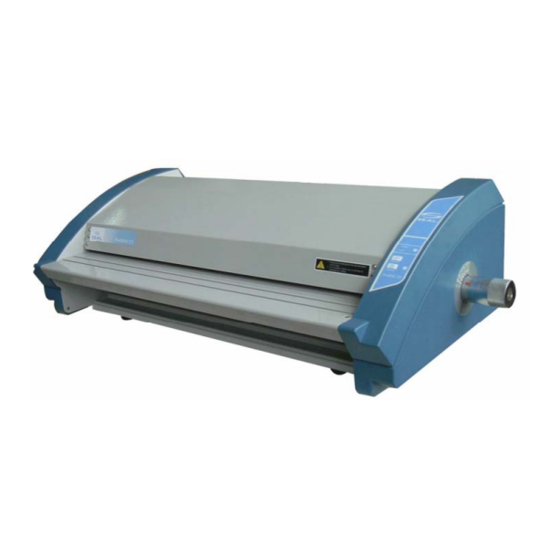
Summary of Contents for SEAL ProSEAL 44
- Page 1 All manuals and user guides at all-guides.com ® ProSEAL 44 Laminator Owners Operation Manual ProSEAL ® 44 Pouch Board Laminator...
- Page 2 All manuals and user guides at all-guides.com ProSEAL ® 44 Pouch Board Laminator...
-
Page 3: Table Of Contents
All manuals and user guides at all-guides.com TABLE OF CONTENTS INTRODUCTION IMPORTANT SAFEGUARDS UNPACKING AND SET-UP NIP CONTROL KNOB, REAR PANEL CONTROL PANEL MOUNTING USING A ProSEAL MOUNTING BOARD ® MOUNTING USING A ProSEAL POUCH BOARD ® ENCAPSULATING USING A ProSEAL FLEXIBLE POUCH ®... -
Page 4: Introduction
All manuals and user guides at all-guides.com INTRODUCTION STATEMENT OF INTENDED USE Thank you for purchasing a ProSEAL laminator. We have designed the ProSEAL Your ProSEAL Laminator meets the standards Laminator to give you years of reliable of UL 775 and CAN/CSA C22.2 No. 60950. service. -
Page 5: Important Safeguards
If purchased in U.S./Canada, 3. Save your carton! ProSEAL laminators return the laminator to SEAL Graphics or if are shipped in special cartons and should purchased in Europe or Asia, return to your... -
Page 6: Unpacking And Set-Up
All manuals and user guides at all-guides.com UNPACKING AND SET-UP The ProSEAL 44 is a professional laminator NOTICE! Retain original packaging. Failure to designed for ease of use. The process speed return machines properly packed in original and temperature have been preset to eliminate packaging will impose a fifteen percent restocking operator guesswork. - Page 7 All manuals and user guides at all-guides.com NIP CONTROL KNOB The Control Knob (see figure 1) is located on the right hand side of the laminator and should be operated from this side. The control knob is used to adjust the height of the rollers. The Nip Settings are 1/4"(6mm), 3/16"...
-
Page 8: Control Panel
All manuals and user guides at all-guides.com CONTROL PANEL The Control Panel (see Figure 2) is located on the top right of the machine. A diagram of the Control Panel is shown in Figure 3. Figure 2 Control Panel Location PANEL FUNCTIONS: <LED>... - Page 9 All manuals and user guides at all-guides.com MOUNTING USING A ProSEAL MOUNTING BOARD Using a ProSEAL Mounting Board The board will feed through the laminator and automatically exit at the rear of the unit. Refer to the instruction sheet packed with each box of ProSEAL Mounting Boards for specific CAUTION! The board will be hot! Allow it information on mounting with a ProSEAL Board.
- Page 10 All manuals and user guides at all-guides.com MOUNTING USING A ProSEAL POUCH BOARD Refer to the instruction sheet packed with each Slowly insert the Pouch Board into the inlet box of ProSEAL Pouch Boards for specific opening. Ensure that the Pouch Board will information on mounting/laminating with a enter centered and straight.
- Page 11 8. Ensure that the sled is centered and at the end opposite the hinge. Take care not to straight. A gentle push may be required to break the hinged seal. start the sled into the laminator. 9. Hold the edge of the sled until it is engaged, 1.
-
Page 12: Cleaning Your Laminator
All manuals and user guides at all-guides.com CLEANING YOUR LAMINATOR Cleaning the Outside of the Laminator: Cleaning the Rollers CAUTION! Disconnect the laminator from The laminating rollers of your ProSEAL should the power supply before cleaning. be periodically cleaned of adhesive build up that might occur during normal operation. -
Page 13: Troubleshooting Guide
Representative (see rear cover). When the warranty. A service technician must use calling for Technical Service, please have replacement parts specified by SEAL Graphics. Laminator Serial Number (listed on the ratings label) available. The ratings label is NOTE! Service Technicians must perform safety located on the rear side of the laminator. -
Page 14: Spare Parts
All manuals and user guides at all-guides.com SPARE PARTS LIST PART DESCRIPTION SPARE PART NO. TOP-COVER 011LR3001A BASE-FRONT 013LR3043A BASE-REAR 013LR3044A FRAME-REAR 013LR3045A FRAME-L 013LR3046A FRAME-R 013LR2054A SENSOR-ASS'Y 313LR3001A ROLLER-LAMI.UP 133LR3003A ROLLER-LAMI.LO 133LR3003B TABLE-FRONT 014LR3002A COVER-R 021LR3015A COVER-L 021LR3016A KNOB-CONTROL 021LR2006A FOOT 026004005A... -
Page 15: Glossary Of Terms
All manuals and user guides at all-guides.com GLOSSARY OF TERMS Cleaning Board: Mounting Board: Board used to capture any adhesive that may be An adhesive coated board used for mounting clinging to the rollers. images. Cold Mode: Heat is off. Nip: The spot where the top and bottom rollers meet. -
Page 16: Technical Specifications
*** Specifications are subject to change without notice. Each SEAL Brand laminator has a Serial Number label. This is located to the rear of the laminator. This label indicates the model type, the electrical rating, and the laminator serial number. -
Page 17: Limited Warranty
Equipment shall vary, not exceeding the maximum warranty period stated herein. All SEAL Graphics shall not be liable for incidental or Demo Equipment comes with a specific consequential damages in connection with, or warranty, which will be stated at the time of arising out of the furnishing, performance, or use purchase. - Page 18 NOTICE: Retain original machine packaging. Failure to return machine properly packed in original packaging will impose a fifteen percent restocking fee plus any costs to repair shipping damage. For service or return authorization call Seal Technical Service. SEAL TECHNICAL SERVICE (Technical assistance & service)
Need help?
Do you have a question about the ProSEAL 44 and is the answer not in the manual?
Questions and answers