Advertisement
Quick Links
sauder.com
Library Return
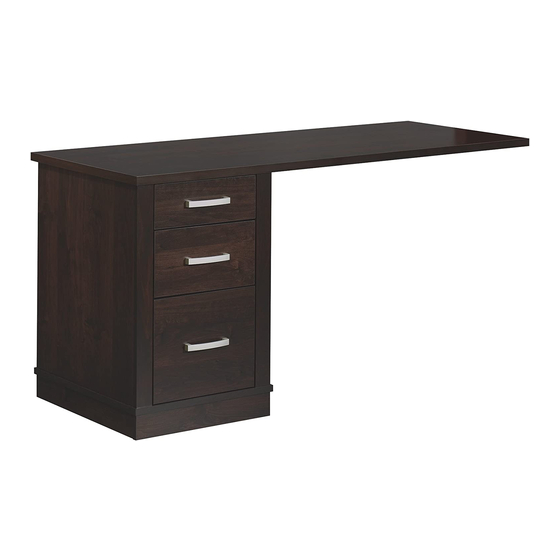
Offi ce Port Collection | Model 408363
Need help? Visit Sauder.com to view video assembly tips or chat with a live rep.
Prefer the phone? Call 1-800-523-3987.
Share your journey!
We're in your corner.
NOTE: THIS INSTRUCTION
BOOKLET CONTAINS IMPORTANT
SAFETY INFORMATION.
PLEASE READ AND KEEP FOR
FUTURE REFERENCE.
English pg 1-25
Français pg 26-28
Español pg 29-32
Lot # 363434
07/10/14
Purchased: __________________
Be sure to give us a ring before
making any returns. 1-800-523-3987
Advertisement

Related Manuals for Sauder Office Port Library Return 408363


Summary of Contents for Sauder Office Port Library Return 408363
- Page 1 Offi ce Port Collection | Model 408363 NOTE: THIS INSTRUCTION BOOKLET CONTAINS IMPORTANT SAFETY INFORMATION. Need help? Visit Sauder.com to view video assembly tips or chat with a live rep. PLEASE READ AND KEEP FOR FUTURE REFERENCE. Prefer the phone? Call 1-800-523-3987.
- Page 2 LARGE LEFT DRAWER SIDE (1) SIDE SKIRT (2) LEFT DRAWER SIDE (1) D707 DRAWER BOTTOM (2) FRONT SKIRT (2) SMALL RIGHT DRAWER SIDE (1) D708 LARGE DRAWER BOTTOM (1) EXTENSION BLOCK (2) SMALL LEFT DRAWER SIDE (1) Page 2 408363 www.sauder.com/services...
- Page 3 Now you know Part Identifi cation our ABCs. D707 D707 D708 www.sauder.com/services 408363 Page 3...
- Page 4 FASTENER - 8 LL CORNER CAP - 4 PULL - 3 CORNER BRACKET - 4 METAL BRACKET - 4 CONNECTOR PLATE - 4 NN SLIDE CAM - 6 RAIL BRACKET - 8 FILE ROD - 2 Page 4 408363 www.sauder.com/services...
- Page 5 BLACK 1" PAN HEAD SCREW - 6 BLACK 1-1/2" PAN HEAD SCREW - 4 BLACK 9/16" LARGE HEAD SCREW - 48 WW GOLD 5/16" FLAT HEAD SCREW - 24 30S BLACK 1-9/16" FLAT HEAD SCREW - 12 www.sauder.com/services 408363 Page 5...
- Page 6 Assemble your unit on a carpeted fl oor or on the empty å carton to avoid scratching your unit or the fl oor. To begin assembly, push a SAUDER TWIST-LOCK® å FASTENER (II) into the large holes in the RIGHT END (A) and LEFT END (B).
- Page 7 Step Step 2 Fasten eight RAIL BRACKETS (PP) to the ENDS (A and B). å Use sixteen BLACK 9/16" LARGE HEAD SCREWS (VV). (8 used) BLACK 9/16" LARGE HEAD SCREW (16 used in this step) www.sauder.com/services 408363 Page 7...
- Page 8 Step Step 3 Fasten the EXTENSION BLOCKS (I) to the ENDS (A å and B). Use four SILVER 2" FLAT HEAD SCREWS (RR). SILVER 2" FLAT HEAD SCREW (4 used in this step) Page 8 408363 www.sauder.com/services...
- Page 9 NOTE: The CABINET RAILS are marked "CABINET å RIGHT" and "CABINET LEFT" for easy identifi cation. Roller end GOLD 5/16" FLAT HEAD SCREW (8 used in this step) Use exact Notched edge holes shown. Roller end Notched edge www.sauder.com/services 408363 Page 9...
- Page 10 EXTENSION BLOCK. Turn a SCREW into this hole. Push the release lever in and pull the SLIDE from the RAIL. Notched edge Open end GOLD 5/16" FLAT HEAD SCREW (4 used in this step) Notched edge Hole Open end Page 10 408363 www.sauder.com/services...
- Page 11 Fasten the RIGHT END (A) and the LEFT END (B) to the å ® How to use the SAUDER TWIST-LOCK FASTENER BACK (E). Tighten four TWIST-LOCK® FASTENERS. 1. Insert the dowel end of the FASTENER into the hole of the adjoining part.
- Page 12 Slide the END MOLDINGS (Z) onto the notched edges of å the ENDS (A and B). * U.S. Patent No. 5,499,886 å Notched edge These edges should be even. Slide the END MOLDINGS (Z) onto the notched edges. Page 12 408363 www.sauder.com/services...
- Page 13 Fasten the BOTTOM (D) to the ENDS (A and B). Use four å BLACK 1-7/8" FLAT HEAD SCREWS (SS). f a c s u r n i s h U n fi BLACK 1-7/8" FLAT HEAD SCREW (4 used in this step) www.sauder.com/services 408363 Page 13...
- Page 14 Step Step 9 Fasten the CORNER BRACKETS (MM) to the BOTTOM (D). å Use eight BLACK 9/16" LARGE HEAD SCREWS (VV). Use these two holes. BLACK 9/16" LARGE HEAD SCREW (8 used in this step) Page 14 408363 www.sauder.com/services...
- Page 15 Slide the SKIRTS (F and G) onto the CORNER BRACKETS (MM). å NOTE: Pay close attention to the positioning of the parts. Be sure å the grooves in the SKIRTS face in. These holes should be located here on all the SKIRTS. Groove www.sauder.com/services 408363 Page 15...
- Page 16 å and SKIRTS (F and G). Use eight BLACK 9/16" LARGE HEAD SCREWS (VV). BLACK 9/16" LARGE HEAD SCREW BLACK 1-1/2" PAN HEAD SCREW (8 used for the METAL BRACKETS) (4 used for the CORNER CAPS) Page 16 408363 www.sauder.com/services...
- Page 17 L i b r a r y B a s Assembly for Library Return on the LEFT 408364 Library Hutch 3 6 5 4 0 8 r a r y L i b B a s www.sauder.com/services 408363 Page 17...
- Page 18 DRAWER SIDES (D87 and D88). Use four BLACK 1-9/16" FLAT HEAD SCREWS (30S). NOTE: Be sure the LARGE DRAWER BOTTOM (D708) å inserts into the groove of the LARGE DRAWER BACK (D78). Repeat this step for the remaining drawers. å Page 18 408363 www.sauder.com/services...
- Page 19 SLIDE. Screw head - turn CAM to line up holes in Open end the SLIDES with holes in DRAWER SIDES Open end GOLD 5/16" FLAT HEAD SCREW (4 used in this step) www.sauder.com/services 408363 Page 19...
- Page 20 Repeat this step for the last drawer. å Roller end Screw head - turn CAM to line up holes in the SLIDES with holes in DRAWER SIDES Roller end GOLD 5/16" FLAT HEAD SCREW (8 used in this step) Page 20 408363 www.sauder.com/services...
- Page 21 Slide the FILE RODS (RR) into the FILE GLIDE (HH) on the å RIGHT DRAWER SIDE. Slide another FILE GLIDE (HH) onto the other end of the FILE å RODS (RR), then press this FILE GLIDE over the LEFT DRAWER SIDE (D88). www.sauder.com/services 408363 Page 21...
- Page 22 Fasten a PULL (KK) to the LARGE DRAWER FRONT (T). å Use two BLACK 1" PAN HEAD SCREWS (UU). Repeat fastening the PULLS to the other drawers. å BLACK 1" PAN HEAD SCREW (6 used in this step) Page 22 408363 www.sauder.com/services...
- Page 23 B a s BLACK 9/16" LARGE HEAD SCREW (8 used in this step) Assembly for Library Return on the RIGHT 4 0 8 3 6 5 L i b r a r y B a s www.sauder.com/services 408363 Page 23...
- Page 24 RAILS on the unit and push the drawer into the unit until the drawer is fully inserted. The drawer will push in hard until it is all the way in, then it will slide in and out easier. 75 lbs. 5 lbs. 15 lbs. 35 lbs. Page 24 408363 www.sauder.com/services...
- Page 25 #4. The higher the screw in the oblong hole, the higher your drawer front will be. The lower the screw, the lower the drawer front. www.sauder.com/services 408363 Page 25...
- Page 26 EXTRÉMITÉ DROITE ..........1 GLISSIÈRE DROITE D’ÉLÉMENT ....2 pour future référence. EXTRÉMITÉ GAUCHE ..........1 GLISSIÈRE GAUCHE D’ÉLÉMENT ....2 Pour contacter Sauder en ce qui concerne cet DESSUS ................1 COULISSE DROITE DE TIROIR ......2 élément, faire référence DESSOUS ................1 COULISSE GAUCHE DE TIROIR .....2...
- Page 27 Enfi ler les MOULURES D’EXTRÉMITÉ (Z) sur les chants crantés des EXTRÉMITÉS (A et B). Pour commencer l’ a ssemblage, enfoncer une FIXATION TWIST-LOCK® SAUDER (II) dans les gros trous de l’EXTRÉMITÉ DROITE (A) et * Brevet État Unis n_ 5.499.886 l’EXTRÉMITÉ GAUCHE (B).
- Page 28 REMARQUE : Prière de lire attentivement les importantes informations concernant la sécurité qui fi gurent sur les pages arrière du manuel d’instructions. Ceci complète l’ a ssemblage. Pour nettoyer, utiliser l’encaustique pour meubles préférée ou un chiff on humide. Essuyer. Page 28 408363 www.sauder.com/services...
- Page 29 (ENSEMBLE DE GLISSIÈRE ILLUSTRÉ À PART) et conserver le livret RIEL DE EXTENSIÓN ..........2 EXTREMO IZQUIERDO ..........1 pour future référence. Pour contacter Sauder CORREDERA DE EXTENSIÓN ......2 PANEL SUPERIOR ............1 en ce qui concerne cet CORRIMIENTO DE ARCHIVERO.....2 FONDO .................1 élément, faire référence...
- Page 30 Cómo utilizar el SUJETADOR TWIST-LOCK® SAUDER (Refi érase al diagrama ampliado.) Para comenzar el ensamblaje, empuje un SUJETADOR TWIST-LOCK® SAUDER (II) dentro de los agujeros grandes del 1. Inserte el extremo con cabilla del SUJETADOR dentro del EXTREMO DERECHO (A) y del EXTREMO IZQUIERDO (B).
- Page 31 "DRAWER RIGHT" (derecha) y la inscripción "DRAWER LEFT" (izquierda) para identifi carlas fácilmente. NOTA: La cabeza de tornillo del EXCÉNTRICO debe ser visible a través del agujero alargado de la CORREDERA. Repita este paso para el otro cajón. www.sauder.com/services 408363 Page 31...
- Page 32 Base de Biblioteca 408365. Utilice ocho para información importante sobre la seguridad. TORNILLOS NEGROS DE CABEZA GRANDE de 14 mm (VV). Esto completa el ensamblaje. Limpie con su pulimento para muebles preferido o un paño húmedo. Seque con un paño. Page 32 408363 www.sauder.com/services...
- Page 33 à Les téléviseurs peuvent être particulièrement un téléviseur. cet eff et. lourds. De plus, le poids et l’emplacement du tube image ont tendance à rendre les téléviseurs instables et enclins à tomber vers l’ a vant. www.sauder.com/services 408363 Page 33...
- Page 34 Además, el peso y la ubicación del tubo de imagen tienden a causar la inestabilidad de televisores y propensa a volcarse hacia adelante. Page 34 408363 www.sauder.com/services...
- Page 35 à compter de la date d'achat la première fois et qui sont signalés à Sauder dans les limites de couverture de la contre tout défaut de matériaux ou de fabrication des composantes de mobilier Sauder.
- Page 36 Dear Valued Customer: So, how did it go? Thanks so much for choosing Sauder® furniture. I hope the Set a world record for speed? purchase and assembly process was a positive experience Feeling good about yourself? and you feel good about the furniture you just built. If you Nice.
Need help?
Do you have a question about the Office Port Library Return 408363 and is the answer not in the manual?
Questions and answers