Advertisement
Available languages
Available languages
Quick Links
THIS INSTRUCTION BOOKLET CONTAINS IMPORTANT SAFETY INFORMATION.
DO NOT RETURN YOUR UNIT
TO THE STORE
Contact us first
www.sauder.com
For immediate service,
our website is available
24 hours a day, 7 days a week
to order replacement parts,
access assembly tips,
register your product,
and view Sauder products.
Mon-Fri -- 9am-5:30pm ET
United States and Canada (except holidays)
Consumer Services 1--800--523--3987
Most replacement parts ship from our
facility in one or two business days.
The center pages of this book are French instructions.
Se incluyen las instrucciones en español en el centro
de este folleto. Para facilitar su uso, se puede
desprenderlas fácilmente.
register your new purchase online
register your new purchase online
www.sauder.com
www.sauder.com
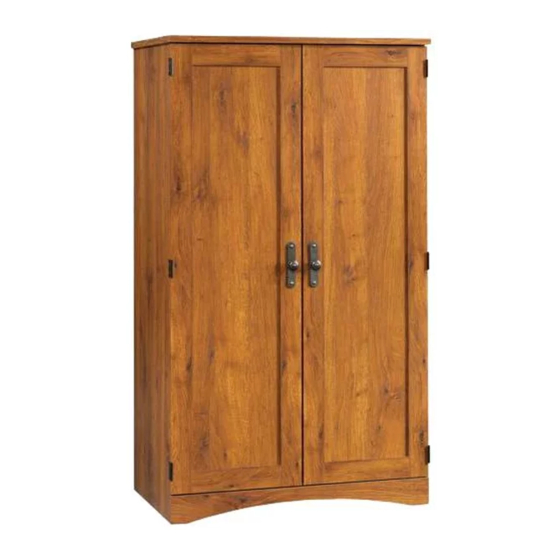
Computer Armoire
Model # 404958
Assembly Instructions
PLEASE READ AND KEEP FOR FUTURE REFERENCE.
NOTE
Record the date you purchased this unit and save the booklet for
future reference.
If you ever need to contact Sauder about this unit, refer to the lot #
and the model # when calling our toll-free number. For more
information about our furniture, company, or to order replacement
parts, please visit our web site.
Lot #: 351201
Date Purchased:
03 / 26 / 13
Advertisement

Related Manuals for Sauder 404958


Summary of Contents for Sauder 404958
- Page 1 Se incluyen las instrucciones en español en el centro de este folleto. Para facilitar su uso, se puede If you ever need to contact Sauder about this unit, refer to the lot # desprenderlas fácilmente. and the model # when calling our toll-free number. For more information about our furniture, company, or to order replacement parts, please visit our web site.
-
Page 2: Parts Identification
DOOR - - 2 ADJUSTABLE SHELF - - 1 SHELF - - 1 ADJUSTABLE PRINTER SKIRT - - 1 CD SHELF - - 1 SHELF - - 1 SHELF - - 1 UPPER LOWER BACK - - 1 BACK - - 1 404958... -
Page 3: Hardware Identification
HOLDER - - 1 HOLDER - - 1 CORD FELT DISC PULL - - 2 BACKPLATE - - 2 CLIP - - 1 CARD - - 1 STRIKE METAL RUBBER PLATE - - 2 PIN - - 12 SLEEVE - - 8 404958... - Page 4 BLACK 9/16” LARGE HEAD SCREW - - 36 BLACK 1/2” FLAT HEAD SCREW - - 2 GOLD 5/16” FLAT HEAD SCREW - - 8 NAIL - - 48 ASSEMBLY TOOLS REQUIRED NO. 2 PHILLIPS SCREWDRIVER TIP SHOWN ACTUAL SIZE HAMMER 404958...
- Page 5 Assemble your unit on a carpeted floor or on the empty carton to avoid scratching your unit or the floor. - Push fourteen HIDDEN CAMS (X2) into the ENDS (A and B), UPRIGHT (C), BOTTOM (F), and SHELF (G). Then, insert a CAM DOWEL (Y2) into each HIDDEN CAM. www.sauder.com/services 404958...
- Page 6 GOLD 5/16” FLAT HEAD SCREW (8 used in this step) - Fasten the CABINET RIGHT (35AW) and the CABINET LEFT (35AX) to the ENDS (A and B) and SHORT UPRIGHT (D). Use eight GOLD 5/16” FLAT HEAD SCREWS (QQ). www.sauder.com/services 404958...
- Page 7 Arrow Caution Start Tighten Arrow Maximum 210 degrees Risk of damage or Minimum injury. Hidden Cams 190 degrees must be completely tightened. Hidden Cams that are not completely tightened may loosen, and parts may separate. To completely tighten: www.sauder.com/services 404958...
- Page 8 Minimum 190 degrees - Fasten the BOTTOM (F) and SHELF (G) to the LEFT END (B). Tighten four HIDDEN CAMS. - Fasten the SHELF (G) to the UPRIGHT (C). Use two BLACK 1- -7/8” FLAT HEAD SCREWS (LL). www.sauder.com/services 404958...
- Page 9 Finished edge Surface without holes - Insert four METAL PINS (JJ) into the CD SHELF (Q). - Insert the METAL PINS (JJ) in one end of the CD SHELF (Q) into the holes in the UPRIGHT (C). www.sauder.com/services 404958...
-
Page 10: Liste De Pieces
Sauder. REMARQUE : Ce manuel d’instructions contient d’importantes informations relatives à la sécurité. À lire et conserver pour Du lundi au vendredi de 9 h 00 à... - Page 11 DESSOUS (F). Utiliser cinq VIS NOIRES TÊTE Flèche LARGE 14 mm (OO). 210 degrés -- serré correctement 190 degrés -- Non serré ! Fixer le LOQUETEAU MAGNÉTIQUE (AA) au DESSUS (E). Utiliser deux VIS NOIRES TÊTE LARGE 14 mm (OO). 404958 Fr...
- Page 12 étape. REMARQUE : Les surfaces des PLAQUES DE Pour insérer les PORTE CD (CC et DD) dans l’unité, BUTÉE comportant l’inscription « SAUDER » insérer les montants des PORTE CD dans les trous devraient être dirigées vers le haut. pré percés de la TABLETTE POUR CD (Q), puis faire pivoter l’autre bord du PORTE CD...
- Page 13 D’ADAPTATION À UN USAGE PARTICULIER, NE substantiellement l’utilisation du produit. S’ÉTENDRA AU- -DELÀ DU TERME DE LA PRÉSENTE 2. En vertu de la présente garantie, Sauder réparera ou GARANTIE EXPRESSE. Certains états ne permettant pas remplacera, à sa seule discrétion, toute pièce de meuble que des limites soient imposées quant à...
- Page 14 Les téléviseurs peuvent être très conçu pour supporter un lourds. De plus, le poids et l’emplacement téléviseur. du tube image ont tendance à rendre les té- léviseurs instables et enclins à tomber vers l’avant. 404958 Fr...
- Page 15 - Fasten the SHORT UPRIGHT (D) to the BOTTOM (F). Use two BLACK 1- -7/8” FLAT HEAD SCREWS (LL). - Fasten the RIGHT END (A) to the TOP (E), BOTTOM (F), and SHELF (G). Tighten six HIDDEN CAMS. NOTE: Be sure the METAL PINS in the CD SHELF insert into the holes in the RIGHT END. www.sauder.com/services 404958...
- Page 16 - Fasten the SKIRT (O) to the ENDS (A and B) and BOTTOM (F). Use five BLACK 9/16” LARGE HEAD SCREWS (OO). - Fasten the MAGNETIC CATCH (AA) to the TOP (E). Use two BLACK 9/16” LARGE HEAD SCREWS (OO). www.sauder.com/services 404958...
- Page 17 NOTE: Be sure to tap NAILS into the holes that line up over the UPRIGHTS (C and D). NOTE: Perforations have been provided for access through the LOWER BACK (S). Carefully cut out the rectangle for proper ventilation of your CPU. www.sauder.com/services 404958...
- Page 18 - Fasten three HINGES (Z) to each DOOR (I). Use twelve BLACK 9/16” LARGE HEAD SCREWS (OO). - Fasten a STRIKE PLATE (II) to each DOOR (I). Use two BLACK 1/2” FLAT HEAD SCREWS (PP). NOTE: The surfaces of the STRIKE PLATES with “SAUDER” should be facing up. www.sauder.com/services...
- Page 19 - Fasten a BACKPLATE (FF) and PULL (EE) to the DOOR (I). Use a GOLD 1” MACHINE SCREW (NN). - Repeat this step for the other DOOR (I). NOTE: To make adjustments to the DOORS, loosen the SCREWS in the HINGES, make needed adjustments, and tighten the SCREWS. www.sauder.com/services 404958...
- Page 20 - Fasten the DRAWER RIGHT (35AY) and DRAWER LEFT (35AZ) to the KEYBOARD SHELF (J) and PRINTER SHELF (N). Use eight BROWN 1” FLAT HEAD SCREWS (MM). - Turn the CORD CLIP (GG) into the KEYBOARD SHELF (J). NOTE: The CORD CLIP is used to hold your keyboard cord against the KEYBOARD SHELF. www.sauder.com/services 404958...
- Page 21 Lift the front of the SHELF up and slide it into the unit. Repeat this process to insert the PRINTER SHELF (N). NOTE: The DOORS should be open completely to pull out the KEYBOARD and PRINTER SHELVES. www.sauder.com/services 404958...
- Page 22 ENDS (A and B) and UPRIGHT (C). Set the ADJUSTABLE SHELVES (L and M) onto the METAL PINS. NOTE: Please read the back page of the instruction booklet for important safety information. This completes assembly. Clean with your favorite furniture polish or a damp cloth. Wipe dry. www.sauder.com/services 404958...
- Page 23 6. For warranty inquiries or claims, you may contact inconsistent with its intended use. Sauder shall not be Sauder at 1- -800- -523- -3987 or visit us at www.sauder.com. liable for any expense to repair or replace any item placed Sauder may require warranty claims to be submitted in on, in, or around any Sauder furniture product.
- Page 24 Certificate of Conformity 1. This certificate applies to the Sauder Woodworking Product identified by this Instruction Book. 2. This certificate applies to compliance of this product with the CPSC Ban on Lead--Containing Paint (16 CFR 1303).
Need help?
Do you have a question about the 404958 and is the answer not in the manual?
Questions and answers