Advertisement
Quick Links
sauder.com
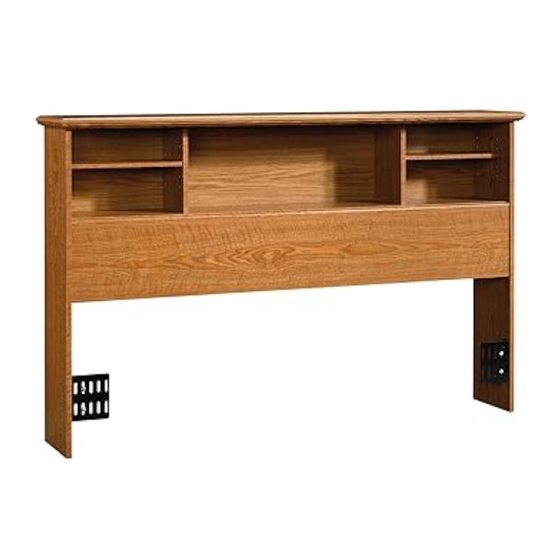
Full/Queen Headboard
Orchard Hills Collection | 401294
Need help? Visit Sauder.com to view video assembly tips or chat with a live rep.
Prefer the phone? Call 1-800-523-3987.
Share your journey!
You are getting sleepy.
Very sleepy.
NOTE: THIS INSTRUCTION
BOOKLET CONTAINS IMPORTANT
SAFETY INFORMATION.
PLEASE READ AND KEEP FOR
FUTURE REFERENCE.
English pg 1-14
Français pg 15-16
Español pg 17-18
Lot # 376048
08/27/15
Purchased: __________________
Be sure to give us a ring before
making any returns. 1-800-523-3987
Advertisement

Related Manuals for Sauder 401294


Summary of Contents for Sauder 401294
- Page 1 Orchard Hills Collection | 401294 NOTE: THIS INSTRUCTION BOOKLET CONTAINS IMPORTANT SAFETY INFORMATION. Need help? Visit Sauder.com to view video assembly tips or chat with a live rep. PLEASE READ AND KEEP FOR FUTURE REFERENCE. Prefer the phone? Call 1-800-523-3987.
- Page 2 Use this part identifi cation to help identify similar parts. RIGHT END (1) LEFT END (1) ADJUSTABLE SHELF (2) SHELF (1) TOP (1) PANEL (1) BACK (1) UPRIGHT (2) FRONT MOLDING (1) RIGHT MOLDING (1) LEFT MOLDING (1) Page 2 401294 www.sauder.com/services...
- Page 3 Now you know Part Identifi cation our ABCs. www.sauder.com/services 401294 Page 3...
- Page 4 METAL PIN - 16 WASHER - 4 117S BLACK 1-7/8" FLAT HEAD SCREW - 4 SILVER 1-1/4" BOLT - 4 BLACK 9/16" LARGE HEAD SCREW - 16 SILVER 1-1/8" FLAT HEAD SCREW - 8 NAIL - 32 Page 4 401294 www.sauder.com/services...
- Page 5 PANEL (F). Then, insert the metal end of a CAM DOWEL (N2) into each HIDDEN CAM. Do not tighten the HIDDEN CAMS in this step. Arrow (8 used) Arrow Arrow Insert the metal end of the CAM DOWEL into the HIDDEN CAM. www.sauder.com/services 401294 Page 5...
- Page 6 Step 2 Tap two MOLDING CONNECTORS (P) into the notches in å the MOLDINGS (I, J, and K). Use your hammer to tap the MOLDING CONNECTORS (P) into the notches in the MOLDINGS. Flat end Flat end Page 6 401294 www.sauder.com/services...
-
Page 7: U Black 1-7/8" Flat Head Screw
BLACK 1-7/8" FLAT HEAD SCREWS (U). Do not stand the unit upright without the BACK fastened. The unit may collapse. Remember: Righty tighty. Lefty loosey. BLACK 1-7/8" FLAT HEAD SCREW (2 used in this step) Finished surface Finished edge www.sauder.com/services 401294 Page 7... - Page 8 9/16" LARGE HEAD SCREWS (X) through the ANGLE BRACKETS on the PANEL and into the SHELF. BLACK 9/16" LARGE HEAD SCREW (8 used in this step) S u r f a c i t h H I D D E N Rounded edge Page 8 401294 www.sauder.com/services...
- Page 9 Tighten Risk of damage or Arrow injury. HIDDEN CAMS must be completely Arrow Maximum tightened. HIDDEN 210 degrees CAMS that are not completely tightened may loosen, and parts may separate. To Minimum completely tighten: 190 degrees www.sauder.com/services 401294 Page 9...
-
Page 10: Right
Fasten the RIGHT END (A) to the SHELF (D) and å PANEL (F). Tighten four HIDDEN CAMS. BLACK 1-7/8" FLAT HEAD SCREW (2 used in this step) Finished edge Maximum Arrow 210 degrees Minimum 190 degrees Page 10 401294 www.sauder.com/services... - Page 11 Insert four METAL PINS (S) into the holes in å the SHELF (D). Push the UPRIGHTS (H) onto the METAL PINS å in the SHELF (D). Surface without holes Finished edge Surface with holes Finished edge www.sauder.com/services 401294 Page 11...
- Page 12 NOTE: Be sure the METAL PINS in the UPRIGHTS insert å into the TOP. SILVER 1-1/8" FLAT HEAD SCREW (8 used in this step) Long rounded edge (4 used) r f a w i t l e s Page 12 401294 www.sauder.com/services...
-
Page 13: Front
UPRIGHTS (H). NAIL NOTE: Perforations have been provided for access å (32 used in this step) through the BACK. Carefully cut out the holes needed. These holes must line up over the UPRIGHTS (H). www.sauder.com/services 401294 Page 13... -
Page 14: S Silver 1-1/4" Bolt
7 lbs. your arms. 40 lbs. 30 lbs. total 7 lbs. 117S BLACK 9/16" LARGE HEAD SCREW (8 used to attach the BRACKETS) 117S 117S SILVER 1-1/4" BOLT WASHER (4 of each used in this step) Page 14 401294 www.sauder.com/services... -
Page 15: Français
élément et conserver le livret pour future référence. EXTRÉMITÉ DROITE ..........1 CONSOLE DE TÊTE DE LIT ........2 Pour contacter Sauder EXTRÉMITÉ GAUCHE ..........1 EXCENTRIQUE ESCAMOTABLE .....8 en ce qui concerne cet TABLETTE RÉGLABLE ..........2 CHEVILLE D'EXCENTRIQUE ......8 élément, faire référence... - Page 16 CONSOLES DE TÊTE DE LIT. Fixer l'EXTRÉMITÉ DROITE (A) à la TABLETTE (D) et au PANNEAU (F). Serrer quatre EXCENTRIQUES ESCAMOTABLES. Ceci complète l'assemblage. Nettoyer à l’ a ide d’une encaustique pour meubles ou d’un chiff on humide. Essuyer. Page 16 401294 www.sauder.com/services...
-
Page 17: Español
EXTREMO DERECHO ..........1 MÉNSULA DE CABECERA ........2 et conserver le livret pour future référence. EXTREMO IZQUIERDO ..........1 EXCÉNTRICO ESCONDIDO .......8 Pour contacter Sauder ESTANTE AJUSTABLE ..........2 PASADOR DE EXCÉNTRICO ......8 en ce qui concerne cet ESTANTE ................1 SOPORTE ANGULAR ..........4 élément, faire référence... - Page 18 Fije el EXTREMO DERECHO (A) al ESTANTE (D) y al PANEL (F). Apriete TUERCAS (Q) a través de las MÉNSULAS DE CABECERA. cuatro EXCÉNTRICOS ESCONDIDOS. Esto completa el ensamblaje. Limpie con su pulimento para muebles preferido o un paño húmedo. Seque con un paño. Page 18 401294 www.sauder.com/services...
- Page 19 à compter de la date d'achat la première fois et qui sont signalés à Sauder dans les limites de couverture de la contre tout défaut de matériaux ou de fabrication des composantes de mobilier Sauder.
- Page 20 Dear Valued Customer: So, how did it go? Thanks so much for choosing Sauder® furniture. I hope the Set a world record for speed? purchase and assembly process was a positive experience Feeling good about yourself? and you feel good about the furniture you just built. If you Nice.
Need help?
Do you have a question about the 401294 and is the answer not in the manual?
Questions and answers