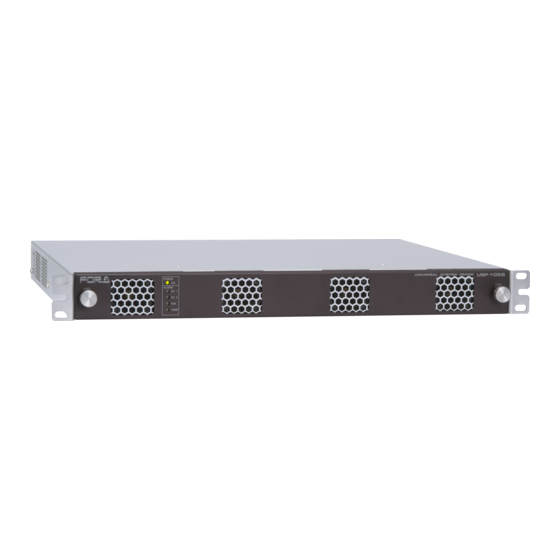
Advertisement
Quick Links
USF-105AS
Quick Setup Guide
1. Installing the AC Cord Clamp
Secure the AC cord with the supplied ladder strap/retaining clip assembly to prevent accidental disconnection from the USF-105AS.
Apply before mounting on the rack.
1) Wrap the retaining clip around the AC cord. (with the anchor of the ladder strap toward the unit.)
2) Insert the anchor into the hole next to the AC IN socket.
3) Lightly fasten the clip around the AC cord.
4) Plug in the power cord.
5) Slide the clip on the ladder strap toward the plug.
6) Fasten the clip tightly.
7) Gently pull on the AC cord to ensure it is secured.
2)
4)
2. Opening the Front Panel
The Front panel may be difficult to open if the USF frame is placed on a desk, and may be damaged the front panel if it is forced to
open. Perform the following steps after setting the frame in a rack.
POWER
ON
ALARM
DC 1
DC 2
FAN
TEMP
Loosen the two thumbscrews of the front
panel by turning them counterclockwise.
An OPEN alarm sounds intermittently, every 30 seconds, when the front panel is opened. After 5 minutes, the alarm will sound
continuously until the front panel is closed. In case the power is on, complete the procedure in a short period of time
USF105AS_SETUPGUIDE-E-11.DOCX
5)
6)
3)
UNIVERSAL SYSTEM FRAME
USF-105AS
Pull out the front panel grasping the
thumbscrews. Cooling fans stop
while the front panel is open.
Pull out the front panel.
Packing list
USF-105AS: 1, AC Cord: 1 set,
DVD-ROM: 1, Air duct unit: 1,
Quick Setup Guide: 1 (This guide)
3. Front Interior
The slot configuration as shown below is revealed when the front panel is removed.
(1)
(2)
SLOT 5
(3)
No.
Slot Type
Dedicated power unit is installed in this slot as standard. Power is supplied when the switch is turned
(1)
Power Supply 1 slot
on.
Slot for redundant power supply USF-105PS. Redundant operation available when optional USF-105PS
(2)
Power Supply 2 slot
is installed. A blank panel will otherwise cover the slot.
Network module is installed in this slot. Enables you to monitor power supply and fan states via SNMP
(3)
Control module slot
from back port LAN 1/LAN A and alarm output via GPI. Distributes reference signal to each module.
Dedicated USF module slots. (Front USF modules)
(4)
USF module slot
For details on module operation, refer to the respective operation manuals.
4. USF Module Installation
USF Modules can be installed into any free slot if there are no installation slot limitations. If multiple free slots exist, do not install
modules side-by-side but leave slots open to prevent overheating and facilitate signal connection from the rear panel.
The procedure for installing the USF module in Slot 1 is described below as an example.
Installing a USF Rear Module
Open the front panel
Slot 1 is the top slot in the left module block in the
and shut down the
rear panel. Remove the blank panel by detaching
USF-105AS power
the two screws on both ends. Keep the blank panel
supply.
and screws in a safe place after removal.
Installing a USF Front Module
Make sure to install the front module after installing the rear module.
1) SLOT 1 is the top slot in the right block of the front panel. (Refer to Step 3. "Front Interior.")
2) Set the module on the guide rail and carefully insert the module slowly.
Guide Rail
Guide Rail
You can download manuals and other documents by registering your email address.
(4)
SLOT 3
SLOT 1
SLOT 2
SLOT 4
(4)
Description
1
2
1
2
3G/HD/SD SDI OUT
3G/HD/SD SDI IN
USF-1043FS
Insert the rear module into
the slot and fasten both
screws.
Guide Rail
Guide Rail
https://www.for-a.com/
3
4
Advertisement

Summary of Contents for FOR-A USF-105AS
- Page 1 3. Front Interior The slot configuration as shown below is revealed when the front panel is removed. Secure the AC cord with the supplied ladder strap/retaining clip assembly to prevent accidental disconnection from the USF-105AS. Apply before mounting on the rack.
- Page 2 When USF-105AS is network connected via network to a PC, operation can be monitored on Web/SNMP manager using a web browser, and GPIO alarm setting can be entered. There are two ways to connect USF-105AS to a PC; using LAN A or LAN 1 port.


Need help?
Do you have a question about the USF-105AS and is the answer not in the manual?
Questions and answers