Advertisement
Quick Links
Advertisement

Related Manuals for Casall R300 II


Summary of Contents for Casall R300 II
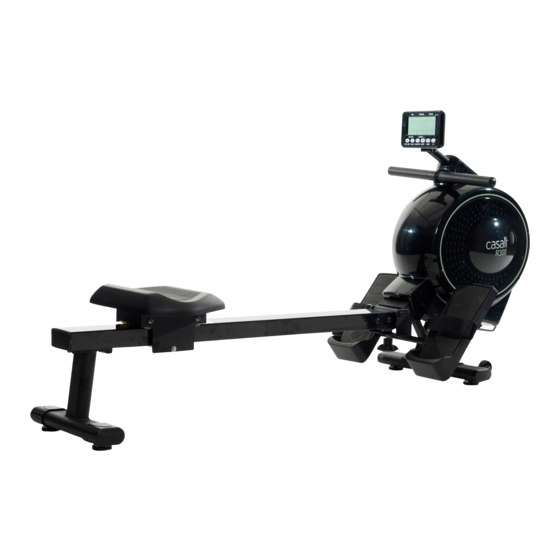
- Page 1 Casall R300 II Manual ROWER MACHINE...
- Page 2 Important: Please locate your serial number and record in the box below for service support purposes. Serial number here: - 3 -...
- Page 3 R300 II...
-
Page 4: Assembly Diagram
Assembly Diagram... -
Page 5: Exploded Diagram
EXPLODED DIAGRAM - 3 -... - Page 6 Parts List Description Quantity COMPUTER SCREW FOR FIXING COMPUTER MAIN FRAME BRACKET FOR FIXING COMPUTER SCREW M6xP1.0x57L FIXING CAP FLAT WASHER φ6xφ16x1t NYLON NUT M6 STRAP HANDLABAR HANDLEBAR FOAM LEFT COVER B-10 L RIGHT COVER B-10 R SCREW M4x40L B-11 SCREW M5x16L B-12 SCREW M5x16L...
- Page 7 CAP FOR REAR STABLILZER HEXAGON NUT 3/8”-16x3t ADJUSTING CAP SCREW 3/16” FOR REAR STABILIZER FIXED HOLDER FIXED SPINDLE OF HOLDER FIXED FLAT WASHERφ8xφ16x2t OF HOLDER FIXED SCREW M8xP1.25x20L OF HOLDER SEAT ROLLING SLIDER NYLON NUT M6 FLAT WASHERφ6xφ16x2t BUSHING φ8xφ11.6x14.8 PU WHEELφ36x17W ROLLER AXLE H-10...
- Page 8 Steps 1 Fit the front stabilizer (F) to the main frame and secure it with 2 of screws M8xP1.25x55L carriage (I-1), 2 flat washers (I-2), and two nut (I-3). Make sure they are securely tightened. Steps 2 Fit paddle holder (E) to the main frame (B) and secure it M8xP1.25x20L screws (I-4) and 4 with 4 flat washers (I-2).
- Page 9 Steps 3 Please remove the M8xP1.25x20L Screws (H-3) and Flat Washers (H-2) on the rear stabilizer (G). Then fit the rear stabilizer (G), and then attach the rear stabilizer (G) with slippery rail (H-12) by M8xP1.25x20L Screws (H-3) and Flat Washers (H-2). Remarks: Do not screw one set of the M8xP1.25x20L Screws and Flat washers too firm at one time.
- Page 10 Steps 5 Please remove the M8xP1.25x20L Screws (H-3) and Flat Washers (H-2) on the frame(B), then insert the slippery rail (H-12) to the Main Frame (B) and attach by M8xP1.25x20L Screws (H-3) and Flat Washers (H-2). Remarks: Do not screw one set of the M8xP1.25x20L Screws and Flat washers too firm at one time.
- Page 11 Steps 7 Plug the Adaptor (M) into the DC hole (B-14) to start the computer - 5 -...
- Page 12 Folding instructions 2. Turn the rail 90 degree then inert the rail 1. Release the knob (H-20) and put out the into the notch on the frame rail (H-12), then pull the rail out. 3. Use the knob to lock the rail onto the frame.
- Page 13 SM5835-61 INSTRUCTIONAL MANUAL !!! For simple exercise, it is not always necessary to select a training program or manually set the TIME, DISTANCE or other values. You can simply start pedaling. ...
- Page 14 As soon as the computer is connected with power supply, an acoustic signal sounds and all of the displays are shown on LCD for 2 seconds. If no button are pressed and the pedals have not been moved for approx. 4 minutes, the computer will switch to power saving mode. And display clock, calendar and room Temp. Only. DISPLAY & BUTTON FUNCTIONS Training Values Display Range Description/ Setting Range SPM 0~999 ‐Strokes per minute TIME/500m 0.0 ~ 99:00min. ‐User exercising time displaying; ‐It will scan in every 6s and display the remain time to finish 500 meters rowing according to current speed. METERS 0~9999m ‐Setting range 50~1000 CALORIES 0 ~ 9999 Cal. ‐Burned calories during rowing. ‐Setting range 0~9990 STROKES ...
- Page 15 Then MANUAL‐‐>PROGRAM‐‐>RACE‐‐>USER is flashing with 1Hz. Press UP and DOWN to choose MANUAL and confirm by pressing ENTER. If you have previously selected a program or started your workout, press RESET to return to the starting display. ‐Press START/STOP button to start workout immediately without entering further settings. ‐Press UP and DOWN keys to input your personal settings and press ENTER to confirm. The following fields will flash in turn: . Resistance level (1~16) ’ . TIME (or METERS) (Time and Meters can t preset at the same time.) . CALORIES Use UP & DOWN to set values and confirm your selection by ENTER button. ...
- Page 16 Interval programs P2‐ P3‐ P7‐ P12 Increasing resistance level programs P6‐ P9‐ P11 Increasing and decreasing resistance level programs P1‐ P4‐ P5‐ P8 ‐P10 The stored training programs are designed especially to enhance aerobic base fitness. . As a beginner you should start with those programs slowly and set a low paddle resistance. . You should only graduate to Interval programs once you have been rowing for several times. ‐Press START/STOP to end exercising. All exercising value will remain. ‐Press RESET to reverse to workout selection menu. Training with competition mode (RACE) ...
-
Page 17: Troubleshooting
setting, hold on pressing ENTER button. ‐Set the desired session TIME with UP & DOWN buttons and press ENTER to confirm. ‐ Press STATR/STOP to start workout. As soon as one of the set value reach the preset Target, the computer will alarm with Bi‐bi sound and stop. ‐You can adjust the level of resistance on the paddles while rowing by pressing UP and DOWN keys. The newly set level value will be shown in the profile(default value is Level 1). ‐Press START/STOP to end exercising. All exercising value will remain. ‐Press RESET to reverse to workout selection menu. Trouble shooting: E‐2 : Motor stroke over the normal range. Plug the adaptor again. Repowering on the console and the motor will back to the normal range. E‐7 : Check if cables were well connected or damaged. Attention! All preset data will be lost when unplug the power (adaptor) from the "machine".
Need help?
Do you have a question about the R300 II and is the answer not in the manual?
Questions and answers