Table of Contents
Advertisement
Quick Links
Advertisement
Table of Contents

Subscribe to Our Youtube Channel
Related Manuals for Casall INFINITY 1.3X 93013


Summary of Contents for Casall INFINITY 1.3X 93013
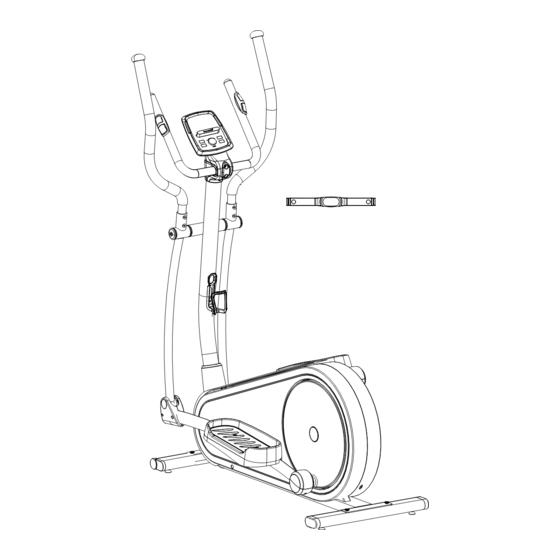
- Page 1 Casall INFINITY 1.3X CROSSTRAINER 93013...
- Page 2 Important: Please locate your serial number and record in the box below for service support purposes. Serial number here: ...
- Page 3 INFINITY 1.3X P-13 P-12 S c r e w M 3 * 1 4 L ( 2 ) Allen Bolt M7*P1.0*30L(2) A c o r n N u t f o r M 8 B o l t ( 2 ) C u r v e w a s h e r 1 7 .
- Page 4 INFINITY 1.3X P-16 B o x S p a n n e r ( 1 ) A l l e n K e y ( 2 ) P-17 P-19 Knob (foot pedal)M6*P1.0 (4) P-18 P i v o t T u b e ( 4 ) Spring Washer for handlebar bolt 6(black)(4) Carrage bolt M6*P1.0*40L (black)(4)
- Page 5 Assembly Diagram...
- Page 6 EXPLODED DIAGRAM...
- Page 7 PARTS LIST Item spec. Q'ty A , A-1 Computer & Screw for computer 1SET Chest belt Front handlebar Foam grip for front handlebar 2PCS φ7/8" End cap for foam grip 2PCS Hand pulse WP1007-33B 1SET Screw M3x20L 2 PCS Wire for hand pulse 1 PC Upper handlebar ( L) 1SET...
- Page 8 K-1~K-3 Rear stabilizer set 1SET L-1~L-11 Idler wheel set 1SET Front cover for computer Rear cover for computer Bottle holder Front cover (Left) for pedal post 2PCS Front cover (Right) for pedal post 2PCS Pedal (Left) M-7,M8 Left rear cover (upper/down) for pedal post 1SET Pedal (Right) M-10,M-11 Right rear cover (upper/down) for pedal post...
-
Page 9: Assembly Steps
ASSEMBLY STEPS STEP 1 Attach the Front Stabilizer (pt.J-1) to the Main Frame (pt.F-1) using two Allen bolt (pt.P-7) Attach the Rear Stabilizer (pt.K-1) to the Main Frame (pt.F-1) using two Allen bolt (pt.P-7). K - 1 M8*16L STEP 2 1. - Page 10 STEP 3 1. Attach the Front handlebar (pt.B-1) to the Handlebar post (pt.D-1) using the clamp cover (pt.P-3), and then fix with two Flat Washers (pt.P-2), two Spring Washers (pt.P-4), two Fixing Bolt (pt.P-1). 2. Pass the hand-pulse wire (pt.B-6) through the hole. 3.
- Page 11 STEP 4 1. Remove the pre-installed Screws (pt.D-3) on the handlebar post first. 2. Attach the Rear cover (pt.M-2) using two of Screws (pt.P-6) and one of Screws (pt.D- 3) . 3. Attach the Front cover (pt.M-1) using Screws (pt.D-3) 4.
- Page 12 Fix the two Lower handlebar (pt.E-1) to the Handlebar Post (pt.D-1) with one STEP 5 Axle (pt.M-19), two sets of Wave washer (pt.P-13), Flat washers (pt.P-12) and Gasket (pt.P-11) and Allen bolt (pt.P-10). Pay attention : Please use two allen key tools to fix bolt ( P-10 ) on both side at the same time.
- Page 13 STEP 6 1. Attach the Left and Right lower Handlebar (pt.E-1 L/R) to the Left and Right pedal post (pt.I-1 & I-3) using two Allen bolt (pt.P-14), four Flat washers (pt.P-15) and two Nylon nuts (pt.P-9). --- Figure A 2. Attach the Pedal post (pt.I-1 & I-3) onto the Crank connation set using one of Nylon nuts (pt.S-4), Flat washers (pt.S-3) and Plastic washers (pt.S-8).
- Page 14 STEP 7 1. Remove the pre-installed screws (pt.I-2) on the Pedal post first. 2. Attach the Lower handlebar (E-1 R/L) to the left and right pedal post (I-1), and then close the cover (M-4 & M-5) using screws (pt.P-5 & I-2). 3.
- Page 15 STEP 9 Connect the adaptor (N) to the DC hole (located on the back of the chain cover). 2. Adjust the belt to the position shown on the sketch. 3. The distance between the belt and the monitor should be 80cm ±10.
- Page 16 SM2564‐71 and iConsole App INSTRUCTION MANUAL Connection for mobile phone or pad ...
- Page 17 !!! For simple exercise, it is not always necessary to select a training program or manually set the TIME,DISTANCE or other values. You can simply start pedaling . As soon as the computer is connected with power supply, an acoustic signal sounds and all of the displays are shown on LCD for 2 seconds. Then wheel diameter (78.0) will be shown briefly, as well as unit KM (K) text would display on the right. DISPLAYS and BUTTON FUNCTIONS Training Values Display Range Setting Range TIME 0:00 ~ 99:59 min. 0:00 ~ 99:00 min. SPEED 0.0 ~ 99.9 KM / DISTANCE ...
- Page 18 Hand sensor for measurement . * The display in the center field depends on the type of exercise that has been set. The computer provides a number of ways to vary the exercise session and make it more motivating. The following exercising are available: ‐Manual Training (training without programs) ‐Training with Programs ( there are 12 programs built‐in, P01~P12) ‐Training with your own program (User program) ‐Training with the Heart Rate program (H.R.C) ‐Training with set output value (WATT) Starting exercise immediately (Manual) Once a power connection has been established, the computer will requires to create your own profile. Rotate and press joggle wheel to enter USER setting (for BODY FAT function), setting personal data in U1~U4. Press joggle wheel to go to workout selection mode. MANUAL is flashing in matrix display with 1Hz.If you have previously selected a program or started your workout, press RESET to return to the starting display. ‐Press START/STOP button to start workout immediately without entering further settings. ‐Press joggle wheel to enter your personal settings: the following fields will flash in turn . TIME . DISTANCE . CALORIES . PULSE ...
- Page 19 Press START/STOP to start workout. As soon as one of the set value reach the preset Target, the icon will flash in the appropriate display window (e.g. TIME) and several beeps sound. ‐You can adjust the level of resistance on the pedals while exercising by rotating joggle wheel up or down. The newly set value will be shown under the LOAD window (default value is Level 1).Without KEY entry for 3 seconds, the Load level value will change to WATT value. ‐Press START/STOP to end exercising. All exercising value will remain (HR signal would not effect). Selecting a Program to do training Once a power connection has been established, MANUAL is flashing in the display. ‐Rotate joggle wheel to go between M(Manual)→P(Program)→♥ (H.R.C.)→W(Watt)→U(User) cyclically. ‐Choose P(Program) and press joggle wheel to confirm. The programs are preset with profiles. Rotate the joggle wheel to select one from the 12 preset profiles. Set the desired session time with joggle wheel press STATR/STOP to start workout. ‐You can adjust the level of resistance on the pedals while exercising by rotating joggle wheel up or down. The newly set value will be shown under the LOAD window. Without KEY entry for 3 seconds, the Load level value will change to WATT value. ‐Program explain: Interval programs P2‐ P3‐ P7‐ P12 Increasing resistance level programs P6‐ P9‐ P11 Increasing and decreasing resistance level programs P1‐ P4‐ P5‐ P8 ‐P10 The stored training programs are designed especially to enhance aerobic base fitness. . As a beginner you should start with those programs slowly and set a low pedal resistance. . You should only graduate to Interval programs once you have been training for several times. Set program according to heart rate (H.R.C.) In this program, the exercise bike reacts to your pulse as measured by the hand sensors or chest belt. This programs allows you to exercise efficiently and safely within your required heart rate zone. In addition, simple graphics also show you whether you need to need to increase or decrease your stress ...
- Page 20 HRC75 This range of 75% of the maximum pulse rate is suitable for experienced users and athletes. HRC90 The anaerobic range of 90% of the maximum pulse rate is only suitable for competitive athletes and short sprint exercises. TAG The computer uses your Age to calculate a target pulse rate, which you can change as per your willing. Never select a target pulse that is higher than your age‐determined maximum pulse rate. ‐Press joggle wheel to select H.R.C. and enter by pressing it. Choose HRC55‐‐>HRC75‐‐>HRC90‐‐>TARGET. With HRC55,HRC75,HRC90, the max. Heart rate will be calculated by the computer automatically. ‐With the TARGET program, the preset value 100 will be shown. Rotate joggle wheel to set a value between 30~230 and confirm. The program has been saved. ‐Set the desired session time with joggle wheel and press STATR/STOP to start workout. For this program, it is necessary to keep your hands on the sensor grips or wear chest strap while exercising so that computer can detect and display your heart rate value. Program sequence: The computer sets a pedal resistance that keeps you exercising constantly within your target pulse rate. .If you are exercising and go below your preset pulse rate, the pedal resistance will automatically rise by one stress level every 30 seconds. .If you are exercising and go above your preset pulse rate, the pedal resistance will automatically decrease by one stress level every 15 seconds. If you have already reached the lowest level “1” and your pulse rate is still higher than your preset value, then after about 30 seconds an acoustic signal will alarm and computer program will end automatically. Exercising with set output values (Watt) Here you can enter a constant output value. The computer automatically adjusts the pedal resistance to your speed so that your output remains constant. ‐Press joggle wheel to select WATT and enter by pressing it. Rotate joggle wheel to set desired session output value (default value: 120). ‐Set the desired session time with joggle wheel press STATR/STOP to start workout. ‐You can adjust WATT level while exercising by rotating joggle wheel up or down. The newly set value will be shown under the WATT window. Without KEY entry for 3 seconds, the Load level value will change to WATT value. ...
- Page 21 User‐defined profile Here you can design your own profile with bars just like the preset program profiles. ‐Press joggle wheel to select USER PROGRAM and enter by pressing it. The first bar will be displayed. ‐Rotate joggle wheel to set resistance level and confirm by pressing it. The next bar will be displayed. ‐Continue this process till set up 8 bars. The max. Resistance level is 16. Once finishing your desired profile, press and hold joggle wheel for 2 seconds, the profile has been saved. ‐Set the desired session time with joggle wheel and press STATR/STOP to start workout. ‐You can adjust the level of resistance on the pedals while exercising by rotating joggle wheel up or down. The newly set value will be shown under the LOAD window. Without KEY entry for 3 seconds, the Load level value will change to WATT value. Measuring your pulse with the hand sensors The hand sensor are not medical products, but rather exercising tools designed for the approxl-mate measurement and displaying of the pulse rate when exercising with the exercise bike. You can measure your pulse with the two hand sensor on the handle.
- Page 22 <REFERENCE> B.M.I. (Body mass index) integrated B.M.I LOW/MED MEDIUM MED/HIGH SCALE RANGE <20 20-24 24.1-26.5 >26.5 BODY FAT: SYMBOL — ▲ + ◆ FAT% LOW/MED MEDIUM MED/HIGH MALE <13% 13%-25.9% 26%-30% >30% FEMALE <23% 23%-35.9% 36%-40% >40% ...
- Page 23 iPod touch (4th generation) iPod touch (3rd generation) iPhone 6+ iPhone 6 iPhone 5S iPhone 5C iPhone 5 iPhone 4S iPad Air2 iPad Air iPad 4 iPad 3 iPad 2 iPad iPad Min3 iPad Min2 iPad Min Support iOS 5.1.1 or above ‐ Support Android devices: Android tablet OS 4.02 or above Android tablet resolution 1280X752 pixels (only 10inch under) Android phone OS 2.2 or above Android phone resolution (support for 7 inch under) 1280X800 pixels 1280X720 pixels 800X480 pixels “Made for iPod,” “Made for iPhone,” and “Made for iPad” mean that an electronic accessory has been designed to connect specifically to iPod, iPhone, or iPad, respectively, and has been certified by the developer to meet Apple performance standards. Apple is not responsible for the operation of this device or its compliance with safety and regulatory standards. Please note that the use of this accessory with iPod, iPhone, or iPad may affect wireless performance. iPad, iPhone, iPod, iPod classic, iPod nano, iPod shuffle, and iPod touch are trademarks of Apple Inc., registered in the U.S. and other countries. Attention! All preset data will be lost when unplug the power (adaptor) from the "machine".
Need help?
Do you have a question about the INFINITY 1.3X 93013 and is the answer not in the manual?
Questions and answers