Table of Contents
Advertisement
Quick Links
Advertisement
Table of Contents

Related Manuals for W6 Wertarbeit EU-7


Summary of Contents for W6 Wertarbeit EU-7
- Page 1 W6 EU-7 sewing machine embroidery table...
- Page 2 Instruction manual...
- Page 3 This document is protected by copyright. All rights reserved. The document may not, in whole or in part, be copied, reproduced, translated or reduced to an electronic medium of machine- readable form without the explicit permission of W6 Wertarbeit Projektierungs- und Handelsgesellschaft mbH. Preamble Thank you very much for buying a W6 product.
- Page 4 This manual is revised from time to time. You can find the latest version under Service / Help / Your machine type / Downloads. Subscribe to our W6 newsletter. We keep you up-to-date and you can take part in our special weekly promotions.
- Page 5 But now have fun discovering your new W6 Wertarbeit EU-7 embroidery unit. WARNING When using the embroidery unit, the basic safety instructions must always be observed. Before using this machine, read all the instructions through carefully. Danger Follow the instructions below to reduce the risk of electric shock: Do not leave the machine unattended when it is connected to the mains power.
- Page 6 In the event of a malfunction, switch the machine off • immediately. W6 WERTARBEIT offers frequent sewers an annual • inspection, at the owner’s expense, after a year. Normal use indicates that an inspection should be performed...
-
Page 7: Table Of Contents
Contents W6 EU-7 embroidery unit............10 Main embroidery unit............10 Attaching the embroidery foot..........12 Attaching the adapter............14 Attaching the embroidery unit..........15 Dismantling the embroidery unit.........24 Setting up the embroidery unit..........26 A. Edit screen..............26 B. Embroidery pattern selection button......26 C. Font selection button...........27 D. - Page 8 Importing embroidery files from the USB stick....76 Tips for embroidery.............80 When the upper thread breaks or is used up....80 When the bobbin thread on the W6 plastic bobbin is used up..................81 If the power fails during embroidery........82 Adjusting the thread tension..........83...
- Page 9 A. Correct thread tension..........83 B. Upper thread too tight..........83 C. Upper thread too loose..........83 EU Declaration of Conformity..........84...
-
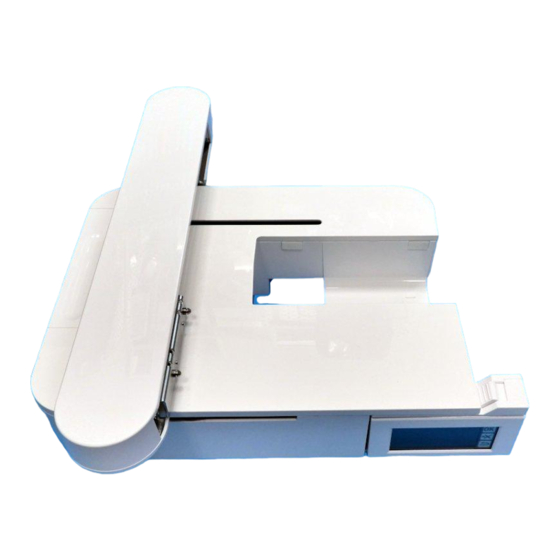
Page 10: W6 Eu-7 Embroidery Unit
W6 EU-7 embroidery unit The embroidery unit automatically recognises which W6 sewing machine it is connected to. If you connect a W6 N 5000 Exklusive or a W6 N 8000 Exklusive to this embroidery unit, the maximum size of the embroidery frame increases from 130 mm x 200 mm to 150 mm x 250 mm. - Page 11 22. Extra large embroidery frame (15 cm x 25 cm)* 23. Extra large template * You can only use the extra large embroidery frame, if you have connected a W6 N 5000 Exklusive or a W6 N 8000 Exklusive to this embroidery unit.
-
Page 12: Attaching The Embroidery Foot
Attaching the embroidery foot First you have to attach the embroidery foot to your sewing machine. Switch off your sewing machine. Turn the hand wheel towards you until the needle is in the highest position. Raise the presser foot lifter. - Page 13 Remove the presser foot holder by loosening the presser foot thumb screw. (Please see the sewing machine manual.) Attach the embroidery foot to the presser bar (A) so that the arm (B) of the foot is on the shaft (C) of the needle screw.
-
Page 14: Attaching The Adapter
An adapter is not required to attach the embroidery unit to the W6 N 5000 Exklusive, W6 N 8000 or W6 N 8000 Exklusive. If you have connected a W6 N 3300 Exklusive, W6 N 5000 or a W6 N 6000 to this embroidery unit, the adapter must be attached. -
Page 15: Attaching The Embroidery Unit
Attaching the embroidery unit Please note: Accident prevention Switch the machine off before connecting the embroidery unit. Do not carry the machine when the embroidery unit is connected. The embroidery unit may come loose and fall off. Switch the sewing machine off. Remove the extension table from the sewing machine. - Page 16 Slide the embroidery unit to the right into the sewing machine until the embroidery unit clicks into place in the sewing machine and is therefore firmly connected to the machine. Stabilise the embroidery unit by setting the three adjustable feet to the correct height, otherwise there is a risk that the embroidery will be distorted.
- Page 17 Switch the sewing machine on. The embroidery unit’s LCD screen shows the Start screen for a few seconds and then switches to illustration 10. Please note: If a message is shown as in illustration 9, then an error has occurred. Switch the machine off and check the connection between the sewing machine and embroidery unit.
- Page 18 If you pressed the Yes button as described in step 10, the LCD display will show either illustration 11 or 12. 11. In the case of the W6 N 3300 Exklusive model, illustration 11 appears. The machine has manual thread tension. Move the upper thread tension to the left, as shown in the illustration, to the end of the mark behind “Auto”.
- Page 19 12. The illustration indicates that the embroidery arm will start moving. Do not touch the embroidery arm and remove all objects out of reach of the embroidery arm. Press the “Yes” button. The embroidery arm moves to the start position. The display shows the original image.
- Page 20 The W6 sewing machine and embroidery unit must have plenty of space so the embroidery frame can move sufficiently during the embroidery process. Only use original W6 75 – 90 titanium needles or W6 75 • blue tip needles, W6 Super Stretch 90 (HAx1SP) needles.
- Page 21 A detailed tutorial video on how to use the embroidery unit can be found on our W6 website under Service / Help / EU-7 embroidery unit / Videos. To familiarise yourself with the embroidery unit, we recommend you embroider an embroidery pattern from the unit's memory.
- Page 22 Pull the lower thread up before starting the embroidery. Only close the hook race’s transparent plastic cover afterwards. Carry out regular care and maintenance on your W6 sewing machine as described on the W6 website under Service / Help / Your W6 machine type.
-
Page 24: Dismantling The Embroidery Unit
Dismantling the embroidery unit Remove the embroidery frame from the embroidery arm. Press the embroidery arm positioning button (A). (If the original image is not displayed, press and hold the “Return” button longer.) If the image appears as shown in illustration 3, do not touch the embroidery arm and make sure that there are no objects on the back of the embroidery arm. - Page 25 The holder opening is located on the embroidery table. On the W6 sewing machine, slide the switch to lower the feed dogs to the right. Turn the hand wheel towards you five times. The feed dogs are in their original position again.
-
Page 26: Setting Up The Embroidery Unit
Setting up the embroidery unit Once you have correctly attached the embroidery unit, the Start image will appear on the screen. A. Edit screen You can combine 3 patterns or letters with each other. When you switch on the embroidery unit, 3 empty placeholders appear and the first placeholder is highlighted on the display by being underlined. -
Page 27: Font Selection Button
C. Font selection button When you press this button, you can select different letters. Please see “Selecting letters”. D. Embroidery arm positioning button When you have finished the embroidery process and want to remove the embroidery unit, press this button. The embroidery arm then moves into the resting position. -
Page 28: E-Iii. Calibration Button
e-iii. Calibration button If you find that the point to press on the screen does not match the display, the screen must be calibrated by pressing this button. Press the “+” markers that are displayed one after the other at two positions on the screen. The Start screen appears again after calibration. -
Page 29: Setting Up The Embroidery Frame
You can get stabiliser on www.w6-wertarbeit.de under Accessories. Upper thread We recommend using original W6 embroidery thread 1000 m in 415 colours. You can create the best embroidery using this. Lower thread We recommend using original W6 embroidery lower thread 1000 m in black or white. - Page 30 B: Medium embroidery frame (special accessory) Embroidery area: 10 cm x 10 cm. C: Small embroidery frame (special accessory) Embroidery area: 5 cm x 4 cm. This frame can be used for monograms or name embroidery. D: Extra large embroidery frame (special accessory) Embroidery area: 15 cm x 25 cm.
-
Page 31: Clamping The Fabric
Frame selection for: W6 N 5000 Exklusive, W6 N 8000 Exklusive. Frame selection for: W6 N 3300 Exklusive, W6 N 5000, W6 N 6000, W6 N 8000. Clamping the fabric Loosen the screw (a) on the outer part of the embroidery frame (b) and remove the inner embroidery frame (c). - Page 32 Make sure that the “-I>” mark on the inner and outer frames line up. Now press the inner frame with the W6 self- adhesive stabiliser into the outer frame until the inner and outer frames are at the same level.
-
Page 33: Using The Template
The stretched piece of fabric with the double layer of W6 self- adhesive stabiliser underneath must not have any waves or folds. Failure to do so will not produce the best embroidery pattern. In the event of any problems or lack of clarity, we recommend our videos on the W6 website under Service / Help / Embroidery unit EU7. -
Page 34: Attaching The Embroidery Frame
Smooth out any creases, waves or unevenness on the fabric and tighten the screw on the outer frame. Remove the template. Attaching the embroidery frame Raise the needle and the embroidery foot. Push the embroidery frame with the “I” mark to the back under the embroidery foot. -
Page 35: Dismantling The Embroidery Frame
If you connect a W6 N 5000 Exklusive or a W6 N 8000 Exklusive sewing machine to the EU 7 embroidery unit, then the patterns for the extra large embroidery frame are automatically displayed. - Page 36 Once you have correctly attached the embroidery unit, the display will show the Start screen. Press the embroidery pattern selection button (A). The first 6 embroidery patterns appear on the screen. Press button (B) to scroll up and press button (C) to scroll down until the embroidery pattern you want appears.
- Page 37 Press the OK button. Long arm Regular shape The screen will display the frame position page. You can set the frame stop position for the colour change. Press the button where the machine is to stop. Your button is highlighted. Press the OK button.
-
Page 38: Setting The Embroidery Pattern
Setting the embroidery pattern Once you have selected the embroidery pattern you want, the LCD screen displays the Settings page. You can change the pattern on this page. A. Frame size The selected frame size is displayed. You can change the frame size by pressing the E button. -
Page 39: Button For Frame Size And Frame Stop Position
E. Button for frame size and frame stop position You can change the frame size and frame stop position by pressing this button. F. Enlarge button When you press this button, the pattern is enlarged. Press the “Up” button (f1) or the “Down” button (f2) to move the view. Where you currently are in the frame is highlighted by the black rectangle (f3). -
Page 40: Rotate Button
I. Rotate button When you press this button, the rotation menu is displayed. Each of the buttons will rotate the pattern 1° / 5° or 90° clockwise / anticlockwise. The selected number of degrees of rotation is displayed in the i1 field. Starting from the selected frame or embroidery pattern, the rotation may extend beyond the embroidery area. -
Page 41: The Settings Have Been Completed
Tip: Selected patterns are always positioned in the centre of the frame. When two or more patterns are selected, they will overlap. To avoid this, move the patterns away from each other until they no longer overlap. The settings have been completed If you want to insert more patterns Press the Return button (A). - Page 42 A placeholder is indicated by a black marker (B) above the main page. The placeholder indicates that a pattern / letter has already been selected. You can now add another pattern or letter. To switch to the settings view without setting patterns or letters, press the OK button.
-
Page 43: Pattern Table
Pattern table These illustrations show the number of the basic patterns, the height, the width, the number of stitches, the colour of the thread and order of the colours. The illustration may vary slightly. Depending on the fabric and choice of thread and the options for changing a pattern. - Page 45 Small pattern...
- Page 47 Medium pattern...
-
Page 53: Overview Of Patterns (Letters)
Overview of patterns (letters) The embroidery unit can embroider the letters shown below. The different fonts can be selected by pressing the “Font” button. -
Page 54: Error Messages
Error messages: Have you lowered the feed dogs? Press the Yes or No button. Do you want to switch from the Settings screen to embroidery mode? Press the Yes or No button. If you press and hold the Return button for a long time, you can switch directly to the Start screen. - Page 55 Remove the foot controller and press the OK button. Move the winding mechanism to the left and press the OK button. Raise the embroidery foot and press the OK button. Move the upper thread tension slightly to the left. Press the OK button. Raise the needle by pressing the needle function button and press the OK button.
-
Page 56: Selecting Letters
The embroidery file is too large for the embroidery unit. Please reduce the file using the embroidery software. You cannot select any other letters. Select another combination of letters. Selecting letters This embroidery unit can embroider 4 different types of letters. To select the letters, please follow the steps below. - Page 57 You can select the font by pressing the Font button. 4 different fonts can be selected. The screen displays 4 letters. Press the “>>” button to display the next letters. Press the “<<” button to display the previous letters. Select letters by pressing the letter selection buttons. The selected letter is displayed in the top line.
- Page 58 Press the “ ” button to delete a letter. The last selected letter is deleted. If you press and hold this button, all the selected patterns and letters are deleted. When you have finished your selection, press the “OK” button. The screen display changes to edit mode. Note: If you select more letters than will fit in the frame, the following message is displayed:...
-
Page 59: Saving Letter Combinations And Colours
Saving letter combinations and colours You can save selected letter combinations and colours at any time on this page. A. Checking the selected letters The selected letters are displayed in the top line on the screen. If you have selected more letters than can be displayed, you can check the letters that are not visible by pressing the buttons. -
Page 60: Changing Colours
D. Changing colours Normally the machine will embroider all the selected letters one after the other. If you want to change the colours of the individual letters, press the “Change Colour” button. This button is highlighted and the machine stops after each letter. E. -
Page 61: Recalling Saved Letters
Note: You can only save letter combinations. The settings are not saved. W6 tip: Letter combinations can also be created and saved using the W6 embroidery software. The embroidery unit can embroider the file from the USB stick. F. Recalling saved letters On the Start screen, press the letter selection button. - Page 62 Press the “Delete” button. The Confirmation screen is displayed. 3.a Press the “Yes” button if you want to delete the saved file. All letters are deleted and the memory is empty. 3.b Press the “No” button if you do not want to delete the file. The Save / Read screen is displayed.
-
Page 63: After You Have Selected The Letters
H. After you have selected the letters Press the “OK” button on the Save and Change Colour screen. See next page for Adjusting the letters. Adjusting the letters If you pressed the “OK” button in the Save and Change Colour screen, the screen will show you the frame settings. -
Page 64: Resize Button
A. Resize button Press the Resize button. The letter size is displayed. The letter size is displayed and you can adjust it by pressing the “+” and “-” buttons (10 mm – 30 mm, default 10 mm). If you press the “RST” button, the letter size is reset to the default setting (10 mm). -
Page 65: Mirror And Positioning Button
Select the Arc button. a. Increase arc b. Decrease arc c. Straighten arc If you have selected the Increase Arc button (a) or Decrease Arc button (b), a Settings screen is displayed. Press the width (d) or height (e) to highlight the letter combination and use the +/- buttons to change it to the desired shape. -
Page 66: Changing Letter Spacing
Changing letter spacing / Changing the space between the letters Press the button to set the letter spacing (c1). The screen to set the spacing is displayed. You can change the space between the letters. Use the “ ” arrow buttons to navigate between the letters and change the space between the letters using the + and - buttons (-5.0 to 9.9 mm, default 2 mm). -
Page 67: Checking The Start Position
Checking the start position To move to the start position, press the c3 position button in the Mirror / Positioning screen. The frame will move to the starting position. This process can be used to string letters together. If you press this button again, the frame moves to the central position. -
Page 68: The Start Screen Contains The Following Information
The Start screen contains the following information: Activated patterns or combinations of letters Other stitches Tip: This embroidery unit automatically skips incorrect stitches. Therefore, the number of stitches per pattern may vary slightly. The current upper thread colour, the upper thread colours required later Time remaining (at full speed) Letters (when the letters are activated) The letters... -
Page 69: Starting The Embroidery Process
(from point 1–6). This should produce an audible grating noise. A video for optimal threading (just 4 min. long) can be found on our W6 website under Service / Help / Model name. Use the colour you want. The colours and the order in which the colours are needed can be found in the embroidery pattern instructions. - Page 70 Press the Start button. The machine will start the embroidery pattern with the first colour. Stop the machine after a few stitches and cut the upper thread using the W6 embroidery scissors. Continue with the embroidery. AUTOMATIC THREAD CUTTER When the embroidery process is finished, the machine will stop by itself and automatically cut the thread.
- Page 71 When all the embroidery work is finished, raise the embroidery foot and remove the embroidery frame. 10. Cut the existing tension threads using the W6 embroidery scissors. Embroidery scissors have a blade that is bent upwards. This prevents the embroidery from being...
-
Page 72: Positioning Letters
Positioning letters If you cannot embroider a letter combination because it is too long for the frame, you can combine the letter combination as follows: Select the first letters and embroider them. Remove the embroidery frame and draw a line so that the new letters are at the same height. - Page 73 Press the Mirror / Positioning button. The Mirror / Positioning screen is displayed. Press the Start Position button. As soon as the warning message is displayed, check the area around the frame and press the “Yes” button. The frame moves and the needle is then in the start position. Horizontal letter sequence: top left Vertical letter sequence: top centre 10.
-
Page 74: Saving Embroidery Files On The Usb Stick
14. Start the embroidery process. 15. Alternatively: You can create ready to embroider patterns on the screen using the W6 embroidery software. Then let the embroidery unit embroider the pattern you want from the USB stick. Saving embroidery files on the USB stick This embroidery unit can save combinations of patterns and letters and the corresponding settings on the USB stick as a file. -
Page 75: Importing Embroidery Files From The Usb Stick
The Save screen appears. A random number is temporarily assigned to the file name. Select 3 numbers if required and press the “ ” or “OK” button. Press the “C” button to reset the temporary number. Press the “ ” Return button to cancel the action. It may take a moment to save the files. - Page 76 4b. You cannot select files that will exceed the embroidery area or the maximum stitch rate. (Maximum frame size for the models W6 N 3300 Exklusive, 5000, 8000: 130 mm x 200 mm. Maximum frame size for the 5000 Exklusive, 8000 Exklusive: 150 mm x 250 mm.
- Page 77 Once the file you want has been selected, the frame selection is displayed. Select the frame you want and the frame stop position. The Settings screen is displayed. When files are selected from the USB stick, the USB icon “ ” is displayed on the Start page’s Settings screen.
-
Page 79: Tips For Embroidery
Hold the upper thread on the spool and pull it very tightly into the thread tension (from point 1–6). This should produce an audible grating noise. A video for optimal threading (just 4 min. long) can be found on our W6 website under Service / Help / Model name. -
Page 80: When The Bobbin Thread On The W6 Plastic Bobbin Is Used Up
Only close the hook race’s transparent plastic cover afterwards. A video for optimal threading (just 4 min. long) can be found on our W6 website under Service / Help / Model name. Reattach the embroidery frame. -
Page 81: If The Power Fails During Embroidery
If the power fails during embroidery If the power fails during embroidery, you can recall active patterns or letter combinations again. Switch the sewing machine on. When the Start screen appears, press the Backup button. The Start screen for embroidering letters or embroidery patterns is displayed. -
Page 82: Adjusting The Thread Tension
Please note: 95% of all thread tension problems are the result of incorrect threading. Please note that only the W6 thread with 1000 m in 415 colours, a suitable W6 embroidery needle and a W6 plastic bobbin will lead to the best embroidery pattern. - Page 83 EU Declaration of Conformity...
Need help?
Do you have a question about the Wertarbeit EU-7 and is the answer not in the manual?
Questions and answers