Table of Contents
Advertisement
Quick Links
Advertisement
Table of Contents

Related Manuals for W6 N 9500C QPL


Summary of Contents for W6 N 9500C QPL
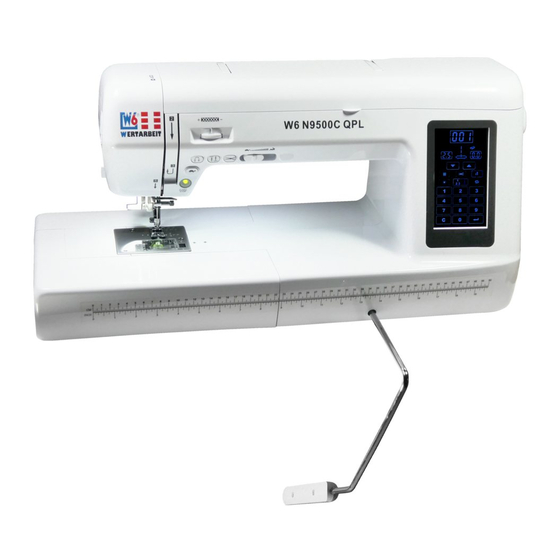
- Page 1 W6 N 9500C QPL sewing machine...
- Page 2 Manual...
- Page 3 Guarantee Registration. W6 WERTARBEIT also offers the following options on its website for free. Please access our website using www.w6-wertarbeit.de and under Service select: Criteria for the optimal threading of a W6 N 9500C QPL • (4-min. video). A tutorial video specifically for the W6 N 9500C QPL •...
-
Page 4: Table Of Contents
3.7 Foot controller socket...............22 3.8 Power plug..................23 3.9 Foot controller...................23 3.10 Extension table with accessories compartment......24 3.11 Why use W6 thread, needles and bobbins?........24 4 Standard accessories................26 5 Operating elements.................29 5.1 Thread tension dial................30 5.2 Start-Stop button / Sewing without a foot controller......30... - Page 5 8 What do I do with the lower thread?............59 8.1 Why use W6 bobbins?..............59 8.2 Removing a W6 plastic bobbin from the black hook race ....59 8.3 Winding a new W6 plastic bobbin............61 8.4 Inserting a plastic bobbin in the hook race ........67...
- Page 6 13.2 Maintenance to be carried out by the customer ......236 13.2.1 Checking the needle plate .............236 13.2.2 Checking the needle / Why using W6 needles is important . .236 13.2.3 Cleaning the hook and hook case.........238 13.2.3.1 Removing the needle ............238...
- Page 7 14.2.4 Increasing the upper thread tension........252 14.2.5 Checking the lower thread tension........252 14.3 Tips & tricks..................254 14.3.1 Changing the spool..............254 14.3.2 Checking the thread quality ...........255 14.3.3 The external spool pin ............256 14.3.4 Inserting a new needle............256 14.3.5 Inserting the bobbin correctly..........257 14.3.6 Threading the upper thread correctly ........258...
-
Page 8: Safety Notes
Notes for operational safety Safety notes Safety notes This section contains information on how to use the manual: Notes for operational safety (Section 1.1) • Instructions for use (Section 1.2) • After sewing (Section 1.3) • Tips for a long service life (Section 1.4) •... -
Page 9: Instructions For Use
Safety notes Instructions for use Please take note of the following points when handling the machine: Always use a W6 trolley to safely transport the machine. • If you are pregnant, let someone help you when assembling and moving •... -
Page 10: After Sewing
• Based on its design, the machine is not intended for commercial use. • Have it inspected by a W6 workshop for a fixed price at your expense. • Frequent sewers should send the machine in for an annual inspection •... -
Page 11: What We Expect From You
WERTARBEIT also offers the following options on its website for free. Please access our website using www.w6-wertarbeit.de and under SERVICE select: Criteria for the optimal threading of a W6 N 9500C QPL video. • A tutorial video specifically for the W6 N 9500C QPL. -
Page 12: Assembling The Machine
Unpacking Assembling the machine Assembling the machine This section contains information on how to set up the machine: Unpacking (Section 2.1) • Setting up (Section 2.2) • Connecting the machine (Section 2.3) • Unplugging the power plug (Section 2.4) • Unpacking You are responsible for shipping the machine for inspection or repair to a specialist workshop. -
Page 13: Setting Up
Setting up Assembling the machine Setting up When setting up, please pay attention to the following points: The supporting surface must be sturdy, non-slip and of adequate size. • There is adequate lighting for work. • Your seat ensures a convenient and ergonomically sound posture when •... - Page 14 Connecting the machine Assembling the machine Carry out the following steps: Plug the ‹power plug› into the sewing machine socket. Plug ‹foot controller plug› into the sewing machine socket. Plug the ‹power plug› into the power socket.
- Page 15 Connecting the machine Assembling the machine Set the ‹on / off switch› to the “I” (ON) position. ➔ machine switched ➔ lighting is switched machine does not sew? The machine is not connected correctly. ➔ Switch the machine off again. ➔...
-
Page 16: Unplugging The Power Plug
Unplugging the power plug Assembling the machine Slowly press the ‹foot controller› to start sewing. The further the ‹foot controller› is pressed, the faster the machine sews. Alternatively, you can sew without the foot controller, just unplug the foot controller. Start and stop the sewing machine using the ‹Start-Stop›... -
Page 17: Getting To Know The Machine
Sewing machine socket (Section 3.6) • Foot controller socket (Section 3.7) • Power plug (Section 3.8) • Foot controller (Section 3.9) • Extension table with accessories compartment (Section 3.10) • Why use W6 thread, needles and bobbins? (Section 3.11) •... -
Page 18: Front View
Front view Getting to know the machine Front view Machine components – front view Machine parts No. Designation 01 Extension table (removable) 02 Please see “View of the presser foot, automatic needle threader and needle plate” for the names 03 Thread cutter 04 Foot pressure regulator 05 Upper thread tension dial 06 Face plate... -
Page 19: Rear View
Rear view Getting to know the machine Machine parts (continued) No. Designation 14 “Needle Up / Needle Down” button 15 “Reverse” button 16 “Slow Sewing” button 17 Start-Stop button (not active when sewing with foot controller) Rear view Machine components – rear view Machine parts No. -
Page 20: Top View
Front view Getting to know the machine Top view Machine components – top view Machine parts No. Designation 01 Thread take-up lever 02 Thread guide (for sewing) 03 Metal thread guide 04 Pattern overview, please see “Using a pattern” > “Overview of patterns”... -
Page 21: View Of The Presser Foot, Automatic Needle Threader, Needle Plate
View of the presser foot, automatic needle threader and needle plate Getting to know the machine View of the presser foot, automatic needle threader and needle plate Machine components – presser foot and needle plate Machine parts No. Designation 01 Transparent plastic bobbin cover 02 Fixing screw for the needle plate 03 Needle plate 04 Presser foot holder screw... -
Page 22: On / Off Switch
On / off switch Getting to know the machine On / off switch On / off switch for the sewing machine Sewing machine socket Sewing machine socket Foot controller socket Foot controller socket... -
Page 23: Power Plug
The harder you press it down, the faster the machine sews. Foot controller W6 tip You do not have to sew with the foot control. Just unplug the foot controller from the sewing machine. It is ergonomically better for your back to sew without the foot controller. -
Page 24: Extension Table With Accessories Compartment
Apart from the quality of the thread and the needle, a correctly running thread and neat seam pattern largely depend on the bobbins used. Each manufacturer has its own bobbin system. Therefore, always use original plastic spools from W6 WERTARBEIT. -
Page 25: Standard Accessories
Standard accessories Standard accessories The following accessories are supplied with the machine: Accessories No. Picture Designation Standard foot Installed on delivery Zipper foot Blind hem foot Buttonhole foot I, automatically detects the button size Buttonhole foot II, manual setting of button size Overlock/overcasting foot, only for sewing fabric edges. - Page 26 Standard accessories Accessories (continued) No. Picture Designation Quilting foot Straight stitch foot Open-toe transparent satin stitch foot Special high quilting foot Spool cap Four W6 plastic bobbins Selection of needles for standard woven fabrics Two screwdrivers...
- Page 27 Cover, folded, with opening for the handle W6 note All presser feet that are not listed here as accessories, are special accessories. These specific presser feet can be found on our W6 WERTARBEIT website under Accessories.
-
Page 28: Operating Elements
Thread tension dial Operating elements Operating elements This section contains information on the machine’s operating elements: Thread tension dial (Section 5.1) • Start-Stop button / Sewing without a foot controller (Section 5.2) • Slow Sewing button (Section 5.3) • Reverse button (Section 5.4) •... -
Page 29: Thread Tension Dial
Thread tension dial Operating elements Thread tension dial You can set the upper thread tension on the ‹dial›. Set the upper thread tension dial to AUTO for normal sewing. As a rule, you will obtain good results with this setting. Thread tension dial An upper thread tension symbol is located above the dial. -
Page 30: Slow Sewing Button
Slow Sewing button Operating elements Slow Sewing button Press the ‹Slow Sewing› button to sew stitch by stitch. The sewing machine stops when you release the button. The needle is in the lowest position. Slow Sewing button Reverse button Every kind of fabric should be secured with a backtack stitch at the beginning and end to make it last longer. -
Page 31: Needle Up / Needle Down Button
Needle Up / Needle Down button Operating elements Needle Up / Needle Down button Safety instruction: The sewing machine only moves into the correct starting and threading position to thread the upper thread for the thread take-up lever and needle threader when you press the ‹Needle Up / Needle Down›... -
Page 32: Automatic Thread Cutter Button
It is essential that any pieces of thread and lint in the thread cutter and in the hook are carefully removed without damaging the thread cutter, e.g. using a W6 brush or tweezers. Speed Control button Speed Control button You can adjust the sewing speed at any time. -
Page 33: Presser Foot Lifter
Presser foot lifter Operating elements W6 note The sewing speed can be changed using the Speed Control button if the ‹Start- Stopbutton› or the foot controller is activated. Presser foot lifter Movable presser foot lifter You can raise and lower the... -
Page 34: Hand Wheel
W6 tip Always take note of the correct direction of rotation. Turning it in the opposite direction results in the hook system jamming as well as a seam with an unsatisfactory appearance. -
Page 35: Drop Feed Lever
Drop feed lever Foot pressure regulator 5.13 Drop feed lever If you move the lever to the left, the feed dogs are lowered. To raise the feed dogs again, move the lever to the right and turn the ‹hand wheel› forwards towards you five times. -
Page 36: Automatic Needle Threader
• damage to the sewing machine. In the event of any lack of clarity, you can obtain information on www.w6-wertarbeit.de under Service / HELP / W6 N 9500 Criteria for optimal threading. Press the Needle Up / Needle Down button once,... - Page 37 Automatic needle threader Foot pressure regulator Guide the thread around the guide hook. Press ‹needle threader lever› the left- hand side down as far as possible. needle threader swivels the hook in the down position through the eye of the needle. Guide thread from the...
- Page 38 Automatic needle threader Foot pressure regulator Reduce the pressure on the ‹needle threader lever› until it moves slowly up. Let go of the thread slightly at the same time. The threader jumps back in and the hook pulls the thread through the eye of the needle. Hold the loop and pull...
-
Page 39: Explanation For The Touchscreen And How It Works
Display Operating elements 5.16 Explanation for the touchscreen and how it works This number is the program number PLEASE NOTE The number changes depending on the choice of patterns. The stitch width and stitch length settings change accordingly. 5.16.1 Stitch Length button (1) Function: 1. -
Page 40: Stitch Width Button
Display Operating elements 5.16.2 Stitch Width button (2) Function: 1. Press the Stitch Width button. 2. The Stitch Width button flashes. Press the button to set the stitch width you want. 4. Confirm the stitch width you want by pressing the Stitch Width button again. -
Page 41: Needle Stop Up Or Down
Display Operating elements 5.16.6 Needle stop up or down (6) The needle is in the up or down position. Activation: The needle stop is activated when a solid outer border is • placed around the dashed inner border. Deactivation: The needle stop is deactivated when only the dashed •... -
Page 42: Switch Display Button
CAUTION ➔ Only use needles that are suitable for this machine. E.g. from W6 Wertarbeit. ➔ The built-in automatic needle threader cannot be used. 5.16.14 Mirror button (14) If you press the Mirror button, the set pattern is mirrored vertically. -
Page 43: Changing The Presser Foot And Presser Foot Holder
• damage to the sewing machine. In the event of any lack of clarity, further information can be found on www.w6-wertarbeit.de under Service / HELP: Criteria for optimal threading. The lower thread has been pulled taut and carefully to the 7 o’clock and 9 o’clock positions in the silver slot of the black hook race. - Page 44 • damage to the sewing machine. In the event of any lack of clarity, you can obtain information on www.w6-wertarbeit.de under Service / HELP / W6 N 9500 Criteria for optimal threading. Press the Needle Up / Needle Down button once, if the presser foot is up.
- Page 45 Changing the presser foot Changing the presser foot and presser foot holder Place the ‹presser foot holder› on the centre of the bar on the new ‹presser foot›. Make sure that the presser foot bar is aligned with the recess in the ‹presser foot holder›.
-
Page 46: Changing The Presser Foot Holder, Fitting Special Accessory Feet
Failure to do this will always result in a sloppy seam, blockages or • damage to the sewing machine. In the event of any lack of clarity, you can obtain information on www.w6-wertarbeit.de under Service / HELP / W6 N 9500 Criteria for optimal threading. - Page 47 Changing the presser foot holder, fitting special accessory feet (to be purchased extra) Changing the presser foot and presser foot holder Press the Needle Up / Needle Down button once, if the presser foot is up. Using the screwdriver, loosen the slotted screw on the ‹presser foot holder›.
- Page 48 Changing the presser foot holder, fitting special accessory feet (to be purchased extra) Changing the presser foot and presser foot holder Push the ‹presser foot lifter› up again. Place the ‹walking foot› onto the presser foot holder presser bar. Make sure that the walking foot’s arm is on the needle clamp’s shaft.
-
Page 49: Selecting The Needle
This results in the sewing thread breaking, being damaged or the sewing machine skipping stitches. For safety’s sake, always use original W6 WERTARBEIT needles. Checking the needle Safety instruction: Use of needles Only use 130/705 H system needles from W6 WERTARBEIT. -
Page 51: Inserting A Needle
Inserting a needle Make sure you select a needle that is suitable for the fabric, e.g. the W6 WERTARBEIT Super Stretch 90 needle for stretch fabrics and jersey fabrics. Prerequisite: A new W6 WERTARBEIT needle is ready for use. - Page 53 • damage to the sewing machine. In the event of any lack of clarity, you can obtain information on www.w6-wertarbeit.de under Service / HELP / W6 N 9500 Criteria for optimal threading. Press the Needle Up / Needle Down button once, if the presser foot is up.
- Page 54 Inserting a needle Selecting the needle Pull the old needle down out of the holder. Insert the new needle straight up into the needle holder until it stops. When inserting the needle, make sure the flat side is pointing towards the rear. The needle clamp screw must be opened a bit further if, for example, you are removing a size 75 needle and inserting a size 90 needle.
-
Page 55: Needle And Thread Table
• Always use thread of the same weight and the same material for the • upper and lower threads. Only use sharp, straight, undamaged and high quality W6 needles for • your sewing. Note To sew the best pattern, it is necessary to adapt the patterns on a sewing machine with a stitch width of 9 mm to the fabrics to be sewn with regard to stitch width and stitch length. - Page 56 Needle and thread table Selecting the needle Needle selection (continued) Weight Fabric Needle type Needle size Heavy Poplin, corded wool fabric, linen, Universal chintz, gabardine, felt, terry Woven fabrics fabrics, hand woven linen, quilting, double knitted fabric (synthetic or natural) Heavy All stretch fabrics, fabrics with Super Stretch...
-
Page 57: What Do I Do With The Lower Thread
• Why use W6 bobbins? Only W6 plastic bobbins fit perfectly in your W6 sewing machine. Bobbins made by other manufacturers and metal bobbins do not fit and lead to a seam with an unsatisfactory appearance or damage to the machine. - Page 58 • damage to the sewing machine. In the event of any lack of clarity, you can obtain information on www.w6-wertarbeit.de under Service / HELP / W6 N 9500 Criteria for optimal threading. Press the Needle Up / Needle Down button once, if the presser foot is up.
-
Page 59: Winding A New W6 Plastic Bobbin
This may result in skipped stitches. Thread the thread. Prerequisite: A new W6 WERTARBEIT upper thread spool is ready for use. • An empty W6 WERTARBEIT plastic bobbin is ready for use. • Required: A pair of scissors •... - Page 60 • damage to the sewing machine. In the event of any lack of clarity, you can obtain information on www.w6-wertarbeit.de under Service / HELP / W6 N 9500 Criteria for optimal threading. Press the Needle Up / Needle Down button once, if the presser foot is up.
- Page 61 Winding a new W6 plastic bobbin What do I do with the lower thread? Fasten the spool using the spool cap. Gently press the spool onto the ‹spool pin› move the spool into horizontal (lying) position. Make sure that there is not a gap between the spool cap and the spool.
- Page 62 Winding a new W6 plastic bobbin What do I do with the lower thread? Guide the thread around the metal thread guide tip at the front. Guide thread back in front of the spool past it to the hook in front...
- Page 63 Winding a new W6 plastic bobbin What do I do with the lower thread? Thread the thread through the hole in the W6 WERTARBEIT ‹plastic bobbin› from the inside. Place empty ‹plastic bobbin› on the ‹bobbin winder spindle›. Press ‹bobbin winder spindle›...
- Page 64 Winding a new W6 plastic bobbin What do I do with the lower thread? Carry out the following steps: Hold the end of the thread you have threaded through the hole in the ‹plastic bobbin› tight. Carefully press the ‹foot controller›...
-
Page 65: Inserting A Plastic Bobbin In The Hook Race
Inserting a plastic bobbin in the hook race What do I do with the lower thread? Inserting a plastic bobbin in the hook race Carry out the following steps: Hold the ‹plastic bobbin› between your thumb and index finger in your left hand. - Page 66 » The plastic bobbin has been inserted. W6 tip On the W6 WERTARBEIT website you will find assistance under Service / Help / W6 N 9500C / Videos: Optimal Threading (approx. 4 minutes long).
-
Page 67: Using The Upper Thread To Pull Up The Lower Thread
• damage to the sewing machine. In the event of any lack of clarity, you can obtain information on www.w6-wertarbeit.de under Service / HELP / W6 N 9500 Criteria for optimal threading. Press the Needle Up / Needle Down button once, if the presser foot is up. - Page 68 ➔ Turn the spool and invert it on the spool pin. Always place the spool in a horizontal (lying) position. ➔ ➔ Only use W6 thread. Close the hook race with the plastic bobbin cover. The bobbin cover is in the correct position if it clicks into place when inserted.
-
Page 69: What Do I Do With The Upper Thread
The illustration below shows an overview of how to guide the thread. Thread guide Prerequisite: A new W6 WERTARBEIT upper thread spool is ready for use. • Required: A pair of scissors •... - Page 70 • damage to the sewing machine. In the event of any lack of clarity, you can obtain information on www.w6-wertarbeit.de under Service / HELP / W6 N 9500 Criteria for optimal threading. Press the Needle Up / Needle Down button once, if the presser foot is up.
- Page 71 Unwind approx. 60 cm of thread from the W6 WERTARBEIT upper thread spool. When doing so, hold the spool firmly in the right hand. The spool must not be released. First guide the thread around the back of the metal thread guide.
- Page 72 W6 tip You will hear a clear threading noise between position 1 to 3. The upper thread is only threaded correctly into the thread tensioner if you hear this noise. Continue...
- Page 73 Threading the upper thread What do I do with the upper thread? Continue threading the upper thread under tension through the 4th threading point at the top (‹thread take-up lever›). Guide the upper thread from right to left through the thread take-up lever.
-
Page 74: Using The Automatic Needle Threader
Illustration of the upper thread guide W6 tip W6 WERTARBEIT offers the following options on its website for free. Please access our website using www.w6-wertarbeit.de and select SERVICE / W6 N 9500C QPL: “Optimal Threading” video for W6 N 9500C QPL. - Page 75 • damage to the sewing machine. In the event of any lack of clarity, you can obtain information on www.w6-wertarbeit.de under Service / HELP / W6 N 9500 Criteria for optimal threading. Press the Needle Up / Needle Down button once, if the presser foot is up.
- Page 76 Using the automatic needle threader What do I do with the upper thread? Guide the thread around the guide hook. Guide thread from the left under the right guide hook and keep it taut. thread must now be under the hook in the middle in front...
-
Page 77: Using The Upper Thread To Pull Up The Lower Thread
• damage to the sewing machine. In the event of any lack of clarity, you can obtain information on www.w6-wertarbeit.de under Service / HELP / W6 N 9500 Criteria for optimal threading. Press the Needle Up / Needle Down button once,... - Page 78 ➔ Turn the spool and invert it on the spool pin. Always place the spool in a horizontal (lying) position. ➔ ➔ Only use W6 thread. Close the hook race with the plastic bobbin cover. The bobbin cover is in the correct position if it clicks into place when inserted.
-
Page 79: Sewing A Test Seam
• thread”. In this regard, also view the “Criteria for optimal threading of a W6 N 9500 QPL” video that is just 4 minutes long under Service / Help on our website at www.w6-wertarbeit.de. Use a W6 Super Stretch 90 (HAx1SP) needle for stretch and non- •... - Page 80 • damage to the sewing machine. In the event of any lack of clarity, you can obtain information on www.w6-wertarbeit.de under Service / HELP / W6 N 9500 Criteria for optimal threading. Press the Needle Up / Needle Down button once, if the presser foot is up.
- Page 81 Sewing a test seam using straight stitch centre 002 as an example Sewing a test seam Use one hand to hold the thread and fabric firmly. The edge of the fabric should be 3 to 5 stitches behind the first needle entry point.
-
Page 82: Sewing A Test Seam Using Stretch Zigzag Stitch
• thread”. In this regard, also view the “Criteria for optimal threading of a W6 N 9500 QPL” video that is just 4 minutes long under Service / Help on our website at www.w6-wertarbeit.de. Use a W6 Super Stretch 90 (HAx1SP) needle for stretch and non- •... - Page 83 • damage to the sewing machine. In the event of any lack of clarity, you can obtain information on www.w6-wertarbeit.de under Service / HELP / W6 N 9500 Criteria for optimal threading. Press the Needle Up / Needle Down button once,...
- Page 84 Sewing a test seam using stretch zigzag stitch 022 as an example Sewing a test seam On the touchscreen, press the button highlighted blue here, if you are in another submenu. An input field now appears on your touchscreen with Arabic numerals.
- Page 85 Sewing a test seam using stretch zigzag stitch 022 as an example Sewing a test seam Reduce the stitch width as follows: • ◦ Press the Stitch Width button. The Stitch Width button flashes. ◦ Reduce the stitch width to 6.5 using ◦...
- Page 87 Sewing a test seam using stretch zigzag stitch 022 as an example Sewing a test seam Increase the stitch length to 1.5 using ◦ ◦ Press the flashing Stitch Length button with set to 1.5 again. ◦ The value 1.5 is stored when the value 1.5 stops flashing. Lower the ‹presser foot lifter›.
- Page 88 Sewing a test seam using stretch zigzag stitch 022 as an example Sewing a test seam Use one hand to hold the thread and fabric firmly. The edge of the fabric should be 3 to 5 stitches behind the first needle entry point.
- Page 89 Use a W6 Super Stretch 90 (HAx 1SP) needle for stretch and non-stretch fabrics or a W6 Super Stretch 75 (HAx 1SP) needle for thinner fabrics.
-
Page 90: Using A Pattern
Pattern overview Using a pattern Using a pattern This section contains information on the patterns: Overview of patterns (Section 11.1) • Using a pattern (Section 11.2) • Utility stitch selection (Section 11.3) • ◦ Straight stitch: programs 001 and 002 (Section 11.3.1) ◦... -
Page 91: Overview Of Patterns
The machine has 500 patterns. W6 note The overview of the 200 patterns is located in the middle of the hinged face plate. The letters and special characters can be found in 4 folding pattern cards in front... -
Page 92: Using A Pattern
The following table shows all patterns offered by the machine with what they are called and their settings for practical application. Similarly, the correct presser foot as well as the recommended W6 needle size are noted for each pattern. Pattern overview... - Page 93 Using a pattern Using a pattern Overview of patterns (continued) Designation Program Pattern Presser foot Needle Buttonhole W6 Super Stretch Automatic 90 (HAX1SP) needle or with thin fabrics, Super Stretch 75 Buttonhole W6 Super Stretch Automatic 90 (HAX1SP) needle or with thin...
- Page 94 Stretch 75...
- Page 95 Using a pattern Using a pattern Overview of patterns (continued) Designation Program Pattern Presser foot Needle Buttonhole W6 Super Stretch Automatic 90 (HAX1SP) needle or with thin fabrics, Super Stretch 75 Buttonhole W6 Super Stretch Automatic 90 (HAX1SP) needle or with thin...
- Page 96 Stretch 75 Using a pattern Using a pattern Overview of patterns (continued) Designation Program Pattern Presser foot Needle Vari-overlock W6 Super Stretch stitch (hem 90 (HAX1SP) seam) needle or with thin fabrics, Super Stretch 75 Scalloped hem 027 W6 Super Stretch...
- Page 98 Using a pattern Using a pattern Overview of patterns (continued) Designation Program Pattern Presser foot Needle Quilting stitch W6 quilting needles Quilting stitch W6 quilting needles Quilting stitch W6 quilting needles Quilting stitch W6 quilting needles Quilting stitch W6 quilting needles...
- Page 99 Using a pattern Using a pattern Overview of patterns (continued) Designation Program Pattern Presser foot Needle Quilting stitch W6 quilting needles Antique and W6 quilting needles nostalgia stitch Antique and W6 quilting needles nostalgia stitch Crazy quilting W6 quilting needles...
- Page 100 Using a pattern Using a pattern Overview of patterns (continued) Designation Program Pattern Presser foot Alwaysuse a needle + stabiliser Decorative W6 Top Stitch stitch Decorative W6 Top Stitch stitch Decorative W6 Top Stitch stitch Decorative W6 Top Stitch stitch...
- Page 101 Using a pattern Using a pattern Overview of patterns (continued) Designation Program Pattern Presser foot Alwaysuse a needle + stabiliser Decorative W6 Top Stitch stitch Decorative W6 Top Stitch stitch Decorative W6 Top Stitch stitch Decorative W6 Top Stitch stitch...
- Page 102 Using a pattern Using a pattern Overview of patterns (continued) Designation Program Pattern Presser foot Alwaysuse a needle + stabiliser Decorative W6 Top Stitch stitch Decorative W6 Top Stitch stitch Decorative W6 Top Stitch stitch Decorative W6 Top Stitch stitch...
- Page 103 Using a pattern Using a pattern Overview of patterns (continued) Designation Program Pattern Presser foot Alwaysuse a needle + stabiliser Decorative W6 Top Stitch stitch Decorative W6 Top Stitch stitch Decorative W6 Top Stitch stitch Decorative W6 Top Stitch stitch...
- Page 104 Using a pattern Using a pattern Overview of patterns (continued) Designation Program Pattern Presser foot Alwaysuse a needle + stabiliser Decorative W6 Top Stitch stitch Decorative W6 Top Stitch stitch Decorative W6 Top Stitch stitch Decorative W6 Top Stitch stitch...
- Page 105 Using a pattern Using a pattern Overview of patterns (continued) Designation Program Pattern Presser foot Alwaysuse a needle + stabiliser Decorative W6 Top Stitch stitch Decorative W6 Top Stitch stitch Decorative W6 Top Stitch stitch Decorative W6 Top Stitch stitch...
- Page 106 Using a pattern Overview of patterns (continued) Designation Program Pattern Presser foot Alwaysuse a needle + stabiliser Satin stitch W6 Top Stitch Satin stitch W6 Top Stitch Satin stitch W6 Top Stitch Satin stitch W6 Top Stitch Satin stitch W6 Top Stitch...
- Page 107 Using a pattern Using a pattern Overview of patterns (continued) Designation Program Pattern Presser foot Alwaysuse a needle + stabiliser Decorative W6 Top Stitch stitch Decorative W6 Top Stitch stitch Decorative W6 Top Stitch stitch Decorative W6 Top Stitch stitch...
- Page 108 Using a pattern Using a pattern Overview of patterns (continued) Designation Program Pattern Presser foot Alwaysuse a needle + stabiliser Decorative W6 Top Stitch stitch Decorative W6 Top Stitch stitch Decorative W6 Top Stitch stitch Decorative W6 Top Stitch stitch...
- Page 109 Using a pattern Using a pattern Overview of patterns (continued) Designation Program Pattern Presser foot Alwaysuse a needle + stabiliser Decorative W6 Top Stitch stitch Decorative W6 Top Stitch stitch Decorative W6 Top Stitch stitch Decorative W6 Top Stitch stitch...
- Page 110 Using a pattern Using a pattern Overview of patterns (continued) Designation Program Pattern Presser foot Alwaysuse a needle + stabiliser Decorative W6 Top Stitch stitch Decorative W6 Top Stitch stitch Decorative W6 Top Stitch stitch Decorative W6 Top Stitch stitch...
- Page 111 Using a pattern Pattern index (continued) Designation Program Pattern Presser foot Needle / always use a stabiliser Letters 301–400 W6 Top Stitch Special always use a characters stabiliser Handwriting Letters Special 401 - 500 W6 Top Stitch characters always use a...
-
Page 112: Utility Stitches
Designation Prog. Patter Application Presser Needle size Needle foot position Straight stitch Topstitching W6 Super Stretch 90 (HAX1SP) centre seams needle or with thin fabrics, Super Stretch 75 When using special feet, please use the appropriate special needles, e.g. a... - Page 113 Using a pattern Applications (continued) Designation Prog. Patter Application Presser Needle size Needle foot position Automatic Buttonhole W6 Super Stretch 90 buttonhole (HAX1SP) needle or with thin fabrics, Super Stretch 75 Automatic Buttonhole W6 Super Stretch 90 buttonhole (HAX1SP) needle or with...
- Page 115 Using a pattern Applications Designation Prog. Patter Application Presser Needle size Needle foot position Automatic Buttonhole W6 Super Stretch 90 buttonhole (HAX1SP) needle or with thin fabrics, Super Stretch 75 Automatic Buttonhole W6 Super Stretch 90 buttonhole (HAX1SP) needle or with...
-
Page 116: Straight Stitches: Programs 001 And 002
In the case of thicker, non-stretch fabrics, e.g. denim = length 4–5. • Use a W6 Super Stretch 90 (HAx1SP) needle for stretch and non-stretch fabrics, or a W6 Super Stretch 75 (HAx1SP) needle for thinner fabrics. Needle position settings for program 002... - Page 117 • thread”. In this regard, also view the “Criteria for optimal threading of a W6 N 9500 QPL” video that is just 4 minutes long under Service / Help on our website at www.w6-wertarbeit.de. Use a W6 Super Stretch 90 (HAx1SP) needle for stretch and non- •...
- Page 118 • damage to the sewing machine. In the event of any lack of clarity, you can obtain information on www.w6-wertarbeit.de under Service / HELP / W6 N 9500 Criteria for optimal threading. Press the Needle Up / Needle Down button once, if the presser foot is up.
- Page 119 • thread”. In this regard, also view the “Criteria for optimal threading of a W6 N 9500 QPL” video that is just 4 minutes long under Service / Help on our website at www.w6-wertarbeit.de. Use a W6 Super Stretch 90 (HAx1SP) needle for stretch and non- •...
- Page 120 • damage to the sewing machine. In the event of any lack of clarity, you can obtain information on www.w6-wertarbeit.de under Service / HELP / W6 N 9500 Criteria for optimal threading. Press the Needle Up / Needle Down button once, if the presser foot is up.
-
Page 121: Stretch Zigzag Stitch: Program 022
• thread”. In this regard, also view the “Criteria for optimal threading of a W6 N 9500 QPL” video that is just 4 minutes long under Service / Help on our website at www.w6-wertarbeit.de. Use a W6 Super Stretch 90 (HAx1SP) needle for stretch and non- •... - Page 122 90 or 75 needles (HAx1SP) Thread tension setting Zigzag stitch settings W6 note The stitch length and stitch width can be changed manually in the specified ranges. Sewing on elastic / Smocking: Carry out the following steps: Sew the fabric on the wrong side.
- Page 123 Utility stitches Using a pattern Hold the elastic in front of and behind the presser foot and keep it taut while sewing. » The stretch zigzag stitch has been sewn. Overlocking: using the overlock foot Carry out the following steps: ➔...
-
Page 124: Stretch Straight Stitch: Program 004
• thread”. In this regard, also view the “Criteria for optimal threading of a W6 N 9500 QPL” video that is just 4 minutes long under Service / Help on our website at www.w6-wertarbeit.de. Use a W6 Super Stretch 90 (HAx1SP) needle for stretch and non- •... -
Page 125: Using The Overlock Foot For Overlock Seams: Overlocking Fabric Edges
Prog. Pattern Application Presser Needle size Needle foot position Stretch Topstitching stretch W6 90 or 75 Straight stitch seams Super Stretch needles (HAx1SP) Thread tension setting Stretch straight stitch settings W6 note The stitch length and stitch width can be changed manually in the specified ranges. - Page 126 • damage to the sewing machine. In the event of any lack of clarity, you can obtain information on www.w6-wertarbeit.de under Service / HELP / W6 N 9500 Criteria for optimal threading. Press the Needle Up / Needle Down button once, if the presser foot is up.
- Page 127 Select the following settings: Designation Prog. Pattern Application Presser Needle size Needle foot position Overcasting / For overlocking W6 90 or 75 overlock fabric edges Super Stretch stitch needles (HAx1SP) Thread tension setting Stretch overlock stitch settings Select the following settings: Designation Prog.
-
Page 128: Open Seams
You have threaded the sewing thread properly, see “Threading the upper • thread”. In this regard, also view the “Criteria for optimal threading of a W6 N 9500 QPL” video that is just 4 minutes long under Service / Help on our website at www.w6-wertarbeit.de. - Page 129 Utility stitches Using a pattern Use a W6 Super Stretch 90 (HAx1SP) needle for stretch and non- • stretch fabrics or a W6 Super Stretch 75 (HAx1SP) needle for thinner fabrics. If necessary, install a special needle. You are using W6 plastic bobbins and thread tension-friendly and lint-free •...
- Page 130 Prog. Pattern Application Presser Needle size Needle foot position Open Creating W6 90 or 75 open Super Stretch seams seams needles (HAx1SP) Thread tension setting Open seam settings Turn both the fabric edges over by 1.5 cm each and smooth the edges.
- Page 131 • thread”. In this regard, also view the “Criteria for optimal threading of a W6 N 9500 QPL” video that is just 4 minutes long under Service / Help on our website at www.w6-wertarbeit.de. Use a W6 Super Stretch 90 (HAx1SP) needle for stretch and non- •...
-
Page 132: Triple Straight Stitch
• thread”. In this regard, also view the “Criteria for optimal threading of a W6 N 9500 QPL” video that is just 4 minutes long under Service / Help on our website at www.w6-wertarbeit.de. Use a W6 Super Stretch 90 (HAx1SP) needle for stretch and non- •... - Page 133 Utility stitches Using a pattern You are using W6 plastic bobbins and thread tension-friendly and lint-free • W6 thread. The presser foot that matches the pattern is installed. • Carry out the following steps: Set the ‹presser foot lifter› to the upper position.
- Page 134 Utility stitches Using a pattern Fold the edge of the fabric to the desired hem width. Position the fabric so that presser foot guide fits against the edge of the hem. needle should pierce the fabric as close as possible to the edge of the fold of the hem.
- Page 135 (HAx1SP) Thread tension setting Blind stitch settings program 029 W6 tip Blind stitches cannot be sewn if the left-hand needle insertion point does not grasp the hem. If the needle grasps too much of the hem, then the fabric cannot...
-
Page 136: Scalloped Hem: Program 027
• thread”. In this regard, also view the “Criteria for optimal threading of a W6 N 9500 QPL” video that is just 4 minutes long under Service / Help on our website at www.w6-wertarbeit.de. Use a W6 Super Stretch 90 (HAx1SP) needle for stretch and non- •... -
Page 137: Satin Stitches Programs 137 To
Satin stitches Using a pattern Press the Needle Up / Needle Down button once, if the presser foot is up. Select the following settings: Designation Prog. Pattern Application Presser Needle size Needle foot position Scalloped hem 027 Decorative seam on thinner, non-stretch 90 or 75 fabrics... - Page 138 • thread”. In this regard, also view the “Criteria for optimal threading of a W6 N 9500 QPL” video that is just 4 minutes long under Service / Help on our website at www.w6-wertarbeit.de. Use a W6 Top Stitch needle.
- Page 139 • damage to the sewing machine. In the event of any lack of clarity, you can obtain information on www.w6-wertarbeit.de under Service / HELP / W6 N 9500 Criteria for optimal threading. Press the Needle Up / Needle Down button once, if the presser foot is up.
-
Page 140: Decorative Stitches
Decorative stitches Using a pattern Turn the fabric over and press the curved seam outwards. ➔ result Iron the fabric carefully. » The curved seam has been sewn. 11.5 Decorative stitches programs 062 to 080, 090 to 133 and 147 to 199 Open-toe satin stitch foot Super Stretch 90 or 75 needle This stitch is used to embellish the edges of women’s and children’s garments or... - Page 141 • thread”. In this regard, also view the “Criteria for optimal threading of a W6 N 9500 QPL” video that is just 4 minutes long under Service / Help on our website at www.w6-wertarbeit.de. Use a W6 Top Stitch needle.
- Page 142 • damage to the sewing machine. In the event of any lack of clarity, you can obtain information on www.w6-wertarbeit.de under Service / HELP / W6 N 9500 Criteria for optimal threading. Press the Needle Up / Needle Down button once, if the presser foot is up.
-
Page 143: Antique And Nostalgia Stitches
Antique and nostalgia stitches Using a pattern Place the W6 stabiliser either under or between the layers of fabric for stabilisation. » The decorate stitch has been sewn. W6 tip Use our W6 multicoloured thread for fancy stitching to achieve unusual effects. - Page 144 • thread”. In this regard, also view the “Criteria for optimal threading of a W6 N 9500 QPL” video that is just 4 minutes long under Service / Help on our website at www.w6-wertarbeit.de. Use a W6 Top Stitch needle.
-
Page 145: Quilting
Quilting Using a pattern Use two layers of fabric and sew along the edge of the fabric keeping a spacing of about 2 cm. Iron the fabric carefully. Place stabiliser either under or between layers of fabric for stabilisation. » The antique and nostalgia stitch has been sewn. 11.7 Quilting Quilting or topstitching refers to the linking of two or more layers of fabric when... -
Page 146: Applications
‹special high quilting foot›. This foot will enable you to sew all quilt seams effortlessly. The special high quilting foot can be purchased from our W6 Wertarbeit online shop in the Accessories category. Please bear in mind that successful quilting requires a certain amount of practice. -
Page 147: 11.7.2 Attaching A Quilting Bar
The appearance of the pattern and even lines improve noticeably the more you practice. You can find a step by step guide to quilting on our W6 website under Sewing ideas / Patchwork & quilting. 11.7.2 Attaching a quilting bar... - Page 148 Quilting Using a pattern Required: A pair of scissors • Quilting bar • CAUTION Risk of injury posed by breaking needles When the quilting foot is used for quilting, the needle may break if any stitch other than the straight stitch with a central needle position is used. There is a risk of injury posed by uncontrolled, moving parts.
-
Page 149: Patches / Patchwork
• thread”. In this regard, also view the “Criteria for optimal threading of a W6 N 9500 QPL” video that is just 4 minutes long under Service / Help on our website at www.w6-wertarbeit.de. Use a W6 Super Stretch 90 (HAx1SP) needle for stretch and non- •... - Page 150 Patch stitch settings PLEASE NOTE The needle position must be set to centre! Failure to do this will result in damage to the W6 sewing machine parts, which are not covered by the warranty. W6 tip Sew patchwork pieces together using the straight stitch 001.
-
Page 151: Step 1
There are numerous techniques for sewing the pieces together using a sewing machine. The same applies to any technique: the W6 sewing machines’ 1/4 inch patchwork quilting foot neatly and precisely sews the 1⁄4 inch seam (6.3 millimetre) that is typically used for patchwork. -
Page 152: Automatic Buttonholes
Programs 007 and 008: The stitch length can be changed manually in the specified ranges. The stitch width cannot be changed. Always place either tear-away or self-adhesive W6 stabiliser on the wrong side of the fabric for the purposes of stabilisation. -
Page 153: Eyelet Buttonhole: Programs 009 And 010
Program 010: The stitch length can be changed manually in the specified ranges. The stitch width cannot be changed. Always place either tear-away or self-adhesive W6 stabiliser on the wrong side of the fabric for the purposes of stabilisation. 11.9.3... -
Page 155: Sewing Buttonholes With Buttonhole Foot I Automatic Detection Of The Buttonhole Size
• thread”. In this regard, also view the “Criteria for optimal threading of a W6 N 9500 QPL” video that is just 4 minutes long under Service / Help on our website at www.w6-wertarbeit.de. Use a W6 Super Stretch 90 (HAx1SP) needle for stretch and non- •... - Page 156 Press the Needle Up / Needle Down button once, if the presser foot is up. Always place W6 stabiliser under the fabric so that the fabric is held in place and the buttonhole seam will have a neat appearance. Mark the buttonhole starting position and length on the fabric.
- Page 157 Automatic buttonholes: programs 007 to 018 Using a pattern Pull the buttonhole attachment backwards and place the button in the button holder. Make sure that the button fits securely in the buttonhole attachment. The length of the buttonhole is determined by the diameter of the button.
- Page 158 Sewing buttonholes with buttonhole foot II Manual setting of buttonhole size program 019 Using a pattern Gently pull the buttonhole lever down as far as possible. Hold the upper thread gently and start sewing. buttonhole is sewn automatically by the machine. Raise the presser foot and cut the threads.
- Page 159 In this regard, also view the “Criteria for optimal threading of a W6 N 9500 QPL” video that is just 4 minutes long under Service / Help on our website at www.w6- wertarbeit.de. Use a W6 Super Stretch 90 (HAx1SP) needle for stretch and non- •...
- Page 160 Using a pattern Press the Needle Up / Needle Down button once, if the presser foot is up. Place W6 stabiliser under the fabric so that the fabric is held in place and the buttonhole seam will have a neat appearance. Mark...
- Page 161 Sewing buttonholes with buttonhole foot II Manual setting of buttonhole size program 019 Using a pattern Place the fabric under the presser foot so that the needle sticks into the starting position for the buttonhole. Lower presser foot (buttonhole foot). Gently pull the buttonhole lever down as far as possible.
-
Page 162: Cutting Out The Buttonhole
Using a ripping knife or a pair of sharp W6 buttonhole scissors, cut open the buttonhole. Make an incision in the centre of the buttonhole and cut it open on both sides up to the pins. -
Page 163: Sewing With The Walking Foot (Special Accessory)
• thread”. In this regard, also view the “Criteria for optimal threading of a W6 N 9500 QPL” video that is just 4 minutes long under Service / Help on our website at www.w6-wertarbeit.de. Use a W6 Super Stretch 90 (HAx1SP) needle for stretch and non- •... - Page 164 • damage to the sewing machine. In the event of any lack of clarity, you can obtain information on www.w6-wertarbeit.de under Service / HELP / W6 N 9500 Criteria for optimal threading. Press the Needle Up / Needle Down button once, if the presser foot is up.
- Page 165 Sewing with the walking foot (special accessory) Using a pattern Using the screwdriver, loosen the slotted screw on the ‹presser foot holder›. Push ‹presser foot lifter› Remove ‹presser foot holder› and the ‹presser foot›. Push ‹presser foot lever› again. Place ‹walking foot›...
- Page 166 Sewing with the walking foot (special accessory) Using a pattern Make sure that the walking foot’s arm is on the needle clamp’s shaft. Fasten ‹presser foot› using the screw. Hold the upper thread gently when starting to sew and sew slowly.
-
Page 167: Sewing On Buttons: Program 021
• thread”. In this regard, also view the “Criteria for optimal threading of a W6 N 9500 QPL” video that is just 4 minutes long under Service / Help on our website at www.w6-wertarbeit.de. Use a W6 Super Stretch 90 (HAx1SP) needle for stretch and non- •... - Page 168 Sewing on buttons: program 021 Using a pattern In the event of any lack of clarity information can be found on www.w6- wertarbeit.de under Service / HELP: Criteria for optimal threading. The lower thread has been pulled taut and carefully to the 7 o’clock and 9 o’clock positions in the silver slot of the black hook race.
- Page 169 Sewing on buttons: program 021 Using a pattern Adjust the stitch width so that the needle stitches into the left hole of the button precisely. Turn machine’s hand wheel several times and check whether the button’s second hole is also stitched into precisely. If this is not the case, then readjust the stitch width.
-
Page 170: Sewing With The Twin Needle 2.0
You have threaded the sewing thread properly, see “Threading the upper • thread”. In this regard, also view the “Criteria for optimal threading of a W6 N 9500 QPL” video that is just 4 minutes long under Service / Help on our website at www.w6-wertarbeit.de. - Page 171 Sewing with the twin needle: program 006 Using a pattern Use a W6 twin needle. • You are using W6 plastic bobbins and thread tension-friendly and lint-free • W6 thread. The presser foot that matches the pattern is installed. •...
- Page 172 Sewing with the twin needle: program 006 Using a pattern Pull the thread through the left-hand eye of the needle from front to back. Place second spool on external spool pin. Thread second thread in precisely the same way as the first.
- Page 173 • thread”. In this regard, also view the “Criteria for optimal threading of a W6 N 9500 QPL” video that is just 4 minutes long under Service / Help on our website at www.w6-wertarbeit.de. Use a W6 Super Stretch 90 (HAx1SP) needle for stretch and non- •...
- Page 174 • damage to the sewing machine. In the event of any lack of clarity, you can obtain information on www.w6-wertarbeit.de under Service / HELP / W6 N 9500 Criteria for optimal threading. Press the Needle Up / Needle Down button once, if the presser foot is up.
- Page 175 (special accessory) is on the needle clamp’s shaft. Attach the darning embroidery foot using the screw. Draw the design you want on the fabric. Fasten the fabric with W6 stabiliser to prevent the seam from having a distorted appearance.
- Page 176 Using a pattern Clamp the fabric and stabiliser with the sketched embroidery design in a freehand embroidery frame. The W6 freehand embroidery frame is not supplied with the sewing machine. Place embroidery frame under the needle and lower the presser foot.
-
Page 177: Sewing In Zippers
• thread”. In this regard, also view the “Criteria for optimal threading of a W6 N 9500 QPL” video that is just 4 minutes long under Service / Help on our website at www.w6-wertarbeit.de. Use a W6 Super Stretch 90 (HAx1SP) needle for stretch and non- •... - Page 178 • damage to the sewing machine. In the event of any lack of clarity, you can obtain information on www.w6-wertarbeit.de under Service / HELP / W6 N 9500 Criteria for optimal threading. Press the Needle Up / Needle Down button once, if the presser foot is up.
- Page 179 Sewing in zippers: program 002 Using a pattern Using the ‹zipper foot› sew as far as the zipper bottom stop. Then tack up to the edge of the fabric. No. Designation Wrong side of the fabric Tack seam Zipper bottom stop Reinforcing stitches Press the ‹Reverse button›...
- Page 180 Sewing in zippers: program 002 Using a pattern Sew in the zipper. Pull the tacking threads. » The zipper has been sewn in.
-
Page 182: Saving And Sewing Patterns, Deleting Pattern Sequences
(#176). W6 tip Always place W6 stabiliser under the fabric so that the fabric is held in place and the embroidery pattern produced is neat. Have you ever used our W6 multicoloured thread? You can achieve amazing effects with this. - Page 183 • damage to the sewing machine. In the event of any lack of clarity, you can obtain information on www.w6-wertarbeit.de under Service / HELP / W6 N 9500 Criteria for optimal threading. Press the Needle Up / Needle Down button once,...
- Page 185 Saving and sewing patterns, deleting pattern sequences Using a pattern Starting position on your touchscreen: Press the button until the numbers 1–9 appear.
- Page 186 Saving and sewing patterns, deleting pattern sequences Using a pattern Press the Memory button. A solid border is placed around the dashed border. The Memory button is activated. Enter the number #201. PLEASE NOTE If you enter something incorrectly, press the button.
- Page 188 Saving and sewing patterns, deleting pattern sequences Using a pattern Enter the number #254. Press , then you do not have to enter the number #254 again.
- Page 189 Saving and sewing patterns, deleting pattern sequences Using a pattern Enter the number #241. Enter the number #176.
-
Page 190: Selecting, Saving A Pattern Template And Creating A Mirror Image Of A Pattern
• thread”. In this regard, also view the “Criteria for optimal threading of a W6 N 9500 QPL” video that is just 4 minutes long under Service / Help on our website at www.w6-wertarbeit.de. Use a W6 Super Stretch 90 (HAx1SP) needle for stretch and non- •... - Page 191 • damage to the sewing machine. In the event of any lack of clarity, you can obtain information on www.w6-wertarbeit.de under Service / HELP / W6 N 9500 Criteria for optimal threading. Press the Needle Up / Needle Down button once,...
- Page 193 Selecting, saving a pattern template and creating a mirror image of a pattern Using a pattern Starting position on your touchscreen: Press the button until the numbers 1–9 appear.
- Page 194 Selecting, saving a pattern template and creating a mirror image of a pattern Using a pattern Press the Memory button. A solid border is placed around the dashed border. The Memory button is activated. Enter the number #161. PLEASE NOTE If you enter something incorrectly, press the button.
- Page 195 Selecting, saving a pattern template and creating a mirror image of a pattern Using a pattern Press the button to change the menu. Activate the Mirror button on the touchscreen. symbol appears top right on the touchscreen.
- Page 197 Selecting, saving a pattern template and creating a mirror image of a pattern Using a pattern Press the button until the numbers 1–9 appear. Press , then you do not have to enter the number #161 again.
- Page 198 Selecting, saving a pattern template and creating a mirror image of a pattern Using a pattern Press the button for continuous repeat. The button is activated when a solid border is placed around the dashed inner border. Do you want to stop the pattern sequence, for example, at the end of the seam? Deactivate the button for continuous repeat.
-
Page 199: The First Pattern Is To Be Mirrored In The Pattern Sequence
• thread”. In this regard, also view the “Criteria for optimal threading of a W6 N 9500 QPL” video that is just 4 minutes long under Service / Help on our website at www.w6-wertarbeit.de. Use a W6 Super Stretch 90 (HAx1SP) needle for stretch and non- •... - Page 200 • damage to the sewing machine. In the event of any lack of clarity, you can obtain information on www.w6-wertarbeit.de under Service / HELP / W6 N 9500 Criteria for optimal threading. Press the Needle Up / Needle Down button once, if the presser foot is up.
- Page 201 The first pattern is to be mirrored in the pattern sequence Using a pattern Press the button until the numbers 1–9 appear. Press the Memory button. A solid border is placed around the dashed border. The Memory button is activated.
- Page 203 The first pattern is to be mirrored in the pattern sequence Using a pattern Press the button to change the menu. Activate the Mirror button on the touchscreen. symbol appears top right on the touchscreen...
- Page 205 The first pattern is to be mirrored in the pattern sequence Using a pattern Press the button until the numbers 1–9 appear. Enter the number #161. PLEASE NOTE If you enter something incorrectly, press the button.
- Page 207 The first pattern is to be mirrored in the pattern sequence Using a pattern Press the button to change the menu. Deactivate the Mirror button by pressing on the touchscreen again. symbol top right on the touchscreen has disappeared. Select the pattern sequence you want, please see Section 11.16.1.
-
Page 208: 12 Practical Tips
Before you start sewing, take note of the following information, which is applicable to all sewing work. 12.1.1 Why use W6 thread? One particular nuisance when sewing can be cheap, inferior quality threads. Which is why we recommend our thread tension-friendly and lint-free W6 thread for sewing, embroidery and overlocking. -
Page 210: Tension Testing Sewing Thread | Is My Thread Unwinding Correctly
➔ Turn the spool and invert it on the second supplied spool pin. ➔ Put the second supplied spool pin on your W6 machine’s winder. ➔ Only use W6 thread. » The tension test has been carried out. -
Page 212: Changing The Thread
First cut the thread at the spool and then pull it out through the needle. If you want to change the thread in the machine, never pull it up with the spool. This may result in damage to your W6 sewing machine’s thread tension. This is not covered by the warranty. - Page 214 • thread”. In this regard, also view the “Criteria for optimal threading of a W6 N 9500 QPL” video that is just 4 minutes long under Service / Help on our website at www.w6-wertarbeit.de. Use a W6 Super Stretch 90 (HAx1SP) needle for stretch and non- •...
- Page 216 • damage to the sewing machine. In the event of any lack of clarity, you can obtain information on www.w6-wertarbeit.de under Service / HELP / W6 N 9500 Criteria for optimal threading. Press the Needle Up / Needle Down button once, if the presser foot is up.
- Page 217 Gathering: program 001 Practical tips Knot the two threads together. Using a needle, pull the ends of thread into the dart. Iron the dart to one side. The dart ➔ lies flat. » The dart has been sewn. 12.3 Gathering: program 001 Standard foot, Super Stretch 90 or 75 needle Gathering is especially suitable for the waistbands of skirts, shirt sleeves and...
- Page 218 • thread”. In this regard, also view the “Criteria for optimal threading of a W6 N 9500 QPL” video that is just 4 minutes long under Service / Help on our website at www.w6-wertarbeit.de. Use a W6 Super Stretch 90 (HAx1SP) needle for stretch and non- •...
- Page 219 Gathering: program 001 Practical tips Pull both threads backwards about 8 cm under the ‹presser foot›. a parallel straight stitch seam at distance of 10 to 15 mm the left and right of the end line. the two threads with the scissors so that about 8 cm is left.
-
Page 220: Appliqués / Appliqué
• thread”. In this regard, also view the “Criteria for optimal threading of a W6 N 9500 QPL” video that is just 4 minutes long under Service / Help on our website at www.w6-wertarbeit.de. Use a W6 Super Stretch 90 (HAx1SP) needle for stretch and non- •... - Page 221 • damage to the sewing machine. In the event of any lack of clarity, you can obtain information on www.w6-wertarbeit.de under Service / HELP / W6 N 9500 Criteria for optimal threading. Press the Needle Up / Needle Down button once, if the presser foot is up.
- Page 222 Sew reinforcing stitches at the end of the seam. » The appliqué has been sewn W6 tip A thin insert of stabilising material helps you to keep the position of the stitches along the appliqué more accurate. This can then be removed easily.
-
Page 223: Sewing Corners
• thread”. In this regard, also view the “Criteria for optimal threading of a W6 N 9500 QPL” video that is just 4 minutes long under Service / Help on our website at www.w6-wertarbeit.de. Use a W6 Super Stretch 90 (HAx1SP) needle for stretch and non- •... - Page 224 • damage to the sewing machine. In the event of any lack of clarity, you can obtain information on www.w6-wertarbeit.de under Service / HELP / W6 N 9500 Criteria for optimal threading. Press the Needle Up / Needle Down button once, if the presser foot is up.
-
Page 225: Sewing At Edges
• thread”. In this regard, also view the “Criteria for optimal threading of a W6 N 9500 QPL” video that is just 4 minutes long under Service / Help on our website at www.w6-wertarbeit.de. Use a W6 Super Stretch 90 (HAx1SP) needle for stretch and non- •... - Page 226 • damage to the sewing machine. In the event of any lack of clarity, you can obtain information on www.w6-wertarbeit.de under Service / HELP / W6 N 9500 Criteria for optimal threading. Press the Needle Up / Needle Down button once, if the presser foot is up.
-
Page 227: Sewing Thick Fabrics
• thread”. In this regard, also view the “Criteria for optimal threading of a W6 N 9500 QPL” video that is just 4 minutes long under Service / Help on our website at www.w6-wertarbeit.de. Use a W6 Super Stretch 90 (HAx1SP) needle for stretch and non- •... - Page 228 Sewing thick fabrics Practical tips In the event of any lack of clarity, further information can be found on www.w6- wertarbeit.de under Service / HELP: Criteria for optimal threading. The lower thread has been pulled taut and carefully to the 7 o’clock and 9 o’clock positions in the silver slot of the black hook race.
-
Page 229: Sewing Thin Fabrics
Place a piece of cloth, paper or cardboard of similar thickness to the fabric behind and under the ‹presser foot›. To compensate for the difference in height, you can also use the W6 Balance Hub (special accessory). Lower the ‹presser foot›. Continue sewing. » Done. 12.8... - Page 230 Sewing thin fabrics Practical tips In this regard, also view the “Criteria for optimal threading of a W6 N 9500 QPL” video that is just 4 minutes long under Service / Help on our website at www.w6- wertarbeit.de. Use a W6 Super Stretch 90 (HAx1SP) needle for stretch and non- •...
-
Page 231: Sewing Stretch Fabrics
• thread”. In this regard, also view the “Criteria for optimal threading of a W6 N 9500 QPL” video that is just 4 minutes long under Service / Help on our website at www.w6-wertarbeit.de. Use a W6 Super Stretch 90 (HAx1SP) needle for stretch and non- •... - Page 232 • damage to the sewing machine. In the event of any lack of clarity, you can obtain information on www.w6-wertarbeit.de under Service / HELP / W6 N 9500 Criteria for optimal threading. Press the Needle Up / Needle Down button once, if the presser foot is up.
-
Page 233: Sewing A Straight Line Using Straight Stitch On Fabric Edges
Straight stitch centre Super Stretch (HAx1SP) Thread tension setting Sewing a straight line using straight stitch on the fabric edge, technique 1 Prerequisite: ‹blind hem foot› is fitted. • Use a W6 Super Stretch 90 needle (HAx 1SP). •... - Page 234 • thread”. In this regard, also view the “Criteria for optimal threading of a W6 N 9500 QPL” video that is just 4 minutes long under Service / Help on our website at www.w6-wertarbeit.de. Use a W6 Super Stretch 90 (HAx1SP) needle for stretch and non- •...
- Page 235 Sewing a straight line using straight stitch on the fabric edge, technique 2 Prerequisite: ‹blind hem foot› is fitted. • Use a W6 Super Stretch 90 needle (HAx1SP). • Prerequisite: You have read the safety notes for this sewing machine, see “Safety •...
- Page 236 • thread”. In this regard, also view the “Criteria for optimal threading of a W6 N 9500 QPL” video that is just 4 minutes long under Service / Help on our website at www.w6-wertarbeit.de. Use a W6 Super Stretch 90 (HAx1SP) needle for stretch and non- •...
-
Page 237: 12.11 Topstitching Seams / Sewing Jeans Seams
➔ Thread two upper threads, as described in Section 11.13 Sewing with the twin needle. ➔ Thread the two upper threads without using the automatic needle threader into a W6 Jeans needle. ➔ Do not use the automatic needle threader, as it may be damaged by two upper threads. -
Page 238: Maintenance
However, you cannot reach certain areas of your W6 sewing machine with normal cleaning. If your W6 machine has been used very frequently, then the fluff and dust deposits must be removed regularly. Is the appearance of the seam no... -
Page 239: Maintenance To Be Carried Out By The Customer
If the needle plate is severely damaged by needle strikes, it must be replaced. Please see “Selecting the needle” > “Inserting a needle”. We recommend you use our high-quality W6 needles, which can be purchased from our W6 Wertarbeit online shop under the Accessories category. We can only guarantee a... -
Page 240: 13.2.3 Cleaning The Hook And Hook Case
Maintenance to be carried out by the customer Maintenance 13.2.3 Cleaning the hook and hook case The ‹hook› must always be kept clean. If dust has collected on the ‹hook›, it must be removed immediately. Dust, pieces of thread and lint in the vicinity of the rotary hook can lead to uneven seams or the ‹hook system›... - Page 241 Check the needle for damage or wear. Replace damaged or worn needles. » The needle has been removed. W6 tip Worn or damaged needles may break and damage the machine. There is a risk of injury. Replace the needles regularly.
-
Page 242: Removing The Presser Foot And Presser Foot Holder
Maintenance to be carried out by the customer Maintenance Removing the presser foot and presser foot holder 13.2.3.2 Carry out the following steps: Push the ‹presser foot lifter› up. ‹presser foot lifter› can also be lifted for different presser feet. ➔... - Page 243 Maintenance to be carried out by the customer Maintenance Push the ‹presser foot lifter› Remove ‹presser foot holder› and the ‹presser foot›. » The presser foot and presser foot holder have been removed and can be checked.
-
Page 244: 13.2.3.3 Removing The Plastic Bobbin
Maintenance to be carried out by the customer Maintenance 13.2.3.3 Removing the plastic bobbin Carry out the following steps: Check the needle position. If it is not in the up position, press the ‹Needle Up / Needle Down› button. ➔ The sewing machine is automatically moved into the ideal starting position for sewing. -
Page 245: 13.2.3.4 Removing The Needle Plate
Minor needle strikes on the needle plate can be removed using fine emery paper (for example 800 grit). If the needle plate is severely damaged by needle strikes, it must be replaced. You can order a new needle plate from our W6 Wertarbeit online shop (Spare Parts category). -
Page 246: 13.2.3.5 Checking The Hook System
Maintenance to be carried out by the customer Maintenance 13.2.3.5 Checking the hook system Prerequisite: The needle plate has been removed. • Carry out the following steps: Remove the ‹hook race›. Clean remove pieces of thread sewing dust from this area Using a cleaning brush. -
Page 247: 13.2.3.6 Checking The Hook Race For Damage
Minor needle strikes on the hook race can be removed carefully using fine emery paper (for example 800 grit). If the hook race is severely damaged by needle strikes, it must be replaced. You can order a new hook race from our W6 Wertarbeit online shop (Spare Parts category). -
Page 248: 13.2.4 Disposal
Maintenance to be carried out by the customer Maintenance 13.2.4 Disposal It is not permitted for this product to be disposed of using the normal household waste at the end of its service life. It must be handed in at a collection point for the recycling of electrical and electronic devices. -
Page 249: Help
◦ Checking the needle plate (Section 14.3.9) ◦ Checking the bobbin (Section 14.3.10) ◦ Fitting the needle plate (Section 14.3.11) ◦ Using plastic bobbins (only original W6 WERTARBEIT bobbins) (Section 14.3.12) ◦ Taking note of the stitch length settings (Section 14.3.13) ◦... -
Page 250: Troubleshooting
Troubleshooting Help 14.1 Troubleshooting You can find a table about possible sources of error here. If you cannot rectify the fault, contact your nearest customer service centre. Troubleshooting Possible cause Effect Solution Upper thread is not threaded Upper thread Rethread the upper thread. correctly. - Page 251 “Inserting a plastic bobbin in the hook race” and “Threading the upper thread”. Incorrect needle or non- Insert the correct needle. standard W6 quality needle in Incorrect needle/thread/fabric Please see, “Selecting the combination. needle” > “Needle and thread table”.
- Page 252 Insert the needle correctly. correctly. Needle is worn, non-standard Replace the needle for a new W6 quality needle not in use W6 quality needle. or needle is too old. There are needle strikes on Sand the parts with fine emery the metal needle plate.
-
Page 253: Setting The Correct Thread Tension
Zigzag stitch: left – from below | right – from above Should the sewing machine skip stitches on your jersey fabric, you should use a size 90 Super Stretch needle (HAx1SP) from W6 WERTARBEIT in conjunction with a stretch pattern. -
Page 254: Loosening The Upper Thread Tension
Sew a test seam on a cotton tea towel folded double to test and evaluate the thread tension. W6 tip The correct thread tension is pre-set for you by W6 WERTARBEIT. 14.2.3 Loosening the upper thread tension Turn the upper thread tension dial to a value less than 4 to slacken the upper thread tension. - Page 256 • thread”. In this regard, also view the “Criteria for optimal threading of a W6 N 9500 QPL” video that is just 4 minutes long under Service / Help on our website at www.w6-wertarbeit.de. Use a W6 Super Stretch 90 (HAx1SP) needle for stretch and non- •...
-
Page 257: Tips & Tricks
The thread must unwind smoothly and without jamming. You should always follow this tip when sewing and embroidering. W6 tip On the W6 WERTARBEIT website you will find assistance under Service/ Help / W6 N 9000 QPL / Videos: Optimal Threading (approx. 4 minutes long.) -
Page 258: Checking The Thread Quality
This is very helpful if your thread has been wound incorrectly by the manufacturer (if the thread has not been wound correctly, it cannot unwind smoothly). We recommend our thread tension-friendly and lint-free W6 thread for sewing, embroidery and overlocking. -
Page 260: The External Spool Pin
14.3.4 Inserting a new needle Based on our experience, we recommend the use of W6 WERTARBEIT quality needles, to proceed with troubleshooting. The needle must be inserted up to the stop in the needle holder. When doing so, the flat side of the sewing machine needle must point to the rear, see “Selecting... -
Page 262: Inserting The Bobbin Correctly
• hand. The lower thread must hang down the left side. This results in the thread forming a “C” shape. See Optimal Threading video for the W6 N 9500 QPL. This results in a “C” shape when you hold the plastic bobbin. -
Page 264: Threading The Upper Thread Correctly
Make sure that you are threading in the top needle position and the presser foot is in the up position. W6 note If you want to change the thread in the machine, never pull it up with the spool. -
Page 266: Bringing Up The Lower Thread
If the thread stops unwinding, use the external spool pin (see “Help” > “The external spool pin” or turn the spool over once or try another branded spool, e.g. W6 thread. A needle that is too thin can also be the cause of poor unwinding thread. -
Page 267: Checking The Needle Plate
In the event of excessive damage, the needle plate must be replaced, see “Maintenance” > “Removing the needle plate”. You can order a new needle plate from our W6 online shop under “Spare parts”. -
Page 268: Checking The Hook Race
Tips & tricks Help 14.3.10 Checking the hook race Please follow the instructions below: Remove the black hook race with the bobbin. Check for needle strikes • and damage. Remove needle strikes or unevenness using fine 800 emery paper. • On the right-hand side of the black hook race (5 o'clock on the dial of a •... -
Page 270: Fitting The Needle Plate
Tips & tricks Help Insert a neatly wound W6 original plastic bobbin in the black hook race. • This means: Hold the plastic bobbin between your thumb and index finger • in your left hand. The lower thread must hang down the left side! Now place the plastic bobbin in the hook race and hold it in place with the •... -
Page 271: Taking Note Of The Stitch Length Setting
Tips & tricks Help Wind the tread twice around the tension disc Bobbin winding: left – incorrect | right – correct Make sure that you use original bobbins (plastic bobbins from W6 WERTARBEIT). 14.3.13 Taking note of the stitch length setting Very important: Take note of the following stitch length settings for straight stitch. -
Page 272: Correct Thread Take-Up Lever / Thread Take-Up Arm Position
Zigzag stitch: left – from below | right – from above Should the sewing machine skip stitches on your fabric, you should use a size 90 Super Stretch needle from W6 WERTARBEIT in conjunction with a stretch pattern. Is your fabric bunching up? Then place stabiliser under the fabric and/or reduce the stitch width. -
Page 273: Overlocking Fabric Edges
Tips & tricks Help 14.3.16 Overlocking fabric edges We recommend the “Feather stitch” sewing program for overlocking and overcasting. Overcasting and overlocking W6 tip We recommend using the blind hem foot or the G foot. Use the edge. -
Page 274: Technical Data
Key data The sewing machine’s key data Type Sewing machine Model W6 N 9500C QPL The sewing machine is intended for domestic use only. Other use or use in excess of the intended rating does not comply. 15.2 Technical data... -
Page 275: Eu Declaration Of Conformity
EU Declaration of Conformity Technical data 15.3 EU Declaration of Conformity EU Declaration of Conformity As soon as this machine has been altered in a material way this declaration becomes null and void. A new conformity process in accordance with the EU Low Voltage Directive is then required. -
Page 276: Service Information
• Contact us directly by e-mail at info@w6-wertarbeit.de. W6 WERTARBEIT also offers the following options on its website for free. Please access our website using www.w6-naehmaschinen.de and under HELP select: Criteria for the optimal threading of a W6 N 9500C QPL video. - Page 277 Checking the hook race for damage............245 Checking the hook system...............244 Checking the lower thread tension............252 Checking the needle..................53 Checking the needle / Why using W6 needles is important....236 Checking the needle plate...............260 Checking the thread quality..............255 Checking the thread tension............251, 263 Cleaning the hook and hook case............238...
- Page 278 Power plug....................23 Practical tips.....................208 Presser foot lifter..................34 Quilting.....................147 Rear view....................19 Removing a W6 plastic bobbin from the black hook race......59 Removing the needle................238 Removing the needle plate..............243 Removing the plastic bobbin..............242 Removing the presser foot and presser foot holder........240 Reverse button...................31 Round buttonhole: programs 011, 012, 013 and 014......156...
- Page 279 Service information..................268 Setting the correct thread tension............251 Setting the upper thread tension..............251 Setting up....................13 Sewing a straight line using straight stitch on fabric edges.....229 Sewing a test seam..................84 Sewing a test seam using straight stitch far left.........84 Sewing a test seam using stretch zigzag stitch.........87 Sewing at edges..................221 Sewing buttonholes with buttonhole foot I –...
- Page 280 What do I do with the upper thread?............72 What we expect from you................11 Why use W6 bobbins?................59 Why use W6 thread, needles and bobbins?..........24 Why use W6 thread?................208 Winding a new W6 plastic bobbin..............61 Zigzag stitch: program 006 Standard foot..........120...
- Page 281 You are also welcome to contact our customer service by email. You will find our contact details and a lot of useful information that has been collected for you under “Help” on our www.w6-wertarbeit.de website. You will also find many helpful videos on instructions, threading and applications.
Need help?
Do you have a question about the N 9500C QPL and is the answer not in the manual?
Questions and answers