Table of Contents
Advertisement
Quick Links
Advertisement
Table of Contents

Related Manuals for W6 N 5000 Exklusive


Summary of Contents for W6 N 5000 Exklusive
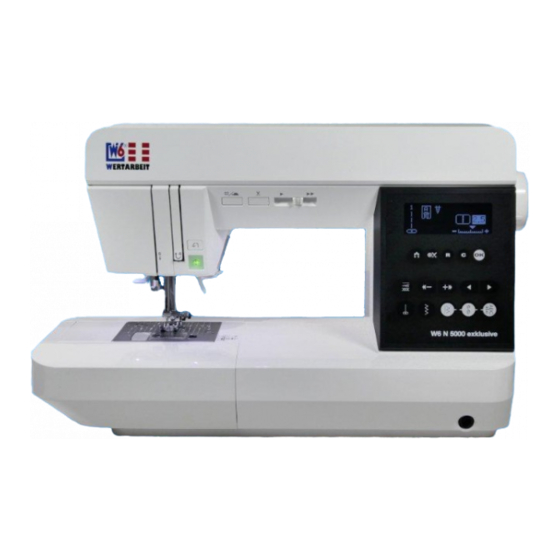
- Page 1 W6 N 5000 Exklusive sewing machine Manual...
- Page 2 A visual selection of stitches and their use, and much • more. The W6 sewing ideas on the W6 website support you with creative sewing projects. Please take a look at the website. Please read the manual and the safety notes carefully, before operating the machine.
-
Page 3: Table Of Contents
Contents Inhaltsverzeichnis 1 Safety notes.......................6 1.1 Notes for operational safety.................6 1.2 Instructions for use..................6 1.3 After sewing....................7 1.4 Tips for a long service life................7 1.5 What we expect from you................8 2 Assembling the machine..................9 2.1 Unpacking....................9 2.2 Setting up....................10 2.3 Connecting the machine................10 2.4 Unplugging the power plug................12 2.5 Information on the embroidery unit............13 3 Getting to know the machine................15... - Page 4 7.1 Checking the needle..................60 7.2 Inserting a needle..................61 7.3 Needle and thread table................64 8 Inserting the bobbin..................67 8.1 Why use W6 bobbins?................67 8.2 Removing the bobbin.................67 8.3 Winding the bobbin..................68 8.4 Inserting a plastic bobbin in the hook race..........70 8.5 Using the upper thread to pull up the lower thread........72 9 What do I do with the upper thread?..............74...
- Page 5 12.2 Maintenance to be carried out by the customer........155 12.2.1 Checking the needle plate...............155 12.2.2 Checking the needle / Why using W6 needles is important?...155 12.2.3 Cleaning the hook, hook race and feed dogs........156 12.2.4 Checking the hook system for damage...........158 12.2.5 Checking the hook race for damage..........159...
-
Page 6: Safety Notes
Notes for operational safety Safety notes Safety notes This section contains information on how to use the manual: Notes for operational safety (Section 1.1) • Instructions for use (Section 1.2) • After sewing (Section 1.3) • Tips for a long service life (Section 1.4) •... -
Page 7: After Sewing
• Based on its design, the machine is not intended for commercial use. • Have it inspected by a W6 workshop (this may result in additional costs). • Frequent sewers should send the machine in for an annual inspection •... -
Page 8: What We Expect From You
Only allow an authorised workshop to work on electrical components. • W6 WERTARBEIT also offers the following options on its website for free. Please access our website using www.w6-wertarbeit.de and under HELP select: Criteria for the optimal threading of a W6 N 5000 Exklusive video. -
Page 9: Assembling The Machine
Unpacking Assembling the machine Assembling the machine This section contains information on how to set up the machine: Unpacking (Section 2.1) • Setting up (Section 2.2) • Connecting the machine (Section 2.3) • Unplugging the power plug (Section 2.4) • Information on the embroidery unit (Section 2.5) •... -
Page 10: Setting Up
Setting up Assembling the machine Setting up When setting up, please pay attention to the following points: The supporting surface must be sturdy, non-slip and of adequate size. • There is adequate lighting for work. • Your seat ensures a convenient and ergonomically sound posture when •... - Page 11 Connecting the machine Assembling the machine Carry out the following steps: Place the machine on a sturdy, non-slip and adequately sized table. Plug the power plug into the sewing machine socket. Plug the power plug into the power socket. Plug the foot controller plug into the sewing machine socket.
-
Page 12: Unplugging The Power Plug
Unplugging the power plug Assembling the machine Set the on / off switch to the “I” (ON) position. ➔ The machine is switched on. ➔ The lighting is switched on. The machine does not sew? The machine is not connected correctly. ➔... -
Page 13: Information On The Embroidery Unit
With the W6 embroidery software, you can also easily create any customised embroidery you fancy. A basic W6 embroidery software is included in the embroidery unit price. Data is transferred from the embroidery software to the embroidery unit using a USB stick. - Page 14 Information on the embroidery unit Assembling the machine 3) Switch the sewing machine on after attaching the embroidery unit. The thread tension is shown on the sewing machine’s LCD display when using the embroidery unit. You can adjust the thread tension using the buttons on the control panel.
-
Page 15: Getting To Know The Machine
Front view Getting to know the machine Getting to know the machine This section will familiarise you with the machine parts and what they are called: Front view (Section 3.1) • View of the presser foot, automatic needle threader and needle plate •... -
Page 16: Front View
Front view Getting to know the machine Front view Machine components – front view Machine parts No. Designation 01 Needle Up / Down / Slow Sewing button (See notes, Section 5.3) 02 Thread Cutter button 03 Speed control 04 Top cover 05 LCD display 06 Control panel 07 Hand wheel... -
Page 17: View Of The Presser Foot, Automatic Needle Threader And Needle Plate
View of the presser foot, automatic needle threader and needle plate Getting to know the machine Machine parts (continued) No. Designation 21 Twin Needle button 22 Tie-off / Cut button (See notes, Section 5.4) 23 Length / Width / Tension button 24 Straight Stitch button 25 Extension table 26 Knee lifter connection... -
Page 18: Top View
Top view Getting to know the machine Machine parts (continued) No. Designation 36 Metal thread guide needle support 37 Needle 38 Locking button on the presser foot 39 Needle plate 40 Bobbin cover release button 41 Bobbin cover (transparent) Guide lines on the needle plate indicate the distance from the centre needle position. - Page 19 Top view Getting to know the machine Machine parts (continued) No. Designation 46 Thread guide 47 Thread take-up lever (inside / covered) 48 Thread tension regulator (inside / covered) 49 Spool cap (small) 50 Horizontal spool pin 51 Felt washer 52 Bobbin guide 53 Thread cutter for bobbin winder 54 Bobbin winder stop...
-
Page 20: Rear View
Rear view Getting to know the machine Machine parts (continued) No. Designation 63 Foot controller socket 64 Foot controller 65 Power cable Rear view Machine components – rear view Machine parts No. Designation 66 Drop feed lever (The drop feed lever can only be accessed when the extension table has been removed.) Extension table Extension table... -
Page 21: Removing The Extension Table
Extension table Getting to know the machine Removing the extension table Removing the extension table Reach into the extension table with your finger on the bottom left and pull it to the left. Slide it to the right to insert. Free arm sewing Simply remove the extension table for free arm sewing. -
Page 22: Connecting The Machine
Connecting the machine Getting to know the machine Connecting the machine Connecting the machine Place the machine on a sturdy table. Plug the power cable with the two-pin plug into the sewing machine socket. Plug the power plug into the power socket. Switch on the power switch. -
Page 23: Foot Controller
Foot controller Getting to know the machine Foot controller The foot controller allows you to control the speed using your foot. When the foot controller is plugged in, the Start / Stop button is disabled. Switch off the power switch (O symbol). -
Page 24: Accessories
Spool cap (small) for W6 spools On the accessory shelf (front compartment) Picture Designation Satin stitch foot Overcasting / overlock foot Blind hem foot Button foot Zipper foot Screwdriver for needle plate Four W6 plastic bobbins (one in the machine) Seam ripper... - Page 25 Accessories Under the accessory shelf (front compartment) Lift the shelf (a) by the tab (b). There is a compartment underneath. Picture Designation Screwdriver Brush Quilting bar Spool cap (large) Felt washer Extra spool pin (external) Selection of needles for standard woven fabrics In the rear accessory compartment Picture...
- Page 26 Magnifier Accessories Magnifier With the magnifier you can see the needle area better or it can be used to help with threading. Attaching the magnifier Hold the magnifier holder (a) and insert the pin (b) into the hole for the magnifier (c) until it stops.
- Page 27 Knee lifter Accessories Removing the magnifier Grab holder pull magnifier out downwards. DANGER Accident prevention. Do not look at the sun through the magnifier. There is a risk of blindness. WARNING Reducing the fire hazard. Do not leave the magnifier in direct sunlight. This can cause a fire. Knee lifter By attaching the knee lifter to the machine, you can raise or lower the presser foot with your knee.
- Page 28 Knee lifter Accessories Dust cover Cover the machine with the dust cover when not in use.
-
Page 29: Operating Elements
Operating elements Operating elements This section contains information on the machine’s operating elements: Start / Stop button (Section 5.1) • Reverse button (Section 5.2) • Needle Up / Down / Slow Sewing button (Section 5.3) • Thread Cutter button (Section 5.4) •... -
Page 30: Start / Stop Button
Start / Stop button Operating elements Start / Stop button (A) The machine starts when the Start / Stop button is pressed and stops when it is pressed again. The machine starts slowly at the beginning of the sewing process. Indicator light Green “ON”... -
Page 31: Needle Up / Down / Slow Sewing Button
When NOT sewing, the needle stop position changes to up or down when this button is pressed. Please note: Only use thread tension-friendly and lint-free W6 thread. • Always press the Needle Up / Needle Down button before threading. •... -
Page 40: Speed Control
PLEASE NOTE: Only use thread tension-friendly and lint-free W6 thread. • Poor quality threads may damage the cutter. • Do not press this button if there is no fabric in the machine or if the threads • are not to be cut. The threads could become entangled and cause damage. -
Page 41: Presser Foot Lifter
Presser foot lifter Operating elements Presser foot lifter (F) The presser foot is raised or lowered using this lever. NOTE: The machine will not start if the presser foot is up (except when winding). Drop feed lever (G) - Page 43 The lever should be in this position for most sewing operations. For darning or embroidering with the W6 embroidery unit or if the fabric is to be moved by hand, move the drop feed lever to the left to lower the feed dogs.
-
Page 44: Thread Tension Dial
Thread tension dial Operating elements Thread tension dial (H) The right tension is required to transport the fabric correctly when sewing. The presser foot setting is mainly determined by the weight of the fabric being sewn. The tension is reduced for light fabrics, such as curtains, batiste, voile, etc. The tension is increased for heavy fabrics such as denim or canvas. - Page 45 Utility stitch selection Operating elements Zigzag Stitch button (B) Always select the zigzag stitch by pressing this button. Utility stitch selection (C) Press the Utility Stitch button. The first 6 utility stitches appear on the LCD display. By pressing the Up ( ) or Down ( ) button, the next or previous 6 patterns appear.
-
Page 46: Information On The Lcd Screen Display
Information on the LCD screen display Operating elements Press the OK button. The LCD display shows information for the selected pattern. To select decorative or letter stitches, see “Sewing with decorative and letter stitches”. 5.10 Information on the LCD screen display When a stitch is selected, the following information is shown on the LCD display. - Page 47 Information on the LCD screen display Operating elements Needle stop position (d) Specifies the needle stop position by selecting the Needle Up / Down button. Up position: Down position: When you switch on the machine, the needle stop position is set to down. Stitch length, width and thread tension (e) When you press the Length / Width / Tension button (e), this information changes as follows.
- Page 49 The preset stitch length is displayed as a marked number. For a shorter stitch length, press the “Down” button ( For a longer stitch length, press the “Up” button ( Stitch width The preset stitch width is displayed as a marked number. For a narrower stitch width, press the “Down”...
- Page 50 For a lower upper thread tension press the “Down” button ( For a higher upper thread tension press the “Up” button ( Your W6 sewing machine’s factory settings are ideal. Twin Needle button Press this button when sewing with a twin needle. This button reduces the stitch...
-
Page 51: Basic Setting Options On The Sewing Machine
Basic setting options on the sewing machine Operating elements 5.11 Basic setting options on the sewing machine You can adjust the brightness of the LCD screen if it is difficult to see. You can also switch the LED light on and off. If you switch off the beep, you can use the machine without any beeps. - Page 52 Basic setting options on the sewing machine Operating elements c, d: LCD display Every time you press the (c) or (d) buttons, the scale moves and the brightness changes. Press the Clear button (c) if you want to increase the screen brightness.
-
Page 53: Changing The Presser Foot And Presser Foot Holder
Changing the presser foot Changing the presser foot and presser foot holder Changing the presser foot and presser foot holder The presser foot must be changed to suit the selected pattern or project. Changing the presser foot (Section 6.1) • Changing the presser foot holder (Section 6.2) •... -
Page 54: Changing The Presser Foot Holder
Changing the presser foot Changing the presser foot and presser foot holder Lower the presser foot lifter and the presser foot will engage in place. The bar fits into the holder. If it is not fully inserted, try pressing the lever to release the presser foot. - Page 59 To refit it, pull the holder up as far as possible from underneath the presser foot bar (b). Tighten slotted screw.
-
Page 60: Selecting The Needle
This results in the sewing thread breaking, being damaged or the sewing machine skipping stitches. For safety’s sake, always use original W6 WERTARBEIT needles. Checking the needle Safety instruction: Use of needles Only use W6 WERTARBEIT 130/705 H system needles. -
Page 61: Inserting A Needle
Inserting a needle Selecting the needle Inserting a needle PLEASE NOTE Accident prevention. Switch off the power switch before carrying out the following procedure. If you place a cloth on the needle plate, you prevent the needle from falling into the machine. -
Page 64: Needle And Thread Table
• Always use thread of the same weight and the same material for the • upper and lower threads. Only use sharp, straight, undamaged and high quality W6 needles for • your sewing. Note To sew the best pattern, it is necessary to adapt the patterns on a sewing machine with a stitch width of 6 mm to the fabrics to be sewn with regard to stitch width and stitch length. - Page 65 Needle and thread table Selecting the needle Needle selection Weight Fabric Needle type Needle size Very Chiffon, crêpe de chine, Silk crêpe, 7HAx1GT light sheer crêpe Georgette Light Silk, crêpe de chine, Silk crêpe, 7HAx1GT sheer crêpe Georgette Medium Chambray, handkerchief linen, Blue Tip gingham, challis percale, wool crêpe, pure silk, taffeta...
- Page 66 Needle and thread table Selecting the needle The following table provides an overview of the special needles. Special needles Type Application Needle size Quilting Topstitching and quilting 75–90 Super Stretch Sewing stretch and 75–90 HAx1SP non-stretch fabrics Microtex For microfibre 60–70 Titanium Embroidery or for extremely demanding...
-
Page 67: Inserting The Bobbin
• Why use W6 bobbins? Only W6 plastic bobbins fit perfectly in your W6 sewing machine. Bobbins made by other manufacturers and metal bobbins do not fit and lead to a seam with an unsatisfactory appearance or damage to the machine. -
Page 68: Winding The Bobbin
Winding the bobbin Inserting the bobbin Winding a new W6 plastic bobbin Inserting the bobbin Winding the bobbin Open the top cover. Place the bobbin on the bobbin winder spindle so that the notch (a) in the bobbin fits on the spindle’s spring (b). - Page 69 Winding the bobbin Inserting the bobbin Guide the thread to the back and thread it through the thread guide (e) from left to right. Guide the thread to the right and thread it through the thread guide from the back. Guide the thread anti-clockwise under the tension disc. Hold the thread with your left hand and wind the thread around the bobbin 4 to 5 times.
-
Page 70: Inserting A Plastic Bobbin In The Hook Race
Winding the bobbin Inserting the bobbin Start the machine by pressing the Start / Stop button or by pressing the foot pedal. The winding process stops automatically when the bobbin is full. (Release the pedal.) Slide the bobbin and spindle to the left. Take the bobbin off the spindle. Hook the thread into the thread cutter (g) from the rear on the left and pull forwards to the right. - Page 71 Inserting a plastic bobbin in the hook race Inserting the bobbin Insert the plastic bobbin with the “C” shape into the hook race. Using the index finger on your right hand, hold the plastic bobbin tight and guide the thread through the slot of the hook race keeping it taut. The slot is located at the 7 o'clock position.
-
Page 72: Using The Upper Thread To Pull Up The Lower Thread
W6 tip On the W6 WERTARBEIT website you will find assistance under Service / Help / W6 N 5000 Exklusive / Videos: Optimal Threading (approx. 4 minutes long). Using the upper thread to pull up the lower thread Set the presser foot lever to the upper position. - Page 73 ➔ Turn the spool and invert it on the spool pin. ➔ Always place the spool in a horizontal (lying) position. ➔ Only use W6 thread. Close the hook race with the plastic bobbin cover. The bobbin cover is in the correct position...
-
Page 74: What Do I Do With The Upper Thread
Threading the upper thread What do I do with the upper thread? What do I do with the upper thread? Threading the upper thread (Section 9.1) • Using the needle threader (Section 9.2) • Using the upper thread to pull up the lower thread (Section 9.3) •... - Page 75 Threading the upper thread What do I do with the upper thread? Push the small spool cap (a) tightly onto the spool (b). The spool must run and lie smoothly without sticking. Unwind approx. 30 cm of thread from the spool. Hold the thread on the spool taut.
- Page 76 Threading the upper thread What do I do with the upper thread? To thread the concealed thread take-up lever, pull the thread up taut and guide it down again from right to left through the slot. Pull the thread taut through the slot down towards 6 to the metal needle clamp.
-
Page 77: Using The Needle Threader
In the event of any lack of clarity: watch the Optimal Threading video that is • just 4 minutes long on the W6 website under Service / Help / W6 N 5000 Exklusive. 95% of all errors occur during threading. Failure to do this will always lead to •... - Page 78 Using the needle threader What do I do with the upper thread? Pull the thread through the needle threader (a) and to the right. Pull the thread into the guide (b). The thread hooks into (c). Hook the thread into the thread cutter (d) from the back to front. Pull to cut the thread.
-
Page 79: Using The Upper Thread To Pull Up The Lower Thread
In the event of any lack of clarity: watch the Optimal Threading video that is • just 4 minutes long on the W6 website under Service / Help / W6 N 5000 Exklusive. 95% of all errors occur during threading. Failure to do this will always lead to •... - Page 80 ➔ Turn the spool and invert it on the spool pin. ➔ Always place the spool in a horizontal (lying) position. ➔ Only use W6 thread. Close the hook race with the plastic bobbin cover. The bobbin cover is in the correct position if it clicks into place when inserted.
-
Page 81: Sewing A Test Seam
In the event of any lack of clarity: watch the Optimal Threading video that is • just 4 minutes long on the W6 website under Service / Help / W6 N 5000 Exklusive. 95% of all errors occur during threading. Failure to do this will always lead to •... - Page 82 Sewing a test seam using straight stitch as an example Sewing a test seam Check the presser foot (standard foot). See the section on changing the presser foot. Place the fabric under the presser foot and lower it. The indicator light is now green. Hold the upper thread behind the needle and press the Start / Stop button or the foot pedal.
- Page 83 Sewing a test seam using straight stitch as an example Sewing a test seam Press the Thread Cutter button. When the needle stop position ➔ is down: the threads are cut and the needle goes up. In this case the stop position setting does not change even if the needle goes up.
-
Page 84: Backtacking Options
Sewing a test seam using straight stitch as an example Sewing a test seam Thread cutter If you are not using the Thread Cutter button after sewing, you can cut the threads using the manual thread cutter. Raise presser foot and pull the fabric threads... -
Page 85: 10.2.2 Automatic Tie-Off, Automatic Tie-Off And Cut
Sewing a test seam using straight stitch as an example Sewing a test seam When you have reached the end of the seam, press and hold the Reverse button and sew 4 to 5 stitches in reverse. NOTE: When the foot controller is connected and the pedal is pressed, the machine sews in reverse as long as the button is pressed. - Page 86 Sewing a test seam using straight stitch as an example Sewing a test seam When you have reached the end of the seam, press the Reverse button once. The machine sews tie-off stitches and stops automatically. The machine sews tie-off stitches, cuts the threads and stops automatically.
-
Page 87: Using A Pattern
Using a pattern Using a pattern To keep the W6 instructions up-to-date at all times, we offer you our W6 practical tips on the W6 Wertarbeit website under Sewing Ideas. Have a look at the sewing ideas page and be inspired. -
Page 88: Overview Of Patterns
The following table shows all patterns offered by the machine with what they are called and their settings for practical application. Similarly, the correct presser foot as well as the recommended W6 needle size are noted for each pattern. Designation Program Program no. - Page 89 Pattern overview Using a pattern Continued Designation Program Program no. Presser foot / Needle / Prerequisites Quilting Presser foot: W6 standard foot or stitches 19–25 W6 special feet Prerequisite: Use thread tension-friendly and lint- free W6 thread / W6 multi-coloured thread.
- Page 90 Pattern overview Using a pattern Continued Designation Program Program no. Presser foot / Needle / Prerequisites Antique and Presser foot: W6 satin stitch foot or nostalgia 30–32 W6 open-toe satin stitch foot stitches Prerequisite: Place W6 stabiliser or W6 decorative stabiliser under the fabric to secure the fabric.
- Page 91 The bold part of the decorative stitch is always one pattern unit that is stored. Designation Program Program no. Presser foot Needle Antique and 001–006 Presser foot: W6 satin stitch foot or nostalgia W6 open-toe satin stitch foot stitches Prerequisite: Place W6 stabiliser or W6 decorative stabiliser under the fabric to secure the fabric.
- Page 92 Continued Designation Program Program no. Presser foot Needle Decorative 016–036 Presser foot: W6 satin stitch foot or stitches W6 open-toe satin stitch foot Prerequisite: Place W6 stabiliser or W6 decorative stabiliser under the fabric to secure the fabric. Use thread tension-friendly and lint- free W6 thread / W6 multi-coloured thread.
- Page 93 Using a pattern Using a pattern Pattern index Designation Program Pattern Presser foot Needle / always use a stabiliser Letters, W6 Top Stitch numerals and always use a special stabiliser characters Or W6 open-toe satin stitch foot Decorative (available as an...
-
Page 94: Straight Stitch
In the case of thicker, non-stretch fabrics, e.g. denim = length 4–5. • Use a W6 Super Stretch 90 (HAx1SP) needle for stretch and non-stretch fabrics, or a W6 Super Stretch 75 (HAx1SP) needle for thinner fabrics. Needle position settings for program 01... - Page 95 Utility stitches Using a pattern Hold the upper thread loosely and start sewing. The machine sews 4 to 5 stitches forwards, then 4 to 5 stitches backwards and then continues sewing forwards. When you have reached the end of the seam, press the Reverse button once.
-
Page 96: Stretch Straight Stitch
In the event of any lack of clarity: watch the Optimal Threading video that is • just 4 minutes long on the W6 website under Service / Help / W6 N 5000 Exklusive. 95% of all errors occur during threading. Failure to do this will always lead to •... -
Page 97: Triple Pierced Seat Seam
In the event of any lack of clarity: watch the Optimal Threading video that is • just 4 minutes long on the W6 website under Service / Help / W6 N 5000 Exklusive. 95% of all errors occur during threading. Failure to do this will always lead to •... -
Page 98: Quilting Stitches
In the event of any lack of clarity: watch the Optimal Threading video that is • just 4 minutes long on the W6 website under Service / Help / W6 N 5000 Exklusive. 95% of all errors occur during threading. Failure to do this will always lead to •... - Page 99 In the event of any lack of clarity: watch the Optimal Threading video that is • just 4 minutes long on the W6 website under Service / Help / W6 N 5000 Exklusive. 95% of all errors occur during threading. Failure to do thiswill always lead to •...
-
Page 100: Flat Stitch
In the event of any lack of clarity: watch the Optimal Threading video that is • just 4 minutes long on the W6 website under Service / Help / W6 N 5000 Exklusive. 95% of all errors occur during threading. Failure to do this will always lead to •... -
Page 101: Stretch Zigzag Stitch
7 o’clock and 9 o’clock positions on the black hook race until it clicks into place. In the event of any lack of clarity: watch the Optimal Threading video that is • just 4 minutes long on the W6 website under Service / Help / W6 N 5000 Exklusive. Utility stitches Using a pattern When you sew using a flat stitch, it is preset to narrower stitches than the normal zigzag stitch. - Page 102 90 or 75 needles (HAx1SP) Thread tension setting Automatic W6 note: The stitch length and stitch width can be changed manually in the specified ranges. Sewing on elastic / Smocking: Carry out the following steps: Sew the fabric on the wrong side.
-
Page 103: Overcasting / Overlock
In the event of any lack of clarity: watch the Optimal Threading video that is • just 4 minutes long on the W6 website under Service / Help / W6 N 5000 Exklusive. 95% of all errors occur during threading. Failure to do this will always lead to •... - Page 104 Select the following settings: Designation Prog. Pattern Application Presser Needle size Needle foot position Stretch Overlocking fabric W6 90 or 75 Zigzag stitch edges; overcasting needles prevents Super Stretch the fabric edges from (HAx1SP) fraying Thread tension setting Automatic Select the following settings: Designation Prog.
- Page 105 Utility stitches Using a pattern CAUTION Risk of injury posed by breaking needles The stitch width must be adjusted to suit the presser foot. If the incorrect stitch width is selected, the needle may hit the presser foot and bend or break as a result;...
-
Page 106: Scalloped Hem
7 o’clock and 9 o’clock positions on the black hook race until it clicks into place. In the event of any lack of clarity: watch the Optimal Threading video that is • just 4 minutes long on the W6 website under Service / Help / W6 N 5000 Exklusive. Utility stitches Using a pattern 11.2.9 Scalloped hem –... -
Page 107: Stretch, Non-Stretch Blind Stitch
In the event of any lack of clarity: watch the Optimal Threading video that is • just 4 minutes long on the W6 website under Service / Help / W6 N 5000 Exklusive. 95% of all errors occur during threading. Failure to do this will always lead to •... - Page 108 (HAx1SP) Thread tension setting Automatic W6 tip Blind stitches cannot be sewn if the left-hand needle insertion point does not grasp the hem. If the needle grasps too much of the hem, then the fabric cannot be folded and a large and unsightly seam appears on the right side of the fabric.
-
Page 109: Sewing Buttonholes
In the event of any lack of clarity: watch the Optimal Threading video that is • just 4 minutes long on the W6 website under Service / Help / W6 N 5000 Exklusive. 95% of all errors occur during threading. Failure to do this will always lead to •... - Page 110 Stretch buttonhole Thread tension setting Automatic When using the buttonhole foot, always reinforce the fabric with W6 self-adhesive stabiliser or W6 decorative stabiliser on the wrong side. Mark the buttonhole position and length on the fabric. a: Starting position for sewing...
- Page 111 Sewing buttonholes Using a pattern Place the button in the holder. If the button does not fit in the holder, adjust the buttonhole foot’s attachment to the diameter of the button plus the thickness of the button. b: Button length + thickness Thread the upper thread through the opening in the buttonhole foot and leave the upper thread on the left-hand side.
- Page 112 Sewing buttonholes Using a pattern Hold the upper thread loosely and start the machine. The machine sews the buttonhole in the order shown and stops automatically afterwards. Press the thread cutter button and raise the presser foot to remove the fabric.
-
Page 113: Automatic Bar Tack
In the event of any lack of clarity: watch the Optimal Threading video that is • just 4 minutes long on the W6 website under Service / Help / W6 N 5000 Exklusive. 95% of all errors occur during threading. Failure to do this will always lead to •... - Page 114 Automatic bar tack Using a pattern Select the following settings: Designation Prog. Pattern Application Presser Needle size Needle foot position Buttonholes Bar tack for reinforcing heavily 90 Super stressed areas, such Stretch as trouser pockets. needles (HAx1SP) Thread tension setting Automatic Adjust the slider to the length of the bar tack.
- Page 115 Automatic bar tack Using a pattern Lower the buttonhole lever as far as possible. NOTE: If you do not lower the buttonhole lever properly, the indicator light will light up red and the sewing process will stop after 2 to 3 stitches. Hold the upper thread loosely and start the machine.
-
Page 116: Patches / Patchwork
In the event of any lack of clarity: watch the Optimal Threading video that is • just 4 minutes long on the W6 website under Service / Help / W6 N 5000 Exklusive. 95% of all errors occur during threading. Failure to do this will always lead to •... - Page 117 PLEASE NOTE The needle position must be set to centre! Failure to do this will result in damage to the W6 sewing machine parts, which are not covered by the warranty. Place the fabrics on top of each other with the right side facing each other and sew them together.
-
Page 118: Antique And Nostalgia Stitches
In the event of any lack of clarity: watch the Optimal Threading video that is • just 4 minutes long on the W6 website under Service / Help / W6 N 5000 Exklusive. 95% of all errors occur during threading. Failure to do this will always lead to •... -
Page 119: Dekorative Stitches
In the event of any lack of clarity: watch the Optimal Threading video that is • just 4 minutes long on the W6 website under Service / Help / W6 N 5000 Exklusive. 95% of all errors occur during threading. Failure to do this will always lead to •... - Page 120 Thread tension setting Automatic W6 tip Place either tear-away or self-adhesive W6 stabiliser on the wrong side of the fabric for the purposes of stabilisation. Adjust the stitch width and stitch length according to the type of fabric. Use two layers of fabric.
-
Page 121: Satin Stitch
In the event of any lack of clarity: watch the Optimal Threading video that is • just 4 minutes long on the W6 website under Service / Help / W6 N 5000 Exklusive. 95% of all errors occur during threading. Failure to do this will always lead to •... - Page 122 Satin stitches Using a pattern Fold the fabric with the right side facing the right side. Draw the desired curved seam on the fabric keeping a spacing of approx. 1 cm from the edge of the fabric. Sew along the pre-drawn curved seam. Using a pair of scissors, cut the end of the curve vertically.
-
Page 123: Sewing In Zippers (Centre / Concealed)
In the event of any lack of clarity: watch the Optimal Threading video that is • just 4 minutes long on the W6 website under Service / Help / W6 N 5000 Exklusive. 95% of all errors occur during threading. Failure to do this will always lead to •... - Page 124 Sewing in zippers (centre / concealed) Using a pattern Sewing zippers in the centre Tack the fabric together with the right sides facing each other. Sew to the end of the opening. a: Upper stitch b: End of the opening c: Tacking d: Wrong side of the fabric Press the seam allowance open.
- Page 125 Sewing in zippers (centre / concealed) Using a pattern Sew the right side of the zipper from the bottom. Sew keeping a spacing of 0.7–1.0 cm from the seam. Sew over the bottom end and the right side of the zipper. Remove the tacking threads and press it down.
- Page 126 Sewing in zippers (centre / concealed) Using a pattern Fold over the left-hand seam allowance. Fold the right-hand seam allowance underneath it to create a 3 mm fold. Attach the zipper foot. Attach the left presser foot pin in the presser foot holder when sewing the right side of the zipper and the right presser foot pin when sewing the left side.
- Page 127 Sewing in zippers (centre / concealed) Using a pattern Stop about 5 cm before the top end of the zipper. Remove the tacking threads and open the zipper. Sew the rest of the seam. Opening the zipper while sewing Stop the sewing machine before you get to the pull tab. Lower the needle into the fabric.
-
Page 128: Sewing With The Twin Needle
In the event of any lack of clarity: watch the Optimal Threading video that is • just 4 minutes long on the W6 website under Service / Help / W6 N 5000 Exklusive. 95% of all errors occur during threading. Failure to do this will always lead to •... - Page 129 Sewing with the twin needle Using a pattern Remove the single needle and insert the twin needle. Thread the first upper thread as usual. Thread the thread in the left-hand eye of the needle from the front to the back. Press the extra spool pin with the felt washer into the hole.
- Page 130 Sewing with the twin needle Using a pattern Press the Twin Needle button. The symbol for the twin needle is shown on the LCD display and the stitch width is reduced automatically. PLEASE NOTE Accident prevention. If you do not switch to twin needle mode, the needle may hit the needle plate and break.
-
Page 131: Sewing On Buttons
In the event of any lack of clarity: watch the Optimal Threading video that is • just 4 minutes long on the W6 website under Service / Help / W6 N 5000 Exklusive. 95% of all errors occur during threading. Failure to do this will always lead to •... - Page 132 Sewing on buttons Using a pattern Lower the feed dogs by moving the drop feed lever to the left. Attach the button foot and align two holes on the button with the presser foot slot. Lower the foot so the button is held securely. Adjust the stitch width so that the needle stitches into the left hole of the button.
- Page 133 Sewing on buttons Using a pattern Lift the presser foot and cut off the remaining threads to a length of approx. 10 cm. Pull the lower thread to bring the upper thread to the left-hand side of the fabric and knot the threads. After sewing, move the drop feed lever to the right and turn the hand wheel forwards (towards you) five times (the feed dogs are up again).
-
Page 134: Sewing Decorative Stitches And Letters
In the event of any lack of clarity: watch the Optimal Threading video that is • just 4 minutes long on the W6 website under Service / Help / W6 N 5000 Exklusive. 95% of all errors occur during threading. Failure to do this will always lead to •... - Page 135 Sewing decorative stitches and letters Using a pattern Selecting decorative stitches and letters Decorative stitches: Press the Decorative Stitch button. The first 4 decorative stitches appear on the LCD display. Letter stitches (upper case letters): Press the Letter Stitch button once. The first 8 upper case letters (A–H) appear.
- Page 136 Sewing decorative stitches and letters Using a pattern Press the ( ) or ( ) Cursor button to highlight the pattern you want. Note: If the pattern is highlighted to the far right or left, the next or previous patterns appear when the ( ) or ( ) Cursor button is pressed. Press the OK button.
- Page 137 Sewing decorative stitches and letters Using a pattern Note: The machine automatically switches the sewing mode to “Single”, “Single with cut”, “Repeat”. Deleting the selected pattern Select the unwanted pattern and press the Clear button (C) briefly (less than 0.5 sec.). The machine deletes the last selected pattern.
- Page 138 Sewing decorative stitches and letters Using a pattern Press the ( ) Cursor button. The highlighting moves one pattern to the left. Check the selected patterns by pressing the ( ) or ( ) Cursor button. Press the Read (R) button again to return to the selection mode. Adjusting the stitch length, stitch width and thread tension You can adjust the stitch width and length of each decorative stitch.
- Page 139 Sewing decorative stitches and letters Using a pattern Use the Cursor buttons to select (highlight) the pattern you want to adjust. Press the Length / Width / Tension button until the mode you want to set appears. Mode a: Adjusting the stitch length. Mode b: Adjusting the stitch width.
- Page 140 Sewing decorative stitches and letters Using a pattern Press the Read (R) button again to return to the selection mode. Sewing selected patterns Sewing mode (Single, Single with cut, Repeat) You can change the sewing mode by pressing the Tie-off / Cut button several times.
- Page 141 Sewing decorative stitches and letters Using a pattern Attach the satin stitch foot to sew decorative and letter stitches. Lower the presser foot and start sewing. The sewing pattern is displayed in the upper left corner of the LCD display. Note: In single or single with cut mode, a tie-off stitch is sewn at the beginning •...
- Page 142 Sewing decorative stitches and letters Using a pattern Tips For immediate tie-off. Stop the sewing process and press the Reverse button. When you resume sewing, the machine automatically sews a tie-off stitch. For tie-off after one complete pattern. Press the Reverse button while sewing a stored pattern.
- Page 143 Sewing decorative stitches and letters Using a pattern Setting forward and backward stitches NOTE: Remove the extension table before selecting the following settings. The forward and reverse stitches may need to be adjusted to suit the type of fabric you are sewing. This setting is required if a decorative pattern or letter pattern is distorted.
-
Page 144: Darning / Freehand Embroidery
In the event of any lack of clarity: watch the Optimal Threading video that is • just 4 minutes long on the W6 website under Service / Help / W6 N 5000 Exklusive. 95% of all errors occur during threading. Failure to do this will always lead to •... - Page 145 Sewing decorative stitches and letters Using a pattern Remove the presser foot and presser foot holder. The darning embroidery foot’s arm should be on the needle clamping screw’s shaft. Slide the plastic presser mount from left to right so it fits into the presser foot bar.
- Page 146 Sewing decorative stitches and letters Using a pattern Hold the fabric in front of and behind the area to be darned. Operate the machine by moving the fabric back and forth evenly by hand and topstitching in close rows across the hole or worn area. Once the area has been covered with new stitches, move the fabric from side to side in the same way to interlace or reinforce the seams.
- Page 147 Sewing decorative stitches and letters Using a pattern Position the design to be embroidered between the embroidery frame’s two parts. Note: An embroidery frame is not included with this machine. Slide the embroidery frame under the needle and lower the foot. Start the machine at medium speed and guide the frame carefully so that the needle moves along the pattern’s line.
-
Page 148: Appliqués / Appliqué
In the event of any lack of clarity: watch the Optimal Threading video that is • just 4 minutes long on the W6 website under Service / Help / W6 N 5000 Exklusive. 95% of all errors occur during threading. Failure to do this will always lead to •... - Page 149 Sew reinforcing stitches at the end of the seam. W6 tip: A thin W6 decorative stabiliser helps you to keep the position of the stitches along the appliqué more accurate. This can then be removed easily. If necessary, reduce the adjustable foot pressure to 1 to make sewing round corners easier.
-
Page 150: Quilting Bar
In the event of any lack of clarity: watch the Optimal Threading video that • is just 4 minutes long on the W6 website under Service / Help / W6 N 5000 Exklusive. 95% of all errors occur during threading. Failure to do this will always lead •... -
Page 151: Walking Foot (Special Accessory)
In the event of any lack of clarity: watch the Optimal Threading video that • is just 4 minutes long on the W6 website under Service / Help / W6 N 5000 Exklusive. 95% of all errors occur during threading. Failure to do this will always lead •... - Page 152 Walking foot (special accessory) Using a pattern Push the presser foot lever up. Using the screwdriver, loosen the slotted screw on the presser foot holder. Push the presser foot lever up. Remove the presser foot holder and the presser foot. Push the presser foot lever up again.
- Page 153 Walking foot (special accessory) Using a pattern Push the walking foot from left to right onto the presser bar. Make sure that the walking foot’s arm is on the needle clamp’s shaft. Attach the presser foot using the screw. Hold the upper thread gently when starting to sew and sew slowly.
-
Page 154: Maintenance
For all other customers we recommend an inspection interval of 2 to 4 years be maintained. You can book the inspection at a fixed price on the W6 website yourself. The fixed price includes labour costs, spare parts and shipping costs. -
Page 155: Maintenance To Be Carried Out By The Customer
If the needle plate is severely damaged by needle strikes, it must be replaced. You can order a new needle plate from our W6 Wertarbeit online shop (Spare Parts category). The following illustration shows an example of a severely damaged needle plate that must be replaced. -
Page 156: Cleaning The Hook, Hook Race And Feed Dogs
NOTE: On this machine the sewing area is illuminated with an LED light. If it is • not working, please contact W6. The machine does not need to be lubricated. • If the machine becomes dirty, soak a cloth in a small amount of mild •... - Page 157 Maintenance to be carried out by the customer Maintenance Remove the needle plate by lifting the right side. Lift out the bobbin holder (b). c: Thread cutter Clean the hook (d), feed dogs and bobbin holder. Clean with a soft, dry cloth. Insert the bobbin holder back into the hook race so the tip (e) fits into the stop (f) as shown.
-
Page 158: Checking The Hook System For Damage
Carry out the following steps: Remove the hook race. Clean and remove any pieces of thread and sewing dust from this area using a W6 cleaning brush. You can also carefully clean the hook system using a vacuum cleaner. Check the black hook race carrier for needle strikes or damage. -
Page 159: Checking The Hook Race For Damage
Minor needle strikes on the hook race can be removed carefully using fine emery paper (for example 800 grit). If the hook race is severely damaged by needle strikes, it must be replaced. You can order a new hook race from our W6 Wertarbeit online shop (Spare Parts category). -
Page 160: Disposal
Maintenance to be carried out by the customer Maintenance 12.3 Disposal It is not permitted for this product to be disposed of using the normal household waste at the end of its service life. It must be handed in at a collection point for the recycling of electrical and electronic devices. -
Page 161: Error Messages
Troubleshooting Error messages Message 1. Wind the bobbin. 2. Lower the buttonhole lever. 3. After sewing the buttonhole, raise the presser foot lifter and move the buttonhole foot attachment to the start position. 4. Release the foot pedal. 5. Lower the presser foot. 6. - Page 162 Troubleshooting Continued Message 14. Machine can no longer save. 15. System error. The winder switch in the machine is defective. (Contact customer service.) 16. System error. (Contact customer service.)
-
Page 163: Technical Data
Key data The sewing machine’s key data Type Sewing machine Model W6 N 5000 Exklusive The sewing machine is intended for domestic use only. Other use or use in excess of the intended rating does not comply. 14.2 Technical data... -
Page 164: Eu Declaration Of Conformity
EU Declaration of Conformity Technical data 14.3 EU Declaration of Conformity EU Declaration of Conformity As soon as this machine has been altered in a material way this declaration becomes null and void. A new conformity process in accordance with the EU Low Voltage Directive is then required. -
Page 165: Service Information
• Contact us directly by e-mail at info@w6-wertarbeit.de. W6 WERTARBEIT also offers the following options on its website for free. Please access our website using www.w6-naehmaschinen.de and under HELP select: Criteria for the optimal threading of a W6 N 5000 Exklusive video. - Page 166 Checking the hook race for damage............142 Checking the hook system for damage...........141 Checking the needle..................42 Checking the needle / Why using W6 needles is important....138 Checking the needle plate...............138 Cleaning the hook, hook race and feed dogs..........139 Connecting the machine..............10, 22 Darning / Freehand embroidery...............125...
- Page 167 Overview of patterns..................68 Patches / Patchwork..................97 Pattern information..................35 Pattern number...................35 Presser foot lifter..................32 Quilting bar....................132 Quilting stitches..................79 Rear view....................20 Removing the bobbin.................47 Removing the extension table..............21 Reverse button...................30 Safety notes....................6 Satin stitch....................102 Scalloped hem....................87 Selecting the needle...................42 Service information..................148 Setting up....................10 Sewing a test seam..................61 Sewing a test seam using straight stitch as an example......61 Sewing buttonholes..................90...
- Page 168 Walking foot (special accessory)..............134 What do I do with the upper thread?............54 What we expect from you................8 Why use W6 bobbins?................47 Winding the bobbin..................48 Zigzag stitch....................80 Zigzag Stitch button...................34...
- Page 169 “Help” on our www.w6-wertarbeit.de website. You will also find many helpful videos on instructions, threading and applications. We also offer you useful and tested original accessories for sewing on www.w6- wertarbeit.de. An inspection performed at regular intervals will result in quiet operating characteristics and nice seams.
Need help?
Do you have a question about the N 5000 Exklusive and is the answer not in the manual?
Questions and answers