Table of Contents
Advertisement
Quick Links
Advertisement
Table of Contents

Subscribe to Our Youtube Channel
Related Manuals for W6 N 1615


Summary of Contents for W6 N 1615
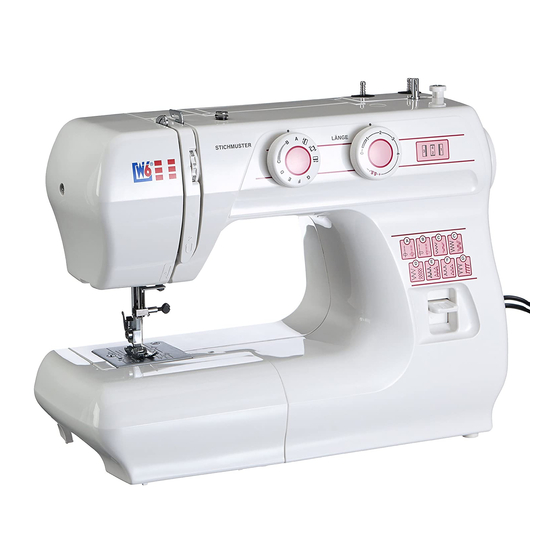
- Page 1 W6 N 1615 sewing machine Manual N 1615-120201...
- Page 2 Dear customer Thank you very much for buying a W6 product. Discover the reliability of our products for yourself. We have included a comprehensive manual, so that you may easily learn how to operate the machine. Please read the manual and the safety notes carefully before operating the machine.
-
Page 3: Table Of Contents
Sewing corners .............................. 26 Sewing at edges at a spacing of less than 3 mm ..................26 Sewing curves ............................... 26 Sewing thick fabrics ............................27 Sewing thin fabrics ............................27 Using the needle plate ........................... 27 ........................28 Pattern overview table www.w6-wertarbeit.de... - Page 4 Cleaning the sewing machine case ....................... 42 Cleaning the hook ............................42 ........................44 Changing the light bulb ..........................45 Troubleshooting Problems with threads and stitches ....................... 45 ..................... 46 Notes on environmental protection ..........................46 Service information ..............................47 Index www.w6-wertarbeit.de...
-
Page 5: Safety Notes
2 When cleaning the machine, only use dry or damp cloths. Never use benzine, thinners or other chemical cleaning agents for cleaning. 3 Do not expose the machine to strong vibrations. 4 The machine is not designed or intended for commercial use. www.w6-wertarbeit.de... -
Page 6: Getting To Know The Machine
15 Presser foot release lever 22 Foot controller 16 Screw for fixing the sewing needle 23 Handle 17 Screw for the face plate 24 Presser foot lifter 18 Thread tension dial 25 Machine socket 19 Face plate 26 Power switch 27 Hand wheel www.w6-wertarbeit.de... -
Page 7: Power Switch And Connections
Only use the accessories provided in order to avoid damage to the machine. CB bobbins suitable for this sewing machine are stored in the accessories compartment. Only Accessories compartment in the extension these bobbins may be used. table www.w6-wertarbeit.de... -
Page 8: Standard Accessories
Selection of needles Screwdriver Ripping knife Feed dog cover plate Cover Free-arm sewing Sewing with the free arm The extension table can be removed sideways. Free-arm sewing is especially suitable for sewing tubular parts such as trouser hems or cuffs. www.w6-wertarbeit.de... -
Page 9: Connecting The Sewing Machine
The harder you press the foot controller the faster the machine sews. Release the foot controller to stop sewing. To switch off the machine, set the power switch to “ 0 ” (OFF). Power switch position Foot controller www.w6-wertarbeit.de... -
Page 10: Operating Elements
, the patterns A to G (inside) will be selected. Setting mark The super utility stitches can be enlarged or Sewing a buttonhole and satin stitch made smaller by turning to “+” or “-“. Stitch length scale Super utility stitches (letters A to G, inside) www.w6-wertarbeit.de... - Page 11 Pulling out the hand wheel at standstill will cause sewing function deactivated. This function is used to wind the thread onto the CB bobbins. The sewing function is re-activated when the hand wheel is pushed in again. Hand wheel pulled out www.w6-wertarbeit.de...
-
Page 12: Changing The Presser Foot
If the presser foot pin does not click into place, briefly press the small lever on the presser foot holder. Check whether the presser foot has clicked correctly into place by lifting the presser foot lifter. Slot in the presser foot holder Presser foot pin www.w6-wertarbeit.de... -
Page 13: Changing The Presser Foot Holder
Then tighten the fixing screw and check whether all functions can be executed correctly by turning the hand wheel. Presser foot holder www.w6-wertarbeit.de... -
Page 14: Fabric, Needle And Thread Table
Sewing silk Lastex, Helanca 120/3 Synthetic thread Wool jersey 75, 90 100/3 Sewing silk For embroidery and darning work 75, 80 Machine embroidery and darning thread 120/3 Synthetic thread For decorative stitching 100 - 110 50/3 - 30/3 Synthetic thread www.w6-wertarbeit.de... -
Page 15: Changing A Needle
Flat side of the needle forcibly. Caution If the needle has been inserted incorrectly or if the screw has not been tightened properly, the needle may break or the machine may be damaged. This poses a risk of injury. www.w6-wertarbeit.de... -
Page 16: Winding The Lower Thread
10 Push the bobbin winder to the left, cut the thread (10) and remove the bobbin. 11 Push in the hand wheel back in (11). Hand wheel pulled out Cut the thread just above the bobbin 10 Cut the thread 11 Push in the hand wheel www.w6-wertarbeit.de... -
Page 17: Removing The Bobbin
Important: For further information about leading out the lower thread see chapters “Threading the upper thread/Retrieving the lower thread” (page 20). Bobbin case finger Shaft in the hook case Bobbin case Bobbin case bar tack www.w6-wertarbeit.de... -
Page 18: Inserting The Bobbin
Make sure to check that the bobbin case has been inserted correctly. Otherwise, it will fall out of the hook Bobbin case finger when sewing. Opening in the ring cover Hook 10 Shaft in the hook 11 Bobbin case bar tack www.w6-wertarbeit.de... -
Page 19: Threading The Upper Thread
Note • An incorrect thread guide may result in tearing of the thread, skipped stitches and waving of the fabric along the seam. • If the thread is tensioned, it can be placed through the following guides more easily. www.w6-wertarbeit.de... -
Page 20: Threading The Upper Thread/Retrieving The Lower Thread
Important: Always lift the presser foot before removing the upper thread as otherwise the thread Guide the end of the thread back tension assembly may be damaged. Insert the extension table www.w6-wertarbeit.de... -
Page 21: Stitch Length
If the marking is directly above the symbol , the standard version of the super utility stitch (A to G, inside) is sewn. The pattern is enlarged (stretched) with “+” and made smaller (compressed) with “-”. Compressed pattern Standard version of the pattern Stretched pattern www.w6-wertarbeit.de... -
Page 22: Sewing A Test Seam
Switch on the machine at the power switch. Caution Always insert the correct presser foot matching for the desired pattern. By means of the hand wheel, check that the needle does not hit the presser foot. Upper thread Lower thread Approx. 80 mm www.w6-wertarbeit.de... - Page 23 Lift the presser foot lifter, remove the fabric and cut the thread. Note Reinforcing stitches (at the end) Try the pattern on residual fabric with 2 layers and adjust the stitch length and the thread tension to match the fabric. www.w6-wertarbeit.de...
-
Page 24: Thread Tension
Loosening the upper thread tension Turn the upper thread tension dial upwards to loosen to upper thread tension (3..2..1). Lower thread Upper thread Right side of the fabric (top) Visible loops on the top of the fabric Upper thread tension dial www.w6-wertarbeit.de... -
Page 25: Increasing The Upper Thread Tension
Only then is the compressive force of the tension spring set correctly. 15 Tension spring The lower thread tension is set by turning the screw with a small screwdriver. www.w6-wertarbeit.de... -
Page 26: Useful Tips
For narrow curves, stop the sewing with the needle lowered, lift the presser foot, turn the fabric, lower the presser foot and continue sewing. www.w6-wertarbeit.de... -
Page 27: Sewing Thick Fabrics
Align the fabric edge to a line of the needle plate to sew even seam allowances. Digits on the needle plate Distance in cm Distance between the entry point of the needle and the lines on the needle plate www.w6-wertarbeit.de... -
Page 28: Pattern Overview Table
0 - 4 Elastic blind stitch 0 - 4 Blind stitch 0 - 4 Lingerie stitch 0 - 4 Buttonhole Stretch straight stitch Stretch straight stitch (left) Stretch zigzag stitch Diamond stitch Special overlock stitch Overlock stitch Feather stitch www.w6-wertarbeit.de... -
Page 29: Straight Stitch
Changing the stitch length Turn the stitch length dial from to “+” or “-” Tack seam to enlarge or reduce the size of the pattern for the stretch straight stitch. www.w6-wertarbeit.de... -
Page 30: Zigzag Stitch
Satin stitch Set the stitch length dial to the symbol sew satin stitches (narrow zigzag stitch). The zigzag stitch must be selected on the pattern selector dial. www.w6-wertarbeit.de... -
Page 31: Overlock Stitch/Special Overlock Stitch
This stitch requires a higher thread tension than normal. Sew with reduced speed. www.w6-wertarbeit.de... -
Page 32: Blind Stitch / Elastic Blind Stitch
If the needle grasps too much of the hem, the fabric cannot be folded and the seam on the right side of the fabric looks too large and unsightly. Back side of the fabric Front side of the fabric www.w6-wertarbeit.de... -
Page 33: Buttonholes
Insert a pin at the inner edge of the front and rear bar tack crosswise into the buttonhole. Pierce the middle of the buttonhole with the ripping knife and cut the buttonhole in one direction and then the other direction towards the pin. www.w6-wertarbeit.de... -
Page 34: Sewing Stretch Fabrics
After completing the sewing process, lightly pull the cord to tension the thread. Then, cut the excess cord ends. Selecting the stitch length By turning the stitch length dial in the direction “0” or “1”, the stitch length can be changed. www.w6-wertarbeit.de... -
Page 35: Sewing In Zippers
The needle must not touch the zip teeth. It can break or lead to injuries. • When using the one-sided zipper foot, make sure that the straight stitch with pattern “A” is set. Top side of the fabric 10 Sewing direction www.w6-wertarbeit.de... -
Page 36: Darts
Cut the threads so that the thread ends have a length of 50 mm and tie the ends together in a knot. Using a needle, pull the ends of the thread into the dart. Iron the dart to one side so that it lies flat. www.w6-wertarbeit.de... -
Page 37: Gathering
Pull the lower threads of the two straight stitch seams to gather the fabric and tie the ends into a knot. Arrange the folds evenly and iron the fabric. Align the gather evenly and secure it with a straight stitch seam. www.w6-wertarbeit.de... -
Page 38: Securing The Gather
Finally, pull out the straight stitch threads. Note: To stretch or compress the decorative stitch, set the stitch length dial to “+” or “-“ on the right or left side of the symbol www.w6-wertarbeit.de... -
Page 39: Tucks
Turn the hand wheel and check that the needle does not touch the presser foot. Width of the tuck Back side of the fabric Top side of the fabric Iron the folds so that they lie flat in one direction. www.w6-wertarbeit.de... -
Page 40: Appliqués
Slightly raise the presser foot and turn the fabric to maintain the correct needle position. Note A thin insert of stabilising material (that can be Needle entry removed easily afterwards) can help you to keep the position of the stitches along the appliqué more accurate. www.w6-wertarbeit.de... -
Page 41: Darning
Fill the hole by sewing transverse lines. After completion of the work, remove the feed dog cover and reinsert the presser foot holder with the presser foot. Please note: The embroidery frame is not included in the scope of delivery. www.w6-wertarbeit.de... -
Page 42: Maintenance
Shaft in the hook case Bobbin case bar tack Bobbin case Turn the two clamping bar tacks to the Bobbin case finger side so that the ring cover is loosened. Remove the ring cover. Clamping bar tack Ring cover opening Ring cover www.w6-wertarbeit.de... - Page 43 (see page 18). Inserting the bobbin case incorrectly leads to problems with sewing. Dust and lint in the area of the rotary hook may lead to uneven stitches. www.w6-wertarbeit.de...
-
Page 44: Changing The Light Bulb
The arrow indicates the direction in which the light bulb must be screwed out and in. Reattach the face plate and secure it in place with the screw. Note Only use 230 V 15 W BA light bulbs. www.w6-wertarbeit.de... -
Page 45: Troubleshooting
1 Power switch is set to “O”. 1 Switch on the machine. not start 2 Power plug is not plugged in. 2 Plug in the power plug. 3 Hand wheel is pulled out. 3 Push in the hand wheel, see page 16. www.w6-wertarbeit.de... -
Page 46: Notes On Environmental Protection
Do you have questions that the manual does not provide an answer for? Do you require specific spare parts? Visit our website at www.w6-wertarbeit.de or call us! Our telephone number, contact information as well as further information can be found on the warranty card which you have received together with the machine. -
Page 47: Index
Inserting the bobbin 18 Upper thread tension 24 Inserting the bobbin case 18 Upper thread tension dial 10 Inserting the needle 15 Winding the lower thread 16 Lingerie stitch 31 Lower thread winding 16 Zigzag stitch 30 Zipper 35 www.w6-wertarbeit.de...
Need help?
Do you have a question about the N 1615 and is the answer not in the manual?
Questions and answers