Electro Industries/GaugeTech Nexus 1250 Quick Start
Hide thumbs
Also See for Nexus 1250:
- Installation & operation manual (115 pages) ,
- Installation & operation manual (8 pages)
Table of Contents
Advertisement
Quick Links
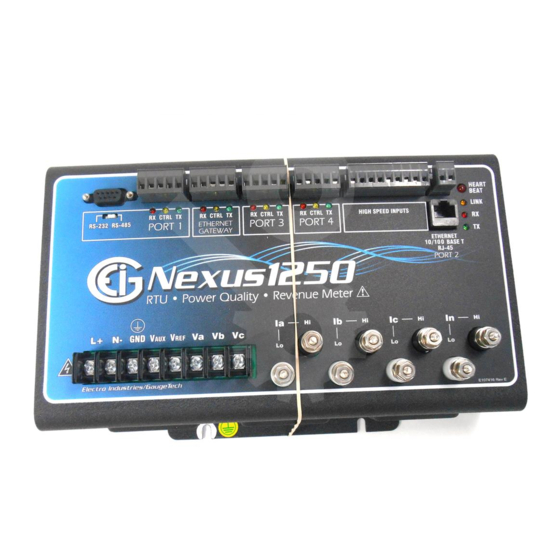
Nexus® 1250/1252 Meter Quick Start
Hardware Installation
PC, Connected to RS232/RS485 Connection
For Programming
Installing the Meter
Mount the Nexus® 1250/1252 meter against a firm, flat surface. Use a #10 screw in each of the four slots on
the flange to insure that the unit is installed securely. For safety reasons, mount the meter in an enclosed and
protected environment, such as in a switchgear cabinet.
Installing an External Display
The Nexus® 1250/1252 meter LED Display Model # P40N+ mounts using a
standard ANSI C39.1 drill plan.
1. Secure the four mounting studs to the back of the panel with the supplied nuts.
2. Insert one end of the supplied RS485 cable into Port 3 of the Nexus® meter
(or to another Port set to a Baud Rate of 9600). Insert the other end of the cable
into the back of the Nexus® P40N+ Display.
NOTE: RS485 communication is viable for up to 4000 feet (1219 meters). If your cable
length exceeds 200 feet you must use a remote power supply, such as EIG's PSIO.
Electro Industries/GaugeTech
The Leader In Power Monitoring and Smart Grid Solutions
External Display, Connected to Port 3
Ports 1
2
3
4
Nexus® 1250/1252 Meter
Doc# E107754 V.1.02
Output Modules, Connected to Port 4
Modem/Ethernet
Option
RJ11 or RJ45
Connection
Connect to Meter
QS-1
Advertisement
Table of Contents

Subscribe to Our Youtube Channel
Related Manuals for Electro Industries/GaugeTech Nexus 1250


Summary of Contents for Electro Industries/GaugeTech Nexus 1250
- Page 1 Nexus® P40N+ Display. NOTE: RS485 communication is viable for up to 4000 feet (1219 meters). If your cable length exceeds 200 feet you must use a remote power supply, such as EIG’s PSIO. Electro Industries/GaugeTech QS-1 Doc# E107754 V.1.02...
- Page 2 4-Wire, 3-Element Wye, with 3 PTs and 3 CTs 4-Wire, 3-Element Wye, with 4 CTs NOTE: This page and the next show some possible wiring configurations. Refer to the meter’s manual for additional configurations. Electro Industries/GaugeTech Doc# E107754 V.1.02 QS-2...
- Page 3 Software User Manual, on the enclosed CD, for additional instructions. Click Help>Contents from the Title Bar at the top of the screen to open the User Manual online. Electro Industries/GaugeTech QS-3 Doc# E107754 V.1.02 The Leader In Power Monitoring and Smart Grid Solutions...
- Page 4 OK. You can now click the Update Device button in the Device Profile screen to upload this Device profile to the connected meter. Electro Industries/GaugeTech Doc# E107754 V.1.02 QS-4 The Leader In Power Monitoring and Smart Grid Solutions...
Need help?
Do you have a question about the Nexus 1250 and is the answer not in the manual?
Questions and answers