Table of Contents
Advertisement
Quick Links
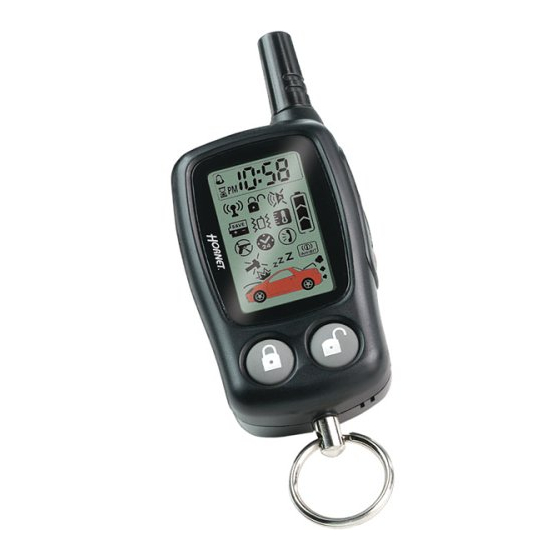
Model 554R
Installation Guide
NOTE:
This product is intended for installation by a professional installer only!
Any attempt to install this product by any person other than a trained professional
may result in severe damage to a vehicle's electrical system and components.
© 2003 Directed Electronics, Inc. Vista, CA
N554R 6-03
Advertisement
Table of Contents

Related Manuals for Directed Electronics 554R


Summary of Contents for Directed Electronics 554R
- Page 1 This product is intended for installation by a professional installer only! Any attempt to install this product by any person other than a trained professional may result in severe damage to a vehicle’s electrical system and components. © 2003 Directed Electronics, Inc. Vista, CA N554R 6-03...
- Page 2 Soft Chirp®, Stinger®, Valet®, Vehicle Recovery System®, VRS®, and Warn Away® are all Trademarks or Registered Trademarks of Directed Electronics, Inc. w w w w w w . . d d i i r r e e c c t t e e c c h h s s . . c c o o m m D D i i r r e e c c t t F F a a x x 8 8 0 0 0 0 - - 9 9 9 9 9 9 - - 1 1 3 3 2 2 9 9 T T e e c c h h n n i i c c a a l l S S u u p p p p o o r r t t 8 8 0 0 0 0 - - 7 7 5 5 3 3 - - 0 0 8 8 0 0 0 0 These resources are for authorized Directed Dealer use only.
-
Page 3: Table Of Contents
W W i i r r i i n n g g Q Q u u i i c c k k R R e e f f e e r r e e n n c c e e G G u u i i d d e e ......4 4 2 2 © 2003 Directed Electronics, Inc. - Page 4 O O R R P P A A Y Y F F O O R R I I N N S S T T A A L L L L A A T T I I O O N N O O R R R R E E I I N N S S T T A A L L L L A A T T I I O O N N C C O O S S T T S S . . © 2003 Directed Electronics, Inc.
-
Page 5: Before Beginning The Installation
How to find a tachometer wire with your multimeter: 1. Set to ACV or AC voltage (12V or 20V is fine). 2. Attach the (-) probe of the meter to chassis ground. © 2003 Directed Electronics, Inc. -
Page 6: Finding The Wait-To-Start Bulb Wire For Diesels
OEM security system’s integrity. For vehicle listings and required bypass, see DirectFax Document 1059, available only to authorized dealers though the technical resources listed at the front of this guide. © 2003 Directed Electronics, Inc. -
Page 7: Primary Harness (H1) Wiring Diagram.7
NOTE: If using the H1/1 ORANGE wire to activate an add-on accessory such as window automation, pager or voice module a 1 Amp diode must be installed to ensure proper operation. Insert the diode as shown in the following diagram. © 2003 Directed Electronics, Inc. -
Page 8: H1/2 White
SPDT relay must be used on the H1/2 light flash output wire. IMPORTANT! DO NOT connect this wire to a negative vehicle light flash wire before changing the programming jumper to the negative polarity position or damage to vehicle light circuit may occur. © 2002 Directed Electronics, Inc. -
Page 9: H1/3
See DirectFax document 1076 for wiring instructions. This wire will report Zone 3. NOTE: If using a door trigger wire that has a delay, Advanced Menu 2, feature 6, or the 998T Bitwriter can be used to turn Bypass Notification off. © 2003 Directed Electronics, Inc. -
Page 10: H1/6
DOES NOT have any vehicle component grounds attached to it. A screw should only be used when in conjunction with a two-sided lock washer. Under dash brackets and door sheet metal are not acceptable ground points. It is recommended that all security components be grounded at the same location. © 2002 Directed Electronics, Inc. -
Page 11: H1/10
IMPORTANT! Never use this wire to drive anything but a relay or a low-current input! The transistorized output can only supply 200 mA of current. Connecting directly to a solenoid, motor, or other high-current device will cause it to fail. © 2003 Directed Electronics, Inc. -
Page 12: Secondary Harness (H2) Wiring Diagram
Ford Trucks: Black/Pink Dodge Ram Trucks: Orange/Black or Black/Orange NOTE: A 1-amp diode must be installed in line on the factory wire between the wait-to-start indicator and the ECM. (See the following diagram for details.) © 2002 Directed Electronics, Inc. - Page 13 IMPORTANT! Never use this wire to drive anything but a relay or a low-current input! This transistorized output can only supply 200 mA, and connecting directly to a solenoid, motor, or other high-current device will cause the module to fail. © 2003 Directed Electronics, Inc.
-
Page 14: Heavy Gauge Relay Satellite Wiring Diagram
Connect this wire to the ignition wire in the vehicle. ORANGE (+) Accessory Output Connect this wire to the accessory wire in the vehicle that powers the climate control system. PURPLE (+) Starter Output Connect this wire to the starter wire in the vehicle. © 2002 Directed Electronics, Inc. -
Page 15: Remote Start Ribbon Harness Wiring Diagram
BLUE wire can also be used to rearm a factory anti-theft system when the remote start shuts down. (See the Feature Descriptions section in this guide.) NOTE: This wire can also be used to bypass optional sensors as described in the following diagram. © 2003 Directed Electronics, Inc. - Page 16 The remote start will be disabled or shut down any time the brake pedal is pressed. This wire will also trigger the security system if the brake pedal is pressed while the system is armed and will report Zone 1. © 2002 Directed Electronics, Inc.
- Page 17 Figure A Figure B IMPORTANT! Always perform the Vehicle Safety Check section of this guide to verify that the vehicle cannot be started in ANY drive gear and that the override switch is functioning properly. © 2003 Directed Electronics, Inc.
-
Page 18: Testing The Neutral Safety Switch
IMPORTANT! Once the interface is complete, attempt to remote start the vehicle with the door closed and the key in the ignition. The vehicle should not start. If it does, recheck the connections. © 2002 Directed Electronics, Inc. -
Page 19: Super Bright Led, 2-Pin White Plug
LED wires are not shorted to ground as the LED will be damaged. Multiple LED’s can be used, but they must be wired in series. The LED fits into a 9/32-inch mounting hole. Be sure to check for clearance prior to drilling the mounting hole. DIA-41 © 2003 Directed Electronics, Inc. -
Page 20: Valet/Program Switch, 2-Pin Blue Plug
Zone Two. If installing an optional Directed dual-stage sensor, connect to the green wire as shown below. The diagram below eliminates the need for diodes to isolate the sensors. Diagram for adding optional Directed dual-stage sensor to GREEN wire (Zone 2): © 2002 Directed Electronics, Inc. -
Page 21: Mounting The Receiver/Antenna
4. Route the receiver/antenna cable to the control module and plug it into the four-pin antenna connector. IMPORTANT! To achieve the best possible range, DO NOT leave the antenna cable bundled under the dash. Always extend the cable full length during installation, regardless of the antenna mounting location. © 2003 Directed Electronics, Inc. -
Page 22: Light Flash Jumper
Changing the jumper to the ON setting changes the trigger threshold of the digital tach circuit so it will work properly with these vehicles. The vehicles affected include many newer Dodge/Chrysler/Plymouth vehicles, such as the Neon, Cirrus, Stratus, Breeze and LH-based vehicles. © 2002 Directed Electronics, Inc. - Page 23 For example, to access the third feature, press and release the switch three times. Then press the switch once more and HOLD it. The siren will chirp the number of times equal to the feature you have accessed. © 2003 Directed Electronics, Inc.
- Page 24 Menu #2, you press and HOLD the Valet/Program button. After three seconds, the siren chirps twice indicating access to Menu #2. To exit the learn routine do one of the following: Close the open door. Turn the ignition on. © 2002 Directed Electronics, Inc.
-
Page 25: Menu #1 - Basic Features
Ignition-controlled domelight OFF Single unlock pulse Double unlock pulse Factory disarm with Channel 2 ON Factory disarm with Channel 2 OFF 2-10 Channel 4 Validity Channel 4: latched/latched, reset with ignition/30-second timed/ second unlock output © 2003 Directed Electronics, Inc. -
Page 26: Menu #3 - Remote Start Features
Active locking means the system will not lock the doors when it passively arms. Passive locking means that the system will lock the doors when it passively arms. © 2002 Directed Electronics, Inc. - Page 27 The longer the word is, the easier it is to block its transmission to the unit. Disabling the Code Hopping™ feature lets the receiver ignore the Code Hopping™ part of the transmitted word. As a result, the unit may have better range with Code Hopping™ off. © 2003 Directed Electronics, Inc.
-
Page 28: Menu #2 - Advanced Features
2-6 BYPASS NOTIFICATION CHIRP ON/OFF: When programmed on, any active zone input to the system during arming will generate a bypass notification chirp. When programmed OFF, no bypass notification chirps will be generated if any zone is active during arming. © 2002 Directed Electronics, Inc. -
Page 29: Menu #3 - Renote Start Features
The default setting is 0.6 second. If a different crank time is desired, select feature 3-5 and select either © 2003 Directed Electronics, Inc. - Page 30 O O p p e e n n a a d d o o o o r r . . (The H1/5 GREEN wire or the H1/7 VIOLET wire must be connected.) K K e e y y . . Turn the ignition ON. (The heavy-gauge PINK wire of the relay satellite must be connected.) © 2002 Directed Electronics, Inc.
- Page 31 This will erase any lost or stolen transmitters from the system's memory. It can also be used to start from scratch if the transmitter buttons were programmed incorrectly. © 2003 Directed Electronics, Inc.
-
Page 32: Standard Configuration
When programmed for standard configuration, the transmitter buttons are assigned to the following functions: operates Arm only operates Disarm only operates Channel 2 and Silent Mode operates Panic only operates Remote extended functions operate Remote start operate Channel 4 © 2002 Directed Electronics, Inc. -
Page 33: Single Button Arm/Disarm Configuration
T T o o l l e e a a r r n n t t h h e e t t a a c c h h s s i i g g n n a a l l : : Start the vehicle with the key. Within 5 seconds, press and hold the Valet/program switch. © 2003 Directed Electronics, Inc. - Page 34 Press and release the Valet/program switch. The LED will now report the last system shutdown by flashing for one minute in the below grouped patterns; the LED will stop flashing when the ignition is turned on. © 2002 Directed Electronics, Inc.
- Page 35 Rapid Resume Logic ensures that the when the system is powered up it will return to the same state it was in when power is disconnected. For a full description of Rapid Resume Logic refer to the owner's manual. © 2003 Directed Electronics, Inc.
-
Page 36: Arm/Disarm Diagnostics
Full Trigger Shock Sensor Icon detected by the shock sensor Door switch trigger Door Open and Trigger Alert Icon Instant trigger - for optional sensors Ignition trigger NOTE: The Warn Away® response does not report on the LED. © 2003 Directed Electronics, Inc. - Page 37 The LED will flash for one minute or until the ignition is turned off. NOTE: The Warning Zone triggers are not stored to memory and will not be reported. © 2003 Directed Electronics, Inc.
- Page 38 Once the system passes the three tests, the vehicle can be re-assembled and delivered. Do not the use the remote start system or finalize the installation if it fails any of the safety check tests. © 2003 Directed Electronics, Inc.
-
Page 39: Alarm Troubleshooting
Reducing the sensitivity can solve this problem. The Valet®/Program switch doesn't work. Is it plugged into the correct socket? See Plug-In LED and Valet®/Program Switch section of © 2003 Directed Electronics, Inc. -
Page 40: Remote Start Troubleshooting
Also, if the vehicle has more than one 12-volt input wire, then connect one red wire to each. The vehicle starts, but immediately dies. Does the vehicle have an immobilizer? The vehicle’s immobilizer will cut the fuel and/or spark © 2003 Directed Electronics, Inc. - Page 41 The climate control system does not work while the unit is operating the vehicle. Either the wrong accessory wire is being energized or more than one ignition or accessory wire must be energized in order to operate the climate control system. © 2003 Directed Electronics, Inc.
- Page 42 Wiring Quick Reference Guide © 2003 Directed Electronics, Inc.
Need help?
Do you have a question about the 554R and is the answer not in the manual?
Questions and answers