Advertisement
Quick Links
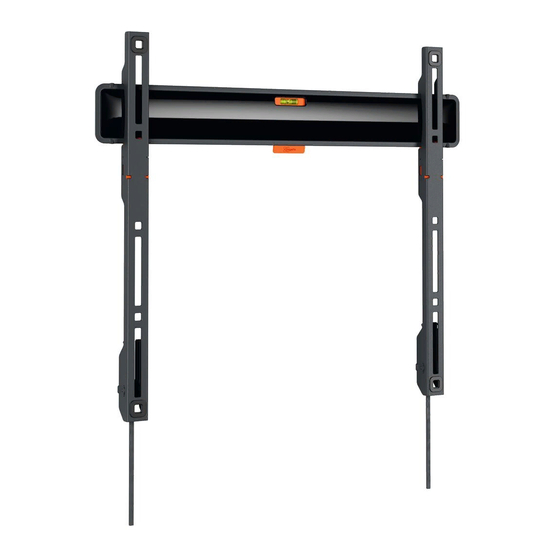
TVM 3200 Series
TVM 3400 Series
TVM 3600 Series
Full Installation Guide
Everything you need to get your TV safely on the wall, in no time
Before you start
...we just wanted to say thanks for choosing Vogel's. Smart choice.
And you're already making another smart choice – reading the manual! Keep reading to learn all about safe, efficient
installation, and how to use your new mount.
TVM 3200/3400/3600 Series English
1
Advertisement

Related Manuals for vogel's TVM 3200 Series


Summary of Contents for vogel's TVM 3200 Series
- Page 1 TVM 3200 Series TVM 3400 Series TVM 3600 Series Full Installation Guide Everything you need to get your TV safely on the wall, in no time Before you start …we just wanted to say thanks for choosing Vogel’s. Smart choice.
- Page 2 Stay safe Warning Always read these safety instructions carefully before installing and using this product. Following these instructions is strictly required. Incorrect mounting and/or installation could put you, your TV, and your family at substantial risk. Don’t dare risk it… Read all Vogel’s recommends that the mounting and/or installation of this product should be carried out by a suitably qualified expert.
-
Page 3: What's In Your Box
K. Cover F. Spacers L. Protective TV patches G. Washers Ø 18 mm Contents of the TV fasteners kit: TVM 3400/3600 Series: TVM 3200 Series: 4x M6*12mm bolts 4x M4*12mm bolts 4x M4*25mm bolts 4x M6*25mm bolts 4x M6*12mm bolts... - Page 4 You don't need all fasteners to mount your TV. Store the rest for later or other use! Got your tools ready? Don’t start without all the necessary tools: Crosshead screwdriver Drilling machine 8mm or 5/16” concrete/brick drill (for concrete/brick walls only) 4mm or 5/32”...
- Page 5 Ready… set… get installing! Step 1: Attach the strips to the TV 1. Put the protective TV patches Ⓛ on the strips Ⓒ. 2. Put the TV carefully on a clean surface without any obstacles. 3. Screw the strips Ⓒ on to the TV with the bolts Ⓔ. Make sure the strips Ⓒ are at the same height and do not stick out. Are you missing any bolts? Or need different ones? The friendly team at Vogel’s Consumer Care are waiting to help: vogels.com/contact Make sure that the release cords are at the bottom of the TV when attaching the strips.
- Page 6 Make sure bolts and spacers are positioned correctly. Make sure bolts and spacers are positioned correctly. Refer to the user manual of your TV for the correct mounting material. TVM 3200/3400/3600 Series English...
- Page 7 Step 2: Attach the wall mount to the wall How well do you know your walls? What they’re made of matters more than you think… Concrete/Brick wall Don’t drill yet! Try our free DrillRight™ AR app to find just the right height and mark the first hole, easily. 1.
- Page 8 3. Attach the wall mount Ⓐ to the wall with the screws Ⓗ, washers Ⓙ and plugs Ⓘ. Use the spirit level to level the wall mount. Lubricate the screws for easy screwing in. 4. Click the cover Ⓚ into place. Simple! TVM 3200/3400/3600 Series English...
- Page 9 Wooden wall with studs TVM 3200 and TVM 3210 Series are not suitable for mounting on stud walls, without special mounting material. Ask your installer, specialist supplier or the Vogel’s Consumer Care team at www.vogels.com/contact for more information. Don’t drill yet! Try our free DrillRight™ AR app to find just the right height and mark the first hole, easily. 1.
- Page 10 Don’t destroy your belongings! The wall mount must always be attached to the studs. 3. Now for the fun part… drilling the holes. 4. Attach the wall mount Ⓐ to the wooden wall with the screws Ⓗ and washers Ⓙ. Use the spirit level to level the wall mount.
- Page 11 Lubricate the screws for easy screwing in. 5. Click the cover Ⓚ into place. Simple! Other wall type/I don’t know my wall type If your wall is a little special – for example, hollow bricks, metal stud walls, wood panels or plasterboard – or you simply aren’t sure, don’t worry! Just ask your installer, specialist supplier or the Vogel’s Consumer Care team at www.vogels.com/contact.
- Page 12 Step 3: Attach the TV to the wall mount 1. Carefully lift and attach the TV to the wall mount Ⓐ. 2. When you hear a satisfying click (ClickLoc™ Safety System), you know your TV is safely in place. Lifting your TV is a two-person job. Don’t be bold! 3.
- Page 13 Handy features Easy cable access Stop struggling! Enjoy quick access to your cable connectors easily: 1. Pull the release cords to unlock the TV. 2. Tilt the TV so the cable access stands fold out. 3. Install the cables to the TV. 4.
- Page 14 Removing your TV 1. Pull the release cords to unlock the TV. 2. Remove the TV, and put it down somewhere safe. Again, lifting your TV is a two-person job. Always get help. Tell us how you feel! Your opinion matters more than you might think. It helps us make better products, and helps other customers make informed choices.
-
Page 15: Simple Troubleshooting
– it can be hard service kit, and we’ll send everything you need. to keep up sometimes. So, it might Click here to contact Vogel's Consumer Care. be the case that the correct bolt size is not included… you’re just... - Page 16 TV and wall. Do you miss the correct bolts for your TV? Please contact your local Vogel's dealer. Click here to contact Vogel's Consumer Care. ‘Why do you use Fischer© plugs?’...
- Page 17 Go green! We care about the planet. If you’re getting rid of the packaging or the TV mount itself, please visit your local recycling facility, or contact your municipal office. Recycling matters! Guarantee Thanks again for choosing Vogel’s! Just like every product we make, your new purchase is made of durable materials and is based on a meticulous design.
Need help?
Do you have a question about the TVM 3200 Series and is the answer not in the manual?
Questions and answers