
Related Manuals for Kaysun Aquantia KHP-MO HT HP


Summary of Contents for Kaysun Aquantia KHP-MO HT HP
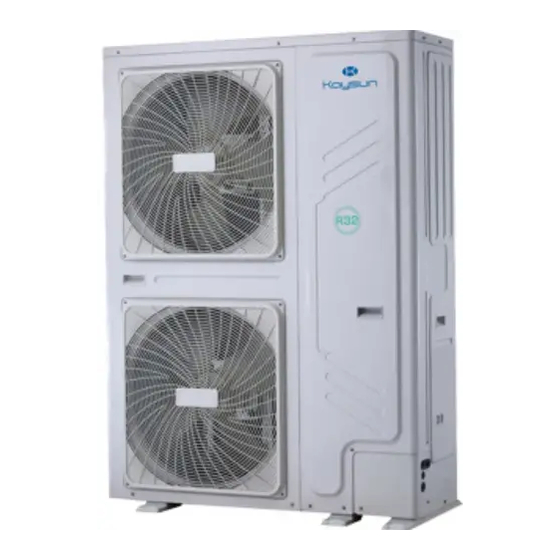
- Page 1 INSTALLATION MANUAL Aquantia KHP-MO HT HP KHP-MO 26 DTP KHP-MO 30 DTP KHP-MO 35 DTP Please read this manual carefully and keep it for future reference. All the pictures in this manual are for illustrations purpose only.
-
Page 2: Table Of Contents
CONTENTS 1 SAFETY PRECAUTIONS .................. 01 2 GENERAL INTRODUCTION ................07 • 2.1 Documentation............................ 07 • 2.2 Validity of the Instructions ........................07 • 2.3 Unpacking ............................08 • 2.4 Accessories of the Unit ........................08 • 2.5 Transportation ............................. 09 •... - Page 3 • 8.3 Wiring ..............................33 • 8.4 Mounting ............................34 9 COMPLETION OF INSTALLATION ..............36 10 CONFIGURATION ................... 36 • 10.1 Check Before Configuration ......................36 • 10.2 Configuration ........................... 37 11 COMMISSIONING .................... 38 • 11.1 Test Run for the Actuator ......................... 38 •...
-
Page 4: Safety Precautions
1 SAFETY PRECAUTIONS Intended use There is a risk of injury to the user or others, or of damage Observe the basic safety regulations before starting to the product and other property in the event of improper work and operation. or unintended use. - Page 5 Regulations to be observed Working on the system • National installation regulations. Switch off the power supply for the unit (including all affiliated parts) at a separate fuse or mains isolator. • Statutory regulations for the prevention of accidents. Check and ensure that the system is no longer live. •...
- Page 6 • Inform the following persons of the type of work to be DANGER carried out: – All maintenance personnel – All persons in the vicinity of the system. Damage to the refrigerant circuit can cause • Inspect the area immediately around the heat pump refrigerant to enter the hydraulic system.
- Page 7 Connecting cables CAUTION DANGER Direct contact with liquid or gaseous refrigerant can cause serious damage to health, e.g. frostbite and/ With short electrical cables, should there be leakage or burns. Breathing in liquid or gaseous refrigerant in the refrigerant circuit, gaseous refrigerant may may cause asphyxiation.
- Page 8 The following checks should be applied to installations WARNING using flammable refrigerants: • The charge size should depend on the size of the A fire with R290 should only be fought with CO room within which refrigerant containing components are dry powder extinguishers.
- Page 9 Check and ensure that cabling is free from wear, corrosion, i) Do not exceed the maximum working pressure of the excessive pressure, vibration, sharp edges or any other cylinders, even temporarily. adverse environmental effects. The check should also take j) When the cylinders have been filled correctly, make sure into account the effects of ageing or continual vibration that the cylinders and the equipment are removed from the from sources such as compressors or fans.
-
Page 10: General Introduction
Leak detection equipment should be set at a percentage of the LFL of the refrigerant and should be calibrated to be suitable for the refrigerant employed, with the appropriate percentage of gas (25% maximum) confirmed. Leak detection fluids should be suitable for most refrigerants but the use of detergents containing chlorine should be avoided as the chlorine may react with the refrigerant and corrode the copper pipes. -
Page 11: Unpacking
2.3 Unpacking ① ② For the accessories box, see 2.4.1 Accessories supplied with the unit for more details. 2.4 Accessories of the Unit Accessories of the unit Thermistor Name Illustration Quantity Specification (T5, Tw2, Tbt) Installation Manual Drain joint φ32 Technical Data Energy label Manual... -
Page 12: Transportation
2.5 Transportation Pass the transport straps through the holes on the left and right sides of the pallet properly. 2.5.1 Dimensions and barycenter No pallet under the unit: The transport straps can be fitted into foreseen sleeves The illustrations below are for 26&30&35 kW units. A, B, at the base frame that are made specifically for this and C indicate the locations of barycenter. -
Page 13: About The Unit
2.6 About the Unit 2.6.1 Overview The unit applies to heating, cooling, and DHW scenarios. It can be used together with fancoil units, floor heating devices, low-temperature high-efficiency radiators, domestic hot water tanks, and solar kits. The backup heater can increase the heating capacity at extremely low ambienttemperatures. It serves as a backup heating source in case of heat pump failureorfreeze protection of the water pipingoutsidein winter. - Page 14 2.6.3 Hydraulic module Code Assembly Unit Explanation Automatic air purge valve Automatically removes the remaining air from the water loop. Provides additional heating capacities when the heating capacity of the heat pump Backup heater (optional) is insufficient due to low outdoor temperature, and protects the external water pipes from freezing.
- Page 15 2.6.4 Operating range In DHW mode, the product works at an outdoor temperature of -25 to 43°C In cooling mode, the product works at an outdoor temperature of -15 to 48°C. 10 15 20 25 30 35 10 40 45 55 60 65 70 In case of valid TBH/IBH/AHS settings, only the TBH/IBH/AHS turns on;...
-
Page 16: System Design
3 SAFETY ZONE A Safety zone Corner positioning of the outdoor unit, left The refrigerant circuit in the outdoor unit contains easily flammable refrigerant in safety group A3 as described in ISO 817 and ANSI/ASHRAE Standard 34. Therefore, 2400mm a safety zone is defined in the immediate vicinity of the outdoor unit, in which special requirements apply. -
Page 17: Unit Installation
4 UNIT INSTALLATION For ground installation and flat roof clearance – single unit General Obstacle over the top No obstacle over the top 26-35 kW (mm) Unit height + B ≥500 ≥500 ≥100* ≥500 ≥500 ≥1000 ≥300 ≥500 * In case of cold weather, take into account of snow on the ground. For more information, refer to 5.5 In Cold Climates. -
Page 18: Unit Installation
5 UNIT INSTALLATION Noise impact • Select an installation site that is as far away from 5.1 General Rules living rooms and bedrooms as possible. • Please note the noise emissions. Select an In addition to “Safety zone”, the following conditions installation site that is as far away from the windows of should be observed. -
Page 19: Foundation And Unit Installation
5.2.2 Precautions for installation on a flat roof • Calculate the height (B) in accordance with local conditions. Such height should not be smaller than • Only install the product in a building with a solid 100 mm. construction structure and that has cast concrete ceilings •... - Page 20 The downpipe must flow into a sufficiently large gravel bed so that the condensate can trickle away freely. This drain hole is covered by a rubber NOTE plug. If the small drain hole cannot meet the drainage To prevent the condensate from freezing, the requirements, heating wire must be threaded into the downpipe big drain hole can...
-
Page 21: In Cold Climates
6 HYDRAULIC INSTALLATION a – Outdoor unit b – Concrete strip foundations 6.1 Preparations for Installation c – Foundation (See 5.3.1 Installation on a ground) d – Drain pipe (at least DN 40) NOTE e – Sewer f – Stench trap in an area free from frosting risks •... -
Page 22: Water
Domestic hot water CAUTION For the installation of the domestic hot water tank (supplied on the site), refer to the specific manual of the Incorrect orientation of water outlet and inlet could domestic hot water tank. cause unit malfunction. Do NOT apply excessive force when connecting Others the field piping and make sure the piping is aligned properly. -
Page 23: Filling Water Loop With Water
Validity: Denmark or Sweden NOTE Water hardness at specific system volume Total heating >20 l/kW and During filling, it might not be possible to remove all ≤20 l/kW > 50 l/kW output ≤50 l/kW air from the system. Remaining air will be removed °dH mol/m °dH... -
Page 24: Freeze Protection
6.7 Freeze Protection Types of glycol The types of glycol that can be used depend on whether 6.7.1 Protected by software the system contains a domestic hot water tank: The software is equipped with specific functions to Then protect the entire system from freezing by using the heat The system contains a Only use propylene glycol pump and the backup heater (if available). -
Page 25: Check Of Water Loop
NOTE Do NOT install freeze protection valves, if glycol is added to the water. Otherwise, glycol may leak from the freeze protection valves. When no glycol is added to the water, you can use freeze protection valves to drain the water from the system before it freezes. -
Page 26: Electrical Installation
7 ELECTRICAL INSTALLATION 7.2 Back plate layout for wiring DANGER Risk of electrocution. 7.1 Opening the Electrical Box Cover To access the unit for installation and maintenance, follow the instructions below. WARNING Risk of electrocution. Risk of burning. NOTE Keep the screws properly for later use. ①... -
Page 27: Electrical Wiring Guidelines
7.3 Electrical Wiring Guidelines 7.3.1 Operating current and wire diameter 1) Select the wire diameter ( minimum value) individually for each unit based on Table 7-1 and Table 7-2. The rated current in Table 7-1 means MCA in Table 7-2. In case the MCA exceeds 63 A, the wire diameters should be selected according to the local wiring regulation. -
Page 28: Connection With Power Supply
7.4 Connection with Power Supply NOTE 7.4.1 Wiring of main power supply • If the current of load is smaller than 0.2 A, load can connect to the port directly. If the load current CAUTION is larger than or equal to 0.2sA, it is necessary to connect the AC contactor to the load. - Page 29 7.5.2 Wiring of 3-way valves SV1, SV2 and Control signal port of hydraulic module: The CN11 NOTE contains terminals for the 3-way valve, pump, booster, and heater, etc. Refer to the 3.9 Typical applications for the Connect the cable to an appropriate terminal as shown in installation locations of SV1, SV2 and SV3.
- Page 30 SV3: Additional circulation pump P_o: 3ON 3OFF CN11 CN11 Power supply 7 5 3 1 Voltage 220-240VAC Solar energy pump P_s: Maximum running current (A) Minimum wire size (mm 0.75 Control port signal type Type 2 CN11 7.5.3 Wiring of additional pumps Zone 2 pump P_c: CN11 Power supply...
- Page 31 DHW pipe pump P_d: Voltage 220-240VAC Maximum running current (A) Minimum wire size (mm 0.75 Control port signal type Type 2 CN11 7.5.5 Wiring of tank booster heater (TBH) CN11 Power supply 7 5 3 1 Power supply Voltage 220-240VAC 7 5 3 1 Maximum running current (A) Minimum wire size (mm...
- Page 32 7.5.6 Wiring of external IBH 7.5.7 Wiring of room thermostat (RT) Room thermostat (low voltage): “POWER IN” provides NOTE the voltage to the RT. • The unit only sends an ON/OFF signal to the NOTE heater. • IBH cannot be wired independently. The room thermostat must be low-voltage.
- Page 33 The thermostat cable can be connected in three ways (as described in the figures above) and the specific connection method depends on the application. Method A (Mode setting control) RT can control heating and cooling individually, like the controller for 4-pipe FCU. When the hydraulic module is connected with the external temperature controller, ROOM THERMOSTAT is set to MODE SET on the wired controller:...
- Page 34 7.5.8 Wiring of solar energy input signal 7.5.10 Wiring of smart grid (low voltage) The unit has a smart grid feature, and there are two ports on the PCB to connect SG signals and EVU signals as below: CLOSE: SHUT DOWN SMART GRID 1) SG=ON, EVU=ON.
-
Page 35: Cascade Function
7.6 Cascade Function See the INSTALLATION, OPERATION AND MAINTENANCE MANUAL. 7.7 Connection for Other Optional Components 7.7.1 Wiring of drainage pipe heating tape Heating tape Heating tape Heating tape The maximum power is 100W. NOTE Use tie wraps After wiring, the sleeve should be fastened with a tie wrap (accessory) -
Page 36: Installation Of Wired Controller
8 INSTALLATION OF WIRED CONTROLLER CAUTION • The general instructions on wiring in previous chapters should be observed. • The wired controller must be installed indoors and kept away from direct sunlight. • Keep the wired controller away from any ignition source, flammable gas, oil, water vapor, and sulfide gas. •... -
Page 37: Mounting
Route Bottom-side wiring out X2/ HA Lower-side Place of lower-side wire outlet wire outlet DETAIL A SCALE 2:1 Inside wall wiring (with an 86-type box) Inside wall wiring (without an 86-type box) Wall hole and wiring hole 46mm Diameter: Φ8-Φ10 60mm Wiring hole... - Page 38 • Adjust the length of the plastic bolt in the accessory box to make it suitable for installation. • Fix the wired controller’s bottom cover to the wall through the screw bar by using cross head screws. Make sure the bottom cover is set flush on the wall.
-
Page 39: Completion Of Installation
9 COMPLETION OF INSTALLATION DANGER Risk of electrocution. Risk of burning. Tightening torque 4.1 N•m 10 CONFIGURATION The unit should be configured by an authorized installer to match the installation environment (outdoor climate, installed options, etc.) and meet the user demand. Follow the instructions below for the next step. -
Page 40: Configuration
After powering on the unit, check the following items: Upon power-on of the unit, nothing is displayed on the wired controller: Check the following abnormalities before diagnosing possible error codes. - Wiring connection issue (power supply or communication signal). - Fuse failure on PCB. -
Page 41: Commissioning
11 COMMISSIONING Checklist during commissioning Test run is used to confirm the operation of the valves, air Test run for the actuator. purge, circulation pump operation, cooling, heating and domestic water heating. Air purge Test run for operation. ... -
Page 42: Test Run
Besides “Air vent pump_i output” To set pump_i output. The higher the value is, the pump gives a higher output. “Air vent running time” To set the duration of air purge. When the set time is due, air purge is deactivated. “Status check”... -
Page 43: Maintenance
13 MAINTENANCE • Verify that cabling will not be subject to wear, corrosion, excessive pressure, vibration, sharp edges Regular checks and inspections at certain intervals are or any other adverse environmental effects. Take into required to guarantee the optimal performance of the account the effects of aging or continual vibration from unit. -
Page 44: Technical Data
14. TECHNICAL DATA 14.1 General 3-phase 3-phase 3-phase Model 26 kW 30 kW 35 kW Nominal capacity Refer to the Technical Data Dimensions H×W×D 1816×1384×523 mm Packing dimensions 2000×1480×570 mm H×W×D Weight Net weight 260 kg Gross weight 285 kg Connections Water inlet/outlet G1 1/4”BSP... -
Page 45: Electrical Specifications
14.2 Piping Diagram 26-35 kW units (standard) outlet inlet Item Description Item Description DC inverter compressor Vapor-liquid separator Crankcase heater Temperature sensor (compressor suction) Discharge temperature sensor Low pressure sensor High pressure switch Cooling Electronic expansion valve High pressure sensor One-way valve 4-way valve Liquid reservoir... -
Page 46: Annex
ANNEX Annex 1. Menu Structure (Wired Controller) Weekly schedule Schedule 1 Mode (2) Schedule 2 Menu Heating Schedule 3 Mode Cooling Schedule 4 Schedule Auto Weather temp. settings DHW settings (1) Holiday away Settings Current state Unit status From Error info. Until Schedule Heating mode (1) - Page 47 For serviceman 7 Other heating source 1 DHW setting For serviceman 7.1 IBH function 1.1 DHW mode 7.2 IBH locate 1 DHW setting 1.2 Disinfect 7.3 dT1_IBH_ON 2 Cooling setting 1.3 DHW priority 7.4 t_IBH_DELAY 3 Heating setting 1.4 Pump_D 7.5 T4_IBH_ON 4 Auto mode setting 1.5 DHW priority time set...
-
Page 48: Annex 2. User Settings Parameters
Annex 2. User Settings Parameters Setting Code Definition Default Minimum Maximum Unit interval 6.1 Mode & Temperature set Operation mode setting 1=Auto, Mode Operation mode 2=Cooling, 3=Heating For FCU cooling °C Water outlet For FLH / RAD cooling °C temperature For FLH heating °C (Zone 1) - Page 49 Schedule1 - Schedule4 Enablement 0=inactive, 1=active Schedule1 - Schedule4 Sunday / Monday / Enablement 0=inactive, 1=active (if all the Tuesday / Wednesday / date is active, then display ‘Every day’) Thursday / Friday / Saturday Command1-Command4 Enablement 0=inactive, 1=active Command1-Command4 Zone 2 Timer start time 00:00...
- Page 50 For FCU cooling °C For FLH / RAD cooling °C For FLH heating °C Zone 2 holiday timer temperature of -timer1-timer6 Temp. For FCU / RAD heating °C the timer Room heating set °C temperature Ta Room cooling set °C temperature Ta DHW holiday timer Enablement 0=inactive, 1=active...
- Page 51 Temperature curve Enablement 0=inactive, 1=active Temperature curve type 0=Standard, Temperature curve type 1=Custom Curve for FLH / RAD cooling Standard - Temperature level Curve for FCU cooling Standard - Temperature Zone 2 cooling set temperature offset of °C Zone 2 offset curve cooling...
-
Page 52: Annex 3. Terms And Abbreviation
Annex 3. Terms and abbreviation Compressor discharge temperature Compressor Suction temperature Outdoor air temperature Heat exchanger temperature Heat exchanger outlet refrigerant(cooling) temperature Plate heat exchanger inlet refrigerant(cooling) temperature Plate heat exchanger outlet refrigerant(cooling) temperature Tw_in Inlet water temperature Tw_out Outlet water temperature DHW tank temperature Zone 2 water temperature Balance tank temperature...
Need help?
Do you have a question about the Aquantia KHP-MO HT HP and is the answer not in the manual?
Questions and answers