
Related Manuals for MXN HD7DM


Summary of Contents for MXN HD7DM
- Page 1 All manuals and user guides at all-guides.com TFT DIGITAL LCD Monitor for MXN-HD7DM - Owner’s Manual...
-
Page 2: Table Of Contents
All manuals and user guides at all-guides.com · · · · · · Package Contents Operation System Setting Function Picture Camera Set up Normal/Mirror Auto Picture Scan Camera Trigger Distance Marker Adjust Scan ON/OFF Function Lock ON/OFF Function Connection Installation Monitor installation with Stand bracket &... -
Page 3: Package Contents
All manuals and user guides at all-guides.com PACKAGE CONTENTS CABLE CLIP BRACKET SCREWS MONITOR SUNVISOR SUNVISOR SCREWS STAND BRACKET MANUAL ITEM Q’TY MONITOR SUNVISOR SUNVISOR SCREW STAND BRACKET BRACKET SCREW CABLE CLIP CAMERA INPUT CABLE CAMERA INPUT CABLE MANUAL Owner’s Manual... -
Page 4: Operation
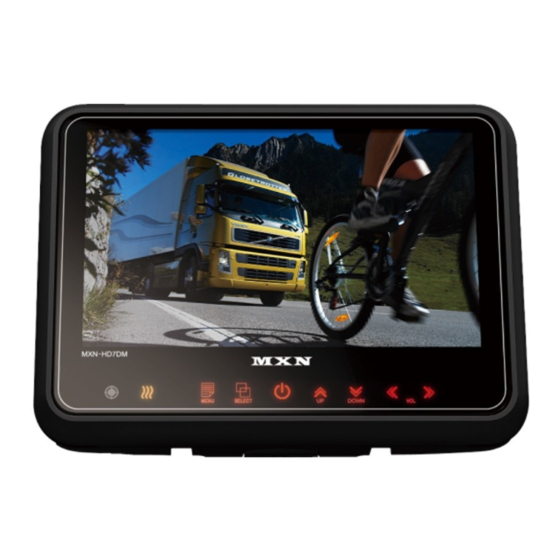
All manuals and user guides at all-guides.com OPERATION A . DAY/NIGHT SENSOR (CDS) Automatic brightness control sensor. B . HEATER LAMP Orange color will be illuminated in case heater function is activated. C . MENU Press [MENU] button for system setting. D . -
Page 5: System Setting
All manuals and user guides at all-guides.com SYSTEM SETTING FUNCTION DIMMER (Automatic Brightness Control) Select AUTO to have Automatic or Manual brightness of the monitor. FUNCTION DIMMER AUTO/OFF REMARK: By activating REMARK: By activating DIMMER AUTO DIMMER AUTO function, the monitor adjusts the brightness function, the monitor adjusts the brightness LANGUAGE ENGLISH/…... -
Page 6: Picture
All manuals and user guides at all-guides.com SYSTEM SETTING PICTURE PICTURE Press [ LEFT/RIGHT ] button to adjust preferred PICTURE of the monitor. CONTRAST 50 (0-100) BRIGHTNESS 50 (0-100) COLOR 50 (0-100) TINT 50 (0-100) CAMERA SET UP CAMERA SET UP TRIG. -
Page 7: Normal/Mirror
All manuals and user guides at all-guides.com NORMAL/MIRROR NORMAL/MIRROR NORMAL/MIRROR CAM1 NORMAL/MIRROR CAM2 NORMAL/MIRROR Each camera picture (CAM1/CAM2/CAM3) can be switchable as NORMAL/MIRROR image. CAM3 NORMAL/MIRROR UP/DOWN UP/UPSIDE DOWN UP/UPSIDE DOWN Camera pictures can be switchable as UP/DOWN image. AUTO PICTURE SCAN AUTO PICTURE SCAN AUTO SCAN ON/OFF... -
Page 8: Camera Trigger
All manuals and user guides at all-guides.com SYSTEM SETTING CAMERA TRIGGER CAMERA TRIGGER TRIGGER 1 CAM1/CAM2/CAM3 TRIGGER 1/2/3 (Trigger source selection) TRIGGER 2 CAM2/CAM3/CAM1 Select the required trigger source at CAM1/CAM2/CAM3. TRIGGER 3 CAM3/CAM1/CAM2 CAM1 DIST. MARKER MARKER ON/OFF REMARK REMARK SPEED SWITCH ON/OFF... -
Page 9: Distance Marker Adjust
All manuals and user guides at all-guides.com DISTANCE MARKER ADJUST User can adjust location of distance marker. At Power mode, select distance marker by pressing [ ] buttons. UP/DOWN When color of distance markers is seen as color, user can adjust the lines DOWN LEFT/RIGHT When both color of distance markers are seen as... -
Page 10: Scan On/Off Function
All manuals and user guides at all-guides.com SYSTEM SETTING SCAN ON/OFF FUNCTION CAM1 CAM2 CAM3 Power-ON mode, hold [ ] buttons pressed for 4 seconds to activate Auto Scan SCAN SCAN SCAN Picture function. During the auto scanning mode, press [ ] button for 4 seconds to inactivate Auto Scan Picture function. -
Page 11: Connection
All manuals and user guides at all-guides.com CONNECTION 7” TFT DIGITAL LCD Monitor Green White Blue S pee itch TACH SIGN NAL)- Orange r ou Black M ain 2 V / 4V DC via ignition (+15)- CAMERA INPUT Camera 1(Option) +12V DC OUTPUT, HEATER &... -
Page 12: Installation
All manuals and user guides at all-guides.com INSTALLATION MONITOR installation with STAND BRACKET & SUNVISOR Remove a protection tape and attach STAND BRACKET into stand place, then fix it with the supplied screws. Connect STAND BRACKET with monitor and adjust height/angle. Attach SUNVISOR to the... -
Page 13: Installation Of Heavy Duty Mounting Brackets
All manuals and user guides at all-guides.com Installation of heavy duty mounting brackets MONITOR can be connected with different type of heavy duty mounting brackets. Please check the compatibility in advance, then please follow installation as described below. TYPE A(option) TYPE B(option) 30mm 40mm... -
Page 14: Specification
Storage Temp. -30˚C to + 85˚C Impact Rating Camera Connector 4-pin mini DIN (MXN configuration) Housing Soft black(Al12) ON-Screen Display Volume · Brightness · Color · Contrast · Tint · CAM Screen 1/2/3 · CAM Trigger 1/2/3 · Heater ·... - Page 15 All manuals and user guides at all-guides.com TFT DIGITAL LCD Monitor for MXN-HD7DM - Owner’s Manual...
Need help?
Do you have a question about the HD7DM and is the answer not in the manual?
Questions and answers