
Related Manuals for FTS BUBBLER


Summary of Contents for FTS BUBBLER
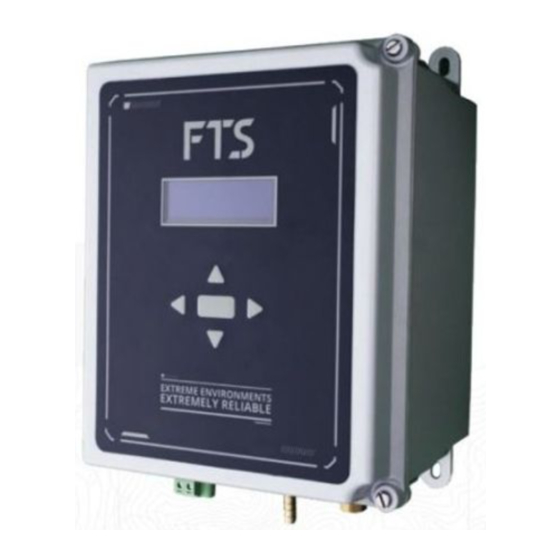
- Page 1 EXTREME ENVIRONMENTS. EXTREMELY RELIABLE. BUBBLER Installation and Quick Start Guide 700-Bubbler-QS Rev 1 11 Dec 2019 Part#20792...
-
Page 2: Table Of Contents
Bubbler Parts……………………………………………………………………………. Data Connections……………………………………………………………………… Connecting the Desiccator………………………………………………………… Orifice Line………………………………………………………………………………… Power…………………………………………………………………………………..…… CONFIGURING THE BUBBLER……………………………………………………... Default Settings……………………………………………………………………….. Configuring Using the Bubbler’s Front Panel…………………………… Bubbler’s Menu Tree..……………………………………………………………… Configuring with Axiom Dataloggers…………………………………..…… Pre-Configured Axiom Dataloggers…………………………………. Unconfigured Axiom Dataloggers……………………………………. Configuring with Other Data Loggers………………………………….…… SDI-12 Commands……………………………………………………………………... -
Page 3: Important Installation Guidelines
IMPORTANT INSTALLATION GUIDELINES This guide is meant as a fast reference when setting up your FTS Bubbler. For detailed instructions and information, refer to the Bubbler User Manual found on the FTS Support website https://support.ftsinc.com/sensors/bubbler/ SITE SELECTION The water should be relatively calm and where sediment accumulations are not likely to block the orifice line. -
Page 4: Orifice Line
Mount the outlet line where it can be exposed at low stage • Leave the line outlet unsecured • WIRING AND CONNECTIONS The following connections should be made BEFORE applying power: Data connections (SDI-12 or 4-20mA) Desiccant assembly Orifice line Power FTS supplied orifice line is USGS approved... -
Page 5: Bubbler Parts
Bubbler outlet terminal block (orifice line connection) Barbed hose fitting Bubbler air for desiccant hose intake fitting DATA CONNECTIONS Use the following diagram for datalogger to Bubbler connections. SDI-12 Connections 4-20mA Connections Description Description 12 VDC Ground Serial data 4-20mA positive... -
Page 6: Connecting The Desiccator
CONNECTING THE DESICCATOR A) Attach the barbed hose fitting to the Bubbler: Wrap Teflon tape around the Bubbler’s air intake fitting, and then screw on the barbed hose fitting finger tight. Ensure it is tightly seated by turning a quarter turn with a wrench. -
Page 7: Orifice Line
Push the desiccant tubing firmly onto the dryer’s barbed desiccant adaptor fitting, ensuring a tight seal. Attach the desiccant hose to the barbed hose fitting on the Bubbler’s air intake Shipping Plug AIRFLOW Desiccant resistance Adaptor inlet vent Part# 19469... -
Page 8: Power
POWER The Bubbler requires a dedicated +12VDC power source to operate. Power supplied from dataloggers is insufficient to run the compressor. IMPORTANT! If not using an FTS supplied power cable (Part #18945) between the battery and the Bubbler, an equivalent power cable should be used. -
Page 9: Configuring Using The Bubbler's Front Panel
The Bubbler will retain the last input configuration whether set through the Bubbler or the data logger. However, changes made using the Bubbler’s interface will not be reflected in the data logger (unless it is an FTS Axiom Datalogger). -
Page 10: Configuring With Axiom Dataloggers
1) Insert the USB stick into one of the USB HOST ports on the Datalogger and select Station> About > Load Configuration. Connect the Bubbler to an SDI port on the Datalogger. Select SDI12 > Vendor/Serial > Bubbler: Once a valid reading has been returned, rom the Bubbler’s home screen select the Set Stage button... -
Page 11: Unconfigured Axiom Dataloggers
UNCONFIGURED AXIOM DATA LOGGERS 1) Connect the Bubbler to an SDI port. Select SDI12 > Search icon > OK 2) Tap on the “NEW” box. Review each tab, input desired parameters, and select OK when done. Note: The default Sensor... -
Page 12: Configuring With Other Data Loggers
CONFIGURING USING OTHER DATA LOGGERS Use SDI-12 commands to change the Bubbler’s default settings. Confirm communication with the sensor, by entering the Send Identification command. To use SDI-12 commands with an Axiom Datalogger enter Transparent Mode. Select SDI-12 > which appears at the bottom of the screen. -
Page 13: X-Commands
COMMENTS Begin tank aXBLD! bleed aXBLDP! End tank bleed Bubbler needs to be power cycled after this command to return to normal operations. Get/set bubble aXBRP! Range: 30-120 rate per minute P.p is the minimum voltage that will trigger a Get/set battery voltage fault. - Page 14 Units field of the Set Stage screen. The user must be aware of the units associated with the input slope value Used when swapping a Bubbler and replacement Bubbler is to use the same offset. Before swapping the Bubbler, get and record the offset Get/set stage aXSOP! Swap Bubblers and then set the offset.
- Page 15 COMMAND DEFINITION COMMENTS Range: 2-60 Get/set period The stage value is an average of the number of for samples in aXSPP! samples taken over the specified sample period seconds (averaging duration). Each sample takes approximately 2 seconds. 0 = ft (feet) (slope=2.307) 1 = in (inches) (slope=27.680) 2 = m (meters) (slope=07.03) 3 = cm (centimeters)
- Page 16 TECHNICAL SUPPORT If you have any questions, please do not hesitate to contact FTS Service & Support. Local (Victoria, B.C.): 250.478.5561 Monday – Friday 7:00 a.m. – 4:00 p.m. PST North America (toll free): 1.800.548.4264 Except Canadian statutory holidays International: (country exit code)+ 1.250.478.5561...
Need help?
Do you have a question about the BUBBLER and is the answer not in the manual?
Questions and answers