
Related Manuals for FTS Radar Stage Sensor


Summary of Contents for FTS Radar Stage Sensor
- Page 1 EXTREME ENVIRONMENTS. EXTREMELY RELIABLE. Radar Stage Sensor (RSS) Operating Manual Continuous Level Measurement For all variants of SDI-RADAR/SDI-RADAR-64 1.800.548.4264 | www.ftsinc.com 700-RSS-Man Rev 13 15 Jun 2021...
- Page 2 Contact Information Canadian Headquarters: 1065 Henry Eng Place Victoria, BC | V9B 6B2 | Canada www.ftsinc.com Toll-free: 1.800.548.4264 Local: 250.478.5561 Technical support portal: http://support.ftsinc.com Email: service@ftsinc.com...
-
Page 3: Table Of Contents
Contents FUNCTION..............................1 TARGET GROUP ............................1 REFERENCES ............................... 1 AUTHORIZED PERSONNEL ........................2 APPROPRIATE USE ............................. 2 GENERAL SAFETY INSTRUCTIONS ......................2 2.3.1 ELECTROMAGNETIC COMPATABILITY .................... 3 RADIO LICENSE FOR U.S./CANADA ......................3 INSTALLATION LIMITATIONS-CANADA ....................3 2.5.1 OPERATING NEAR PENTICTON OR IN THE OKANAGON VALLEY, B.C......... 4 FUNCTIONAL PRINCIPLE ........................... - Page 4 SETTING UP WITH THE FTS AXIOM DATALOGGERS ................16 6.1.1 SETTING UP USING THE RADAR EXTENSION ................17 6.1.2 SETTING UP USING THE SDI GENERIC EXTENSION ..............20 MAPPING THE RADAR SENSOR TO THE DATALOGGER .............. 22 SETTING UP WITH NON–FTS DATA LOGGERS ..................23 USING SDI-12 COMMANDS WITH AXIOM DATALOGGERS ..............
-
Page 5: Function
Please read this information before putting the instrument into operation and keep this manual accessible in the immediate vicinity of the device. This manual can be used with the following variants of the Radar Stage Sensor: SDI-RADAR VARIANTS Part Number... -
Page 6: Authorized Personnel
2.2 APPROPRIATE USE The FTS Radar Range Sensor is a sensor for continuous level measurement. You can find detailed information about the area of application in Chapter 3: Product Description. Operational reliability is ensured only if the instrument is properly used according to the specifications in the operating instructions manual as well as possible supplementary instructions. -
Page 7: Electromagnetic Compatability
• The installation of the device shall be done by trained installers, in strict compliance with the manufacturer's instructions. The International limit value for radiation of persons is < 10 mW/m² for a continuous emission. The FTS Radar Stage Sensor operates emits <10μW/m² in pulsed emissions. -
Page 8: Operating Near Penticton Or In The Okanagon Valley, B.c
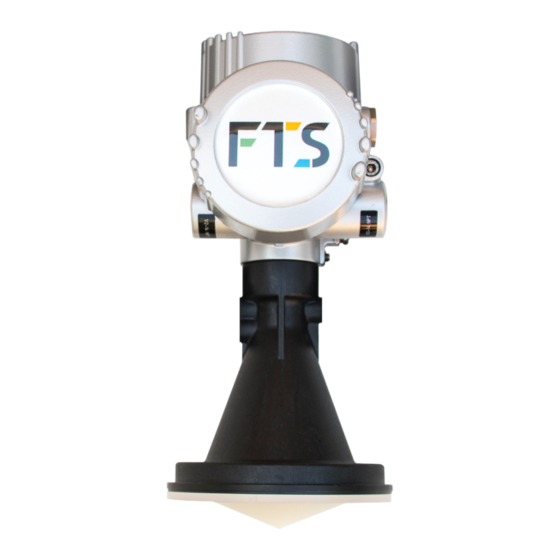
• This device shall be installed only at fixed locations. The device shall not operate while being moved or while inside a moving container. • Hand-held applications are prohibited. • Marketing to residential consumers is prohibited. • The use of this device is on a "no-interference, no-protection" basis. That is, the user shall accept operations of high-powered radar in the same frequency band which may interfere with or damage this device. - Page 9 PRODUCT DESCRIPTION The FTS Radar Range Sensor is a radar sensor for continuous level measurement of liquids under simple process conditions. It is capable of being mounted using the supplied mounting strap or optional adaptor flange. Mounting instructions are contained in Chapter 5.
-
Page 10: Functional Principle
2) If the Vega display and adjustment module is used to reset the sensor to factory default settings, the unit is returned to the VEGA factory defaults, not those set by the FTS factory, which may also place the unit into the unusable condition described in (1) until 15V can be supplied. -
Page 11: Power Modes
See section 6.1.1 and 8.3.2 for how to set the power mode using the Datalogger and SDI-12 commands respectively. 3.1.4 SCOPE OF DELIVERY The scope of delivery encompasses: Radar Stage Sensor and options • Mounting strap with fixing material •... -
Page 12: Sdi-12 Military Bayonet Connector
In the 4-20 mA option, both SDI-12 and the 4-20 MA connections must be made. 4.1 SDI-12 MILITARY BAYONET CONNECTOR When using the Radar Stage Sensor with an FTS Axiom Datalogger, the sensor is supplied with the SDI-12 cable with military bayonet connector installed. -
Page 13: Sdi-12 Connection
4.2 SDI-12 CONNECTION Use 3 wire, shielded cable, preferably with red, black, white colour-coded conductors. Use cable with a round cross section and an outer diameter of 0.17” to 0.45” to ensure the IP protection rating seal of the cable gland. Conductor gauge must be in the AWG 20 - 24 range. SDI-12 connection steps are as follows: 1. -
Page 14: Ma Output Option Connections
4.3 4-20 MA OUTPUT OPTION CONNECTIONS Normally, the radar will be shipped with all internal electrical connections in place. However, should the supplied cables need to be replaced, the cover from the electronics enclosure on the side of the instrument must be removed to make the connections. Connect the SDI-12 cable as directed in the previous section. - Page 15 4-20 mA cable terminal connection SDI-12 cable terminal connection Cable Entry Cable Entry Port Port Compression nut Figure 4-2: Electronics Compartment NOTE: 4-20 mA wires will be Red (pos) and Black (neg) in most radars. Ground Neg (- Figure 4-3: 4-20 mA Wiring Plans 700-RSS-Man Rev.13 15 Jun 2021 11/45...
-
Page 16: General
MOUNTING 5.1 GENERAL The radar sensor can be mounted directly onto a vertical, horizontal, or angled surface using the mounting bracket. Additionally, it can be mounted using an optional flange attachment which accommodates mounting in an enclosure for added protection and security. 5.1.1 PROTECTION AGAINST MOISTURE Protect your instrument against moisture ingress through the following measures: Only use the supplied cable and gland... - Page 17 NOTE: When the housing is rotated, the direction of polarization changes and hence the influence of the false echo on the measured value. Keep this in mind when mounting or making changes later. Polarization Figure 5-1: Polarization Markings Ideally, the polarization markings should be turned towards the nearest vertical surfaces to minimize interference with the transmitting waves.
-
Page 18: Installation Obstructions
5.2.3 INSTALLATION OBSTRUCTIONS The mounting location of the radar sensor should provide a clear view to the measured surface with no equipment or fixtures crossing the signal path. Installations with obstructions such as ladders, struts, etc., can cause false echoes and impair the useful echo. If obstructions cannot be fully avoided, false echo storage should be carried out during setup (see section 9.6). -
Page 19: Mounting Instructions
Figure 5-4: Attaching the Mounting Strap and Adjusting the Angle Place the locking washers on each of the socket screws, place them in the centre holes and loosely screw them by hand into the attachment points. Do the same for the inclination slide. -
Page 20: Setting Up With The Fts Axiom Dataloggers
6.1 SETTING UP WITH THE FTS AXIOM DATALOGGERS Attach the Radar Stage Sensor to one of the Datalogger’s SDI ports the using the military connector. There are two extensions which can be used depending on which SDI-12 “M” command is used. -
Page 21: Setting Up Using The Radar Extension
6.1.1 SETTING UP USING THE RADAR EXTENSION IMPORTANT! Once the Radar is setup, it MUST be mapped. Instructions on mapping the sensor follow the setup instructions. After selecting the Radar Extension, the Radar Setup screen will be displayed: SENSOR TAB: Sensor Name: The default sensor name is Radar. - Page 22 Read: The read button appears on all tabs and will trigger a sensor reading and return the measured values for the fields (averaged Stage and quality metric) in addition to the measurement time. Figure 6-4: Read Button Results SCHEDULE TAB This tab is used to setup how often samples are taken and averaged, and how long the averaging duration lasts.
- Page 23 Mode: There are two power modes: High Power: In high power mode, one sample is taken every second, continuously. These are stored in the buffer. When the scheduled time arrives (based on the input interval and offset times), the most recent samples taken will be used for the average in accordance with the Averaging Duration (ie: an averaging duration of 20 seconds will use the last 20 samples in the buffer).
-
Page 24: Setting Up Using The Sdi Generic Extension
Figure 6-7: Mapped Radar 2. If In-line Logging has been enabled, the In-line Logging Setup screen will appear. Select Edit and check the desired logging and current conditions boxes. Select OK. You will be returned to the SDI Sensor Mapping screen which indicates the sensor is now fully mapped In-line Logging Setup Radar Sensor fully mapped Figure 6-8: In-Line Logging... - Page 25 Figure 6-10: SDI Command Setup screen Cmd: Input the desired” M” command (M, M1 or M2) Interval: This is how often the “M” command will be sent. Offset: This is the time after midnight that the measurement “M” command will be sent. Example: The amount of time the sensor will take to make the measurement can be found by pressing the “Test”...
-
Page 26: Mapping The Radar Sensor To The Datalogger
As data points are added, they will be displayed on the SDI Command Setup screen. Once all data points are added, select OK. Other “M” commands and data points can be added in the same manner. Figure 6-12: Selecting OK on the SDI Sensor Setup screen displays the Radar Sensor screen with the data points and latest measured values: Figure 6-13: Radar Sensor screen... -
Page 27: Setting Up With Non-Fts Data Loggers
6.2 SETTING UP WITH NON–FTS DATA LOGGERS If the Radar Range Sensor is being used with non-FTS data loggers, once the connections are made (see Chapter 4 section 4.1 for cable wire colour coding) and the sensor and data logger have been powered up, the Radar Range Sensor can be configured using SDI-12 commands (See Chapter 8 –... - Page 28 4-20 mA OUTPUT OPTION The FTS Radar Stage Sensor can be ordered with an optional 16 bit 4-20mA output that can be used to connect to a 4-20mA input on a SCADA system, PLC or chart plotter. The output from the RSS is connected to the SCADA equipment as shown in the following diagram.
-
Page 29: Using Sdi-12 Commands With Axiom Dataloggers
SDI-12 COMMANDS The Radar Range Sensor is capable of reading and writing with the standard set of SDI-12 commands. 8.1 USING SDI-12 COMMANDS WITH AXIOM DATALOGGERS To use SDI-12 Commands, the Datalogger must be in Transparent Mode. From the Home screen select the SDI 12 >Transparent Mode. -
Page 30: Sdi-12 Notation
8.2 SDI-12 NOTATION SDI-12 commands are strings of characters sent to the SDI-12 device. The format of the strings is important, and to specify the format of SDI-12 commands different typefaces are used. All commands to and the replies from the device are represented in a mono-spaced font. Different parts of a command are represented with variants on this text format Item Explanation... -
Page 31: Standard Measurement Commands
8.4 STANDARD MEASUREMENT COMMANDS Measurement commands (M commands) trigger a measurement on the addressed sensor. The format of the response to a Measurement command is atttn: in which: the sensor address the specified time, in seconds, until the sensor will have the measurement(s) ready the number of measurement values the sensor will make and return in one or more subsequent D commands;... - Page 32 aM4! Supports NOAA distance calculation. aC4! Measures aMC4! • stage, aCC4! mean distance, • standard deviation, • • number of discarded outliers, good sample count and • • voltage (in V) as per NOAA water level measuring system. See section 8.4.2 for details. Averaged over 2-720 samples.
-
Page 33: Comparison Of The M And M1 Commands
8.4.1 COMPARISON OF THE M AND M1 COMMANDS The M Command averages all the measurements taken over the Averaging Duration. This produces less erratic values than the M1 Command, especially in turbulent water, as troughs and crests are averaged to produce a more accurate assessment of actual stage. The M1 Command produces more erratic data as the logged value is from a single measurement, each of which can be influenced by troughs, crests, and other interference resulting in a wide variance between a series of measurements. -
Page 34: Commands
8.5 X COMMANDS In addition to the standard set of commands the FTS Radar Range Sensor has an extension of custom SDI commands called X commands that access specific features of the sensor. The format of X commands follows the requirement for standard SDI commands in that the first character of every command must be a sensor address which is then followed by the X command and terminated by an exclamation mark. -
Page 35: Commands List
8.5.2 X COMMANDS LIST a – replace the a with the sensor address n – replace the n with the desired numerical parameter X COMMAND DEFINITION COMMENTS Get Hardware aXPCB! revision level Get date of aXDOM! manufacture Get factory aXFSN! Returns serial number serial number SDI address - 0... - Page 36 X COMMAND DEFINITION COMMENTS Return stage units in abbreviated format: FT, IN,M,CM,MM or CU aXSU! Get stage units (refer to slope conversion table above in Set Slope Conversion Value Command c = abbreviated form of stage units: Abbrev Units Setting stage units will Feet automatically change the Inches...
- Page 37 X COMMAND DEFINITION COMMENTS Get number of samples to aXNSM! Returns the number of samples set for averaging. average in the M! cmd Set number of n = desired number of samples for averaging aXNSM3+n! samples to Set the desired number of samples for averaging. average in the The + sign is required when writing the value.
-
Page 38: General
DISPLAY AND ADJUSTMENT MODULE 9.1 GENERAL The display and adjustment module (module) is used to set up the sensor and assign specific parameters to adapt the instrument for its environment and application conditions. The radar will be configured using the display and adjustment module prior to shipment. However, the module will need to be used on-site should a false signal suppression need to be carried out due to obstructions (see section 9.5). -
Page 39: Key Functions
9.3 KEY FUNCTIONS The LC display indicates the individual menu items, and the instrument is adjusted via the four adjustment keys (see Figure 9-2). LC Display Adjustment Keys Figure 9-2: Display and Adjustment Parts The functions of the individual keys are as follows: FUNCTIONS Interrupt input Jump to the next higher menu... -
Page 40: Main Menu
9.4 MAIN MENU Push the [OK] and [ESC] keys simultaneously to display the main menu. The main menu is divided into five sections: Figure 9-3: Main Menu Setup: Settings for measurement loop name, medium, application, vessel information, adjustment, and signal output Display: Settings for language, measured value display, lighting Diagnosis: Information on instrument status, pointer, measurement reliability, simulation, and echo curve... - Page 41 2. Confirm again with [OK]. 3. Confirm again with [OK]. 4. Confirm again with [OK] and enter the actual distance from the sensor to the water’s surface. 5. All interfering signals in this section are detected by the sensor and stored after confirming with [OK].
-
Page 42: False Echo Storage
9.6 FALSE ECHO STORAGE The "Echo curve" shows the signal strength of the echoes over the measuring range in dB. The signal strength enables an evaluation of the quality of the measurement. 1. Select Diagnostics from the main menu, followed by Curve Indication and Echo Curve. The "False signal suppression"... -
Page 43: Configuring For Measuring Water Levels
9.7 CONFIGURING FOR MEASURING WATER LEVELS For the VegaPuls 61 to work properly with the FTS SDI-12 interface it must be configured correctly. This configuration is for water level measuring in open/outdoor environments and is normally done at the factory but it can be re-entered using the display module and the following instructions if it becomes necessary in the field. -
Page 44: Saving The Instrument Settings
1 0. Select Display<Backlight < < and set to Switched off by selecting < <. 1 1. Return to Main Menu 1 2. Select Additional Adjustments < Instrument units < and set parameters to ft and F < ESC. 1 3. Select Additional Adjustments < Linearization < <and set parameter to Linear < ESC. 1 4. -
Page 45: Removal
REMOVAL AND DISPOSAL 10.1 REMOVAL To remove the radar levelling sensor, take note of the "Mounting" instructions (Chapter 5) and carry out the steps in reverse order. 10.2 DISPOSAL Correct disposal avoids negative effects on humans and the environment and ensures recycling of useful raw materials. -
Page 46: Technical Data
TECHNICAL SPECIFICATIONS 11.1 TECHNICAL DATA COMMON TO SDI-RADAR AND SDI-RADAR-64 Physical Housing size (WxDxH) 70mm x 130mm x 120mm (2.76in x 5.12in x 4.72in) Horn Size (W x H) 115mm x 113mm (4.53in x 4.45in) Weight 1.75kg (3.85lbs) Material Housing: Aluminum Antenna Horn: PBT Plastic Protection Rating IP66/67... -
Page 47: Deviation
SDI-RADAR-64 Standard Electronics Max Measuring Range 30m (98.43 ft) Accuracy +/- 1mm (0.003ft) Blanking distance / Near zone 0.25m (0.8ft) Characteristics and Performance Data Measuring Frequency W-Band (80 GHz technology) Measuring Cycle Time 700 ms (approx.) ≤ 3 s Step Response Time 3°... - Page 48 1 Reference plane: The reference plane is the sealing surface on the lower edge of the housing 2 Antenna edge 3 Recommended measuring range SDI-RADAR SDI-RADAR-64 700-RSS-Man Rev.13 15 Jun 2021 44/45...
- Page 49 DOCUMENT REVISION HISTORY Revision Date Description 31 Aug-2015 Original 21 Apr 2016 Added 4-20 mA output information. 18 Aug 2016 Detailed difference between instantaneous/average measurements for the M commands. Inserted Power table to display differences between Modes to reflect measuring differences when used with High/Low power.
Need help?
Do you have a question about the Radar Stage Sensor and is the answer not in the manual?
Questions and answers