FTS Bubbler User Manual
Hide thumbs
Also See for Bubbler:
- User manual (40 pages) ,
- Installation and quick start manual (16 pages)

Related Manuals for FTS Bubbler


Summary of Contents for FTS Bubbler
- Page 1 EXTREME ENVIRONMENTS. EXTREMELY RELIABLE. Bubbler User Manual 1.800.548.4264 | www.ftsinc.com 700-Bubbler-Man Rev 12 13 Feb 2020...
- Page 2 Contact Information Canadian Headquarters: 1065 Henry Eng Place Victoria, BC | V9B 6B2 | Canada www.ftsinc.com Toll-free: 1.800.548.4264 Local: 250.478.5561 Technical support portal: http://support.ftsinc.com Email: service@ftsinc.com...
-
Page 3: Table Of Contents
Contents INTRODUCTION .......................... 1 COMPLIANCE INFORMATION ....................2 DEFAULT VALUES ........................2 BUBBLER RESPONSE TIMES TO STAGE CHANGES ..............2 4-20mA OPTION ......................... 3 1.5.1 4-20MA MINIMUM/MAXIMUM, DEFAULT VALUES, AND UNITS OF MEASUREMENT ... 4 SD CARD ............................4 MAINTENANCE ........................... 4 SHIPPING THE BUBBLER ...................... - Page 4 3.4.1 LINE HIGH DETECTED DURING PURGE .................. 17 3.4.2 BLEEDING THE TANK ....................... 17 CONFIGURING THE BUBBLER USING THE BUBBLER INTERFACE........18 SETTING THE STAGE ......................... 18 3.6.1 USING THE 4-20 MA OPTION TO CONFIGURE STAGE ............19 SETUP MENU ..........................20 DIAGNOSTICS..........................
- Page 5 SDI-12 RESPONSE HEALTH STATUS CODES/ERROR INDICATORS ........47...
-
Page 6: Introduction
It must be used with a desiccator (see section 2.5) and can be connected to any SDI-12 capable data logger or data collection platform (DCP) using the SDI-12 Data Terminal Block for data logging capability. The FTS Bubbler also has the option to output the level value as a 4-20mA signal. Display... -
Page 7: Compliance Information
69.2 feet BUBBLER RESPONSE TIMES TO STAGE CHANGES The following table shows the response time for the Bubbler to recover from a stage change at different bubble rates. Note that response time may vary slightly under different conditions (battery charge levels, extreme ambient temperatures, etc.) -
Page 8: 4-20Ma Option
4-20mA OPTION The Bubbler-has an optional 16 bit 4-20mA output with a resolution of 0.37 µA. A measurement scale is determined by inputting the minimum and maximum water levels which correspond to 4mA and 20 mA outputs respectively. The measured current signal is translated into a level measurement based on the linear relationship between the minimum and maximum levels and the corresponding current output. -
Page 9: 4-20Ma Minimum/Maximum, Default Values, And Units Of Measurement
1.52 and 6.09). SD CARD The Bubbler has an FTS supplied internal SD card which is used for service and factory logs. This SD card has been tested to work in the environmental conditions in which the Bubbler is designed to operate. -
Page 10: Display And Keypad
This sets the Bubbler’s date and time which is used on the time stamp of the Bubbler’s SD card. It does not affect the time stamp of sent data or the timing of scheduled events as those are controlled by the data logger and the telemetry in use. -
Page 11: Prior To Proceeding To The Site
Unpack the Bubbler and conduct a visual inspection for any signs of shipping damage. If any damage is found, contact FTS Service and Support immediately. Retain the shipping container to transport the Bubbler to the site or to return the unit to FTS should damage have occurred during shipping. -
Page 12: Connectors And Wiring
Ensure the orifice line is not bent or crimped. • Do not mount the Bubbler so that it rests on a horizontal surface such as a tabletop or shelf • as this can bend the orifice line permitting moisture to accumulate and preventing the correct operation of the device. -
Page 13: Desiccator
Ensure there are no kinks or bends in the output hose. A barbed hose fitting for the desiccant hose is shipped with the Bubbler and must be attached to the Bubbler’s air intake fitting (see Figure 2-1). Wrap Teflon tape around the Bubbler’s air intake fitting, and then screw on the barbed hose fitting finger tight. -
Page 14: Mounting The Fts Supplied Desiccant Air Dryer
(e.g. check valves) as this can cause spikes in the data; • The air dryer should be installed as close as possible to the Bubbler’s air intake with the air flow going in the direction of the arrow (see Figure 2-4);... -
Page 15: Replacing The Desiccant
11) Push the desiccant tubing firmly onto the dryer’s barbed desiccant adaptor fitting, ensuring a tight seal. 12) Attach the desiccant hose to the barbed hose fitting on the Bubbler’s air intake (see Figure 2-2). 2.5.3 REPLACING THE DESICCANT Observe the silica gel safety handling precautions (section 2.5.1). The silica gel desiccant, visible through the clear polycarbonate plastic bowl, contains a colour indicator: blue indicates it is dry, and pink indicates it is wet and needs to be replaced. -
Page 16: Connecting And Installing The Orifice Line
If the area has high currents, the orifice line should be installed in a static tube. If the waters are turbulent, a muffler should be used. Once the orifice line run is securely laid out, connect the orifice line to the Bubbler outlet (refer to Figure 2-5) and secure it with the provided Swagelok® fitting. -
Page 17: Using The Swagelok® Fitting
To maintain a tight seal, use the provided Swagelok fitting with a brass ferrule. ASSEMBLY: 1) Place the nut and ferrules on the line as shown in Figure 2-5 and fully insert the line into the Bubbler outlet. IMPORTANT! Ensure the... - Page 18 Bubbler outlet. Only turn the nut. DISASSEMBLY 1) Mark a line along the back of the nut and Bubbler outlet. These marks will be used to return the nut to this position. 2) Use a wrench to loosen the nut.
-
Page 19: Power Connections
POWER CONNECTIONS The Bubbler requires a dedicated +12VDC power source to operate. This is normally supplied by an external lead-acid battery. Although the Datalogger supplies some power through the SDI port, it is only enough to view and operate the Bubbler’s screen. It is insufficient to run the compressor. -
Page 20: Keypad
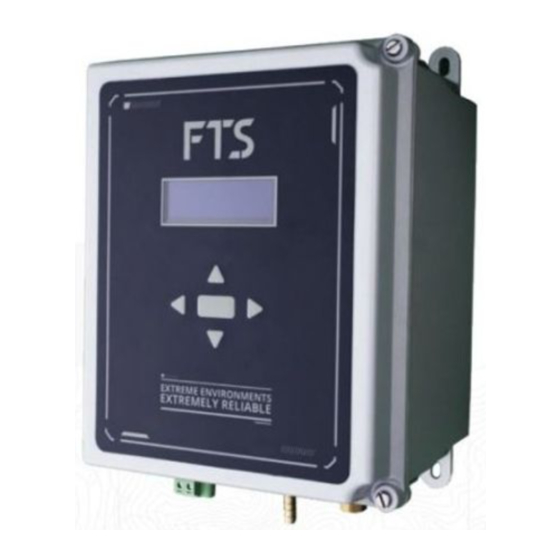
BUBBLER INTERFACE AND MENUS The front panel has a display and keypad which is used to configure the Bubbler. When power is supplied, the start-up screen will display for about 5 seconds before the Status Screen is displayed. After three minutes of inactivity, the display will enter low power mode and blank out. Pressing any button on the keypad will display the status screen. -
Page 21: Editing A Menu Item
See section 3.6 for details of setting stage. 3.3.1 OFFSET Offset is calculated by the Bubbler when the stage is set and is displayed in the same units as stage. 3.3.2 FAULT The FAULT display line can only show a single fault. Possible faults are prioritized, with the understanding that a higher priority fault is normally the cause of lower priority faults (e.g. -
Page 22: Conducting A Manual Purge
3.4.2 BLEEDING THE TANK The tank pressure must be bled prior to shipping, conducting some maintenance such as removing the orifice line or swapping the bubbler. Once started, bleeding can be stopped by selecting the 700-Bubbler-Man Rev 12 13 Feb 2020... -
Page 23: Configuring The Bubbler Using The Bubbler Interface
• SETTING THE STAGE When the stage is set using the front panel, the Bubbler will determine and store the offset. Offset is determined as the difference between the Bubbler’s measured depth and the input stage. The offset is displayed on the Status Screen... -
Page 24: Using The 4-20 Ma Option To Configure Stage
Stage – Use the arrows to input the stage height. The Bubbler will use this value to calculate the offset which will be displayed on the Status Screen. Units – Use the up and down arrows to select the measurement units. The displayed Stage value will automatically be converted to the equivalent stage value in the newly entered measurement unit. -
Page 25: Setup Menu
4mA – input the desired minimum depth value for the selected units 20mA – input the desired maximum depth value for the selected units Output mA – the actual output mA which the Bubbler will convert to the level measurement value SETUP MENU... -
Page 26: Diagnostics
Time: displays the time (set using X command aXDTYYYYMMDD,HHMMSS! (See section 5.3) • 3.8.1 UPDATING FIRMWARE If there is a firmware update required, a notice shall be posted on the FTS Support Website with instructions. IMPORTANT! The Bubbler should be opened in a protected environment free from moisture, dust and other airborne debris which may enter the enclosure. - Page 27 Go to Step 4. 3) Open the Bubbler case and remove the SD card (if present). The SD card slot is found on the board on the interior of the Bubbler case lid.
- Page 28 The following screen will be displayed. Note that the Address displayed will be the address set in the Bubbler. In this example it is the default address of zero (0). Tap on the “New” field to bring you to the Bubbler Sensor Setup.
-
Page 29: Setup General Information
SETUP GENERAL INFORMATION Each of the field names created in the Bubbler Sensor Setup tabs responds to a data point which will be displayed on the Bubbler’s summary screen. Once a data point is created it will be available for other functions such as Logging, Current Conditions, Processes, etc. -
Page 30: Sensor Tab
Offset Name: Input the desired name for the Stage Offset data point. The offset is calculated automatically by the Datalogger but will only be displayed on the main Bubbler Sensor screen if the Offset Name field is populated. See section 4.6. -
Page 31: Setup Tab
Tank Pressure Name: The default name is TankP and can be changed if desired. Units are in psi. Line Pressure Name: The default name is LineP and can be changed if desired. Units are in psi. Temperature Name: Insert the desired name for the temperature variable. 700-Bubbler-Man Rev 12 13 Feb 2020 Page 26/51... -
Page 32: Purge Tab
Offset: Optional. This determines the starting time the purge will commence based on time after midnight. For example: An interval of 24:00:00 and an offset of 10:15:00 means the purge will take place daily (every 24 hours) at 10:15 a.m. 700-Bubbler-Man Rev 12 13 Feb 2020 Page 27/51... -
Page 33: Save Configuration
BUBBLER SENSOR SCREEN From the home screen select the Sensors icon and then the Bubbler icon. Note that the name on the icon will be the same as the Sensor Name input on the Sensor tab. This example retains the default name. -
Page 34: Conduct A Manual Purge
If it is known use the Set Stage button. If it is not known, use the Polled feature. Staff Gauge Reading Known If the staff gauge reading is known, press Set Stage, enter the staff gauge value, and confirm the changes. 700-Bubbler-Man Rev 12 13 Feb 2020 Page 29/51... - Page 35 The polling option is meant as a temporary measure to confirm Bubbler operations and any data collected during the polling will not be recorded by the Datalogger. It will also not affect the Bubbler Setup values. That is to say, once polling is stopped, interval values will revert to those originally input in the Bubbler Setup Screen.
- Page 36 STOP, scroll through the stage sensor readings and tap on the time that corresponds to your reading of the staff gauge. Press Select. 6. The Enter Staff Gauge Value screen appears. Enter the observed value and confirm. 700-Bubbler-Man Rev 12 13 Feb 2020 Page 31/51...
-
Page 37: Setting The Bubbler's Time
SETTING THE BUBBLER’S TIME On power cycle, the Bubbler’s date and time will be set automatically by the Axiom Datalogger. Should the Datalogger and Bubbler’s times fall out of synchronization, the Bubbler’s date and time can be reset using the XDT command (see section 5.2.3) NOTE: The Bubbler’s time is used to timestamp the service and log entries stored on the... -
Page 38: Standard Sdi-12 Measurement Commands
1) M Command followed by the Get Data Command: 0M!00043 Bubbler at address 0, measurements ready in 4 seconds, and 3 fields will be returned. 0D0!+5.23+0+0 Data returned is: stage (5.23), units of stage code (feet) and health status code (0). - Page 39 Status* • See section 5.1.2 for details of purge actions using the M7 command. Use XPR to set purge pressure (default = 90 psi) *See Section 5.1.1 for measurement codes and meanings 700-Bubbler-Man Rev 12 13 Feb 2020 Page 34/51...
-
Page 40: Sdi -12 Measurement Command Codes
The M7 command always responds with a fixed wait time of 300 seconds. This is well beyond the expected worst-case time required (60 seconds to charge, 60 seconds to discharge). The Bubbler will send the service request to the logger once the purging is complete, typically 80 or 90 seconds when purging at 90 psi. -
Page 41: Extended (X) Commands
EXTENDED (X) COMMANDS In addition to the standard set of commands, the FTS Bubbler has an extension of custom SDI -12 commands called X commands that access specific features of the sensor. The format of X commands follows the requirement for standard SDI-12 commands in that the first character of every command must be a sensor address which is then followed by the X command and terminated by an exclamation mark. -
Page 42: Commands List
Begin tank bleed If P is empty or P=B aXBLDP! End tank bleed Bubbler needs to be power-cycled after this command in order to return to normal operations. Bubbles per minute. Minimum value is 30 and max aXBR! Get bubble rate value is 120, default is 60. - Page 43 Get site ID aXIDbubbler1! (sets Site ID to bubbler 1) aXIDP! Set site ID There is no error checking for symbols. Symbols can be entered but are not supported on the Bubbler’s display. aXIMIN! Get 4-20 mA Returns the set minimum value...
- Page 44 Get stage offset in These commands are used when swapping a Bubbler and it is desired for the new installation to use the previously set offset. Set stage offset in aXSOP! Before swapping the Bubbler, use the “get offset”...
- Page 45 Returns either 6 (for F) or 7 (for C) units aXTUP! Set temperature If P = 6 temperature is Fahrenheit units If P = 7 temperature is Celsius aXTU6!a (set to F) aXTU!a6 (get command confirms F) 700-Bubbler-Man Rev 12 13 Feb 2020 Page 40/51...
- Page 46 (0 to 21m) (0 to 70ft) Purge Pressure 20 to 90 psi (user selectable) Gas Delivery Constant flow bubbler with user programmable bubble rate. 30 to 120 bubbles per minute AMBIENT CONDITIONS Operating Temperature -40°C to +60°C (-40°F to +158°F) Storage Temperature -55°C to +85°C (-67°F to +185°F)
-
Page 47: Mechanical Indicators
Teflon tape to maintain tight seal. 2) Inspect orifice line for splices. Replace spliced line. 3) If Bubbler line connections are correct, an internal leak is indicated. Contact FTS Support to return Bubbler. Compressor not Insufficient power 1) Ensure Bubbler has a direct power source. -
Page 48: Data Indicators
Prove the line: Use a 5-gallon bucket of water and a length of orifice line (approximately 5 feet) attached to the Bubbler. Take some readings. If the readings are correct, a line blockage is indicated. 1) Ensure the orifice line termination is free from silt/obstructions. - Page 49 2) Remove any check valves or similar restricting attachments on the air inlet path 3) Ensure each Bubbler has a dedicated desiccator and air intake path (i.e. do not run multiple Bubblers on the same desiccator) For the curious: The atmospheric reference for the pressure transducer is based on the air pressure from the air inlet.
- Page 50 700-Bubbler-Man Rev 12 13 Feb 2020 Page 45/51...
-
Page 51: Bubbler Status Screen Fault Indicators
0.5 psi after 10 seconds of compressor operation. Contact FTS Support. SYSTEM Internal misconnection/damage Refer to section 3.4.1 for Bubbler behaviour if LINE_HIGH is due to tank pressure >35 PSI during a purge 700-Bubbler-Man Rev 12 13 Feb 2020 Page 46/51... - Page 52 Set the date and time. Needs date & time set Issue the aXDTYYYYMMDD, HHMMSS! command (see section 5.2 for details) 1) Ensure Bubbler has a direct power source. It cannot be fully powered through the Datalogger’s SDI port (section Battery out of range 2.6.2).
- Page 53 Bubbler is still operating normally, but the Bubbler’s SD card’s ’ time stamp will not be accurate. If your data logger can be programmed to set the Bubbler’s date and time every 24 hours (as the Axiom does), the appearance of this indicator can be mitigated.
- Page 54 3) 7 – 4 = 3 Health status value closest to 3 is 2= the Bubbler has rebooted 4) 3-2 = 1 Health status Value closest to 1 is 1= data logger and Bubbler are out of Synchronization 5) 1-1 = 0...
- Page 55 32768 Voltage Low 700-Bubbler-Man Rev 12 13 Feb 2020 Page 50/51...
- Page 56 8.5338 0.0853 7000 9.9561 0.0996 8000 11.378 0.1138 9000 12.8007 0.128 10,000 1000 10.0 14.223 0.1422 20,000 2000 20.0 28.4459 30,000 3000 30.0 42.6689 40,000 4000 40.0 56.8918 50,000 5000 50.0 71.1148 700-Bubbler-Man Rev 12 13 Feb 2020 Page 51/51...
- Page 57 19865 Swagelok Nut Set, Bubbler 18729 Barbed hose fitting for 5/16” ID hose For connecting desiccant tubing to the Bubbler 19443 1.5m SDI communication cable with flying leads both ends 19442 1.5m SDI communication cable, MC one end and flying leads other...
- Page 58 DOCUMENT REVISION HISTORY Revision # Date Description SDI-12 commands based on ver 0.78 of the Bubbler SDI 1 Aug 2017 Command Set 14 Aug 2017 Updated for Axiom AS ver 3.8.0.57 (Bubbler extension). Added shield wire to SDI-12 connection, peak current info, 10 Apr 2018 power cable requirements.
Need help?
Do you have a question about the Bubbler and is the answer not in the manual?
Questions and answers