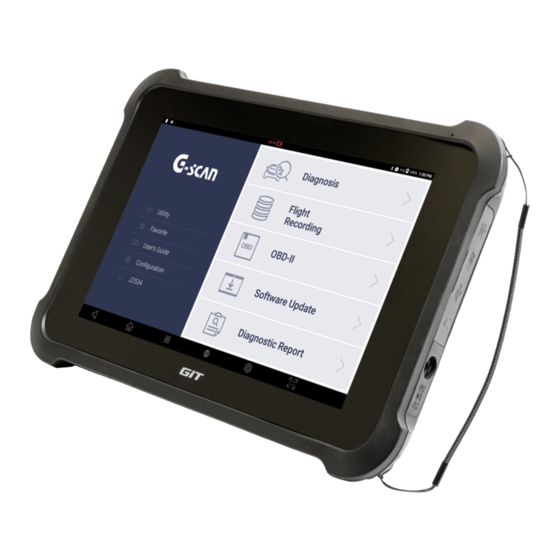
Summary of Contents for GIT G-scan3
- Page 1 GIT-EZDS Aftermarket Distributorship Manual ADM-SVC:2.01 G-scan3 PART REPLACEMENT MANUAL GIT-EZDS Aftermarket Distributorship Manual Feb 20 , 2019 FIRST EDITION GIT-EZDS...
-
Page 2: Chapter 1. Preparation
PR1-1 GIT-EZDS Aftermarket Distributorship Manual ADM-SVC:2.01 Repair Procedure Preparation Chapter 1. Preparation GIT-EZDS Aftermarket Distributorship Manual Feb 20 , 2019 FIRST EDITION GIT-EZDS... - Page 3 PR1-2 GIT-EZDS Aftermarket Distributorship Manual ADM-SVC:2.01 Repair Procedure Preparation 1. Tools and Equipment A. Screw Driver (medium: +) B. Automotive Trim Removal Tool (small) C. Tweezer * Additional Recommended Tools A. Anti-static gloves B. Power supply (12V 3A or more) C.
-
Page 4: Chapter 2. Disassembling The Front Case
PR2-1 GIT-EZDS Aftermarket Distributorship Manual ADM-SVC:2.01 Repair Procedure Disassemble Chapter 2. Disassembling the Front Case GIT-EZDS Aftermarket Distributorship Manual Feb 20 , 2019 FIRST EDITION GIT-EZDS... - Page 5 PR2-3 GIT-EZDS Aftermarket Distributorship Manual ADM-SVC:2.01 Repair Procedure Disassemble 2. Case Opening 2.1. Remove the Stylus Pen GIT-EZDS Aftermarket Distributorship Manual Feb 20 , 2019 FIRST EDITION GIT-EZDS...
- Page 6 PR2-4 GIT-EZDS Aftermarket Distributorship Manual ADM-SVC:2.01 Repair Procedure Disassemble 2. Case Opening 1.2. Unscrew the 2 screws from battery cover GIT-EZDS Aftermarket Distributorship Manual Feb 20 , 2019 FIRST EDITION GIT-EZDS...
- Page 7 PR2-5 GIT-EZDS Aftermarket Distributorship Manual ADM-SVC:2.01 Repair Procedure Disassemble 2. Case Opening 2.3. Disconnect the connector inside and remove the battery GIT-EZDS Aftermarket Distributorship Manual Feb 20 , 2019 FIRST EDITION GIT-EZDS...
- Page 8 PR2-6 GIT-EZDS Aftermarket Distributorship Manual ADM-SVC:2.01 Repair Procedure Disassemble 2. Case Opening 2.4. Remove the “warranty void seal” ** Warranty void if the seal is broken Warranty Void Seal GIT-EZDS Aftermarket Distributorship Manual Feb 20 , 2019 FIRST EDITION GIT-EZDS...
- Page 9 PR2-7 GIT-EZDS Aftermarket Distributorship Manual ADM-SVC:2.01 Repair Procedure Disassemble 2. Case Opening 2.5. Unscrew the 4 screws (M3*10) GIT-EZDS Aftermarket Distributorship Manual Feb 20 , 2019 FIRST EDITION GIT-EZDS...
- Page 10 PR2-8 GIT-EZDS Aftermarket Distributorship Manual ADM-SVC:2.01 Repair Procedure Disassemble 2. Case Opening 2.6. Use “trim removal tool” to gently open up each corner of the case * Too much tension on prying action may damage the LCD while disassembling the front case.
- Page 11 PR2-9 GIT-EZDS Aftermarket Distributorship Manual ADM-SVC:2.01 Repair Procedure Disassemble 2. Case Opening 2.7. Widen up the top and bottom, and remove all the FPCB cables from LCD and Touch Panel. FPCB Cables LCD F-PCB Touch F-PCB BOTTOM ** An individual LCD module itself cannot be replaced. Only the front case assembled with LCD shall be replaced at one go.
-
Page 12: Chapter 3. Lcd Replacement
PR3-1 GIT-EZDS Aftermarket Distributorship Manual ADM-SVC:2.01 Repair Procedure Disassemble Chapter 3. LCD Replacement GIT-EZDS Aftermarket Distributorship Manual Feb 20 , 2019 FIRST EDITION GIT-EZDS... - Page 13 PR3-2 GIT-EZDS Aftermarket Distributorship Manual ADM-SVC:2.01 Repair Procedure Disassemble 3. LCD Replacement 3-1. Put the new LCD in place following the reversed procedure. 3-2. When connecting the F-PCB cables, make sure the wires must be aligned on the line Locking Bar...
-
Page 14: Chapter 4. Disassembling The Vci & Main Board
PR4-1 GIT-EZDS Aftermarket Distributorship Manual ADM-SVC:2.01 Repair Procedure Disassemble Chapter 4. Disassembling the VCI & Main Board GIT-EZDS Aftermarket Distributorship Manual Feb 20 , 2019 FIRST EDITION GIT-EZDS... - Page 15 PR4-2 GIT-EZDS Aftermarket Distributorship Manual ADM-SVC:2.01 Repair Procedure Disassemble 4. Disassembling the VCI Board 4.1. Unscrew the 7 screws 4.2. Detach the F-PCB cable and 6P connector to remove the VCI board ** VCI board must be replaced in case the “tackle buttons” doesn’t work.
- Page 16 PR4-3 GIT-EZDS Aftermarket Distributorship Manual ADM-SVC:2.01 Repair Procedure Disassemble 4. Disassembling the Main Board 4.3. Remove all the connectors on main board 4.4. Unscrew the 6 screws and detach the board LAN & HDMI connectors Antenna Camera Flash Speaker Micro 5 Pin USB,...
-
Page 17: Chapter 5. Disassembling Small Parts
PR5-1 GIT-EZDS Aftermarket Distributorship Manual ADM-SVC:2.01 Repair Procedure Disassemble Chapter 5. Disassembling small parts GIT-EZDS Aftermarket Distributorship Manual Feb 20 , 2019 FIRST EDITION GIT-EZDS... - Page 18 PR5-2 GIT-EZDS Aftermarket Distributorship Manual ADM-SVC:2.01 Repair Procedure Disassemble 5. Disassembling small parts 5.1. Entirely remove the double-sided tape around MIC, Antenna, Speaker before detaching the parts Antenna Speaker GIT-EZDS Aftermarket Distributorship Manual Feb 20 , 2019 FIRST EDITION GIT-EZDS...
- Page 19 PR5-2 GIT-EZDS Aftermarket Distributorship Manual ADM-SVC:2.01 Repair Procedure Disassemble 5. Disassembling small parts Keypad Flash 5.2. Remove the Flash Module first, when replacing the new camera. * F-PCB cable must not have any cracks Camera 5.3. Remove the VCI board first, when replacing the new keypad.
-
Page 20: Chapter 6. Assembling
PR6-1 GIT-EZDS Aftermarket Distributorship Manual ADM-SVC:2.01 Repair Procedure Assemble Chapter 6. Assembling GIT-EZDS Aftermarket Distributorship Manual Feb 20 , 2019 FIRST EDITION GIT-EZDS... - Page 21 PR6-2 GIT-EZDS Aftermarket Distributorship Manual ADM-SVC:2.01 Repair Procedure 6. Assembling 6.1. Insert the connector side USB port first when assembling the mainboard 6.2. Carefully align 2 screw holes on the VCI board and rear case of housing, and check tackle buttons & key pads position as shown below.
- Page 22 PR6-3 GIT-EZDS Aftermarket Distributorship Manual ADM-SVC:2.01 Repair Procedure 6. Assembling Front Case 6.1. Parallel up the touch pad and LCD F-PCB board to assemble in correct line. 6.2. Bottom of the front case should be slide in first and then clip the top part of case * Make sure the F-PCB board to be cleaned and do not put too much pressure on the parts to be over torqued.
-
Page 23: End Of Document
GIT-EZDS Aftermarket Distributorship Manual ADM-SVC:2.01 Repair Procedure END of Document GIT-EZDS Aftermarket Distributorship Manual Feb 20 , 2019 FIRST EDITION GIT-EZDS...


Need help?
Do you have a question about the G-scan3 and is the answer not in the manual?
Questions and answers