Table of Contents
Advertisement
Quick Links
Advertisement
Table of Contents

Subscribe to Our Youtube Channel
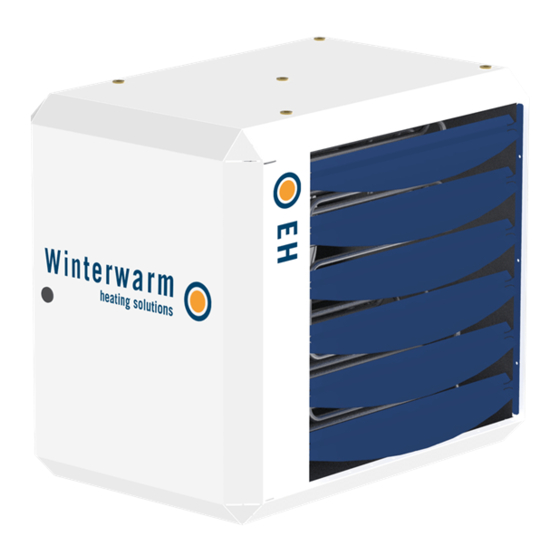
Summary of Contents for Winterwarm EH5
- Page 1 INSTALLATION MANUAL AIR HEATER TYPE EH EH - en - v1.0 - 06 / 2021...
-
Page 2: Table Of Contents
Content 1 Introduction 7 Troubleshooting 1.1 Symbols used in this manual 7.1 Volatile lock outs 1.2 Warranty 7.2 Temporary errors 7.3 Warnings 7.4 Instructions 2 Safety instructions 2.1 Installation 8 Maintenance 2.2 Use 2.3 Maintenance & Cleaning 8.1 Preparation 2.4 Children and vulnerable users 8.2 Basic maintenance 3 Technical specifications 9 Electrical wiring diagram... -
Page 3: Introduction
1 Introduction This manual is intended for the gas, electrical and mechanical installer. This document gives instructions on how to use and maintain the air heater. It is most important to follow the instructions in this document for safe operation of this air heater. -
Page 4: Safety Instructions
2 Safety instructions 2.3 Maintenance & Cleaning Always follow the safety instructions in this chapter when installing, using or performing maintenance on this air heater: Frequent maintenance and cleaning of the air heater is necessary to ensure safe and proper operation. Failure to do so could lead to damage to the heater or its 2.1 Installation surroundings and void the warranty. -
Page 5: Technical Specifications
55 - 58 55 - 58 57 - 60 Weight 3.2 Dimensions The dimensions of this air heater can be found in figure 1. Figure 1 - Dimensions of the EH Model(s) EH5 - EH30 EH40 INSTALLATION MANUAL AIR HEATER TYPE EH... -
Page 6: Installation
Electrical Model(s) Wall support Art. Nr. installation regulations and or other local regulations that may apply. EH5 - EH40 Wall support GA8610 EH5 - EH40 Design console GA8630 4.2 Positioning the air heater... - Page 7 The suspension kit is not delivered with the air heater. Contact your supplier. Figure 5 - Design console (min. 45 Model(s) EH5 - EH30 EH40 The air heater is equipped with threaded sockets to suspend the unit (see §10).
-
Page 8: Electrical Connection
Place the thermostat on an inner wall free from A supply of 230 V/AC + Neutral (1 Phase) is OPTIONAL draught. FOR THE EH5 and EH10 ONLY. The control circuit is a two • Never place the thermostat within the throw of the wire low voltage bus communication. - Page 9 ...8 NOTICE The air heater must be switched off when setting the switches. Otherwise the settings will have no effect. 22°C Figure 8 - Modulating thermostat connection 1 2 3 4 5 6 7 8 1 2 3 4 5 6 7 8 1 2 3 4 5 6 7 8 22°C 1 2 3 4 5 6 7 8...
-
Page 10: Operating The Air Heater
• Connect the two thermostat wires to terminal 6 and NOTICE Never combine these connections with the 7 (see figure 14 or the electrical wiring diagram in terminals 6 and 7 of other air heaters. §11). This is a 24 V connection for the thermostat signal. -
Page 11: Commissioning The Air Heater
6 Commissioning the air heater 6.1 Adjusting the settings Prior to packaging, the safety and functioning of each air heater is checked in detail. It is also set to the right combustion efficiency. In general, the heater does not need to be adjusted after installation. -
Page 12: Troubleshooting
7 Troubleshooting 7.2 Temporary errors If the air heater malfunctions, first check if the problem is caused by external circumstances (e.g. no supply power). If the problem is not caused by external circumstances, The table below describes the temporary errors that can use the tables and instructions in this chapter to fix the air occur. -
Page 13: Instructions
7.4 Instructions After identifying the problem, use the Case number to find the possible cause in this paragraph. Case 3: Heat exchange sensor or flue sensor is overheated. • Check if the connectors J12 and J6 are plugged in correctly and if the connection J12[1-4] (optional overheating protection) is closed. -
Page 14: Maintenance
8 Maintenance CAUTION! The air heater must be inspected and cleaned once a year by a qualified installer with sufficient knowledge about the device. CAUTION! Sufficient maintenance is critical in circumstances such as high humidity, dust, high switching on/off frequency, etc. 8.1 Preparation Before performing maintenance on an air heater that is already installed, do the following:... -
Page 15: Electrical Wiring Diagram
9 Electrical wiring diagram A complete electrical wiring diagram is shown in figure 14. The connections that are most important to the installation process are shown in figure 15. Connection type Alarm output 230V (optional) Modbus (option) 0-10V (option) Modulating thermostat ON/OFF thermostat Power line EMI filter Relay low... -
Page 16: Exploded View And Spare Parts
10 Exploded view and spare parts The parts of the air heater are shown in an exploded view in figure 15. The table below describes each part and shows the correct article number for a replacement part. Figure 16 - Exploded view of the EH Description EH10 EH15... -
Page 17: Disposal And Recycling
7102 DZ, Winterswijk The Netherlands Declares that air heater types: • EH5, EH10, EH15, EH20, EH25, EH30 & EH40 Are in accordance with the essential requirements of the relevant EU directives, being: • 2014/35/EU (LVD) relating to the electric safety of appliances •...


Need help?
Do you have a question about the EH5 and is the answer not in the manual?
Questions and answers