Table of Contents
Advertisement
YOU MUST READ THIS DOCUMENT BEFORE COMMENCING INSTALLATION.
INSTRUCT THE USER ONCE TAKEN INTO USE AND KEEP THIS DOCUMENT
NEAR THE APPLIANCE
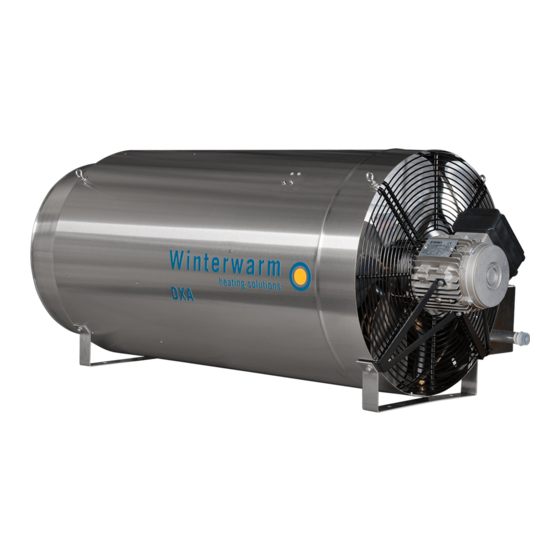
Instruction manual DXA heater
Instruction manual
DXA Heater
Ver GB 503 a
Date: 01-09-2009
Version: GB 503a
Appliances for GB
Natural gas, Propane, Butane, LPG
page 1
Advertisement
Table of Contents

Related Manuals for Winterwarm DXA HEATER 75


Summary of Contents for Winterwarm DXA HEATER 75
- Page 1 Instruction manual DXA Heater Ver GB 503 a YOU MUST READ THIS DOCUMENT BEFORE COMMENCING INSTALLATION. INSTRUCT THE USER ONCE TAKEN INTO USE AND KEEP THIS DOCUMENT NEAR THE APPLIANCE Date: 01-09-2009 Version: GB 503a Appliances for GB Natural gas, Propane, Butane, LPG Instruction manual DXA heater page 1...
-
Page 2: Table Of Contents
Foreword This installation and user manual is intended mainly for the gas, oil and electrical fitter. It also provides instructions for the user and for the maintenance of the air heater. To use this air heater in a safe and effective way, it is strictly essential that this manual is used correctly. Contents: Page ABOUT THIS MANUAL... -
Page 3: About This Manual
1 About this manual In this manual you will find information on the DX Heater. One section of this is intended to enable the user of the DX Heater to operate the appliance in a sensible and safe way. Another section is intended to enable the fitter or service technician to fit, set up and maintain the DX Heater, and to detect and resolve any malfunctions quickly and effectively. -
Page 4: Pre-Check
2.4 Pre-check. Before unpacking and installation, please check (i.e. on the data badges) if the heater corresponds to the order and if it is suitable for the local present provisions (gas type, gas pressure, electrical supply etc.) The installation must comply with all applicable local and national standards. The installation of the air heater must be in accordance with the relevant requirements of the Gas Safety Regulations (for example in GB;... -
Page 5: Water And Chemical Substances
• Do not connect the heater to an air duct, as this has a negative effect on the performance of the heater. • Due to the presence of CO2 and the noise levels produced, you must obtain permission from the safety and health service before taking a heater into use that is to be placed •... -
Page 6: Installation
The heater can be ordered for different gas types and fuel settings: • Natural gas • Propane, Butane and LPG • Paraffin and Diesel 4 Installation Read the chapter on Safety instructions and precautions first and observe all warnings and precautions. -
Page 7: Electricity Supply
Keep the following in mind when connecting the heater to the gas network. The gas supply line has to meet the national valid requirements and possibly the local requirements of the building inspector, police or fire brigade. (For example in GB it must comply with Gas Engineers publication UP-1 and UP-2 together with BS 6891.) A manual isolation valve in the supply line must be placed within reach of the heater, and all gas lines must be mounted without any mechanical tension. -
Page 8: Interface Unit
The heater will only react on the heat demand. Remote reset or the ventilation signal can only be made on the heater itself. The following (Standard) settings on the main board in the heater have to be actual. • The S2 micro switches on the main board have to be set to 1 2 3 4 5 6 7 8 OFF, see example. -
Page 9: Function Of The Heater
• Supply voltage; check if the supply voltage is sufficient. • Transport and combustion air flow, Check if the transport and combustion air exhaust is free from any obstacles. In this way, you will prevent the heater from continuing to operate while the air exhaust is blocked. -
Page 10: Ventilation
not starting. To prevent this there is a random waiting time before the heater starts. In this manner the pressure drop in the gas supply stays to a minimum. 5.4 Ventilation By means of the optional external interface board, the fan in the heater can start without the burning from the heater. -
Page 11: Gas Circuit
Lay-out print board Fuse 5AT Argus vision 1 2 3 4 5 6 7 8 J2 Main power connection 230V J4 Connection for gas valve and the N for system fan relay J6 Connection for room thermostat, appliance recognition J7 Earth burner J8 Fase for system fan rellay and ignition transformer J9 Not used J12 Connections for Temperature sensors, vane switch and gas pressure switch... -
Page 12: Measuring Combustion Values
4. Switch on the heater and start heating manually by pressing the button on the operating panel. 5. Check whether the burner pressure is equal to the nominal burner pressure for the corresponding heater type (refer to Specifications). 6. Record the measured value as a reference for the next measurement. 7. -
Page 13: General Maintenance
6.1 General maintenance The heater must be free of electricity during servicing. Remove the plug from the socket outlet. Do not use water when cleaning the unit. Perform the following activities during general maintenance: • Open the body access panel and especially clean the body, fan blades, fan motors, vane switch, maximum thermostat and swirl ring. -
Page 14: Changing Gas Type
The burner unit has the following parts: 4 Nut with mechanical union 22mm 5 Gas pipe 22mm 6 Nozzle 7 Flame stabilizer 8 Ignition electrode 9 Connection boot 2x 10 Ignition cable 2x Clean the various parts with a soft brush ,a coth or compressed air. Pay attention to dirt building up on the stabilizer and the ignition pen. -
Page 15: Problem Solving
Gas valve Fan motor Fan blade Ignition electrode Ionisation electrode Ignition cable Ignition transformer Vane switch assembly Stabilizer Control unit Minimum Gas pressure switch Fan relay Temperature sensor Propane Kit Natural gas Kit 7 Problem solving 7.1 General When it turns out that the problem is not caused by the external circumstances (i.e. no electric supply power or no gas), please take the following instructions into account. - Page 16 1st temperature Heater stops because the temperature of the heat exchanger is safety too high. When the heater is cooled down, the heater will Blinking restart: Cause 3 Selection Heater recognition does not work: Cause 8 resistance Blinking Selection Heater recognition does not work: Cause 8 resistance Blinking Gas pressure...
-
Page 17: Wiring Diagram
8 Wiring diagram Instruction manual DXA heater page 17... - Page 18 Instruction manual DXA heater page 18...
-
Page 19: Specifications
9 Specifications 9.1 DXA Heater 75 General Nominal input Qn(Hi) is output 75 kW 75 kW 75 kW 75 kW Air volume 6000 m³/h 6000 m³/h 6000 m³/h 6000 m³/h Throw 40 m 40 m 40 m 40 m weight... -
Page 20: Dxa Heater 100
9.2 DXA Heater 100 General Nominal input Qn(Hi) is output 100 kW 100 kW 100 kW 100 kW Air volume 6,000 m³/h 6,000 m³/h 6,000 m³/h 6,000 m³/h Throw 40 m 40 m 40 m 40 m weight 40 kg 40 kg 40 kg 40 kg... -
Page 21: Dxa Heater 120
9.3 DXA Heater 120 General Nominal input Qn(Hi) is output 120 kW 120 kW 120 kW 120 kW Air volume 7,000 m3/h 7,000 m3/h 7,000 m3/h 7,000 m3/h Throw 45 m 45 m 45 m 45 m weight 45 kg 45 kg 45 kg 45 kg...
Need help?
Do you have a question about the DXA HEATER 75 and is the answer not in the manual?
Questions and answers