Table of Contents
Advertisement
Quick Links
P/N 900568-00 REV. E 03/2020
P900568-00
INSTALLER: Leave this manual with the appliance.
CONSUMER: Retain this manual for future reference.
This appliance may be installed in an aftermarket permanently located, manufactured (mobile) home,
where not prohibited by local codes. This appliance is only for use with the type of gas indicated on the
rating plate. This appliance is not convertible for use with other gases.
This is an unvented gas-fired heater. It uses air (oxygen) from the room in which it is installed. Provisions
for adequate combustion and ventilation air must be provided. Refer to Air for Combustion and Ventilation
section on Page 6 of this manual.
WARNING: If the information in this manual is not followed exactly, a fire or explosion may result
causing property damage, personal injury or loss of life.
– Do not store or use gasoline or other flammable vapors and liquids in the vicinity of this or any other
appliance.
– WHAT TO DO IF YOU SMELL GAS
• Do not try to light any appliance.
• Do not touch any electrical switch; do not use any phone in your building.
• Immediately call your gas supplier from a neighbor's phone. Follow the gas supplier's instructions.
• If you cannot reach your gas supplier, call the fire department.
– Installation and service must be performed by a qualified installer, service agency or the gas supplier.
Installation and Operation Instructions
Vent-Free Remote Control Gas Fireplace System
PFS
Models
®
US
Report No. F09-121
Westerly32ZMN
Westerly32ZMP
Advertisement
Table of Contents

Related Manuals for Comfort Flame Westerly32ZMN


Summary of Contents for Comfort Flame Westerly32ZMN
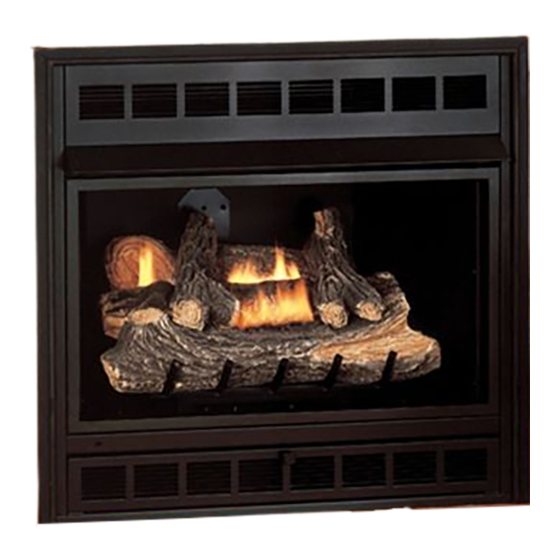
- Page 1 Installation and Operation Instructions Vent-Free Remote Control Gas Fireplace System P/N 900568-00 REV. E 03/2020 Models ® Westerly32ZMN Westerly32ZMP P900568-00 Report No. F09-121 INSTALLER: Leave this manual with the appliance. CONSUMER: Retain this manual for future reference. This appliance may be installed in an aftermarket permanently located, manufactured (mobile) home, where not prohibited by local codes.
-
Page 2: Table Of Contents
Thank you for your purchase. We appreciate your TABLE OF CONTENTS business! Safety ....................2 Please carefully read and follow all instructions in this manual. Pay Product Identification ................4 special attention to all warnings and safety information. Local Codes ..................5 Following these safety, care, and operation instructions will help Requirements for the Commonwealth of Massachusetts .... - Page 3 SAFETY Continued Fireplaces become very hot when running fireplace. DANGER: Carbon monoxide poisoning may lead to death! WARNING: Young children should be carefully Carbon Monoxide Poisoning: Early signs of carbon monoxide poison- supervised when they are in the same room with the ing resemble the flu, with headaches, dizziness or nausea.
-
Page 4: Product Identification
SAFETY 16. Operating fireplace above elevations of 4,500 feet could cause Continued pilot outage. 17. To prevent performance problems, do not use propane/LP fuel 1. WARNING: This appliance is only for use with the type of gas tank of less than 100 lbs. capacity (propane/LP only). indicated on the rating plate. -
Page 5: Local Codes
LOCAL CODES UNPACKING Install and use appliance with care. The installation must conform CAUTION: Do not remove the data plates from the with local codes or in the absence of local codes, to the latest edition grate assembly. The data plates contain important of The National Fuel Gas Code, ANSI Z223.1/NFPA 54*. -
Page 6: Air For Combustion And Ventilation
AIR FOR COMBUSTION AND VENTILATION hour (4.8 m per kw) of the aggregate input rating of all appliances WARNING: This heater shall not be installed in a installed in that space. Rooms communicating directly with the space room or space unless the required volume of indoor in which the appliances are installed*, through openings not furnished with doors, are considered a part of the unconfined space. - Page 7 AIR FOR COMBUSTION AND VENTILATION Continued Ventilation Air From Outdoors A. Rework worksheet, adding the space of an adjoining room. If the extra space provides an unconfined space, remove door to adjoining Provide extra fresh air by using ventilation grills or ducts. You must room or add ventilation grills between rooms.
-
Page 8: Installation
INSTALLATION WARNING: This appliance is equipped for either NOTICE: This appliance is intended for supplemental heating. Use this heater along with your primary heat- natural gas or propane/LP gas but not both. Gas type ing system. Do not install this heater as your primary is indicated on the rating plate. - Page 9 INSTALLATION Continued ASSEMBLING AND ATTACHING BLACK TRIM INSTALLATION CLEARANCES IMPORTANT: If you are recessing the firebox in a wall, do not attach WARNING: Maintain the minimum clearances. If trim at this time. See Page 12. you can, provide greater clearances from floor, ceiling NOTE: The instructions below show assembling and attaching trim and adjoining wall.
- Page 10 INSTALLATION Continued CONVENTIONAL FIREPLACE INSTALLATION 7. Break off nailing flanges (see Figure 11) with hammer or pliers. Conventional installation of this fireplace involves installing fireplace 8. Place cardboard or other protective material on top of hearth along with the corner, face or cabinet mantel with hearth base acces- base.
- Page 11 INSTALLATION Continued BUILT-IN FIREPLACE INSTALLATION 4. Connect wires from the electrical box to duplex outlet. Match wire colors to those indicated on duplex outlet. Be sure to connect Built-in installation of this fireplace involves installing fireplace into a ground wire. framed-in enclosure.
- Page 12 INSTALLATION Continued Support Bracket Mantel Clearances for Built-In Installation If placing mantel above built-in fireplace, you must meet minimum clearance between mantel shelf and top of fireplace opening. NOTICE: If your installation does not meet the mini- mum clearances shown, you must do one of the fol- lowing: •...
- Page 13 INSTALLATION Continued INSTALLING GAS PIPING TO FIREPLACE LOCATION Check your building codes for any special requirements for locating equipment shutoff valve to fireplaces. WARNING: This appliance requires a 3/8" NPT Apply pipe joint sealant lightly to male NPT threads. This will prevent (National Pipe Thread) inlet connection to the pres- excess sealant from going into pipe.
- Page 14 INSTALLATION Continued CONNECTING FIREPLACE TO GAS SUPPLY Flexible Gas Line Log Base Assembly CAUTION: Do not pick up heater base assembly by burners. This could damage heater. Only handle Screw base assembly by grates. NOTICE: Most building codes do not permit concealed gas connections.
- Page 15 INSTALLATION Continued PRESSURE TESTING GAS SUPPLY PIPING SYSTEM Open Equipment The appliance and its appliance main gas valve must be disconnected Shutoff Valve from the gas supply piping system during any pressure testing of that system at test pressures in excess of 1/2 psi (3.5 kPa). The appliance must be isolated from the gas supply piping system by closing its equipment shutoff valve during any pressure testing of the gas supply piping system at test pressures equal to or less than...
- Page 16 INSTALLATION Continued 3. Locate the notches in bottom of front log (#3). Place front log on INSTALLING LOGS grate fingers. Make sure notches of front log line up with grate WARNING: Failure to position the parts in accor- fingers (see Figure 27). dance with these diagrams or failure to use only parts 4.
- Page 17 INSTALLATION Continued INSTALLING BATTERIES IN REMOTE CONTROL AND RECEIVER Installing Cover Plate Onto Remote Receiver 1. Locate and remove cover plate from packaging. WARNING: Make sure your selector switch is in 2. Make sure sliding selector switch fits over switch on receiver. OFF position before installing or changing batteries 3.
-
Page 18: Operation
OPERATION FOR YOUR SAFETY WARNING: Damper handle will be hot if heater READ BEFORE LIGHTING has been running. WARNING: If you do not follow these instructions WARNING: Burners will come on automatically exactly, a fire or explosion may result causing prop- within one minute when the control valve is in the ON erty damage, personal injury or loss of life. - Page 19 OPERATION Continued 9. Slightly push in and turn control knob counterclockwise TO TURN OFF GAS the ON position. TO APPLIANCE 10. Press the on/off key on the remote control to turn on appliance 1. Press on/off key on remote control and turn control knob clockwise main burner.
- Page 20 OPERATION Continued FLAME HEIGHT This function allows you to control the height of the flames through 5 levels. Select manual flame height function by pressing MODE button until a flame is shown in lower left corner of display. Use the UP/DOWN arrow button to set desired flame height (see Figure 37).
- Page 21 OPERATION Continued SMART THERMOSTAT CHILD SAFETY LOCK-OUT The Smart Thermostat adjusts flame height in accordance to dif- This function lets you deactivate the remote control buttons. It is ferences between set temperature and room temperature. As room active when the lock icon is lit on the display. temperature gets closer to set temperature the smart function will To activate, press MODE button and UP arrow button at the same modulate the flame lower.
-
Page 22: Inspecting Burners
INSPECTING BURNERS Check pilot flame pattern and burner flame patterns often. MAIN BURNER Periodically inspect all burner flame holes with the fireplace running. All PILOT FLAME PATTERN slotted burner flame holes should be open with yellow flame present. All round burner flame holes should be open with a small blue flame present. Figure 43 shows a correct pilot flame pattern. -
Page 23: Cleaning And Maintenance
CLEANING AND MAINTENANCE WARNING: Turn off fireplace and let cool before Primary Air Inlet Burner cleaning. Holes (Shape of Tube Holes May Vary by Model) CAUTION: You must keep control areas, burner and circulating air passageways of heater clean. Inspect these areas of heater before each use. -
Page 24: Troubleshooting
TROUBLESHOOTING WARNING: Turn off heater and let cool before servicing. Only a qualified service person should service and repair heater. CAUTION: Never use a wire, needle or similar object to clean ODS/pilot. This can damage ODS/pilot unit. NOTE: All troubleshooting items are listed in order of operation. OBSERVED PROBLEM POSSIBLE CAUSE REMEDY... - Page 25 TROUBLESHOOTING Continued OBSERVED PROBLEM POSSIBLE CAUSE REMEDY Burner does not light after ODS/pilot is lit 1. Inlet gas pressure is too low 1. Contact local natural or propane/LP gas company 2. Burner orifice(s) clogged 2. Clean burner(s) (see Cleaning and Main- tenance, Page 23) or replace burner orifice(s) 3.
- Page 26 TROUBLESHOOTING Continued WARNING: If you smell gas • Shut off gas supply. • Do not try to light any appliance. • Do not touch any electrical switch; do not use any phone in your building. • Immediately call your gas supplier from a neighbor’s phone. Follow the gas supplier’s instructions. •...
-
Page 27: Specifications
SPECIFICATIONS SERVICE HINTS Westerly32ZMN When Gas Pressure Is Too Low • Rating (Variable): 23/33,000 Btu/Hr • pilot will not stay lit • Gas Type: Natural Gas • burner will have delayed ignition • Ignition: Piezo • fireplace will not produce specified heat •... -
Page 28: Wiring Diagram
WIRING DIAGRAM Black Connectors Receiver White To Thermopile CAUTION: Label all wires prior to disconnection when servicing controls. Wiring errors can cause improper and dangerous opera- tion. Verify proper operation after servicing. ComfortFlame.us.com 900568-00E... -
Page 29: Parts
PARTS MODELS WESTERLY32ZMN AND WESTERLY32ZMP WARNING: Failure to position the parts in accordance with these diagrams or failure to use only parts specifi- cally approved with this heater may result in property damage or personal injury. Cat. No. Model Description 32"... - Page 30 WARNING: Contact an IHP dealer to obtain any of these parts. Never use substitute materials not approved by IHP. Use of non-approved parts can result in poor performance and safety hazards. Westerly32ZMP Westerly32ZMN KEY NO. CATALOG NO. DESCRIPTION F2506 F2507 QTY.
- Page 31 PARTS FIREBOX WESTERLY32ZMN AND WESTERLY32ZMP WARNING: Failure to position the parts in accordance with these diagrams or failure to use only parts specifi- cally approved with this heater may result in property damage or personal injury. 900568-00E ComfortFlame.us.com...
- Page 32 PARTS FIREBOX WESTERLY32ZMN AND WESTERLY32ZMP This list contains replaceable parts used in your fireplace. When ordering parts, follow the instructions listed under Replacement Parts on Page 27 of this manual. WARNING: Contact an IHP dealer to obtain any of these parts. Never use substitute materials not approved by IHP.
-
Page 33: Accessories
ACCESSORIES Purchase these appliance accessories from your local dealer. If they can not supply these accessories, contact IHP at ComfortFlame.us.com for referral information. You can also write to the address listed on the back Page of this manual. Only kits supplied by IHP shall be used in the installation of this appliance. Use of non-approved accessory/part kit(s) can result in poor performance and safety hazards. - Page 34 NOTES ______________________________________________________ ______________________________________________________ ______________________________________________________ ______________________________________________________ ______________________________________________________ ______________________________________________________ ______________________________________________________ ______________________________________________________ ______________________________________________________ ______________________________________________________ ______________________________________________________ ______________________________________________________ _____________________________________________________ ______________________________________________________ ______________________________________________________ ______________________________________________________ ______________________________________________________ ______________________________________________________ ______________________________________________________ ______________________________________________________ ______________________________________________________ ______________________________________________________ ______________________________________________________ ______________________________________________________ ______________________________________________________ _____________________________________________________ ______________________________________________________ ______________________________________________________ ______________________________________________________ ______________________________________________________ ______________________________________________________ ______________________________________________________ ______________________________________________________ ComfortFlame.us.com 900568-00E...
-
Page 35: Warranty
® 20 Year Limited Warranty THE WARRANTY Innovative Hearth Products ("IHP") 20 Year Limited Warranty warrants your Comfort Flame ® Brand gas fi replace or insert ("Product") to be free from defects in materials and workmanship at the time of manufacture. The product body, fi rebox and barrier carry the 20 Year Limited Warranty. Ceramic glass carries the 20 Year Limited Warranty against thermal breakage only. - Page 36 ComfortFlame.us.com Record the following important information about your appliance: Appliance model number Appliance serial number Date appliance was Installed Type of gas appliance uses Dealer name Innovative Hearth Products (IHP) reserves the right to make changes at any time, without notice, in design, materials, specifications, prices and also to discontinue colors, styles and products.
Need help?
Do you have a question about the Westerly32ZMN and is the answer not in the manual?
Questions and answers