Page 1
Product Manual : Ver 1.00 TP-781/ TP-782 Living Lodge M / Living Lodge L
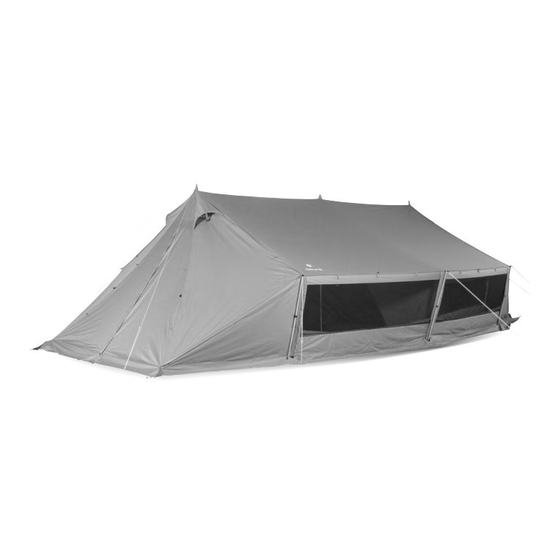
 Living Lodge M Living Lodge L * All illustrations in this manual are for TP-781/Living Lodge M, but the basic setup and disassembly instructions are the same.
Thank you very much for purchasing a Snow Peak product. This product is a shelter designed for camping. To use this product safely and correctly, please carefully read these instructions. After reading these instructions, keep this manual in a safe place for future reference. If you find anything in the instruction manual that is difficult to understand or find a defect with the product, stop using it immediate- ly and contact the dealers where the product was purchased or Snow Peak Customer Service.
Page 3
●Before using the product, check each part for abnormalities. If there are abnormalities, take the product to the dealer or Snow Peak Customer Service for inspection or repair. ●Pay close attention to the weather. If extreme weather is in the forecast, pack up camp and evacuate to a safe place.
Page 4
In the unlikely event that there is a problem or a missing accessory, please contact the dealer where you purchased the product or Snow Peak Customer Service. ●This product does not include pegs and hammers for ropes.
Preparations Before Use A waterproofing treatment with seam taping has been applied to the stitching of the shelter. However, the ventilator and fasteners on the shelter and a part of the bottom sheet of inner room cannot be treated with the seam tape due to their inherent design.
Page 6
Set-Up Procedure : Please make sure to disassemble with at least two people. Follow the instructions below to set up and disassemble. Practice set up before camping and check to ensure all the accessories are functioning. Excessive setup and tear down may damage the body or poles, potentially resulting in an accident.
Page 7
Hook the center loop of the 10m forked end rope to the tips of the main pole (front and back) inserted into the grommet. After that, extend the forked rope about 3.5m( 11.5'), so the forked ends form a 90° angle, and then peg down the rope's end.
Page 8
Enter the shelter and insert the main pole (middle) into the center grommet to raise the structure. Adjust the position of the bottom pole so that each main pole stands up straight. Push Pin Tip of the Main Pole (middle) Insert the lower end of the sub-pole into the pin at each corner (6 spots total) of the bottom, then insert the tip into the grommet at the roof corner.
Page 9
Insert the duralumin pin pegs into the loop at each corner of the shelter's bottom and the rubber loop at the bottom of the front and rear panels, then hammer down (10 locations total). Peg down so the bottom of the sub-pole is inside by the length of a foot (about 27 cm), and the sidewall is inclined. * For the front and rear panels, please peg down the rubber loop attached to both the entrance panel and the triangular panel.
Page 10
Responding to Bad Weather When the rain or wind is severe, take the following measures. If you feel unsafe due to the weather, please pack up camp immediately and evacuate to a safe place. * Please prepare additional ropes and pegs for inclement weather conditions. When there is a strong wind, pull the ropes on the front and back panel to ensure the panels are not loose.
Page 11
How to Install the Inner Room Spread the inner room on the ground sheet with Please connect the buckle on the ceiling of the inner the bottom fabric positioned as shown in the room to the buckle on the shelter. (2 locations) figure.
Page 12
How to Disassemble : Please make sure to disassemble with at least two people. Disassembling should be done in the reverse order of setup. Make sure there is nothing inside the inner room and the shelter before beginning. It will be easier to roll the fabric up if you slightly open the zipper at the inner tent entrance.
Page 13
Place the shelter, the inner room, and the ground sheet on the ground as shown in the figure. Fold them to match the length of the carry bag and put them in the carry bag. How to Fold the Inner Room ①Fold both ends inward toward the center. ②Fold vertically in three and roll it in the direction of the arrow.
Page 14
Precautions for Disassembly and Storage ●Please make sure that the product is sufficiently dry before storing it. ●If the wind is strong, wait for it to subside before disassembling the shelter. ●If you have attached an inner room, be sure to remove the inner room or any other products from the shelter before disassembling it.
10. Damage caused by the use of the product in combination with other maker's products. Regarding Repair ●If a professional repair is necessary, please contact the dealer where the product was sold or Snow Peak Customer Service. ●Please dry and clean the product before sending it for repair.
Page 16
Spec Living Lodge M ●Capacity: 3-5 persons Contents: Shelter, Inner Room, Ground Sheet, Main Pole (x 3), Sub-Pole (x 6), Duralumin Pin Pegs 21 cm(8.3') x 10, Rope with Rope Tensioner (Forked End 10m(32.8') x 2, 2.5m (8.2')x 6), Loop Belt, Seam...
Need help?
Do you have a question about the Living Lodge M and is the answer not in the manual?
Questions and answers