Table of Contents
Advertisement
Quick Links
Advertisement
Table of Contents

Related Manuals for Electrolux LKS5000S0W


Summary of Contents for Electrolux LKS5000S0W
- Page 1 LKS5000S0W Cooker User Manual...
-
Page 2: Table Of Contents
15. ENVIRONMENTAL CONCERNS..............25 WE’RE THINKING OF YOU Thank you for purchasing an Electrolux appliance. You’ve chosen a product that brings with it decades of professional experience and innovation. Ingenious and stylish, it has been designed with you in mind. So whenever you use it, you can be safe in the knowledge that you’ll get great results every time. -
Page 3: Safety Information
ENGLISH SAFETY INFORMATION Before the installation and use of the appliance, carefully read the supplied instructions. The manufacturer is not responsible for any injuries or damage that are the result of incorrect installation or usage. Always keep the instructions in a safe and accessible location for future reference. - Page 4 Do not install the appliance behind a decorative door • in order to avoid overheating. Do not install the appliance on a platform. • Do not operate the appliance by means of an external • timer or separate remote-control system.
-
Page 5: Safety Instructions
ENGLISH To remove the shelf supports first pull the front of the • shelf support and then the rear end away from the side walls. Install the shelf supports in the opposite sequence. WARNING: Use only hob guards designed by the •... - Page 6 • Open the appliance door carefully. leakage trips and contactors. The use of ingredients with alcohol • The electrical installation must have can cause a mixture of alcohol and an isolation device which lets you air.
-
Page 7: Installation
ENGLISH 2.4 Care and Cleaning • Concerning the lamp(s) inside this product and spare part lamps sold WARNING! separately: These lamps are intended Risk of injury, fire, or to withstand extreme physical damage to the appliance. conditions in household appliances, such as temperature, vibration, •... - Page 8 Minimum distances 5. For height, unscrew the screw C (1 screw) in the centre rear of the plinth Dimension and the side screws D (4 screws). 3.2 Technical data Voltage 400 V Frequency 50 - 60 Hz 6. Push the plinth in to the required Appliance class height setting: 919, 884 or 854 mm.
- Page 9 ENGLISH 2. You can find the hole on the left side at the back of the appliance. Lift the front of the appliance and put it in the middle of the space between the cupboards. If the space between the bench cupboards is larger than the width of the appliance, you must adjust the side measurement to...
-
Page 10: Product Description
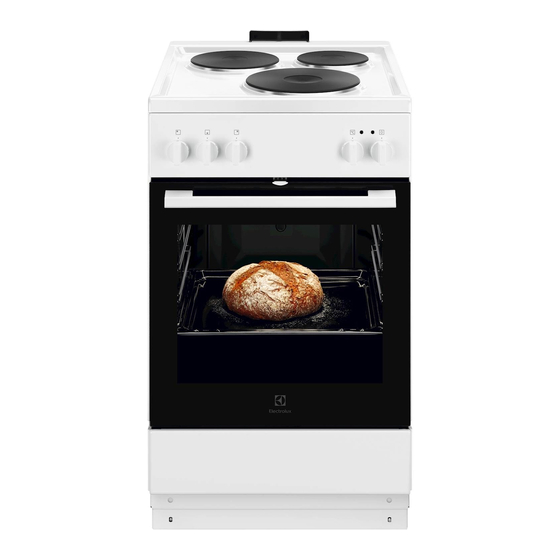
4. PRODUCT DESCRIPTION 4.1 General overview Knobs for the hob Knob for the temperature Temperature indicator / symbol Hob lamp / symbol / indicator Knob for the oven functions Heating element Lamp Shelf support, removable Shelf positions 4.2 Cooking surface layout... -
Page 11: Before First Use
ENGLISH 5. BEFORE FIRST USE 2. Open the door. WARNING! Do not pull the door lock when closing Refer to Safety chapters. the oven door! 5.1 Initial Cleaning Deactivating the appliance does not cancel the Remove all accessories and removable mechanical door lock. -
Page 12: Hob - Daily Use
6. HOB - DAILY USE Turn the knob for the selected cooking WARNING! zone to a necessary heat setting. Refer to Safety chapters. The hob control indicator comes on. To complete the cooking process, turn 6.1 Heat setting the knob to the off position. -
Page 13: Oven - Daily Use
ENGLISH • Scratches or dark stains on the 2. Clean the hob with a moist cloth and surface have no effect on how the hob some detergent. operates. 3. Heat the hotplate to a low Stainless steel temperature and let it dry. 4. -
Page 14: Oven - Using The Accessories
Symbol Oven function Application Conventional Baking This function is designed to save energy dur‐ ing cooking. For the cooking instructions refer to "Hints and tips" chapter, Conventional Bak‐ ing. The oven door should be closed during cooking so that the function is not interrupted and to ensure that the oven operates with the highest energy efficiency possible. -
Page 15: Oven - Hints And Tips
ENGLISH Wire shelf and the deep pan together: Push the deep pan between the guide bars of the shelf support and the wire shelf on the guide bars above. 11. OVEN - HINTS AND TIPS Trays in the oven can distort during WARNING! baking. - Page 16 Initially, monitor the performance when cookware, recipes and quantities when you cook. Find the best settings (heat you use this appliance. setting, cooking time, etc.) for your 11.7 Conventional cooking Food Temper‐ Time Shelf Accessories ature (min) position (°C)
- Page 17 ENGLISH Food Temper‐ Time Shelf Accessories ature (min) position (°C) Swiss roll 150 - 15 - 30 baking tray Stuffed yeast cake 160 - 20 - 35 baking tray Homemade pizza 200 - 20 - 35 baking tray Bread 280 - 10 - 15 baking tray Flat bread...
- Page 18 Food Tem‐ Time Shelf Accessories pera‐ (min) posi‐ ture tion (°C) Brownie 25 - 35 baking tray or grill- / roasting Cakes in tin Soufflé 30 - 40 six ceramic ramekins on wire shelf Sponge flan base 20 - 30...
- Page 19 ENGLISH Food Tem‐ Time Shelf Accessories pera‐ (min) posi‐ ture tion (°C) Vegetables on tray 30 - 40 baking tray or grill- / roasting 700 g 11.9 Fast Grilling Food Tem‐ Time Shelf Accessories pera‐ (min) position ture (°C) Pork roast cutlet 220 - 15 - 25 wire shelf on level 3 and...
-
Page 20: Oven - Care And Cleaning
Food Function Temper‐ Accessories Shelf Time ature position (min) (°C) Fast Grilling wire shelf 2 - 5 Toast Fast Grilling wire shelf 15 first Beef burger side; 15 second side 1) Preheat the oven for 5 minutes. 2) Preheat the oven for 10 minutes. - Page 21 ENGLISH 12.4 Oven ceiling 12.5 Removing and installing the oven glass panels WARNING! Deactivate the appliance You can remove the internal glass before you remove the panels to clean it. The number of glass heating element. Make sure panels is different for different models. that the appliance is cold.
-
Page 22: Troubleshooting
When the cleaning is complete, install 2. Slowly lift the drawer. the glass panels and the oven door. Do 3. Pull the drawer out fully. the above steps in the opposite To install the drawer, do the above steps sequence. -
Page 23: Energy Efficiency
We recommend that you write the data here: Model (MOD.) ......... Product number (PNC) ......... Serial number (S.N.) ......... 14. ENERGY EFFICIENCY 14.1 Product information for hob according to EU 66/2014 Model identifi‐ LKS5000S0W cation Type of hob Hob inside Freestanding Cooker... - Page 24 • If it is possible, always put the lids on the cookware. 14.3 Product information for ovens and Product Information Sheet* Supplier's name Electrolux Model identification LKS5000S0W 943005268 Energy Efficiency Index 95.0 Energy efficiency class Energy consumption with a standard load, con‐ 0.76 kWh/cycle...
-
Page 25: Environmental Concerns
Help protect the contact your municipal office. environment and human health by recycling waste of electrical and electronic appliances. Do not dispose of Electrolux Appliances AB - Contact Address: Al. Powstańców Śląskich 26, 30-570 Kraków, Poland... - Page 28 www.electrolux.com/shop...