
Subscribe to Our Youtube Channel
Related Manuals for Electrolux EBF4P45X


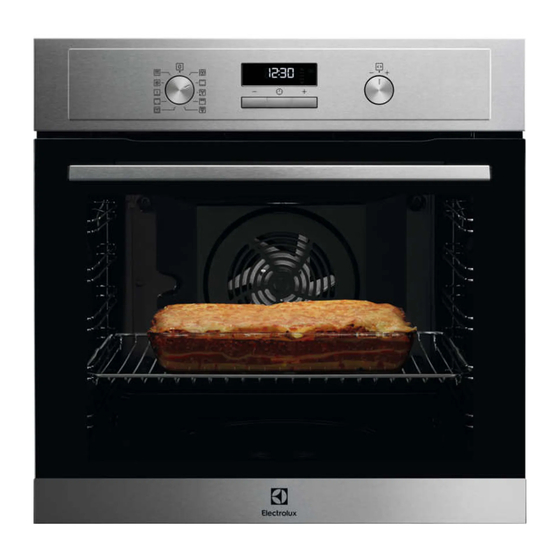
Summary of Contents for Electrolux EBF4P45X
- Page 1 EBF4P45X EOF4P40X Oven User Manual Get the most out of your appliance For quick access to manuals, how-to guides, support and more through our photo registration visit electrolux.com/register...
-
Page 2: Table Of Contents
14. ENERGY EFFICIENCY.................. 32 WE’RE THINKING OF YOU Thank you for purchasing an Electrolux appliance. You’ve chosen a product that brings with it decades of professional experience and innovation. Ingenious and stylish, it has been designed with you in mind. So whenever you use it, you can be safe in the knowledge that you’ll get great results every time. -
Page 3: Safety Information
ENGLISH SAFETY INFORMATION Before the installation and use of the appliance, carefully read the supplied instructions. The manufacturer is not responsible for any injuries or damage that are the result of incorrect installation or usage. Always keep the instructions in a safe and accessible location for future reference. -
Page 4: Safety Instructions
WARNING: The appliance and its accessible parts • become hot during use. Care should be taken to avoid touching heating elements. Always use oven gloves to remove or put in • accessories or ovenware. Before carrying out any maintenance, disconnect the •... - Page 5 ENGLISH • Before mounting the appliance, check • The appliance must be earthed. if the oven door opens without • Make sure that the parameters on the restraint. rating plate are compatible with the • The appliance is equipped with an electrical ratings of the mains power electric cooling system.
- Page 6 For the section of the cable refer to the WARNING! total power on the rating plate. You can Risk of damage to the also refer to the table: appliance. Total power (W) Section of the ca‐ • To prevent damage or discoloration to ble (mm²)
- Page 7 ENGLISH • Replace immediately the door glass • Unlike all humans, some birds and panels when they are damaged. reptiles can be extremely sensitive to Contact the Authorised Service potential fumes emitted during the Centre. cleaning process of all Pyrolytic •...
-
Page 8: Installation
• Cut off the mains electrical cable • Remove the door catch to prevent close to the appliance and dispose of children or pets from becoming trapped in the appliance. 3. INSTALLATION WARNING! Refer to Safety chapters. 3.1 Building In min. -
Page 9: Product Description
ENGLISH 3.2 Securing the oven to the cabinet 4. PRODUCT DESCRIPTION 4.1 General overview Control panel Knob for the heating functions Display Control knob (for the temperature) Heating element Lamp Shelf support, removable Shelf positions 4.2 Accessories For cakes and biscuits. •... -
Page 10: Before First Use
Sensor field / Button Description To set a clock function. To set the time. 5.2 Display A. Timer / Temperature B. Heat-up and residual heat indicator C. Core temperature sensor (selected models only) D. Door lock (selected models only) E. - Page 11 ENGLISH Oven func‐ Application Oven func‐ Application tion tion To bake on up to three To roast large meat shelf positions at the joints or poultry with same time and to dry bones on one shelf po‐ True Fan Turbo Grilling food.
-
Page 12: Clock Functions
8. CLOCK FUNCTIONS 8.1 Clock functions table 2. Press to confirm and set the minutes. Clock func‐ Application The display shows and the set tion hour. "00" flashes. 3. Press to set the current To show or change the minutes. -
Page 13: Using The Accessories
ENGLISH 8.5 Setting the TIME DELAY 1. Press again and again until function starts to flash. 2. Press to set the seconds 1. Set a heating function. and than the minutes. 2. Press again and again until When the time you set is longer than starts to flash. -
Page 14: Additional Functions
Wire shelf and baking tray / deep pan Small indentation at the top together: increase safety. The Push the baking tray / deep pan between indentations are also anti-tip the guide bars of the shelf support and devices. The high rim the wire shelf on the guide bars above. -
Page 15: Hints And Tips
ENGLISH 11. HINTS AND TIPS If you use two baking trays at the same WARNING! time, keep one empty level between Refer to Safety chapters. them. The temperature and cooking times in The function Conventional Cooking at the tables are guidelines only. They the default temperature is ideal for bread depend on the recipes and the quality baking. - Page 16 CAKES Conventional Cook‐ True Fan Cooking (min) (°C) (°C) Buttermilk 80 - 100 Cake mould, cheesecake Ø 26 cm Strudel 60 - 80 Baking tray Jam tart 30 - 40 Cake mould, Ø 26 cm Sponge cake 170 40 - 50 Cake mould, Ø...
- Page 17 ENGLISH CAKES Conventional Cook‐ True Fan Cooking (min) (°C) (°C) Meringues, 2 and 4 80 - 100 Baking tray two levels, preheat the empty oven Buns, pre‐ 12 - 20 Baking tray heat the empty oven Eclairs 25 - 35 Baking tray Eclairs, two 2 and 4...
- Page 18 BREAD AND PIZZA Conventional True Fan Cooking Cooking (min) (°C) (°C) Scones 10 - 20 Baking tray Preheat the empty oven. Use the cake mould. FLANS Conventional Cooking True Fan Cooking (min) (°C) (°C) Pasta flan, preheat‐ 40 - 50 ing is not needed Vegetable flan, pre‐...
- Page 19 ENGLISH MEAT Conventional True Fan Cooking Cooking (min) (°C) (°C) Veal 90 - 120 English roast beef, rare 50 - 60 English roast beef, medium 60 - 70 English roast beef, well done 70 - 75 MEAT Conventional Cook‐ True Fan Cooking (min) (°C) (°C)
- Page 20 FISH Conventional True Fan Cook‐ Cooking (min) (°C) (°C) Trout / Sea bream, 3 - 4 fish 40 - 55 Tuna / Salmon, 4 - 6 fillets 35 - 60 11.3 Grill Preheat the empty oven. Use the fourth shelf position.
- Page 21 ENGLISH BEEF LAMB (°C) (min) (°C) (min) Roast beef or fil‐ 190 - 200 5 - 6 Lamb leg / Roast 150 - 170 100 - 120 let, rare lamb, 1 - 1.5 kg Roast beef or fil‐ 180 - 190 6 - 8 Lamb saddle, 1 - 160 - 180 40 - 60 let, medium...
- Page 22 11.5 Defrost (kg) Defrosting Further defrost‐ time (min) ing time (min) Chicken 100 - 140 20 - 30 Place chicken on an upturned saucer placed on a large plate. Turn halfway through. Meat 100 - 140 20 - 30 Turn halfway through.
- Page 23 ENGLISH 11.7 Moist Fan Baking - recommended accessories FRUIT Use the dark and non-reflective tins and containers. They have better heat absorption than the light colour and reflective dishes. Apple slices 6 - 8 Pears 6 - 9 Ramekins Pizza pan Baking dish Flan base tin Ceramic...
- Page 24 (°C) (min) Victoria sand‐ baking dish on wire 40 - 50 wich shelf Poached fish, baking tray or dripping 20 - 25 0.3 kg Whole fish, 0.2 baking tray or dripping 25 - 35 Fish fillet, 0.3 kg pizza pan on wire shelf 180...
- Page 25 ENGLISH (°C) (min) Small Conven‐ Baking 20 - 30 cakes, tional Cook‐ tray 20 per tray Small True Fan Baking 150 - 20 - 35 cakes, Cooking tray 20 per tray Small True Fan Baking 2 and 150 - 20 - 35 cakes, Cooking tray...
-
Page 26: Care And Cleaning
(°C) (min) Toast, 4 Grill Wire max. 2 - 3 minutes Preheat the oven shelf first side; 2 - 3 for 3 minutes. pieces minutes sec‐ ond side Beef bur‐ Grill Wire max. 20 - 30 Put the wire shelf... - Page 27 ENGLISH 12.2 Stainless steel or Do not start the Pyrolysis if aluminium ovens you did not fully close the oven door. In some models, Clean the oven door with a damp cloth or the display shows "C3" when sponge only. Dry it with a soft cloth. this error occurs.
- Page 28 6. When pyrolysis is completed, the display shows the time of day. The oven door stays locked. 7. When the oven is cool again, the door unlocks. 12.5 Cleaning reminder To remind you that the pyrolysis is necessary, PYR flashes in the display for 10 seconds after each activation and deactivation of the oven.
- Page 29 ENGLISH 5. Hold the door trim (B) on the top edge of the door at the two sides and push inwards to release the clip seal. 6. Pull the door trim to the front to remove it. 7. Hold the door glass panels by their top edge and carefully pull them out one by one.
-
Page 30: Troubleshooting
13. TROUBLESHOOTING WARNING! Refer to Safety chapters. 13.1 What to do if... Problem Possible cause Remedy You cannot activate or op‐ The oven is not connected Check if the oven is cor‐ erate the oven. to an electrical supply or it rectly connected to the is connected incorrectly. - Page 31 ENGLISH Problem Possible cause Remedy The display shows "F102". • You did not fully close • Fully close the door. the door. • Deactivate the oven • The door lock is defec‐ with the house fuse or tive. the safety switch in the fuse box and activate it again.
-
Page 32: Energy Efficiency
......... Serial number (S.N.) ......... 14. ENERGY EFFICIENCY 14.1 Product Information and Product Information Sheet* Supplier's name Electrolux EBF4P45X 949498127 Model identification EOF4P40X 949498129 Energy Efficiency Index 81.2 Energy efficiency class Energy consumption with a standard load, con‐ 0.93 kWh/cycle... - Page 33 ENGLISH Keep breaks between baking as short as to minimum 3 - 10 minutes before the possible when you prepare a few dishes end of cooking. The residual heat inside at one time. the oven will continue to cook. Cooking with fan Use the residual heat to warm up other When possible, use the cooking dishes.
- Page 34 www.electrolux.com...
- Page 35 ENGLISH...
- Page 36 www.electrolux.com/shop...
Need help?
Do you have a question about the EBF4P45X and is the answer not in the manual?
Questions and answers