
Related Manuals for Lightmaxx Platinum LED Par 64 Tri-LED polish


Summary of Contents for Lightmaxx Platinum LED Par 64 Tri-LED polish
- Page 1 Platinum LED Par 64 Tri-LED polish 10/2018 LIG0006342-000 Bedienungsanleitung User Manual...
- Page 2 Wichtige Sicherheitshinweise! Bitte vor Anschluss lesen! • Im Falle von Beschädigungen des Netzkabels muss dieses umgehend gegen ein Original Ersatzteil des Herstellers ersetzt werden. RISK OF ELECTRIC SHOCK DO NOT OPEN • Stellen Sie sicher, dass die Netzspannung nicht höher als die auf dem Gehäuse angegebene Spannung ist.
-
Page 3: Garantie
Fax: +49 221 8884-2500 info@musicstore.de Bestimmungsgemäßer Gebrauch: Das Produkt LightmaXX Platinum LED Par 64 Tri-LED polish wurde für den Einsatz als elek- tronischer LED-Beleuchtungseffekt konzipiert. Das Gerät darf ausschließlich zu diesem Zwecke und im Sinne der Bedienungsanleitung betrieben werden. Andere Verwendungszwecke, sowie der Betrieb unter anderen Betriebsbedingungen sind ausdrücklich nicht bestimmungsgemäß... - Page 4 Sicherheitshinweise: GEFAHR! (Für Babys und Kinder) Verpackungen, Kunststofffolien und sonstiges Verpackungsmaterial ist ordnungsgemäß aufzubewahren oder zu entsorgen. Es ist aufgrund von Erstickungsgefahr außerhalb der Reichweite von Babys und Kindern aufzubewahren. Stellen Sie sicher, dass Kinder niemals unbeaufsichtigt das Gerät benutzen! Vergewissern Sie sich außerdem, dass Kinder keine (Klein-)Teile vom Gerät ent- fernen, da sie durch verschlucken daran ersticken könnten! GEFAHR! (Elektrischer Schlag durch hohe Spannungen im Gerät)
-
Page 5: Installation
Hinweis! (Betriebsbedingungen) Aufgrund seiner baulichen Eigenschaften ist das Gerät für den Betrieb in Innenräumen konzipiert. Setzen Sie das Gerät niemals Regen, Feuchtigkeit oder Flüssigkeiten aus, da dies zu Beschädigungen führen kann. Vibratio- nen, Schmutz oder Sonneneinstrahlung kann ebenso zu Beschädigungen führen, vermeiden Sie diese! Hinweis! (Stromversorgung) Überprüfen Sie unbedingt die Übereinstimmung der Gerätespannung mit... - Page 6 Inbetriebnahme: Sämtliche Verbindungen des Gerätes sollten vor dem Einschalten erfolgen. Benutzen Sie für die Verbindungen ausschließlich hochwertige, möglichst kurze Kabel. Konfiguration des DMX Steckers: Betriebsart DMX: Verbinden Sie den DMX Eingang Ihres Gerätes mit dem DMX Ausgang ihres DMX-Controllers, ihrer DMX Software oder dem DMX Ausgang eines sich bereits in Ihrer DMX Kette befindlichen Gerätes.
-
Page 7: Anschlüsse Und Bedienelemente
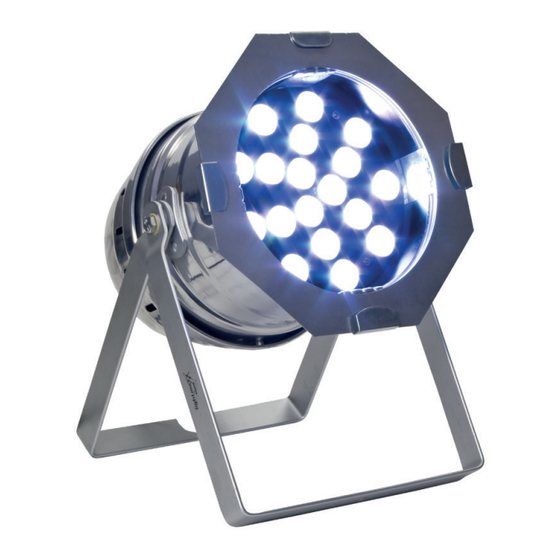
Anschlüsse und Bedienelemente: LED-Linse Strobe-LEDs DMX Eingang (3-pol) DMX Ausgang (3-pol) Display Menu-Tasten Netzkabel Montagebügel Bedienung: Start: Verbinden Sie das Gerät mit dem Stromnetz und warten Sie einige Sekunden bis es Betriebsbereit ist. - Page 8 Menu: Die Navigation im Menu erfolgt über die vier Menu-Tasten unterhalb des Displays. Mit der „MODE“-Taste aktivieren Sie das Menu, die Navigation erfolgt über die „UP“- und „Down“-Pfeiltasten. Eine entsprechende Auswahl wird mit der „Enter“-Taste bestätigt. Die Menu-Struktur im Detail: Statische Farbauswahl: Drücken Sie die MODE-Taste bis zu dieser Ansicht: C00 C100 ROT 00-99 Helligkeit einstellbar...
-
Page 9: Spezifikationen
Spezifikationen: Funktion Lightmaxx LED Color Bar Stripe LEDs 18x 3 Watt Tri-LED RGB Abstrahlwinkel 25° MFL Lüfter Leistung 54 Watt LED Display Spannungsversorgung 230 V / 50 Hz Leistungsaufnahme 80 W bei 100% RGB Stromanschluss Festes Netzkabel Programme DMX, Auto, Static Colomix, Sound to Light DMX Modi 6 Kanäle... -
Page 10: Entsorgung Von Batterien
Die nachfolgende Übersicht dient als Hilfe für eine schnelle Fehlerbehebung. Sollten Sie sich unsicher sein, kontaktieren Sie den Hersteller, den Händler oder entsprechendes Fachpersonal. Öffnen Sie niemals eigenständig das Gerät! Symptom Fehlerbehebung Keine Funktion Überprüfen Sie die Netzverbindung, sowie ihre Sicherung. Überprüfen Sie die Kabelverbindungen. - Page 11 Notizen MS-ID: LIG0006342-000 10/2018...
- Page 12 Safety Instructions! Please read before connection • The device should not be installed by inexperienced and operation! persons and must be installed in compliance with the me- chanical and electrical safety regulations in your country. RISK OF ELECTRIC SHOCK. • If the power cord is damaged, it must be replaced imme- DO NOT OPEN! diately with an original spare part from the manufacturer.
-
Page 13: Scope Of Delivery
Intended use: The product LightmaXX Platinum LED Par 64 Tri-LED polish was designed for use as an electronic LED lighting effect. The device may only be operated for this purpose and in accordance with the operating instructions. Other purposes as well as operation under other operating conditions are expressly not intended and can lead to damage to property or perso- nal injury! No liability is assumed for damage resulting from improper use. -
Page 14: Safety Instructions
Safety instructions: DANGER! (For Babies and Children) Packaging, plastic foils and other packaging material is to be properly stored or disposed of. It must be disposed of due to risk of suffocation outside the reach of babies and children to be kept in a safe place. Make sure that children never use the appliance unattended! In addition, make sure that children do not remove any (small) parts from the device, as they could suffocate by swallowing them! - Page 15 Note! (Operating conditions) Due to its structural characteristics, the device is designed for indoor use. Do not expose the device to rain, moisture or liquids, as this can cause damage. Vibrations, dirt or sunlight can also lead to damage, avoid them! Note! (Power Supply) Make sure that the device voltage matches your local mains voltage.
- Page 16 Commissioning. All connections of the device should be made before switching on. Only use high-quality cables that are as short as possible for the connections. Configuration of the DMX connector: DMX operating mode: Connect the DMX input of your device to the DMX output of your DMX controller, your DMX software or the DMX output of a device already in your DMX chain.
-
Page 17: Connections And Control Elements
Connections and control elements: LED lense Strobe-LEDs DMX Input (3-pin) DMX Output (3-p) Display Menu keys Power cords Mounting bracket Operation: Start: Connect the device to the mains and wait a few seconds until it is ready for operation. - Page 18 Menu: Navigation in the menu is via the four menu buttons below the display. Use the „MODE“ key to activate the menu, navigation is via the „UP“ and „Down“ ar- row keys. A corresponding selection is confirmed with the „Enter“ key. The menu structure in detail: Static colour selection: Press the MODE button up to this view: C00...
-
Page 19: Specifications
Specifications: Function Lightmaxx LED Color Bar Stripe LEDs 18x 3 Watt Tri-LED RGB Beam angle 25° MFL Power 54 Watt LED display Power supply 230 V / 50 Hz Power consumption 80 W at 100% RGB Electrical connection Fixed power cord... -
Page 20: Environmental Protection
The following overview is intended as an aid to rapid troubleshooting. If you are unsure, contact the manufacturer, the dealer or appropriate specialist personnel. Never open the device by yourself! Symptom Troubleshooting No function Check the mains connection and its fuse. Check the cable connections. - Page 21 Notes MS-ID: LIG0006342-000 10/2018...
Need help?
Do you have a question about the Platinum LED Par 64 Tri-LED polish and is the answer not in the manual?
Questions and answers