Advertisement
HC-31-110
Thank you for purchasing the HOZAN HC-31-110 DEMAGNETIZER. With proper care and
handling, this fine instrument will provide years of trouble-free operation. Please read this
entire instruction manual carefully before attempting to place this instrument in service.
Please keep this instruction manual available for reference.
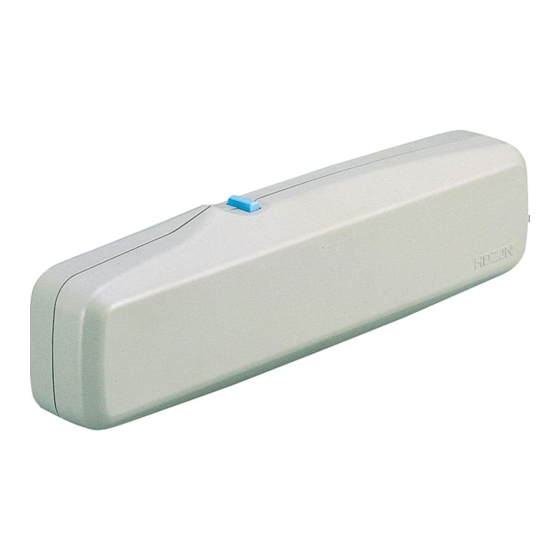
Identification of parts
Power Switch
●HC-31-110 is for 110 -120V.
Do not use by any other voltages.
Specifications
Rating
Frequency
Power consumption
Dimensions
Weight
Max. magnetic flux density
Steady-state current
INSTRUCTION MANUAL
110 Vac
60 Hz
12 W (at steady state)
34(W)X59(H)X216(D) mm
900 g
51mT(510Gs)
0.87 A
1
DEMAGNETIZER
Power Plug
120 Vac
56mT(560Gs)
0.8 A
Advertisement
Table of Contents

Related Manuals for HOZAN HC-31-110


Summary of Contents for HOZAN HC-31-110
- Page 1 INSTRUCTION MANUAL HC-31-110 DEMAGNETIZER Thank you for purchasing the HOZAN HC-31-110 DEMAGNETIZER. With proper care and handling, this fine instrument will provide years of trouble-free operation. Please read this entire instruction manual carefully before attempting to place this instrument in service.
- Page 2 Warning and caution symbols These symbols are used throughout the instruction manual to alert the user to potential safety hazards as follows : Warning … Notice when incorrect handling could cause the user's death or serious injury. Caution … Notice when incorrect handling could cause injury to the user or material damage.
- Page 3 Distance and magnetic flux density, thermal controller The following data shows the relationships between distance and magnetic flux density. Distance (mm) Distance (mm) Measurement apparatus : Gauss meter : GM-4000 manufactured by Electromagnetic Industries Co., Ltd. Sensor probe : T22078 manufactured by Electromagnetic Industries Co., Ltd.
- Page 4 Operation 1 Plug in the power plug to the wall outlet. 2 ● For cathode ray tube Bring the tip of the HC-31 close to the area where color distortion was occurred on the cathode ray tube. While pushing the power switch, gradually pull the HC-31 away from the screen, and release the switch when the distortion stops.
Need help?
Do you have a question about the HC-31-110 and is the answer not in the manual?
Questions and answers