Advertisement
C-405
R R R R ・ ・ ・ ・ L L L L 一軸
一軸BB
一軸
一軸
各部の の の の 名称
各部
各部
各部
名称と と と と 入組明細
名称
名称
※ 本取扱説明書ではギアクランク側
(搭乗者にとっての右側)を右と表現し
ています。
仕 仕 仕 仕
様 様 様 様
注意文
注意文
注意文の の の の 警告
注意文
警告マークについて
警告
警告
マークについて
マークについて
警告
警告
警告
警告
注意
注意
注意
注意
注意
注意
注意
注意
BBタップ
タップ
BB
BB
タップ
タップ
入組明細
入組明細
入組明細
マークについて
※
1 1 1 1
取扱説明書
取扱説明書
取扱説明書
取扱説明書
-
-
Advertisement
Table of Contents

Related Manuals for HOZAN C-405


Summary of Contents for HOZAN C-405
- Page 1 取扱説明書 取扱説明書 取扱説明書 取扱説明書 C-405 R R R R ・ ・ ・ ・ L L L L 一軸 一軸BB BBタップ タップ 一軸 一軸 BB BB タップ タップ 各部 各部の の の の 名称 各部 各部 名称 名称と と と と 入組明細...
- Page 2 ご ご ご ご 使用上 使用上の の の の 注意 注意 使用上 使用上 注意 注意 注意 注意 注意 注意 準 準 準 準 備 備 備 備 1 1 1 1 2 2 2 2 3 3 3 3 4 4 4 4 。...
- Page 3 ご ご ご ご 使用方法 使用方法 使用方法 使用方法 1 1 1 1 ス ベ バ ス 実 2 2 2 2 側 ギ ク ク 側 側 ぐ 3 3 3 3 良質 油 塗布 ぐ 軽 押 回 ~ 食...
- Page 4 ご ご ご ご 使用方法 使用方法 使用方法 使用方法 6 6 6 6 粉 除去 脱脂材 掃除 注意 注意 注意 注意 少 ずつ 互 片 気 ● 油 当社製 必ず良質 粘度 高 ス ● 式 ず 寿命 縮 能力 低下 著 ミ...
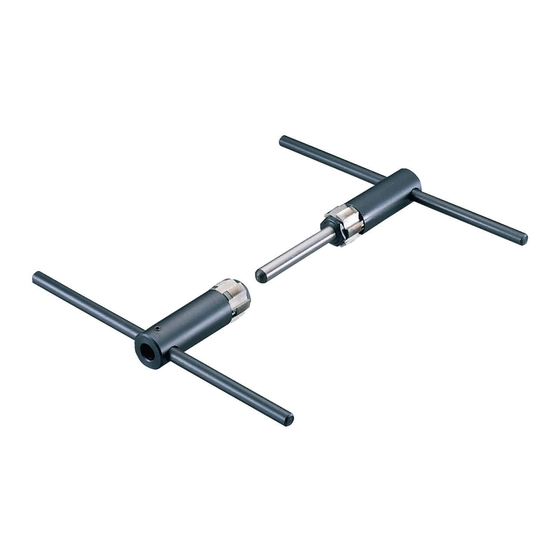
- Page 5 C-405 BRACKET TAP with CENTER GUIDE Thank you for purchasing the HOZAN C-405 BRACKET TAP with CENTER GUIDE. With proper care and handling, this fine instrument will provide years of trouble-free operation. Please read this entire instruction manual carefully before attempting to place this instrument in service.
- Page 6 1. Wear groves during use. 2. The C-405 is for bottom brackets of 1.37×24 (JIS) size. Applicable to Italian standard (36 mm X 24 TPI) by replacing the provided taps with the C-405-2 sold separately. But not applicable for other sizes.
- Page 7 Operation 1 1 1 1 Secure the frame to be corrected in the work stand or the bench vise. 2 2 2 2 Thread tap driver R from right side of the frame (gear crank side) and tap driver L from left side into the bottom bracket shell.
- Page 8 Operation 6 6 6 6 Remove the C-405. Clean out the cut scraps in the bottom bracket shell and wipe off Caution Always remove the both tap drivers R and L loosening gradually by turns. Removing the one tap driver could damage the thread.
Need help?
Do you have a question about the C-405 and is the answer not in the manual?
Questions and answers