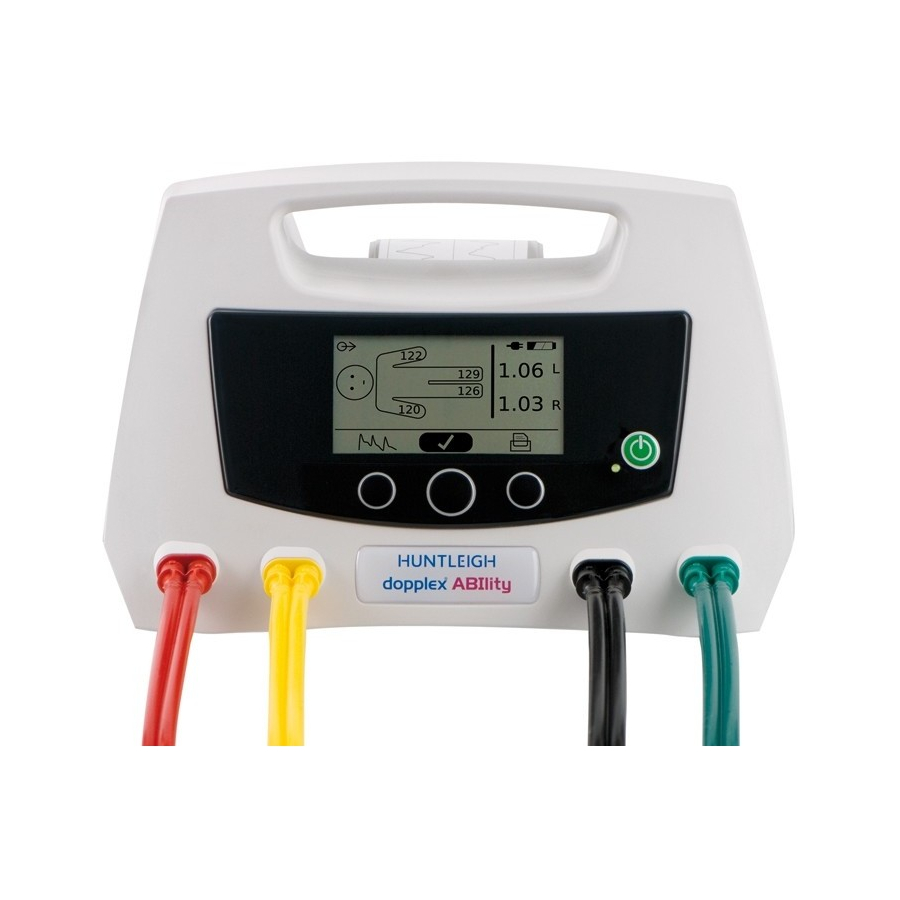
Table of Contents 1. Safety .................4 Warnings ....................4 Residual Risks ..................5 Patient Applied Parts ................5 2. Infection Control ..............6 3. Intended Use ..............6 User Requirements ................6 4. Limitations of Use / Contraindications ......7 Model Description .................. 8 5.
Page 3
12. Operation .................19 12.1 Getting Started ..................19 12.2 Loading Paper ..................20 12.3 User Settings ..................21 12.3.1 System Settings ..................... 21 12.4 Making a Measurement ................. 25 12.4.1 Patient Preparation....................25 12.4.2 Setting Patient Type ....................26 12.4.3 Fitting the Cuffs ...................... 26 12.4.4 Performing the test ....................
Safety Before using this equipment, please study this manual carefully and familiarise yourself with the controls, display features and operation. Ensure that each user fully understands the safety and operation of the unit, as mis-use may cause harm to the user or patient, or damage to the product.
Residual Risks Residual risks are those risks that require a warning or caution to be entered into this manual. They are identifi ed by the proximity of this symbol. Patient Applied Parts As defi ned in IEC60601-1:2005, the patient applied parts of the dopplex Abillity are the four dual chamber cuffs.
Dopplex Ability can be used on patients with unilateral lower limb amputation. User Requirements Dopplex Ability is intended for use only by a suitably qualifi ed healthcare professional. If an ABI test is undertaken by a Healthcare Support Worker, then patient selection and assessment of results must be performed by a qualifi...
A complete vascular assessment including clinical history and symptoms must be made before taking appropriate action. CAUTION: If the results from the dopplex Ability do not match the clinical history and symptoms of the patient, then further tests, e.g. Doppler waveform analysis, are recommended.
CAUTION: Do not sterilise the product or its accessories. The product will be damaged, and there is a risk of patient and user harm. CAUTION: If using the dopplex Ability roll stand, ensure the unit is properly locked in place, otherwise it could fall, and cause personal injury.
However, accidental damage can occur in transit and storage. For this reason we recommend that a thorough visual inspection is made immediately the unit is received. Should any damage be evident or any parts missing, ensure that Huntleigh Healthcare Ltd is informed as soon as possible. Storage...
Initial Set-up Battery Re-Connection * The dopplex Ability is supplied with the internal battery disconnected. To re-connect the battery, please see instructions below. Invert the unit and remove the battery cover by removing the securing screw using the allen key provided.
Connect the unit to the mains supply (1) and switch it on by pressing the On/Off button (2). V1.2 Setting the Language When switched on for the fi rst time, the operating language must be selected. The language selection screen will be displayed. SET LANGUAGE English English...
Use Environment Dopplex Ability is suitable for use in hospital, primary care and community settings. It must not be used outdoors, or in any environment where it may come into contact with water. A couch, or similar level support surface is required for the patient to lie on, and the main unit requires a table or similar for support.
Line (Mains) Power Operation Dopplex Ability is supplied with a plug-in mains lead, fi tted with a 3 pin mains plug. The cores use the European colour code : BROWN LIVE BLUE NEUTRAL GREEN/YELLOW EARTH If it becomes necessary to fi t a new mains plug take care that the wires have correct lengths, so that in the event of extreme strain, the earth wire will be the last to break.
Battery Operation * The internal battery, when fully charged, provides enough power for approximately ten ABI measurements. An on-screen indicator shows the state of charge at all times. Battery charging takes place when the unit is connected to the line (mains) power.
Slide plate Mounting boss Air Filter 10.4 Product Labelling Dopplex Ability is Class II, double insulated according to the defi nitions in BS EN 60601-1:1990 Applied parts (cuffs) are type BF according to the defi nitions in BS EN 60601-1:1990...
Page 17
This symbol signifi es that this product complies with the essential requirements of the Medical Devices Directive 93/42/EEC as amended by 2007/47/EC The UL mark indicates that Dopplex Ability complies with Underwriters Laboratories requirements for safety, and is subject to UL’s follow up services program which...
Huntleigh representative. 11.1 USB Port Dopplex Ability is fi tted with a standard USB port (see item 3, section 10.2 ‘Rear Panel’) for connection to a personal computer (PC). Connections to this port should only be made by suitably technically qualifi ed personnel.
12. Operation 12.1 Getting Started 1. Connect to mains supply. 2. Press V1.2 3. Connect colour coded tubing Note : Use the function buttons below the display to access and change the system setting and patient measurement menus. Function Buttons V1.2...
If using label paper, ensure roll ends are smooth. If not, press end of roll onto a fl at surface. CAUTION: Only use paper approved by Huntleigh. Note: The printer lid is designed to detach if forced. To replace, hook the two lid pivots over the metal rod and press fi...
12.3 User Settings 12.3.1 System Settings CAUTION: Do not apply excessive pressure to the buttons, or use a sharp implement, such as a pen to press the buttons, as damage may result. 1. Press to access the system settings. 24/11/10 14:34 Exit 24/11/10 14:34 Contrast...
Page 22
b. Time/Date: Press to Confi rm. Press to set Time. 24/11/10 14:34 SET TIME SET TIME Exit Contrast Set time/date Paper type SET DATE SET DATE FORMAT d d / m m / y y d d / m m / y y m m / d d / y y 26/03/09 y y / m m / d d...
Page 23
e. Classifi cation: Press to select Classifi cation ON or OFF. Press to Confi rm. Press to change thresholds. Press to Confi rm. 24/11/10 14:34 Incompressible 1.31 Set time/date Normal Classification on Paper type 0.91 Mild Audio volume Classification off 0.81 Classification Moderate...
Page 24
h. Battery Conditioner: * Press to select Battery Conditioner. Press to Confi rm. 24/11/10 14:34 Classification Waveforms Language Battery Conditioner Battery conditioner (Do Not Disconnect from Mains) If Battery Conditioner is selected when mains (line) power is not connected, the following message is displayed:- CONNECT Mains Power Note: Battery conditioning will take approximately 8-10 hours to complete.
12.4 Making a Measurement 12.4.1 Patient Preparation WARNING: Before fi tting cuffs to the patient, evaluate the cross contamination risk. For medium/high risk situations, where the patient has a known infection or skin is not intact, use an infection control barrier sleeve with aseptic technique. WARNING: Do not apply cuff directly to non-intact skin.
12.4.2 Setting Patient Type Press 11/03/08 14:34 Press to select patient normal or amputee mode. Press to Confi rm. Press to progress to cuff placement screen. 12.4.3 Fitting the Cuffs Position the cuffs on the patient. CAUTION: Ensure all cuffs are fi tted correctly and aligned on limbs according to the instructions.
Page 27
Correct Cuff Placement RED- YELLOW - RIGHT ARM LEFT ARM BLACK- GREEN - RIGHT ANKLE LEFT ANKLE Adult 22cm - 36cm (8.7 - 14.2 )
Page 28
Infection Control Barrier Sleeve Note: Remove any trapped air before tightening cuffs. Place strap with white line over the inside of the arm (Over brachial artery) Place distal chamber just below elbow, on largest diameter part of the forearm. Leg/Foot Infection Control Barrier Sleeve Note: Remove any trapped air before tightening cuffs.
Page 29
Foot Position Ensure patients heel is resting on the couch. Do not rest the leg on the cuff as this may affect measurement result. Incorrect Cuff Placement Ensure the cuffs are not rotated around the limb. Measurement error or failure to take correct measurement may occur if cuffs are fi...
12.4.4 Performing the test Patient Briefi ng The patient should always be briefed on what to expect during the test to avoid unnecessary distress. This should describe how the cuffs will infl ate, and then after a short delay the arm cuffs will both tighten, followed by tightening of the ankle cuffs.
Press to return to previous screen or to print* PVR waveforms. Press to view the ABI Classifi cation. 1.06 1.06 Normal 1.03 1.03 Normal Press to print* or to start a new test. CAUTION: Always observe ABI value, not only classifi cation, as marginal results could be overlooked.
12.4.7 Paper Low Indication * When the paper approaches the end of the roll, a red marker line will be visible on the report. Approximately 5 reports with PVR or 8 reports without PVR can be printed before the paper runs out. If the print button is pressed when the paper has run out, the following message will be displayed:- No Paper 12.4.8...
This section gives some of the more common problems encountered during use together with possible causes. If the problem cannot be located after consulting the table in this section, the dopplex Ability should be switched off, disconnected from mains power source and a qualifi ed technician should be consulted.
13.1 Error Messages Cuff Not Connected If the user fails to connect one or more of the cuffs to the unit or the cuffs are not tensioned correctly, one of the following messages is displayed:- Left Arm Cuff - Not Connected Refer To User Manual •...
Page 35
Internal Fault If an internal fault is detected, the following message is displayed on the screen:- Recommended Action: The unit must be Internal Fault AAA:XXXX Refer To Service Manual referred for servicing and/or repair. Refer to contact details at the rear of this manual. Systolic Pressure Out of Measureable Range If the pressure in an occlusion chamber is insuffi...
13.2 Cuff Leak Test The integral cuff leak test is able to test two cuffs at a time for leakage. Each pair of cuffs is connected to the ankle cuff connectors (black and green) on the unit. The arm cuff channels (red and yellow) are not used in this test. Procedure: 1.
13.3 Guidance for Reliable Performance To improve the reliability of the results, the following points should be noted: • Mobile/smart phones etc, must be at least one metre away from the unit. • The couch should be separated from adjacent walls etc. as pressure on the arms or cuffs must be avoided.
Periodically, and whenever the integrity of the system is in doubt, carry out a check of all functions as described in the relevant section of the IFU. If there are any defects to the housing contact Huntleigh or your distributor for repair or to order a replacement.
14.2 Cleaning and Disinfecting Cuffs and Tubing Before fi tting the cuffs to the patient, evaluate the cross-contamination risk according to the defi nitions in the tables below: Low Risk For low-risk situations, when infection control barrier sleeves are not used, clean and disinfect the cuffs &...
Cuff Inspection: All four cuffs should be regularly inspected. Examine the outer cuff surfaces for material damage, splitting, fraying etc. Make sure that labelling is clearly legible. Check the cuff tubing and connections for damage, splits etc. If in any doubt as to the condition, the cuff(s) should be replaced.
It is recommended that the Ability unit and accessories are inspected and tested at least annually. Full details are included in the Service Manual which can be obtained from Huntleigh Healthcare Service Department, quoting the unit serial number (email: service@huntleigh-diagnostics.co.uk ).
Barrier Sleeves Central compartment for dopplex Ability A carry bag is available for the dopplex Abilty. It is highly recommended that the bag is always used whenever the unit is transported. The bag includes a central compartment for the main unit. The side compartments each hold two cuffs.
16.2 Roll Stand A roll stand is available which provides a stable means of support, and a convenient means of moving the unit around within the building. Fitting the Ability Unit to the Roll Stand The roll stand support incorporates a slide mount that allows the unit to be fi tted and removed safely and quickly.
Page 44
Locate the lock pin and pull downwards so that the Ability unit can be positioned centrally on the support surface. Pull lock pin downwards Release the lock pin and ensure it locates in the hole in the mounting plate. This can be verifi ed by attempting to slide the Ability unit sideways.
Page 45
Adjusting the Platform Height The black knob on the roll stand upright must be slowly rotated anti-clockwise whilst supporting the platform. CAUTION: Do not allow the platform to drop, as product damage and personal injury may result. Lower the platform to the desired height and rotate the black knob clockwise to lock it fi...
Arms : 80 - 220 mmHg Pressure Range Ankles : 55 - 205 mmHg Dopplex Ability provides valid ABI results for at least 80% of the patients tested. Valid results consist of both compressible vessels (where Dopplex Ability agrees with the Doppler method to ± 0.28 for the 95% limits of agreement), and incompressible vessels.
17.3 General Supply voltage 100 to 240V ~ 50-60Hz. Fuse Type T1AH 250V Power input 3-80 VA Connector : Mini Type: 1, full speed, 12 Mbps. Safety : Fully isolated Printer * Integral 58 mm, thermal Paper * Roll width : 58 mm nominal, Roll diameter : 40mm Size Height 160mm, Depth 240mm, Width 260mm Weight...
(a) + (d) - Items must be purchased together (b) + (c) + (d) - Items must be purchased together *Do not use dopplex Ability with other non-approved accessories. **Always use the Fixing plate when attaching the dopplex Ability to approved accessories.
Guidance and Manufacturer’s declaration - electromagnetic emissions The dopplex Ability is intended for use in the electromagnetic environment specifi ed below. The customer or the user of the dopplex Ability should assure that it is used in such an environment. Emissions Test...
Page 50
Guidance and Manufacturer’s declaration - electromagnetic immunity The dopplex Ability is intended for use in the electromagnetic environment specifi ed below. The customer or the user of the dopplex Ability should assure that it is used in such an environment. IEC 60601 test...
Page 51
Guidance and Manufacturer’s declaration - electromagnetic immunity The Dopplex Ability is intended for use in the electromagnetic environment specifi ed below. The customer or the user of the Dopplex Ability should assure that it is used in such an environment. IEC 60601 test...
The dopplex Ability is intended for use in an electromagnetic environment in which radiated RF disturbances are controlled. the customer or user of the dopplex Ability can help prevent electromagnetic interference by maintaining a minimum distance between portable and mobile RF communications equipment (transmitters) and the dopplex Ability as recommended below, according to the maximum output power of the communications equipment.
19. End of Life Disposal This symbol signifi es that this product, including its accessories and consumables is subject to the WEEE (Waste Electrical and Electronic Equipment) regulations and should be disposed of responsibly in accordance with local procedures.
A copy is available on request. These contain full details of warranty terms and do not limit the statutory rights of the consumer. Service Returns If for any reason the dopplex Ability has to be returned, please: • Clean the product following the instructions in this manual.
Need help?
Do you have a question about the Dopplex ABIlity and is the answer not in the manual?
Questions and answers