Table of Contents
Advertisement
Quick Links
!
Installation & Calibration Manual
ED3/ED4-RFID SkidWeigh Plus
Lift Truck On-board Check Weighing Scale
Optional:
Impact Monitor, OSHA Pre-Shift Checklist, Overload Warning, Vehicle Utilization,
Authorized Operator Vehicle Access Control
Integrated Visual Data Technology Inc. 3439 Whilabout Terrace, Oakville, Ontario, Canada L6L 0A7
IMPORTANT NOTE:
Please read first the HID ProxPoint Plus card
reader information on the end of this manual
referring to the programming method that is
required to get the system up and running.
RFID Proximity Card Reader
www.skidweigh.com
ED3/ED4-RFID V1.30
Advertisement
Table of Contents

Related Manuals for Integrated Visual Data Technology Inc. ED3-RFID SkidWeigh Plus Series


Summary of Contents for Integrated Visual Data Technology Inc. ED3-RFID SkidWeigh Plus Series
- Page 1 IMPORTANT NOTE: Please read first the HID ProxPoint Plus card reader information on the end of this manual referring to the programming method that is required to get the system up and running. RFID Proximity Card Reader Installation & Calibration Manual ED3/ED4-RFID SkidWeigh Plus Lift Truck On-board Check Weighing Scale Optional:...
-
Page 2: Electromagnetic Compatibility
General Installation Guide This ED3-RFID and ED4-RFID SkidWeigh Plus V1.30 Series installation & calibration guide describes how to install, calibrate, test and use your on-board check weighing unit. Following the instructions in the ADMINISTRATION MENU guide will enable you to get the system set up and weighing calibration function operating quickly. In the event that you require additional assistance, please contact customer support via e-mail at support@skidweigh.com , visit... -
Page 3: Pressure Transducer Installation
(Master card to be used by the end user to program valid operators RFID cards. All programming can be done with ED3-RFID / ED4-RFID mobile units. There is no need for external programming device ) Operational principal The ED3/ED4-RFID SkidWeigh Plus series operational principal is based on the hydraulic pressure transducer mounted in the vehicle lifting hydraulic circuit that will automatically activate the “weighing cycle / specific algorithm ”... -
Page 4: Compact Size
Compact size All of the SkidWeigh systems are compact, housing dimension of only 120 x 80 x 55 mm is ideal for the installations to material handling vehicles of all kinds. Electrical connections All SkidWeigh RFID equipped systems operate from 12 to 55 VDC. Digital indicator with eight wires single cable - Orange Wire (+) Ignition switch On position - Brown Wire (-) Battery negative... - Page 5 Internal relay connections to be used to enable vehicle usage (Dry contacts, SPDT maximum current 1A) - Green Wire Common - Yellow Wire NC - Blue Wire NO Note: Use two wires, BLUE and GREEN normally open SPST contacts and connect in series with vehicle seat switch wire to control vehicle usage Pressure transducer cable White Wire, signal 0 to 2,5 V...
- Page 6 All SkidWeigh systems are internally short circuit protected with resettable fuse. There is no need to install external inline fuse in orange wire that is connected to the ignition switch. IMPORTANT For all SkidWeigh Plus Systems equipped with RFID card reader you MUST HAVE AT LEAST ONE VALID OPERATOR CARD in order to access the administration menu to set up and calibrate the weighing function of the system! “Quick test to determine if electrical connections are done right”...
- Page 7 Lift truck equipped with hydraulic accumulators If the standard SkidWeigh system is installed on the lift trucks equipped with hydraulic accumulators, please contact us to provide you with different digital indicator having specific software algorithm to obtain load weight accuracy within +/- 1% of vehicle maximum lifting capacity.
-
Page 8: Set Clock
Administration Menu Instructions (Weight scale function calibration, time/date, vehicle ID#) To enter into the Administration Menu, press F key and than 9 key and input password 521. Use left and right arrow keys to scroll and follow the LCD instructions. LCD Display MENU PASSWORD = _... - Page 9 LCD Display Aug 28, 2010 12:20:23 “Enter key” ↵ Press to confirm the setting. The cursor will automatically move to the next item to be changed ( Month, Day, Year, Hours, Minutes, Seconds). On the last correction, seconds item press “Enter key” ↵ to confirm new date / time set up.
-
Page 10: Saving To Usb
USB port USB Port Protective Cover Save data to USB The SkidWeigh Plus system will allow you to download all recorded data onto a USB Follow instructions shown on the LCD display drive. This function is located in Supervisor Menu to protect the integrity of the information. - Page 11 Weighing scale function calibration The ED3/ED4-RFID SkidWeigh Plus calibration is automatic and is done by lifting empty and loaded forks (or any other attachment such as paper clamp) just above the ground. MAKE SURE THAT YOU HAVE A KNOWN LOAD WEIGHT AND KEEP IT NEARBY TO COMPLETE THE CALIBRATION.
- Page 12 You must activate lift control valve and lift the empty forks just above the ground the same way that you would normally do when lifting loads. Do not slow down this lifting operational cycle, do not tilt the load, do not lift to different heights or move vehicle.
- Page 13 Lift loaded forks just above the ground. After few seconds the calibrated load weight value of 2000 will be stored in the system memory. The LCD display will prompt you to lower “LOWER FORKS”. LCD Display CALIBRATION 1 LOWER FORKS LCD Display CALIBRATION 1 CONFIGURATED...
- Page 14 Supervisor Menu Instructions (Set Impacts, saving data to USB, other applicable functions) Low impacts High impacts Audible buzzer warning for low and high impacts Audible buzzer warning time from 1 to 60 seconds Continuous audible buzzer warning To enter into the Supervisor Menu, press F key and than number 9 key. Input password 521. Follow instructions shown on the LCD display LCD Display MENU...
-
Page 15: Bluetooth Mode
LCD Display ENTER HI IMPACT CONTINUOUS ? Y LCD Display ENTER HI IMPACT CONTINUOUS ? Y LCD Display IMPACT CONFIGURATED Lift Truck Operator Menu Instructions (Bluetooth, TARE set up, Parts count functions) The SkidWeigh Plus system allows lift truck operator to pair Bluetooth additional devices such as onboard printers or barcode scanners or set TARE, Parts count. - Page 16 Note: For the majority of the Bluetooth pairing applications use AUTO mode. Make sure that you follow pairing instructions for each Bluetooth device. LCD Display BLUETOOTH MODE AUTO _ LCD Display BLUETOOTH MODE INQUIRY LCD Display BLUETOOTH MODE MANUAL LCD Display SEARCHING _ _ _ _ _ _ _ Bluetooth pairing options are...
- Page 17 Operator Reference / Usage Guide - Turn ignition switch - Scan RFID card. “Enter key” ↵ applicable. Note: Input an operator ID# and press LCD Display ENTER ID NUMBER ID = _ LCD Display Aug 11, 2011 11:19:38 - Insert the forks into the pallet or under the product to be weighed. - Lower the forks to the ground.
-
Page 18: Please Wait
LCD Display Aug 11, 2011 PLEASE WAIT LCD will display “PLEASE WAIT” and after few seconds a load weight will be shown Example: Lifted load weight of 300 This load weight will be shown on LCD display until next time the forks are lowered to ground. Note: When vehicle in motion the LCD might show some random load weight. -
Page 19: Tare Adjustment
LCD Display TOTAL = 1200 After each new load weight shown on LCD display and pressing “Enter key” ↵ system will be updated showing the latest current load weight total, number of loads and total load weight of all loads. To reset current individual load weight or totalizing session press “P”... - Page 20 LCD Display TARE CONFIGURATED To reset or change TARE value press F key and than 0 key and set to 0 to reset current TARE value. To change to the new TARE value, input another TARE value and press “Enter key” ↵ . LCD Display Aug 11, 2011 TARE = 1250...
- Page 21 LCD Display TR = 500 Select TARE will be reset to zero. All load weights shown on LCD display will be showing actual load weight. All SkidWeigh products equipped with HID RFID card reader MUST be activated with valid operator access card in order to initiate system set up, calibration and enable vehicle normal usage by authorized operator.
- Page 22 Technology The RFID operator access HID card reader is integrated into digital indicator housing with SkidWeigh system proprietary software that allows self programming, deleting and management of authorized vehicles operators on the any of the Skidweigh products equipped with RFID card readers. There is no need for any additional programming devices! System application to operate on any material handling vehicle having electrical power supply from 12 to 55 VDC.
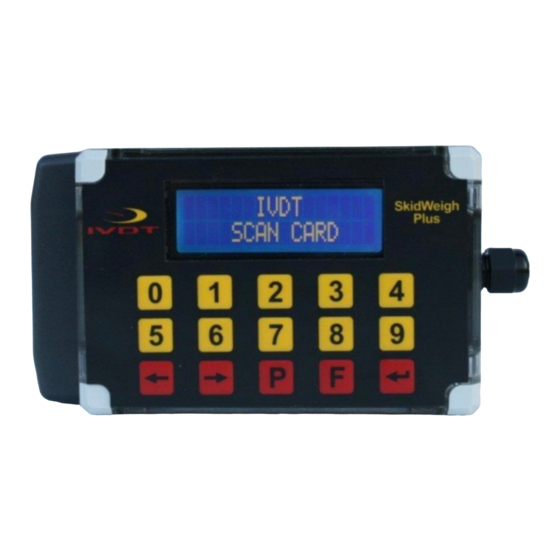
- Page 23 Starting point to delete operator(s) cards already on the system Turn ignition switch to on position The LCD display will indicate to “SCAN CARD” (as shown on the picture) Scan RFID MASTER CARD LCD display will show LCD Display SCAN CARDS <...
- Page 24 input. How to enable RFID reader With digital indicator showing date / time press F key and than input number 9. - LCD display will show PASSWORD =_ - Input < KEY TO SCROLL and follow instructions LCD Display RE-ACTIVATE RFID ENTER TO SELECT LCD Display RE-ACTIVATE RFID...
Need help?
Do you have a question about the ED3-RFID SkidWeigh Plus Series and is the answer not in the manual?
Questions and answers