
Related Manuals for Curtis CFB2


Summary of Contents for Curtis CFB2
- Page 1 USER GUIDE Twin Bowl Frozen Beverage Machine READ AND SAVE THESE INSTRUCTIONS NOTICE TO INSTALLER: Please leave this booklet with the machine.
-
Page 2: Table Of Contents
............................OI60 ..............................CI31 ..........................................................................................................................................EC13 ..............................Contact Information Wilbur Curtis Co., Inc. 6913 Acco Street | Montebello, CA 90640 US Phone: 323-837-2300 | Toll Free: 800-421-6150 Email: csrassistance@wilburcurtis.com | Web: www.wilburcurtis.com . - 4:00 . PT Email: techsupport@wilburcurtis.com... -
Page 3: Fs97
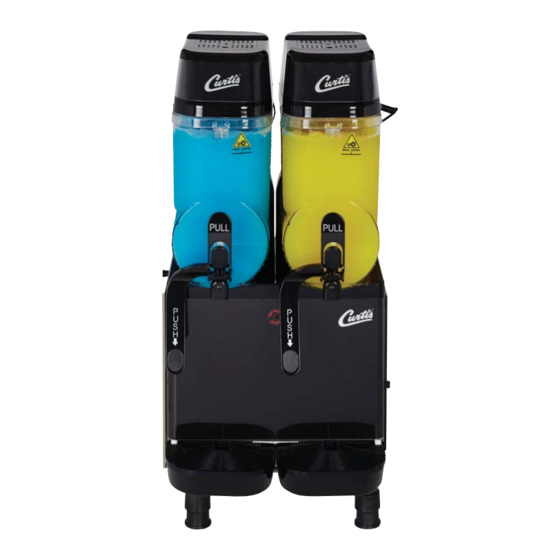
1.3 gal (5 lit.) CFBSA30 24.80” 15.75” 10.63” 11.75“ 10.69 cu ft 132.0 lbs 68ºF/20ºC 90ºF/30ºC each HIGH DESIGN LOW DESIGN MODEL # TYPE AMOUNT PRESSURE PRESSURE CFB2 CFB2A30 R404A 12.84 ounces 397 psig 175 psig CFB2A31 CFBSA30 CFB2, KEY FEATURES/SPECS/SYSTEM REQUIREMENTS 062718NC... -
Page 4: Is10
INSTRUCTIONS could result in personal injury or void the warranty. • This appliance is designed for commercial use. Any service other than cleaning and preventive maintenance should be performed by an authorized Wilbur Curtis service technician. • serviceable parts inside. - Page 5 IMPORTANT SAFEGUARDS IS10 CE Requirements • This appliance must be installed in locations where it can be overseen by trained personnel. • • This appliance is not suitable for outdoor use. • • • This appliance must not be cleaned by water jet. •...
-
Page 6: Ii41
INSTALLATION INSTRUCTIONS II41 WARNING: WARNING: Improper electrical connection may result in an electric shock hazard. This unit must be properly grounded. Do not install a damaged unit or a unit with a damaged power cord. EXCESSIVE WEIGHT WARNING: Due to weight, this unit requires a minimum of two people to lift or reposition. - Page 7 INSTALLATION INSTRUCTIONS II42 Installation Unpack the unit When unpacking the unit, keep the original packaging materials in the event the unit needs to be returned to the manufacturer. IMPORTANT: RMAs will not be accepted unless the unit is packaged in the original packaging material.
-
Page 8: Ii42
INSTALLATION INSTRUCTIONS II42 Attach Drip Trays and Handles (cont.) Base Locate the dispensing levers, packaged inside the bowls. Install them on the tap handles. While pulling outward on both sides of the base of the dispensing lever, insert the pins on the bottom of the handle into the base holes on the lever. - Page 9 INSTALLATION INSTRUCTIONS II42 Set the Timer Clock for Initial Operation (some models) NOTICE: Main power • Set the timer only with the main power switch in switch off the OFF (O) position. • Turn the timer wheel only by hand and only in the clockwise direction.
-
Page 10: Oi60
OPERATING INSTRUCTIONS OI60 WARNING - Do not use this unit with milk/dairy based mixes unless it is equipped with a temperature display. Do not leave milk/dairy based mixtures in the unit without the main power switch on and the refrigeration switch set to standby (||) or freeze (|). WARNING - the tap into a separate container before dispensing the serving for the customer. - Page 11 OPERATING INSTRUCTIONS OI60 Bowl Lights Push (|) on the light switch to turn on the integral lid lights. Adjusting Beverage Thickness Use the adjustment screws at the back of each mixing bowl to adjust beverage thickness. The recommended (factory adjustment hole as shown and turn to adjust. The indicator on the back will move to indicate the thickness level.
- Page 12 OPERATING INSTRUCTIONS OI60 Setting the Timer Clock (some models) NOTICE • Set the timer only with the main power switch in the OFF (O) position. Main power • Turn the timer wheel only by hand and only in the switch off clockwise direction.
- Page 13 CLEANING INSTRUCTIONS CI31 WARNING • Turn off the main power switch before disassembly. Wear protective glasses and gloves. • Never spray water on the unit to clean it. Do not use cleaning liquids, compounds or corrosives. These products promote corrosion and will damage the surfaces. USE OF THESE PRODUCTS WILL VOID THE WARRANTY.
- Page 14 Replace all worn or damaged seals with new ones. Replace the auger seals (Curtis PN WC-100196K) every 3 months, regardless of condition. NOTICE: Failure to replace worn seals may result in leaks. Clean the Mixing Bowl Parts 15 Soak the bottom part of the lids, removed in step 11, the tap parts and auger in the detergent solution and scrub with a soft cloth.
- Page 15 Bowl 24 Using food grade lubricant seal (Curtis PN WC-4916), lubricate the inside of the auger seal. 25 Reinstall the augers. Rotate each auger until it engages completely. 26 Lubricate the inner surface on each bowl seal with food grade lubricant.
- Page 16 Spring must be for attachment. Lubricate the red between mounts rubber seal on the back of the tap handle assembly with food grade lubricant (Curtis PN WC-4916). DO NOT Insert the seal into the tap hole on Mount push here the bottom of the bowl.
-
Page 17: Ci31
Use kit # WC-100201 (2 sets per kit). Use kit # WC-100202 (2 sets per kit). Also required: Curtis Part # WC-4916, food grade lubricant (sold separately) Empty the Bowls (Skip to step 3 if the bowls are already empty) Place a large empty container under each dispenser tap. - Page 18 Discard the seal bushings. Lubricate the inside of the new bushings with food grade lubricant (Curtis PN WC-4916). 10 Install the new bushings in place of the old ones removed in step 8. continued... DO NOT LUBRICATE...
- Page 19 CI31 Replace Seals and Reassemble (cont.) 11 Install new auger seals on each auger. 12 Using food grade lubricant (Curtis PN WC-4916), lubricate the inside of each auger seal. 13 Reinstall the augers. Rotate each auger until it engages completely.
- Page 20 Spring must be for attachment. Lubricate the red between mounts rubber seal on the back of the tap handle assembly with food grade lubricant (Curtis PN WC-4916). DO NOT Insert the seal into the tap hole on Mount push here the bottom of the bowl.
- Page 21 ROUGH-IN DRAWINGS RD97 CFB2 - Twin Bowl Frozen Beverage Machine 19.53 in [49.6 cm] 16.49 in [41.9 cm] 35.51 in [90.2 cm] 11.75 in [29.8 cm] 4.21 in [10.7 cm] 11.69 in 12.60 in [32.0 cm] [29.7 cm] CFB2, ROUGH-IN DRAWING...
- Page 22 ILLUSTRATED PARTS/RECOMMENDED PARTS IP175 CFB2 - Main Chassis - Exploded View 48 17 CFB2, ILLUSTRATED PARTS/RECOMMENDED PARTS 040419E...
- Page 23 ILLUSTRATED PARTS LIST IP175 CFB2 - Main Chassis - Parts List ITEM # PART # DESCRIPTION ITEM # PART # DESCRIPTION WC-100186 THERMAL PROTECTOR DRUM BUSHING, CFB WC-100195 (COMES WITH O-RINGS INSTALLED) WC-100057* MECHANICAL THERMOSTAT KIT, BUSHING AND LUBRICANT, WC-100195,...
- Page 24 ELECTRICAL SCHEMATICS ES135 CFB2 - Twin Bowl Without Digital Temperature Display tº tº Power Consumption: 115 Vac, 60 Hz., 12.4 A Description Description Nº Nº Left auger motor Main power switch Left thermostat Fuse Left micro regulation Compressor Left electrovalve...
- Page 25 ELECTRICAL SCHEMATICS ES135 CFB2 - Twin Bowl With Digital Temperature Display - built before 08/18 tº tº tº tº Power Consumption: 115 Vac, 60 Hz., 12.4 A Description Description Nº Nº Left thermostat Main power switch Fuse holder Left micro regulation...
- Page 26 ELECTRICAL SCHEMATICS ES135 CFB2 - Twin Bowl With Digital Temperature Display - built 08/18 and later Power Consumption: 115 Vac, 60 Hz., 12.4 A Description Description Nº Nº Left electrovalve Main power switch Right mixing switch Relay Right auger motor...
- Page 27 Make sure that the thickness setting is not set too low. See Adjusting Beverage Thickness. Check to see if the compressor reset switch inside the control panel is “popped out” (CFB2 and CFB3 without temperature display only). Push in to reset (see diagram below) and allow the sealed system Compressor Reset Switch to cool before restarting the unit.
- Page 28 TROUBLESHOOTING GUIDE TG42 High Pressure/Temperature Light On CFB2 and CFB3 only. Turn off the main power switch* and check the following: See Check for Proper Ventilation below. If the light still comes on during operation, turn off the main power switch and call for service.
-
Page 29: Ec13
ERROR CODES EC13 Models CFB2 and CFB3 with temperature display only. See list below to determine possible problem when an error code appears on the display. ERROR PROBLEM REMEDY CODE Temperature probe Call for service. for bowl 1 disconnected See “Check for Proper Ventilation” in TROUBLESHOOTING section. If ventilation is OK,... - Page 30 Return Merchandise Authorization (RMA): All returned equipment must be properly re-packaged in the original carton and received by Curtis within 45 days following the issuance of a RMA. NO UNITS OR PARTS WILL BE ACCEPTED WITHOUT A RETURN MERCHANDISE AUTHORIZATION (RMA).
Need help?
Do you have a question about the CFB2 and is the answer not in the manual?
Questions and answers