Table of Contents
Advertisement
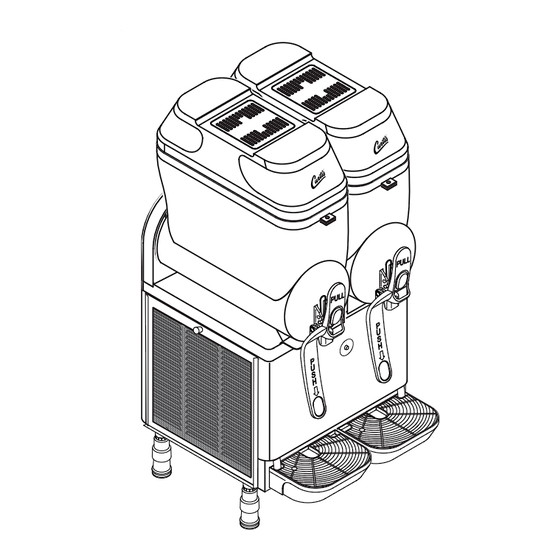
Model CFB2 shown
Models covered
• CFB1
• CFB2
• CFB3
WARNING:
Read and follow the
setup instructions
before attempting to use this
appliance. Failure to follow these
instructions can result in injury
and/or void the warranty.
EXCESSIVE WEIGHT
WARNING: Due
to weight, this unit
requires a minimum of two
people to lift or reposition.
IMPORTANT: Installer:
Observe all codes and
ordinances.
WILBUR CURTIS CO., INC.
Montebello, CA 90640
For the latest information go to
www.wilburcurtis.com
Phone: 800-421-6150
Service Manual – Frozen Beverage Dispenser
Important Safeguards/Symbols
Symbols:
WARNING/CAUTION – To advise about conditions that may result in property damage,
personal injury or death
IMPORTANT - Notes about proper operation
WARNING:
•
This equipment is designed for commercial use only.
To reduce the risk of fire or electric shock, DO NOT open service panels. There are no user
•
serviceable parts inside. Any servicing other than cleaning and routine maintenance should
be performed by an authorized Wilbur Curtis Co., Inc. service technician. Refrigeration
equipment must be serviced by a licensed, certified, refrigerant technician.
•
Do not install a damaged unit or a unit with a damaged power cord.
•
Clean this appliance according to the CLEANING section of this manual before using it for
the first time. Clean this appliance daily according to the CLEANING section.
•
Keep hands and other items away from moving parts during operation.
•
Dispose of refrigeration equipment and refrigerants in accordance with current local
environmental protection regulations and laws. This applies to an appliance that is being
replaced and to this unit, when it has reached the end of its service life. DO NOT dispose of
refrigeration equipment in a landfill or urban waste. Contact your local governing authorities
for information on disposal requirements.
SETUP INSTRUCTIONS
System Requirements
•
Electrical: See the WIRING DIAGRAMS in this
manual or visit www.wilburcurtis.com for your
model. The electrical outlet must be in a location
that allows the unit to be easily disconnected for
service or cleaning.
•
Operating Temperature: 68 to 90°F (20 to 32°C).
1. Select the location. The unit must be installed
indoors away from sources of moisture and heat.
The clearances shown are the minimum distances
from obstructions, between CFB units and other
equipment, required for proper operation. Do not
obstruct the ventilation grills on the back and sides.
Locate the unit on a secure, level surface. Install the
unit for easy removal if service is needed.
2. Unpack the unit. Keep the original packaging
materials in the event the unit needs to be returned
to the manufacturer.
IMPORTANT: RMAs will not be accepted unless the unit
is packaged in the original packaging material.
3. Locate the legs, packaged inside the bowls. Thread
them into the mounts on the bottom of the unit.
Hand tighten into place.
continued...
READ AND SAVE THESE INSTRUCTIONS
W
C
C
ilbur
urtis
o
., i
.
nC
4" min.*
(10 cm)
CFB
frozen
beverage
dispenser
60" min.
(150 cm)
*9" (23 cm) recommended
1
3
Page 1
Advertisement
Table of Contents

Related Manuals for Curtis CFB1


Summary of Contents for Curtis CFB1
- Page 1 To reduce the risk of fire or electric shock, DO NOT open service panels. There are no user • serviceable parts inside. Any servicing other than cleaning and routine maintenance should be performed by an authorized Wilbur Curtis Co., Inc. service technician. Refrigeration equipment must be serviced by a licensed, certified, refrigerant technician. •...
- Page 2 Wilbur Curtis Co., Inc. SETUP INSTRUCTIONS (CONT.) 4. Level the unit left to right and front to back by rotating the feet on the bottom of WARNING: Use the the legs. leveling legs to level the dispenser only. Do 5. Locate the drip trays, packaged inside the bowls. Position the drain hose in the not use them to adjust unit height.
-
Page 3: Timer Operation
Service Manual - Frozen Beverage Dispenser 11. Open the control panel door (on the right side) and make sure the main power switch is in the OFF (O) position. 12. Set the timer clock according to the IMPORTANT: The unit instructions below. - Page 4 Wilbur Curtis Co., Inc. OPERATING INSTRUCTIONS WARNING: • Keep body parts and other items clear of the inside of the mixing bowl when the main power switch is ON (|). Keep the mixing switch in the OFF (O) position whenever the mixing bowl lid is removed.
-
Page 5: Periodic Maintenance
Service Manual - Frozen Beverage Dispenser 6. Once the mixture is frozen (40 to 90 minutes), pull out on the top of the dispenser lever or push the bottom of the lever to dispense. CAUTION: If the tank is filled with a milk or dairy based mix, dispense a small amount of the product from the tap into a separate container before dispensing the serving for the customer. -
Page 6: Daily Cleaning
Wilbur Curtis Co., Inc. CLEANING WARNING: • To avoid personal injury, disconnect the power cord before cleaning. Wear protective glasses and gloves. • Never spray water on the unit to clean it. • Do not use cleaning liquids, compounds or powders containing chlorine (bleach), solvents, scouring flammable materials or corrosives. - Page 7 Service Manual - Frozen Beverage Dispenser Remove the Mixing Bowls and Lids 7. Remove the handle assembly from the bowl tap by pushing in on the top of the handle with CAUTION: your thumb while pulling up on the bottom with your index finger. To prevent damage, DO NOT immerse the top portion of 8.
- Page 8 Wilbur Curtis Co., Inc. Daily Cleaning (Cont.) Sanitizing 16. Fill a container with a sanitizer solution mixed in water (2% of sodium hypoclorite mixed in water). 17. Using a sponge dipped in sanitizing solution, sanitize the underside of the bottom portion of the lids. Allow 30 minutes for the solution to act.
-
Page 9: Weekly Cleaning
2. Lift the filter* up and out of the slot on the left side of the unit. 3. Clean the filter and the ventilation louvers on the outside of the unit with a vacuum or soft bristled brush. 4. Replace the filter. *Model CFB1 is not equipped with a filter. Page 9... -
Page 10: Troubleshooting
Wilbur Curtis Co., Inc. TROUBLESHOOTING Unit Does Not Turn ON Tap Leaks 1. Make sure that the circuit breaker for the electrical 1. Make sure that the (red) tap gasket is properly outlet is not tripped and is turned on. - Page 11 OK, call ture probe shorted for service. REFRIGERANT SPECIFICATIONS For reference only. Check the serial number label on the product for the refrigerant specifications for the unit being serviced. CFB1 CFB3 Refrigerant type R404A Refrigerant type R404A Amount 7.05 ounces...
- Page 12 Wilbur Curtis Co., Inc. ROUGH-IN DIAGRAMS CFB1 SIDE VIEW FRONT VIEW TOP VIEW 20.48” (52.0 cm) 35.51” (90.2 cm) 8.15” 11.75” (20.7 cm) (29.8 cm) 4.21” (10.7 cm) 8.82” 5.91” (15.0 cm) (22.4 cm) CFB2 SIDE VIEW FRONT VIEW TOP VIEW 19.53”...
-
Page 13: Side View
Service Manual - Frozen Beverage Dispenser ROUGH-IN DIAGRAMS CFB3 SIDE VIEW FRONT VIEW 35.51” (90.2 cm) 11.75” (29.8 cm) 4.21” (10.7 cm) 9.76” 10.71” 11.69” (24.8 cm) (27.2 cm) (29.7 cm) 11.30 (28.7 cm) TOP VIEW 19.57” (49.7 cm) 24.53” (62.3 cm) Page 13... -
Page 14: Wiring Diagrams
Wilbur Curtis Co., Inc. WIRING DIAGRAMS tº Power Consumption: 115 Vac, 60 Hz., 8.1 A WIRING DIAGRAM - MODEL CFB1 Description Description Nº Nº Main power switch Thermostat Auger motor Fan motor Fan motor Compressor Tank cover light Tank lights switch... - Page 15 Service Manual - Frozen Beverage Dispenser WIRING DIAGRAMS tº tº Power Consumption: 115 Vac, 60 Hz., 12.4 A WIRING DIAGRAM - MODEL CFB2 WITHOUT TEMPERATURE DISPLAY Description Description Nº Nº Main power switch Left auger motor Left thermostat Fuse Left micro regulation Compressor Fan motor Left electrovalve...
- Page 16 Wilbur Curtis Co., Inc. WIRING DIAGRAMS tº tº tº tº Power Consumption: 115 Vac, 60 Hz., 12.4 A WIRING DIAGRAM - MODEL CFB2 WITH TEMPERATURE DISPLAY Description Description Nº Nº Main power switch Left thermostat Fuse holder Left micro regulation...
- Page 17 Service Manual - Frozen Beverage Dispenser WIRING DIAGRAMS tº tº tº Power Consumption: 115 Vac, 60 Hz., 14.8 A WIRING DIAGRAM - MODEL CFB3 WITHOUT TEMPERATURE DISPLAY Description Description Nº Nº Middle mixing switch Main power switch Middle refrigeration switch Fan motor 1 Middle auger motor Compressor...
- Page 18 Wilbur Curtis Co., Inc. WIRING DIAGRAMS tº tº tº tº tº tº Power Consumption: 115 Vac, 60 Hz., 14.8 A WIRING DIAGRAM - MODEL CFB3 WITH TEMPERATURE DISPLAY Description Description Nº Nº Middle mixing switch Main power switch Middle refrigeration switch...
- Page 19 Service Manual - Frozen Beverage Dispenser EXPLODED VIEW - CFB1 Page 19...
- Page 20 Wilbur Curtis Co., Inc. EXPLODED VIEW - CFB2 Page 20...
- Page 21 Service Manual - Frozen Beverage Dispenser EXPLODED VIEW - CFB3 38 44 Page 21...
-
Page 22: Parts List
WC-100171 POWER CABLE (CFB3) WC-100031 TANK JOINT (CFB1, CFB2, CFB3) WC-100106 WATERTIGHT 2 M6+OR EVAP GHZ-GB (COMES WITH O-RINGS INSTALLED) (CFB1, CFB2, CFB3) WC-100074 FAN MOTOR 16W 115/60 (CFB2, CFB3) WC-100034 WATERTIGHT SHAFT JOINT SIL. TRANSLU. (SEAL) (CFB1, CFB2, CFB3) - Page 23 WC-100043 REGULATION SPRING (CFB1, CFB2, CFB3) WC-100044 TRANSMISSION SHAFT SET (CFB1, CFB2, CFB3) WC-100136 EVAPORATOR SUPPORT SET PZ-1+ PZ-2 - BLACK (CFB1) WC-100045 EVAPORATOR SUPPORT SET PZ-1+ PZ-2 - BLACK (CFB2, CFB3) WC-100046 MINIRRUPTOR (CONTROL SWITCH) (CFB1, CFB2, CFB3) WC-100141...
-
Page 24: Product Warranty
All returned equipment must be properly re-packaged in the original carton and received by Curtis within 45 days following the issuance of a RMA. No units will be accepted if they are damaged in transit due to improper packaging.
Need help?
Do you have a question about the CFB1 and is the answer not in the manual?
Questions and answers