
Related Manuals for Tornatech GFX


Summary of Contents for Tornatech GFX
- Page 1 INSTALLATION AND MAINTENANCE MANUAL FOR ELECTRIC FIRE PUMP CONTROLLERS MODEL GFX...
- Page 2 Table of Contents 1. Introduction 2. Installation 3. Main Features 4. Home 5. Alarms 6. Configuration 7. History 8. Technical Documents GFX-Manual-EN v1.3.0.0...
-
Page 3: Table Of Contents
Table of Contents Introduction ..................................5 Types of Electric Fire Pump Controllers ........................5 Methods of Starting/Stopping ............................. 6 Installation ..................................8 Location ..................................8 Mounting ..................................8 Storage ..................................8 Wiring and Connections ............................. 8 Water Connections ..............................8 Electrical Wiring ................................. - Page 4 Interlock Lockout ..............................34 History ................................... 36 History (Membrane button) ............................36 Details of the History Page ............................37 Events Page ................................37 Download to USB Device ............................37 The Statistics ................................39 All Time Statistics ..............................39 Pressure Curves ..............................39 Graphical Mode ................................
-
Page 5: Introduction
Introduction Electric fire pump controllers are designed to start an electric motor driven fire pump. It can either start the fire pump manually through the local start pushbutton or automatically through the sensing of a pressure drop in the sprinkler system. The fire pump controller is supplied with a pressure transducer. The fire pump can be stopped manually with the local stop pushbutton or automatically after the expiration of a field programmable timer. -
Page 6: Methods Of Starting/Stopping
The power source does not « see » any open circuit during the transition from wye to delta. During the transition from Wye to Delta, a resistor bank is connected in the starting circuit and allows to keep the motor coils energized. - Page 7 AUTOMATIC STOP Automatic stop is possible only after an automatic start and this function has been activated. When this function is enabled, the motor is automatically stopped 10 minutes after the restoration of the pressure (above the cut-out threshold) given that no other run cause is present. EMERGENCY STOP The emergency stop is always possible in any starting condition and is done by using the main disconnecting means located on the door.
-
Page 8: Installation
Installation The GFx electric fire pump controller is intended to be installed in accordance with the Standard of the National Fire Protection Association for the Installation of Centrifugal Fire Pumps, NFPA n°20-2013 (Centrifugal Fire Pumps) and in USA National Electrical Code NFPA 70... -
Page 9: Electrical Wiring
Electrical Wiring The electrical wiring between the power source and the fire pump controller shall meet the latest edition of NFPA 20, NFPA 70 National Electrical Code Article 695 or C22.1 Canadian Electrical Code, Section 32-200 or other local codes. Electrical wiring shall be typically sized to carry at least 125% of the full load current (FLC or FLA) of the fire pump motor. -
Page 10: Terminal Strip Descriptions
Terminal Strip Descriptions Alarm output terminals (SPDT Relay, 11:Common, 12:Normally Closed, 14:Normally Open): A: Motor Run B: Power Available (Failsafe relay) C: Phase Reversal D: Pump Room Alarm E: Motor Trouble F: Factory Reserved Field input terminal (Dry Contact Only: Voltage Free): G: Remote Manual Start (NO) H: Lockout (NO) I: Remote Automatic Start (NC) -
Page 11: Quick Start-Up Guide
Quick Start-Up Guide The rating label is the most important label. It must be read carefully to ensure the compatibility between the controller and the installation. Verify that the controller is installed securely on the wall, or optionally on the mounting stand. Make sure to drill holes for the motor and power connections and run the cables inside the panel, all in accordance with the specifications in order to minimize interference with other equipment. - Page 12 Verify and/or install the proper water connections for the water input and the drain. They must be securely installed and tightened. Refer to the silkscreen markings on the plastic cover. Connect the input power and the motor on their respective terminals. Secure with the appropriate torque as indicated on the torque label and verify all connections.
- Page 13 The "First Setup" page replaces the Homepage until the "First Setup" is done. Proceed to the setup page and press the lock to enter your authorization code. Select the controller pressure units, cut-in and cut-out. Verify that all other parameters on the setup page are correct.
- Page 14 When satisfied with the controller settings, press the “Home” button on the membrane, then acknowledge the changes by pressing the "Done" button. If the "Done" button is unavailable, ensure that a sufficient authorization code has been entered and that at least all three voltages are valid. Proceed with the download step to save the report.
- Page 15 Once the configuration is done, click on the “Home” membrane button. The “First Setup” page will be displayed The “First Start up” is now completed. The controller is fully installed and configured.
-
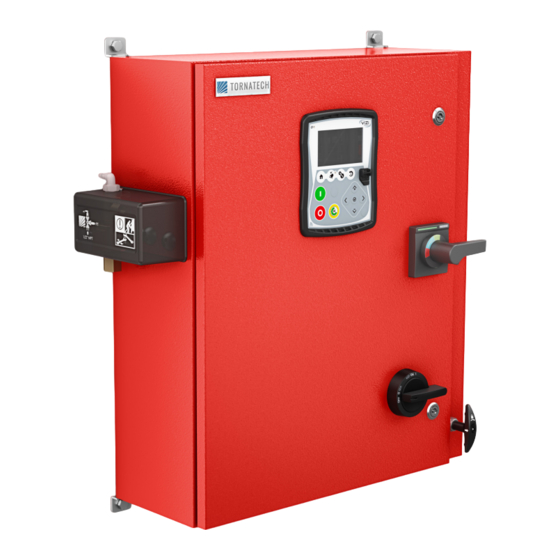
Page 16: Main Features
Main Features The ViZiTouch A: Power Available LED: Indicates that power is available. B: Touch Screen: 4.3 inches color touch screen LCD. C: Alarm LED: Indicates if an alarm is active. D: Front USB Connector: USB Device connector used for files download, software update, service reports. E: Home button: Used to navigate to the Home page. -
Page 17: First Setup
Warning After 2 years of service, the Vizitouch battery may become less efficient and could lose the time after a shutdown. First Setup The First Setup must be done prior to using the controller. Completing the First Setup is the only way to access the homepage and enable the automatic mode of the controller. -
Page 18: Home
Home Home (Membrane button) Home The home page displays all controller statuses and important values of the controller. All voltages, currents, pressure, motor state and status, as well as all timers and motor starting sequences. The entire background will become red if an alarm becomes active. This feature will help the user identify a problem even from a significant distance away from the controller. - Page 19 Alarm indicator: Exclamation mark in a red triangle icon. As soon as at least one alarm is ACTIVE or OCCURRED, the alarm indicator will be flashing. H: The motor configuration symbol shows how the motor is wired to the contactor(s). This symbol is used to show if the motor is in a starting configuration (Wye wiring, for example) or in a permanent running configuration (i.e.
-
Page 20: Screen Saver
Screen Saver After 5 minutes of inactivity on the ViZiTouch, the screen will dim it's brightness to 25%. After 10 minutes of inactivity on the ViziTouch, the “Black Screen” screen saver will activate. Its goal is to expand the lifetime of the LCD screen. -
Page 21: Alarms
Alarms Alarms (Membrane button) Alarms Displays the list of currently active and occurred alarms. An alarm is called ACTIVE when its triggering condition is still valid. An alarm is called OCCURRED when its triggering condition has been active, but is no longer true. Alarms representing serious concerns are colored RED. - Page 22 - Lock Rotor Current: Activates when a lock rotor condition has been detected on the normal power. Note that the motor will not be permitted to start on the normal power as long as this alarm has not been reset from the alarms page.
- Page 23 - IO Electric Communication Error: Activates if no communication with the electric IO card could be established for 15 seconds. This alarm is critical and triggers the bell. If this alarm persists for more than 1 minute, the controller will reboot to try to fix the problem. - IO Expansion Communication Error: Activates if no communication with the Expansion IO card could be established for 15 seconds.
-
Page 24: Configuration
Configuration Config (Membrane button) Config Setup all basic configuration parameters. The main configuration page provides a quick means of changing the most common settings. The padlock icon indicates the current authorization level. A locked padlock indicates that only basic settings can be changed. Press on the padlock to enter an authorization code to unlock additional settings. -
Page 25: Numpad Page
Inside the lower box, the Automatic Shutdown may be activated and the duration of the “Run Period Timer” is shown. To edit the “Run Period Timer”, refer to the “Timers” page in the advanced configuration pages. NumPad Page The NumPad is activated every time the user clicks on a white square box representing a number that can be set. On top of the NumPad, the current parameter is shown. -
Page 26: User Login Page / Keypad Page
The Date and Time can be configured by selecting the current month and year by pressing the arrow buttons on each side of the “Month-Year” display and selecting the day of the month by selecting the actual day. The time is set by pressing the two square boxes under the clock;... -
Page 27: Advanced Configuration Page
character and the "CA" button clears the whole text field. Simply click the "OK" button once the value is set. This type of text field is mostly used to generate a digital text indication for a custom alarm input. Advanced Configuration Page Config >... -
Page 28: Voltage Calibration
Access level 1: - Motor starting and stopping: The sequential start timer set-point, in seconds, will delay an automatic motor starting. The run period timer, in minutes, will delay the stopping of the motor when the automatic run cause of an automatic stop configured controller has returned to normal and that no other run causes are present. -
Page 29: Inputs/Outputs Expansion Board 1-2-3-4
Inputs/Outputs Expansion board 1-2-3-4 Config > Advanced > Expansion Board 1-2-3-4 This page allows the configuration of both programmable inputs and outputs available on an IO Expansion board. Two buttons located far right navigates between the input and output section of the page. Input: The input page has four elements: The NO/NC setting, the "Digital Text Indication"... -
Page 30: Update Program Page
The factory settings are always pre-configured at the factory and set the main parameters of the controller. Most of the settings found on this page can only be changed by an authorized Tornatech employee and is protected by a level 8 password. -
Page 31: Reset To Factory Settings Page
that must be used with care and only if the factory was contacted first. See the “Reset to Factory Settings” help for more details. Voltage: Nominal voltage of the controller FLC: Full load current rating of the motor. LRC: Lock rotor current rating of the motor. Unless specified, this value is automatically set to six times the FLC. Phase: Input power number of phases. -
Page 32: The Sensors Pages
“Factory Reset”. Its purpose is to allow an update of configuration variables that can only be updated by Tornatech Inc. All other square buttons on this page are “Level 9” security and can only be used by certified Tornatech representatives, unless otherwise specified. The first square in the upper left corner performs the “Select all”... - Page 33 Flow: The “Flow” sensor shares the same analog input (AI3) as the spare temperature sensor. Only one of them can be installed at all time. Prior to installing one of them, the other one must be uninstalled by visiting its own sensor page.
-
Page 34: Interlock Lockout
7. Press the right rectangle text field and enter the value read on the external calibrated gauge. 8. Press the calculate button to finish the calibration. If the settings are incorrect, the calculate button will remain red and if correct, the button will turn blue. The resulting measured value is shown in the lower right corner of the “Sensor”... - Page 35 These pages allow to configure the Lockout input and the interlock output parameters. To be active, those options need to be assigned to an Input or an Output on the I/O board. Lockout is an Input that disables the motor from starting. - Enable in emergency: If checked, this option will prevent the electronic assistance on an Emergency start.
-
Page 36: History
History History (Membrane button) History Select a specific page within the History section. Everything related to the statistics, events, pressure, power logs and the download to USB is available within the History page. -Events: This button leads to the “Events” page, which displays the most recent 500 events. Each event log contains the date and time of occurrence as well as a brief description of the event. -
Page 37: Details Of The History Page
Details of the History Page Events Page History > Events Log It shows the last 500 events which occurred in chronological order. The first column is the date, the second one is the time of occurrence and the third column is the “Event message”. To obtain a log that is older than 500 events, visit the “Download to USB Device”... - Page 38 To download information from the ViZiTouch to a USB Device a user with at least a "level 1" password must be logged in. The first square beside the title is a "Select All" button. Pressing it will select all categories except "Archive copied files", which serves a separate purpose.
-
Page 39: The Statistics
The Statistics All Time Statistics History > All Time Statistics All statistics shown here are calculated since the controller's first start-up was done. All dates are in the YYYY.MM.DD format and all time references are in the HH:MM:SS format. -First Power Up: Date and time of when the controller was first powered up. -First Start Up: Date and time of when the controller's first start-up was completed. -
Page 40: Textual Mode
an accurate description of the different curves (Discharge pressure, Suction pressure when available, Cut-In and Cut-Out) with their respective colors. Between the “0” pressure value and the horizontal axis, a short series of narrow horizontal zones are displayed. They are described in the “Indicators” section of the legend. These zones indicate when the motor was running, when a jockey pump was running and when the voltage reading is taken from the alternate side by shading small sections of the horizontal zone whenever the condition is occurring. -
Page 41: Technical Documents
Technical Documents Patents Country Title Grant No Mechanical activator for contactor 2741881 Mechanical activator for contactor US8399788B2 Mechanical activator for electrical contactor 165512 Mechanical activator for electrical contactor 165514 Mechanical activator for electrical contactor D803794 Mechanical activator for electrical contactor Patent pending 002955393- Mechanical activator for electrical contactor... -
Page 42: Pre-Field Acceptance Test
Pre-Field Acceptance Test TORNATECH MODEL GFX ELECTRIC FIRE PUMP CONTROLLER PRE- FIELD ACCEPTANCE TEST CHECK LIST Note: This document should be an official indication of whether or not the installation and general condition of the equipment is adequate for a field acceptance test. This document should also aid the individual responsible for executing the field acceptance test to decide whether or not to carry out the field acceptance test of the equipment. - Page 43 Tornatech Controller S/N: _________________________________________ Installation address: _________________________________________ _________________________________________ _________________________________________ Check list completed? _____________Yes _____________ No Check list completed by: __________________________________________ Company: __________________________________________ Date: __________________________________________ Witnessed By: __________________________________________ Comments: ___________________________________________________________________________ ___________________________________________________________________________ ___________________________________________________________________________ ___________________________________________________________________________ ___________________________________________________________________________ ___________________________________________________________________________...
-
Page 44: Field Acceptance Test Report
Field Acceptance Test Report TORNATECH MODEL HFX ELECTRIC FIRE PUMP CONTROLLER FIELD ACCEPTANCE TEST REPORT Complete this first section if it was not completed during the Pre-Field Acceptance test Note: A manual or automatic start must only be executed if the motor and the pump have been cleared to be started by their respective official service technicians. - Page 45 Power Available connected? _____Yes _____ No Phase Reversal connected? _____Yes _____ No Other contacts supplied and connected? _____Yes _____ No Tornatech Controller S/N: _________________________________________ Installation address: _________________________________________ _________________________________________ Field Acceptance Test completed? _____Yes _____ No Field Acceptance completed by: __________________________________________...
Need help?
Do you have a question about the GFX and is the answer not in the manual?
Questions and answers