Page 1
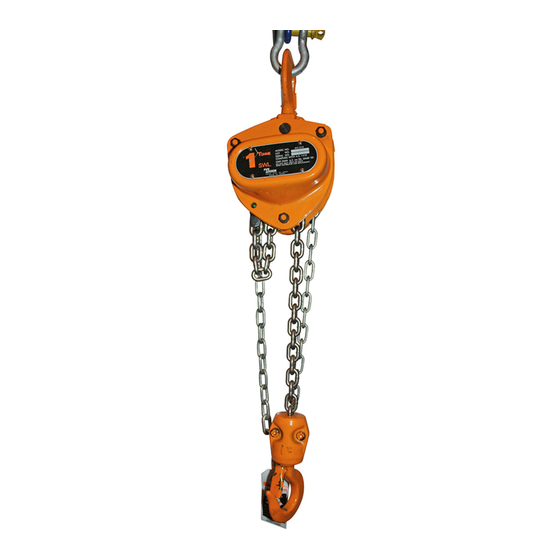
BULLETIN No. M3-9409-10MCE Original Instruction OWNER'S (OPERATOR'S) MANUAL AND SAFETY INSTRUCTIONS FOR KITO MANUAL CHAIN HOIST SERIES ALWAYS SAVE THIS BOOK FOR FUTURE REFERENCE. Issued January 2010. Revised August,2012(revision 03)
Danger exists when heavy loads are transported, particularly when the equipment is not being used properly or is poorly maintained. Because accidents and serious injury could result, special safety precautions apply to the operation, maintenance and inspection of the KITO manual chain hoist M3 series. — 1 —...
Check all applicable safety codes, regulations and other applicable laws for further information about the safe use of your hoist. More detailed safety information is contained in the following pages. For additional information, please contact KITO Corporation or your authorized KITO OVER LOAD dealer.
Page 5
NEVER use a hoist without a hoist name plate. NEVER use modified or deformed hooks. NEVER use non-authentic KITO chains on the hoist. 4.2.2 While operation ALWAYS make sure that the load is properly seated in the hook. ALWAYS tighten the slack out of the chain and sling when starting a lift to prevent a sudden loading.
Page 6
4.2.4 Maintenance ALWAYS let the qualified service personnel inspect the hoist periodically (Refer to 6.3). NEVER splice, add and weld a load chain for extension. 4.2.5 Others ALWAYS consult the manufacturer or your dealer if you plan to use a hoist in an excessively corrosive environment (saltwater, sea air and/or acid, explosive environment or other corrosive compounds, etc.).
5. MAIN SPECIFICATIONS 7.5 t 3 to 5 t 0.5 to 2.5 t 10 t 20 t — 5 —...
Page 8
Specifications Weight for Chain pull Hand chain Load chain Load additional Std. lift to lift Test load Code length for 1m weight dia. (mm) x chain one meter of full load lifting* (m) (kg) pitch (mm) fall (lines) lift (kg) CB005 0.75 5.0 x 15.1...
(4) There are risks of overheating of the breaking system during prolonged lowering of loads. If you are considering of the use under such condition, consult KITO. Remark: The clicking sound of the pawl when a load is being raised indicates normal operation.
Any attempt to do so will void the warranty. Contact your closest KITO dealer, if service is required. The overload limiter device has been developed to avoid overloading. When an applied load exceeds the preset value, the hand chain wheel rotates idly.
7. INSPECTION 7.1 Outline There are two types of inspection, the daily inspection performed by the operator before using the hoist, and the more thorough periodic inspection performed by qualified service personnel who have the authority to remove the hoist from service. 7.2 Daily inspection Before each work shift, check the following points;...
7.3 Periodic inspection Periodic inspection shall be made at the interval shown below and should follow the given procedures. NORMAL (Normal use): Semiannual inspection HEAVY (Frequent use): Quarterly inspection SEVERE (Excessively frequent use): Monthly inspection Figures in parentheses are Fig. No. in “PARTS LIST”. (Refer to page 27 to 32.) Item Inspection method Discard limit/criteria...
Page 13
Item Inspection method Discard limit/criteria Remedy 5. Top/bottom fixture Check visually. No slack or missing rivets, nuts or bolts. Replace the hook. damage [Fittings of 1, 6, 55, 6. Idle sheave rotation Hold the load chain with Smooth rotation. Overhaul. [57, 81] both hands and turn the idle sheave by moving the chain...
Page 14
Item Inspection method Discard limit/criteria Remedy Function 1. Lifting and lowering Lift and lower a light No abnormal difficulty in lifting or Overhaul and service. load. lowering. 2. Brake Lift and lower a light Confirm that none of the problems listed Overhaul and service.
Page 15
Item Inspection method Discard limit / criteria Remedy 4. Flatness of friction Check clearance with Clearance shall be uniform. Replace the part. plate [37] straight gauge. Internal part shall not be thicker than external part. Friction plate (37) Internal (Discard condition) External 5.
Page 16
Item Inspection method Discard limit/criteria Remedy 3. Wear and deformation Check visually. No large wear or no deformation on the Replace the part. of hand wheel [40] surface of hand chain pocket Check visually. Turn and check if it touches the cover. Replace the part.
(3) Only allow qualified service personnel to perform maintenance. (4) After performing any maintenance on the hoist, ALWAYS test to WLL before returning to service. (5) When replacing a part, be sure to use the genuine part for “KITO chain hoist model M3CB”. CAUTION ALWAYS indicate “CHECKING”...
ALWAYS use machine oil equivalent to ISO VG46 or 68. Note: KITO has a corrosion-resistant chain as an option. For information on KITO’s regular and corrosion-resistant chain, please ask KITO or authorized KITO dealer. 8.2 Overhaul, assembly and adjustment 8.2.1 Overhaul Figures in parentheses are Fig.
Page 19
Overhaul procedures Remarks 6. Remove two friction plates [37], the ratchet disc [38] and the bushing [39] from the friction disc [36]. 7. Unscrew the friction disk [36] from the pinion [17] by turning counterclockwise holding the end of the pinion with fingers. 8.
Page 20
8.2.2 Assembly and adjustment Assembly procedures Remarks 1. Apply grease to the rollers of the roller bearing [18] and insert the pinion The arrow* direction on the outer side of the [17] (from the side of the brake screw) into the roller bearing and insert roller bearing shall be faced to pinion gear side.
Page 21
Assembly procedures Remarks 5. Grease the balls of the ball bearing [16]. As for the ball bearing of the load sheave, make Insert it with the snap ring side down to the shaft of the load sheave [14]. sure that the snap ring is placed on the side of the load sheave where the load chain reeves.
Page 22
Assembly procedures Remarks 9. Grease the balls of the ball bearing [28] and insert it with the snap ring down into the end of the pinion [17] shaft. 10. Join the gear case [29] to the side plate B [13] and fix them with the three spring washers [32] and nuts [31].
Page 23
Assembly procedures Remarks 13. Reeve the load chain [47] turning the pinion [17] shaft clockwise through Put the welded part of the standing chain link the space between the left (bottom hook side) guide roller [20] and the load outward and reeve it through the load sheave. sheave [14].
Page 24
Assembly procedures Remarks 14. <For 7.5t and smaller types> Pull the end of the load chain [47] out between the right guide roller [20] and Make sure the load chain is not twisted and the the load sheave [14] (no load side) and insert it to the anchorage [22]. Insert split pin in the stopper pin is bent thoroughly.
Page 25
Assembly procedures Remarks 15. Apply machine oil to the pawl pin (in side plate A [11]) and join the pawl Mark sure the pawl spring is touching the pawl spring A, B [33] and the pawl [34] respectively to it. Fix them with a snap and the snap ring is completely set at the ring [35].
Page 26
Assembly Procedures Remarks 20. Put the hand chain [48] around the hand wheel [40]. Hand Wheel [40] Hand Chain [48] 21. Join the wheel cover [44] to the side plate A [11] and fix them with the spring washers [45] and the nuts [46]. 22.
9. TROUBLESHOOTING Situation Cause Explanation Remedy The pawl makes the Worn friction plates When used at high frequency without Disassemble and proper clicking sound performing maintenance regularly, the replace the friction but fails to lift the friction plates will wear down. This will plates and bushing.
KITO’s Products or for loss of operating time. (6) This warranty shall not apply to KITO’s products which have been fitted with or repaired with parts, components or items not supplied or approved by “KITO” or which have been modified or altered.
11. PARTS LIST When ordering replacement parts, please specify WLL, Fig. No., part No., part name and quantity. — 27 —...
Page 30
Additional parts for 3t and larger types 3t・5t 71/2 to 15t * The Chain pin of 10t model is located on top yoke to connect the Load chain. — 28 —...
Page 31
WLL (t) Fig. Part No. Part name hoist 1001 Top hook set C1FA005-1001 C1FA010-1001 C2FA015-1001 ———————— C3BA0200-1001 1071 Hook latch assembly C3BA005-1071 C1FA005-1071 C1FA010-1071 ———————— C1FA015-1071 Suspender for TSP005 T5PC005-9004 —————————————————————————————————— Suspender for TSG010 T5GC010-9004 ———————————————————————— Suspender ———————————————— T5GC020-9004 ———————— T5GC020-9004 Top pin C3BA005-9163...
Page 32
WLL (t) Fig. Part No. Part name hoist 1001 Top hook set C3BA025-1001 ―――――――――――――――――――――――――――――――――――――――――― 1071 Hook latch assembly C1FA020-1071 ―――――――――――――――――――――――――――――――――――――――――― Suspender for TSP005 ――――――――――――――――――――――――――――――――――――――――――――――――――― Suspender for TSG010 ――――――――――――――――――――――――――――――――――――――――――――――――――― Suspender T5GC025-9004 ―――――――――――――――――――――――――――――――――――――――――― Top pin C3BA025-9163 Split pin J1PW01-030025 1021 Bottom hook set C3BA025-1021 ――――――――――――――――――――――――――――――――――――――――――...
Page 33
WLL (t) No. per Fig. No. Part No. Part name hoist 3(D) 1001 Top hook set C3BA030-1001 C3BA050-1001 C3BA075-1001 C3BA100-1001 C3BA150-1001 C3BA200-1001 Top hook C3BA150-9001 C3BA200-9001 ―――――――――――――――――――――――――――――――――――― 2001 Top hook assembly C3BA100-2001 ―――――――――――――――― ―――――――――――――――――― 1071 Hook latch assembly C1FA020-1071 C1FA030-1071 P1VS200-10712 C2BA150-10711 C3BA200-1071...
Page 34
ASSEMBLY FOR OVERLOAD LIMITER ASSEMBLY FOR OVERLORD LIMITER WLL (t) Fig. No. Pat No. Part name hoist 1111 OLL Kit C3YA005-1111 C3YA010-1111 C3YA015-1111 C3YA020-1111 C3YA025-1111 Pinion C3YA005-9111 C3YA010-9111 C3YA015-9111 C3YA020-9111 C3YA025-9111 Note: When ordering replacement, part, use the symbol M3B in place of M3 for 2.5t, 5t and larger types, because there are no interchangeability.
Increased quality, grade V, certified by Fachausschuss Metall und Oberflächenbehandlung EN 13157:2004+A1:2009 Hand powered lifting equipment, except for the requirement of “5.1.6 Operating effort” The person authorized to compile the technical file Udo Kleinevoß Technical manager Kito Europe GmbH. 40549 Düsseldorf — 33 —...
Page 36
URL. http://www.kito.co.jp KITO Europe GmbH Heerdter Lohweg 93, D-40549 Düsseldorf, Germany TEL: +49-(0)211-528009-00 FAX: +49-(0)211-528009-59 E-mail: info@kito-europe.eu URL: http://www.kito.net/ KITO corporation Tokyo Head office: SHINJUKU NS Building 9F, 2-4-1, Nishi-Shinjuku, Shinjuku-ku, Tokyo 163-0809, Japan URL: http://www.kito.com/ Head office & Factory:...
Need help?
Do you have a question about the M3 Series and is the answer not in the manual?
Questions and answers