Advertisement
Quick Links
Advertisement

Related Manuals for Duratuf MK4B


Summary of Contents for Duratuf MK4B
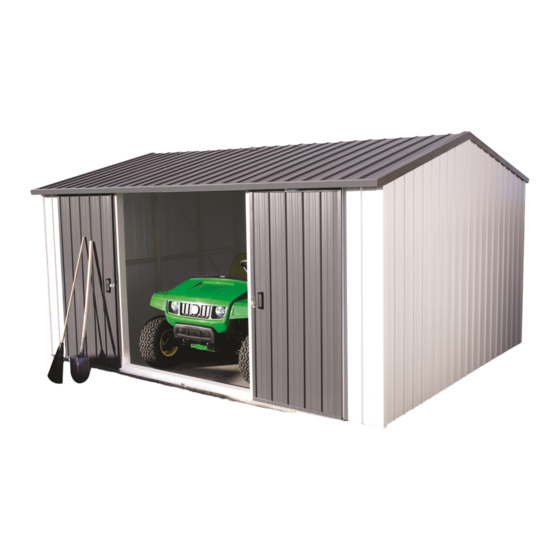
- Page 1 Quality – Built In ASSEMBLY INSTRUCTIONS MK4B BASE SIZE 4210mm x 3380mm...
- Page 2 ASSEMBLY INSTRUCTIONS Tools Required: Drill Drill Bit 3.5mm Drill Bit 6mm (for clear roof panel only) Riveter Hammer Nail Punch Tape Measure Ladder or Saw stool Spanners x 2 String Line ...
- Page 3 2.280m Gable End Wall Sheets 1.890m Wall Sheets 1.890m MK4 1/2 Wall Sheets Door - Standard Security Instruction Booklet 0.260m Jack Studs - 140 x 45mm 0.200m Jack Studs - 60 x 45mm Hardware Pack Centre Door Stop Touch-up Paint & Brush Roof Sheets 3.700m Strip Bracing...
- Page 4 1900 1900 3380...
- Page 5 MK4B TIMBER FRAME JACK STUDS Note: For sheds with the Raised Floor Modification option the studs will be 1.780m long to allow the Wall Sheets to pro- trude 20mm below the Bottom Plate. Refer to Raised Floor Modification section (Page 15).
- Page 6 MK4B TIMBER FRAME Step 4: Stand up Back Wall frame and one End frame and nail together, using two 75mm nails per join, top and bottom. Stand remaining Frames up and nail together. Nail in remaining .765m Nogs in End Walls.
-
Page 7: Terms Explanation
MK4B WALL CLADDING TO AVIOD CORROSION: Where at all possible try not to trap metal filings between two sheets. Remove all metal filings before riveting. Carbon in pencils reacts with the Zinc/Aluminium coating on steel. Use ink to mark steel. - Page 8 MK4B WALL CLADDING Step 1: Front Wall: Start at the left hand side. Posi- tion the Wall Sheet with the LIP on the left hand side. Ensuring the LIP is flush with side of the Stud and the top of the Top Plate, tack in place.
- Page 9 MK4B LOUVRE WINDOW (Optional) 588mm Step 1: Lay out the two window studs (883mm) and Step 2: On the inside of the shed, position studs Nog (634mm) on a flat surface. Position and Nog centrally on window opening. Nog and nail in place using 2x 75mm nails Make sure the studs are parallel and nail at each end.
- Page 10 (G100) with three rivets to each side of the Window Frame to hold glass in place. Pre- drilling Glazing Beads is recommended. MK4B DOOR JAMB & CORNER FLASHINGS Step1: Fit Door Jamb Flashing (A104) in be- Step2: Measure and cut Doorstep Flashing (A106) tween Top and Bottom Plates and hard to fit in between Door Jambs.
- Page 11 MK4B DOOR JAMB & CORNER FLASHINGS Step 3: Fit Corner Flashing (101) over corner Ribs with the top flush with the top of the Top Plate. Rivet in place with six rivets, three each side. Repeat with other three Corner Flashings.
- Page 12 MK4B CLEAR ROOF PANEL (Optional) Step 1: Leave a gap where the Clear Panel is to be fitted. Position the next Roof Sheet. Ensure it overlaps correctly, then rivet together, one rivet in the centre and one approximately 600 mm down from the centre on both sides. Rit re- maining Roof Sheets, overlapping and riveting as you go.
- Page 13 MK4B DOORS Step 1: Top Door Tracks: Mark the centre of the doorway on Step 2: Position right hand Door Track (D107) on front the Overdoor Flashing. Position Centre Door Stop on wall up against underside of Roof, with left hand the front face of the Overdoor Flashing and up against end hard against the Centre Door Stop.
- Page 14 MK4B BARGE & SPOUTING Step 1: Attach left hand and right hand barges (C102 & Step 2: Centralise Barge Flashing on gable end D102) together with three rivets at top overlap. Posi- and rivet in place, one rivet into every tion Barge Flashings on gable ends.
- Page 15 MK4B HASP & STAPLE Using seven rivets, attach hasp to Left Hand Door and the staple to the Right Hand Door as shown. RAISED FLOOR MODIFICATION For sheds being placed on a purpose built floor, (concrete, cobbles, ply etc.), the Wall Sheets will pro- trude 20mm below the Base Plate.
-
Page 16: Warranty Registration
DURATUF PREMIUM SHED WARRANTY GUARANTEE TO CUSTOMER Congratulations on purchasing a Duratuf Storage Shed. With proper care and attention, this product will last many years. For your benefit PLEASE READ THE FOLLOWING INFORMATION CAREFULLY. WARRANTY ON METAL CLADDING Riverlea Group Ltd guarantee that the metal roofing and wall cladding on Kiwi and Fortress Garden Sheds may be used in moderate and inland corrosion zones or areas where the first year mild steel corrosion rate is less than 200g/m2, and that in these conditions, they will not perforate due to corrosion within 18 years of date of manufacture.
Need help?
Do you have a question about the MK4B and is the answer not in the manual?
Questions and answers