Advertisement
Quick Links
Advertisement

Related Manuals for Duratuf TUF 200


Summary of Contents for Duratuf TUF 200
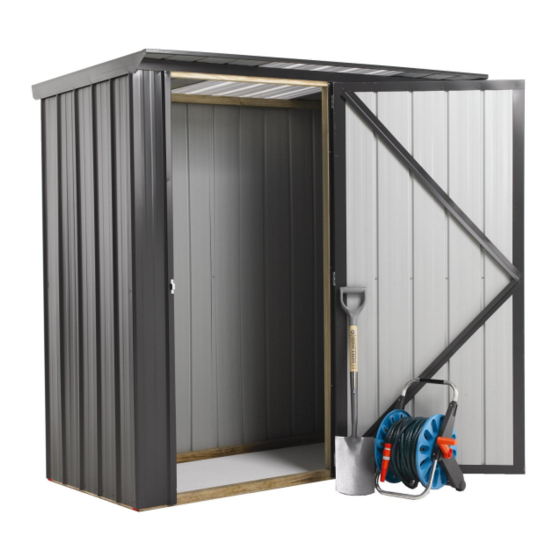
- Page 1 Quality – Made Affordable ASSEMBLY INSTRUCTIONS TUF 200 BASE SIZE 1980mm x 855mm...
- Page 2 ASSEMBLY INSTRUCTIONS Tools Required: Drill Drill Bit 3.5mm Drill Bit 6mm (for clear roof panel only) Riveter Hammer Nail Punch Tape Measure Ladder or Saw stool String Line Masonry Drill and 10mm Masonry Bit (for Bolt Down Kit only) Before you start: ...
- Page 3 TUF 200 PARTS LIST COLOUR:__________________ INV #:_____________ ROOF SIZE: 2.010 x 1.070 BASE SIZE: 1.980 x 0.855 LENGTH DESCRIPTION CHECKED OUT CHECKED IN 1.890 Corner Wall Sheets 1.890 2 Pan Corner Wall Sheets 1.890 Wall Sheets 1.890 3/4 Front Wall Sheet (D008) Roof Sheet Or 1.070...
- Page 4 Step 4: Carefully roll frame over onto its base. Nail on Back and End Wall Nogs .882m above the top of the Bottom Plate. If fitting a Duratuf Floor, fit Floor Joists now. Evenly space joists and nail in place using three 75mm nails per end.
- Page 5 TUF 200 WALL CLADDING D008 180mm 903mm CLADDING DETAIL Birds Eye View fig. 1 fig. 2 To Avoid Corrosion: Where at all possible try not to trap metal filings between two sheets. Remove all metal filings before riveting. Carbon in pencils reacts with the Zinc/Aluminium coating on steel. Use ink to mark steel.
- Page 6 TUF 200 WALL CLADDING Step 2: NOTE: It is very important that the Wall Sheets are positioned exactly as shown in the cladding detail diagram on the previous page. Position Corner Wall Sheets. Check that the Lip is on the correct side of the sheet. While...
- Page 7 TUF 200 ROOF fig. 1 Step 1: Note: Condensation can form on the under side of shed roof. If building paper is required, fit now. Build- ing paper will need to be supported by netting or roofing twine. Standard Roof: Position Roof Sheets as shown in fig 1. Make sure sheet joins at the back are flush. Rivet sheet joins, one rivet 300mm back from edge front and back.
- Page 8 TUF 200 DOOR NOTE: If shed has an optional security upgrade, please use Security door instructions on next page. Step 1: Place shed in final position. Check diagonal measurements are equal and shed is level before fitting door. Step 2: Hold Door in position (approximately 5mm down from Top Plate Flashing) and fit one rivet to top hinge.
- Page 9 FORTRESS SECURITY DOOR (Optional) Step 2: Hold Door in position (approximately 5mm down from Top Plate Flashing) and fit one rivet to top hinge. While still holding in position fit one rivet to bottom hinge. Step 1: Place shed in final position. Check diagonal meas- urements are equal and shed is level before fitting door.
- Page 10 TUF 200 FLOOR (Optional) Step 2: Lay out remaining Floor Boards. Nail in Step 1: Select the two Floor Boards which have each Floor Board, two 50mm nails each checked out corners. Position at front and end and two into each Floor Joist.
- Page 11 CLEAN UP Remove all metal filings with a soft brush or rag. Hose down roof and walls thoroughly. PAINTING Painting Zinc/Aluminium coated steel will extend its life in most environments The surface must be dry and free of dirt, oil, grease and other contaminants prior to painting, but no weathering of the surface is required ...
- Page 12 DURATUF PREMIUM SHED WARRANTY REFERENCE NO:_______________________ GUARANTEE TO CUSTOMER Congratulations on purchasing a Duratuf Storage Shed. With proper care and attention, this product will last many years. For your benefit PLEASE READ THE FOLLOWING INFORMATION CAREFULLY. WARRANTY ON METAL CLADDING...
Need help?
Do you have a question about the TUF 200 and is the answer not in the manual?
Questions and answers