Table of Contents
Advertisement
Quick Links
Air to Water Heat Pump
Split system
Outdoor unit
WO*A060LDC
WO*A080LDC
WO*A100LDT
Hydraulic unit
WS*A050DD6
WS*A100DD6
Document n° 1532-1 ~ 31/10/2012
FR
EN
IT
NL
Installation and
operating manual
intended for professionals
To be saved for
future consultation
Fujitsu General
(Euro) GmbH
Werftstrasse 20
40549 Düsseldorf - Germany
Subject to modifications without notice.
Non contractual document.
DE
Advertisement
Table of Contents

Related Manuals for Waterstage Waterstage Comfort 5


Summary of Contents for Waterstage Waterstage Comfort 5
- Page 1 Document n° 1532-1 ~ 31/10/2012 Air to Water Heat Pump Split system Outdoor unit Hydraulic unit WO*A060LDC WS*A050DD6 WO*A080LDC WS*A100DD6 WO*A100LDT Installation and operating manual intended for professionals To be saved for future consultation Fujitsu General (Euro) GmbH Werftstrasse 20 40549 Düsseldorf - Germany Subject to modifications without notice.
-
Page 2: Table Of Contents
Air to Water Heat Pump " This device requires for its installation, the intervention of qualified personnel with a certificate of capacity for handling refrigerants Contents Description of the unit Package Description Definitions Operating principle Specifications Installation Regulation installation and maintenance conditions Hydraulic connecting Unpacking and reservations General... - Page 3 Air to Water Heat Pump Regulation system User interface, Remote control (option) Parametering the setting and Room thermostat (option) General Description of the display Setting parameters Temperature control List of function lines Set to (settings, diagnosis, status) Overall hydraulic layout Electrical wiring diagrams Troubleshooting Faults displayed on the hydraulic unit...
-
Page 4: Description Of The Unit
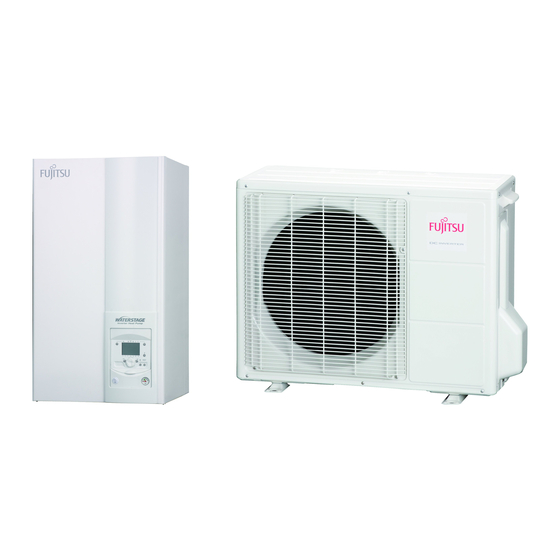
Air to Water Heat Pump Packing list Heat Pump Outdoor Unit Hydraulic Unit Model Reference Reference Waterstage Comfort 5 WO*A060LDC WS*A050DD6 Waterstage Comfort 6 WO*A060LDC Waterstage Comfort 8 WO*A080LDC WS*A100DD6 Waterstage Comfort 10 WO*A100LDT Optional equipment Scope of application This heat pump provides: •... -
Page 5: Specifications
Air to Water Heat Pump Specifications Designation model Waterstage Comfort Nominal heating performances (outdoor temperature / initial temperature) Heat output +7 °C / +35 °C - Floor heating system 4,50 6,00 7,50 10,00 -7 °C / +35 °C - Floor heating system... - Page 6 Air to Water Heat Pump " Outside unit, Model Comfort 5, 6 & 8 4 holes Ø11 Sight of lower part Front view Side view Top view " Outside unit, Model Comfort 10 Sight of lower part Front view Side view Top view figure 1 - Dimensions in mm - 6 -...
- Page 7 Air to Water Heat Pump " Hydraulic module flow Heating Heating return ø M 26x34 ø M 26x34 Front view Side view figure 2 - Dimensions in mm Installation and operating manual "1532 - EN" - 7 -...
- Page 8 Air to Water Heat Pump Outdoor sensor QAC34 Variable pressure 1 mbar = 10 mmCE = 100 Pa mbar 43907 ext. in 10000 2490 1000 ° C m /h Heat pump return sensor Heat pump flow sensor Constante pressure 32500 1 mbar = 10 mmCE = 100 Pa 30000 mbar...
-
Page 9: Description
Air to Water Heat Pump Description " Model Comfort 10 " Model Comfort 5 & 6 " Model Comfort 8 Legend : 1 - Low-noise, high-output fan. 2 - Electric variable speed "inverter" motor. 3 - "Inverter" control module. 4 - Connection terminal blocks (power and interconnection). -
Page 10: Operating Principle
Air to Water Heat Pump Legend : 1 - Electric box. 2 - Regulator / User interface. 3 - Start/stop switch. 4 - Water circulation pump. 5 - Water flow. 6 - Gas refrigeration connection. 7 - Liquid refrigeration connection. 8 - Water return. - Page 11 Air to Water Heat Pump • Domestic hot water (DHW) operating principle Two domestic hot water (DHW) temperatures can be If the contract concluded with the energy provider parametered: nominal temperature (line 1610 to 55 °C) includes a subscription to day/night tariff, the electrical and reduced temperature (line 1612 to 40 °C).
-
Page 12: Installation
Air to Water Heat Pump 2 Installation Regulation installation Installation position and maintenance conditions The choice of the position for installation is particularly The appliance must be installed and the maintained important insofar as any later movement is a delicate operation requiring the intervention of a qualified person. - Page 13 Air to Water Heat Pump • Nothing should obstruct the air circulation through the • The surface on which the appliance is installed must: evaporator and from the fan (figure 11). - be permeable (soil, gravel, etc), • Keep the outdoor unit away from heat sources and - support its weight easily, inflammable products.
-
Page 14: Outdoor Unit Positioning
Air to Water Heat Pump 2 4 2 Outdoor unit positioning The outdoor unit must be raised at least 50 mm above ground level. In areas prone to snow, this height should be increased but should not exceed 1,5 m (figure 12). -
Page 15: Installing The Hydraulic Unit
Air to Water Heat Pump Installing the hydraulic unit 2 5 2 Positioning the hydraulic unit 2 5 1 Installation precautions - Fix the support solidly (4 screws and plugs) to a flat, • The room in which the appliance operates must hard-wearing wall (not a light partition) ensuring that it comply with the prevailing regulations. -
Page 16: Refrigeration Connections
Air to Water Heat Pump Refrigeration connections • Brazing on the refrigeration circuit (if necessary) " This appliance uses refrigerant R410A - Silver brazing (40% minimum recommended). Comply with the legislation for handling refrigerants. - Brazing only under dry nitrogen internal flux. 2 6 1 Rules and precautions •... -
Page 17: Refrigerant Connections
Air to Water Heat Pump 2 6 3 Accessing the hydraulic module’s refrigerant connections - Remove the front panel (2 screws A). - Remove the left-hand panel (2 screws B). figure 14 - Removing the casing 2 6 4 Creating the flarings - Cut the pipe to an appropriate length with a pipe-cutter without deforming it. - Page 18 Air to Water Heat Pump Comfort 5, 6 & 8 Comfort 10 HP model fluid fluid Outdoor unit connections 1/2" 1/4" 5/8" 3/8" Diameter (D1) 1/2" (D2) 1/4" (D1) 5/8" (D2) 3/8" Refrigeration Minimum length (L) connections Maximum length* (L) Maxi level difference (D) Male-female adapter (reduction) (R1) 1/2"...
-
Page 19: Connecting The Flared Connections
Air to Water Heat Pump 2 6 6 Connecting the flared connections " The small pipe must always be connected Holding wrench before the large one " Take particular care positioning the tube opposite its connector so as not to risk damaging the threads A carefully aligned connector can be fitted easily by hand without much force Torque wrench... -
Page 20: Filling The Installation With Gas
Air to Water Heat Pump Filling the installation with gas Manometer kit " This operation is reserved for installers familiar (manifold) with the legislation for handling refrigerants. Vacuum meter " Creating a vacuum with a vacuum pump is High essential pressure pressure "... -
Page 21: Additional Charge
Air to Water Heat Pump 2 7 4 Pump down operation 2 7 3 Additional charge (Refrigerant collecting operation) 20 g of R410A Comfort 5, 6 & 8 Perform the following procedures to collect the per additional meter refrigerant. Length of the connections 15 m 20 m max. -
Page 22: Hydraulic Connecting
Air to Water Heat Pump Hydraulic connecting 2 8 1 General 2 8 2 Rinsing out the installation Before connecting the hydraulic unit to the installation, The connection must comply with good trade practice according to local building regulations. rinse out the heating system correctly to eliminate any particles that may affect the appliance's correct operation. -
Page 23: Heating Circulation Pump Speed Settings
Air to Water Heat Pump Heating circulation pump speed settings 1 mbar = 10 mmCE = 100 Pa mbar Variable pressure ext. in The circulator varies the manometric height according to the flowrate. Recommended for a system equipped with radiators (particularly any system with thermostatic valves). -
Page 24: Electrical Connections
Air to Water Heat Pump 2 10 Electrical connections Flexible wires (B) Ensure that the general electrical power supply has been cut off before starting any repair work. H07RNF type (or superior quality) flexible wire can be used with certain precautions: 2 10 1 Characteristic of the electrical supply - Strip away around 10 mm from the end of the wire. -
Page 25: Overview Of All The Electrical Connections
Air to Water Heat Pump 2 10 3 Overview of all the electrical connections The wiring diagram for the hydraulic unit is shown in detail on figure 39, page 53 Wireless remote control (option) Outdoor sensor cable 2 x 0,75 mm² Wireless room thermostat (option) Interconnection between Remote control (option) -
Page 26: On The Outdoor Unit Side
Air to Water Heat Pump 2 10 5 Electrical connections " Model Comfort 5, 6 & 8 on the outdoor unit side Access to the connection terminals: • Model Comfort 5, 6, 8 - Remove the cap Remove the cap •... -
Page 27: On The Hydraulic Unit Side
Air to Water Heat Pump 2 10 6 Electrical connections on the hydraulic unit side Access to the connection terminals: • Second heating circuit - Remove the front panel (2 screws) (figure 14, page 17). - Please refer to the instructions supplied with the second circuit kit or/and Regulation extension kit. - Page 28 Air to Water Heat Pump • Power shedding or EJP (peak day removal) Power limitation is intended to reduce electrical consumption when this is too high compared to the contract with the power provider. - Connect the power limiting device to input EX1, the back-ups for the heat pump and the DHW stop in the event of over-consumption by the dwelling.
- Page 29 Air to Water Heat Pump Hydraulic unit Outdoor unit single phase 1 2 3 External component contact * Green / yellow Brown Blue Interconnection between the outdoor unit and the hydraulic unit Electrical back-up supply 230 V Electricity supply single phase 230 V single phase figure 29 - Connection to terminal block and power relays Installation and operating manual "1532 - EN"...
-
Page 30: Outdoor Sensor
Air to Water Heat Pump 2 11 Outdoor sensor 2 13 Commissioning The outdoor sensor is required for the heat pump to - Close the installation's main circuit breaker. operate correctly. On first commissioning (or in winter), in order to Consult the fitting instructions on the packaging. -
Page 31: Configuring Room Thermostat
Air to Water Heat Pump 2 14 Configuring room thermostat To configure the room thermostat and connect it to the appropriate heating zone: - Hold down the presence key for more than 3 seconds. - Hold down presence key; room The room thermostat displays RU and a number thermostat displays P1 and a flashing number. -
Page 32: Regulation System
Air to Water Heat Pump 3 Regulation system User interface, Remote control (option) and Room thermostat (option) User interface Auto Auto °C Remote control (option) Room thermostat (option) figure 30 - - 32 - Installation and operating manual "1532 - EN"... - Page 33 Air to Water Heat Pump Ref. Function - Definitions Selecting of the DHW operating mode - If the installation is fitted with a DHW tank. (Domestic hot water) - On: Production of DHW according to the time program. - Off: Preparing the domestic hot water for stopping with the anti-frost function active.
-
Page 34: Description Of The Display
Air to Water Heat Pump Description of the display Temperature control The heat pump's operation is subject to the temperature control. The set temperature for the water in the heating circuit is adjusted according to the outdoor temperature. If there are thermostatic valves on the installation, these must be fully open or adjusted for higher than the normal set temperature. - Page 35 Air to Water Heat Pump Heating curve slope 2,75 ° C Classic 2,25 temperature radiator 1,75 Boiler connection application 1,25 Heat pump application only temperature radiator 0,75 Floor heating system 0,25 ° C Outdoor temperature °C figure 32 - Heating curve slope (line 720) Heating curve slope +4,5 -4,5...
-
Page 36: Parametering The Setting
Air to Water Heat Pump Parametering the setting 3 5 2 Setting parameters - Choose the desired level. 3 5 1 General - Scroll the menu list. Only the parameters accessible to levels: - Choose the desired menu. U - End user. - Scroll the function lines. - Page 37 Air to Water Heat Pump Line Function Setting range Setting Basic or display increment setting Time program heating circuit 1 Pre-selection (Day / Week) Mon-Sun, Mon-Fri, Sat-Sun, Mon-Sun Monday, Tuesday, … 6:00 1st phase On (start) 00:00... --:-- 10 min 1st phase Off (end) 00:00...
- Page 38 Air to Water Heat Pump Line Function Setting range Setting Basic or display increment setting Time program 5 / Cooling If the installation is fitted with the cooling kit (Only with the cooling kit option). Pre-selection (Day / Week) Mon-Sun, Mon-Fri, Sat-Sun, Mon-Sun Monday, Tuesday, …...
- Page 39 Air to Water Heat Pump Line Function Setting range Setting Basic or display increment setting Flow temp setpoint min (for fan convector) 8 °C... Flow temp setpoint max 1 °C 8 °C Flow temp setpoint max Flow temp setpoint min... 70 °C 1 °C 55 °C Floor heating system = 50 °C / Radiators = 65 °C.
- Page 40 Air to Water Heat Pump Line Function Setting range Setting Basic or display increment setting Heating, circuit 2 Only with the 2nd circuit kit option (If the installation consists of 2 heating circuits). 1010 Comfort setpoint Reduced setpoint… 0,5 °C 20 °C Comfort setpoint maximum 1012...
- Page 41 Air to Water Heat Pump Line Function Setting range Setting Basic or display increment setting 1200 Operating mode changeover None, Protection mode, Protection Reduced, Comfort, Automatic mode Operating mode at end of concrete slab drying period. Domestic hot water If the installation is fitted with the DHW kit. 1610 Nominal setpoint Reduced setpoint (line 1612)…...
- Page 42 Air to Water Heat Pump Line Function Setting range Setting Basic or display increment setting Supplementary source (Boiler connection) 3700 Release below outside temperature -50... 50 °C 1 °C 2 °C 3701 Release above outside temperature -50... 50 °C 1 °C 3705 Overrun time 0...
- Page 43 Air to Water Heat Pump Line Function Setting range Setting Basic or display increment setting LPB system 6600 Not used Error 6711 Reset HP No, Yes 6800 History 1 Time, Date, Error code 6802 History 2 Time, Date, Error code 6804 History 3 Time, Date, Error code...
- Page 44 Air to Water Heat Pump Line Function Setting range Setting Basic or display increment setting 7724 Outputs test UX3 ("Inverter" command) 0... 100 % 7725 Voltage value (UX3) 0... 10 v 7804 Sensor temperature BX1 (HP flow temperature) -28... 350 °C 7805 Sensor temperature BX2 (HP return temperature) -28...
- Page 45 Air to Water Heat Pump Line Function Setting range Setting Basic or display increment setting 8425 Temp diff condensor -50... 140 °C 8454 Locking time Heat Pump 0... 2730 h Reset ? (no, yes) 8455 Counter number of locks HP 65535 Reset ? (no, yes) 8456...
- Page 46 Air to Water Heat Pump Line Function Setting range Setting Basic or display increment setting 8830 DHW (domestic hot water) temperature 140 °C DHW temperature setpoint 50 °C 8840 Hours run DHW pump 0... 2730 h 8841 Start counter DHW pump 199999 8842 Hours run electric DHW...
- Page 47 Air to Water Heat Pump Installation and operating manual "1532 - EN" - 47 -...
-
Page 48: Overall Hydraulic Layout
Air to Water Heat Pump 4 Overall hydraulic layout • Configuration 1: 1 heating circuit - 48 - Installation and operating manual "1532 - EN"... - Page 49 Air to Water Heat Pump • Configuration 1: 1 heating circuit and DHW tank (with electrical back-up) Installation and operating manual "1532 - EN" - 49 -...
-
Page 50: Electrical Wiring Diagrams
GY Grey OG Orange RD Red VT Purple WH White YE Yellow figure 36 - Electrical wiring of outdoor unit model alféa excellia (single phase type) Waterstage Comfort 5 & 6 - 50 - Installation and operating manual "1532 - EN"... - Page 51 GN Green GY Grey OG Orange RD Red VT Purple WH White YE Yellow figure 37 - Electrical wiring of outdoor unit model alféa excellia (3-phase type) Waterstage Comfort 8 Installation and operating manual "1532 - EN" - 51 -...
- Page 52 GN Green GY Grey OG Orange RD Red VT Purple WH White YE Yellow figure 38 - Electrical wiring of outdoor unit model alféa excellia (3-phase type) Waterstage Comfort 10 - 52 - Installation and operating manual "1532 - EN"...
- Page 53 Air to Water Heat Pump figure 39 - Electrical wiring, Hydraulic unit comfort(Except installer's connections) Installation and operating manual "1532 - EN" - 53 -...
-
Page 54: Troubleshooting
Air to Water Heat Pump 6 Troubleshooting Depending on whether the fault comes from the outdoor The display shows the symbol. unit or the hydraulic unit, the fault may be indicated by the digital display or the diode on the interface cards. Press the key for more details on the origin of the Faults displayed on the hydraulic unit... -
Page 55: Information Display
Air to Water Heat Pump Information display Various data can be displayed by pressing the info button. Depending on the type of unit, configuration and operating state, some of the info lines listed below may not appear. - Possible error messages from the error code list (see table, page 54). -
Page 56: Start-Up Check-List
Air to Water Heat Pump 7 Quick-start procedure Before switching on the hydraulic unit: • Check the electric wiring. • Check the refrigeration circuit and make sure the gas supply has been performed. • Check the pressure of the hydraulic circuit (1-2 bar), check that the heat pump is purged, and the rest of the installation. -
Page 57: Starting-Up
Air to Water Heat Pump 7 1 2 Starting-up • Switching On (see chapiter "Star-up" page 30 Non compliant & chapter "List of function lines (settings, diagnosis, status)", page 36). Close the installation's main circuit breaker (power supply to the outdoor unit) 2 hours before starting up the tests =>... -
Page 58: Settings Sheet
Air to Water Heat Pump Settings sheet Setting Description Set to. Menus Setting Description Set to. Menus Preliminary settings Boiler backup 3700 OT.switch-on authoris. language addit. gen. operator section 3705 swith-off delay addit. gen. hour / minutes time & date Miscellaneous day / month time &... -
Page 59: Start-Up Data Sheet
Air to Water Heat Pump Start-up data sheet Site Installer serial No. serial No. Outdoor unit Hydraulic unit model model Refrigerant type Refrigerant charge Checks Operating voltage & current on outdoor unit Compliance with positioning distances Condensate evacuation correct Electric connections / connections tightnees No GAS leaks (unit ID No. - Page 60 8 Instructions for the user Explain to the user how his installation operates, in Emphasise that a heated floor has significant inertia and particular the functions of the room thermostat and the that therefore any adjustments must be made progressively. programs accessible to him from the user interface.
Need help?
Do you have a question about the Waterstage Comfort 5 and is the answer not in the manual?
Questions and answers